
Changing colors can look tricky at first, but once you see the flow, it clicks. This guide walks you through each step slowly so you can follow along with confidence - switching colors smoothly and keeping your work clean and neat.
How to change yarn color
Watch the lesson
The heart of it
The secret to a clean color change is to make the very last yarn over of the old stitch with the new color. The new color appears on that final pull-through.
Step-by-step instructions
Step 1:
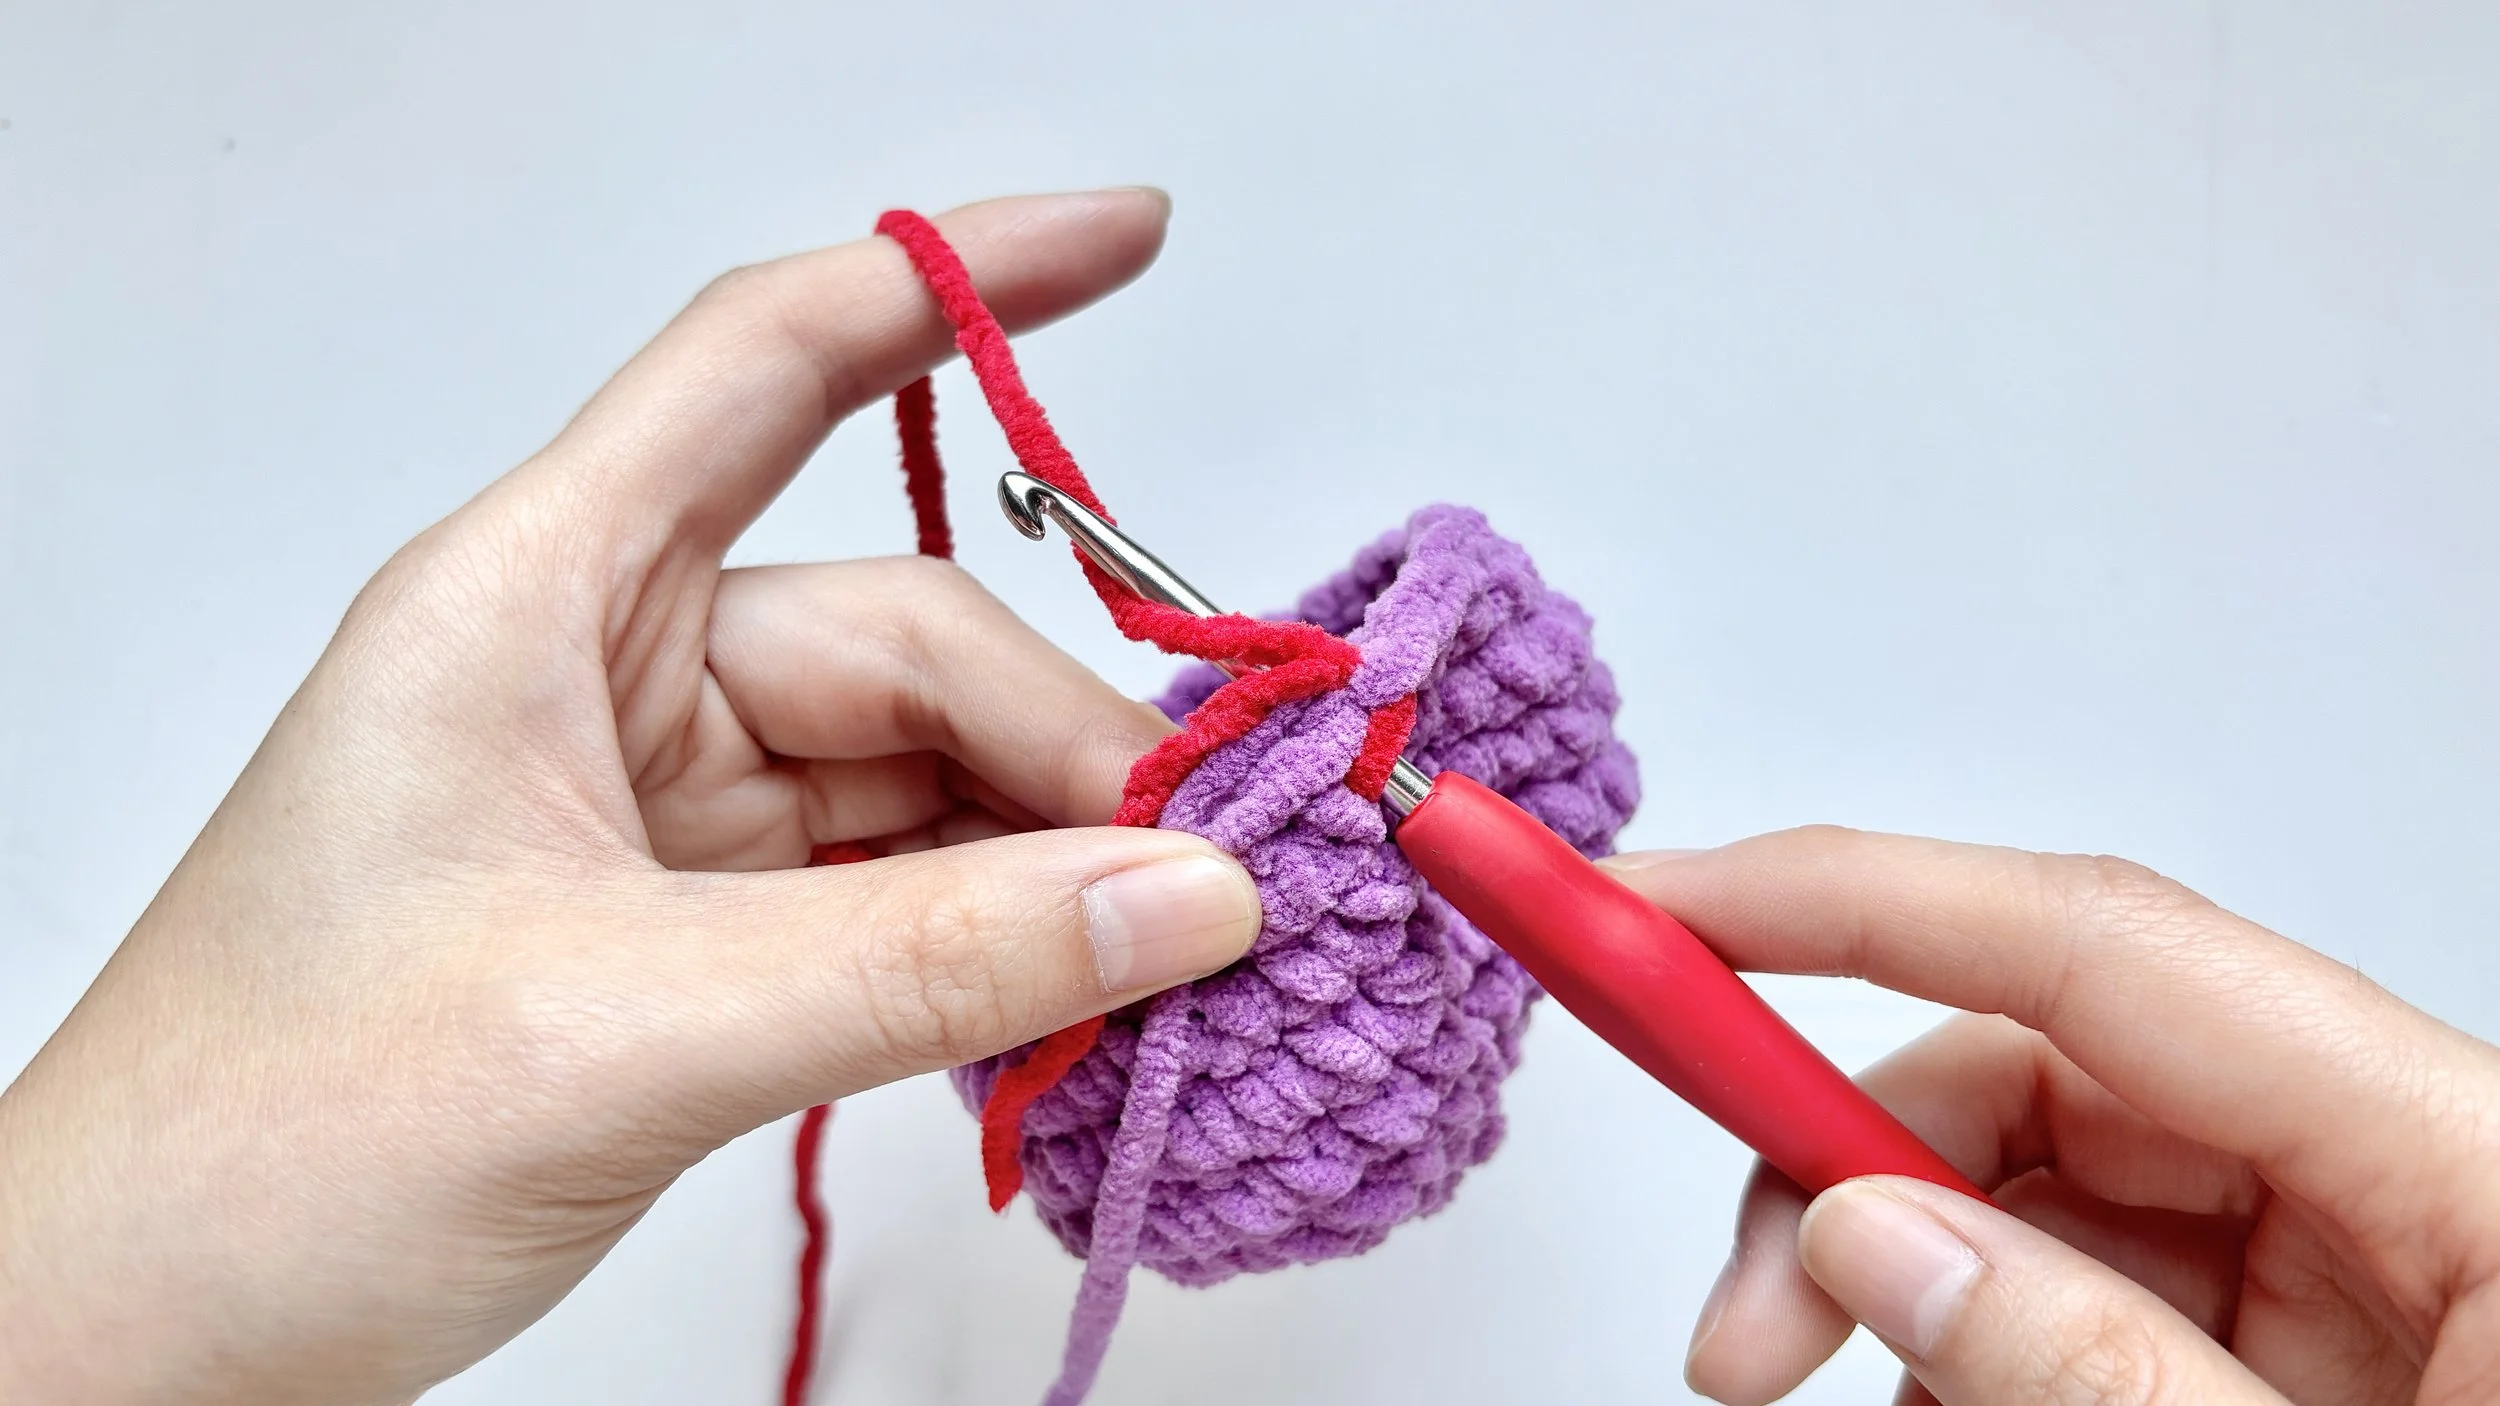
Stop before the last yarn over
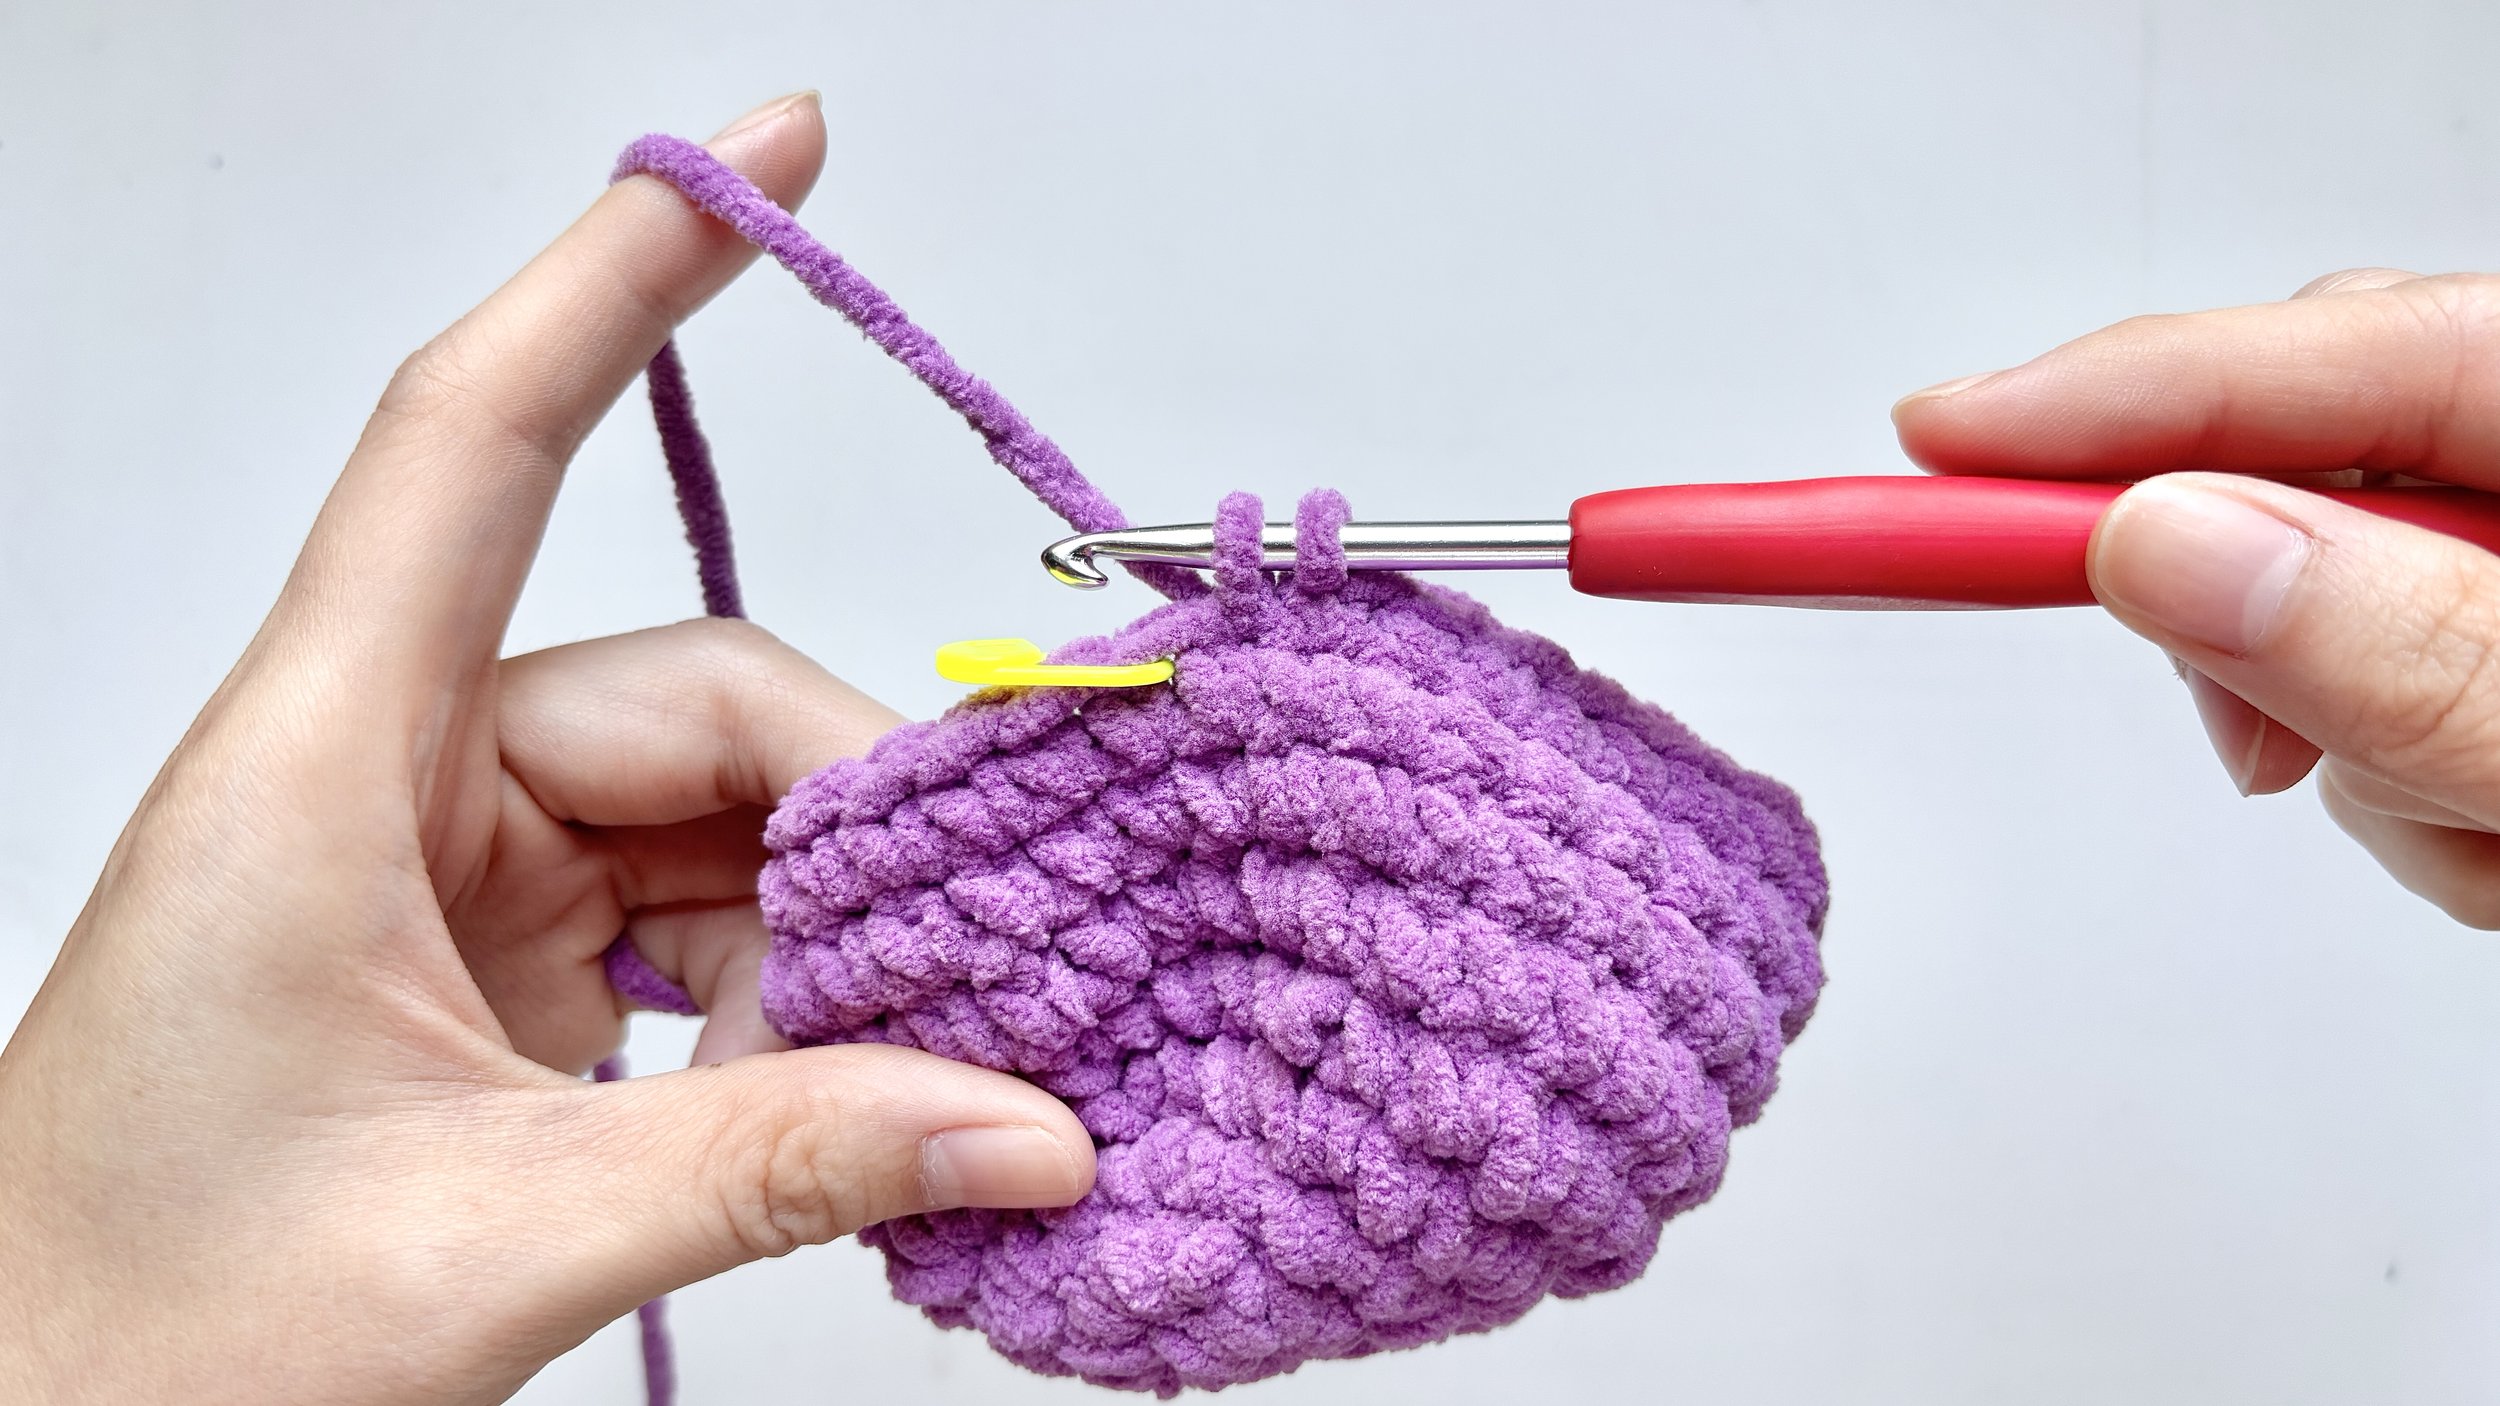
Crochet up to the stitch before the color change as normal - but stop just before the last yarn over.
In this example, that stitch is a single crochet (sc), so stop when you have two loops of Color A (purple) on your hook.
Step 2:
Add Color B
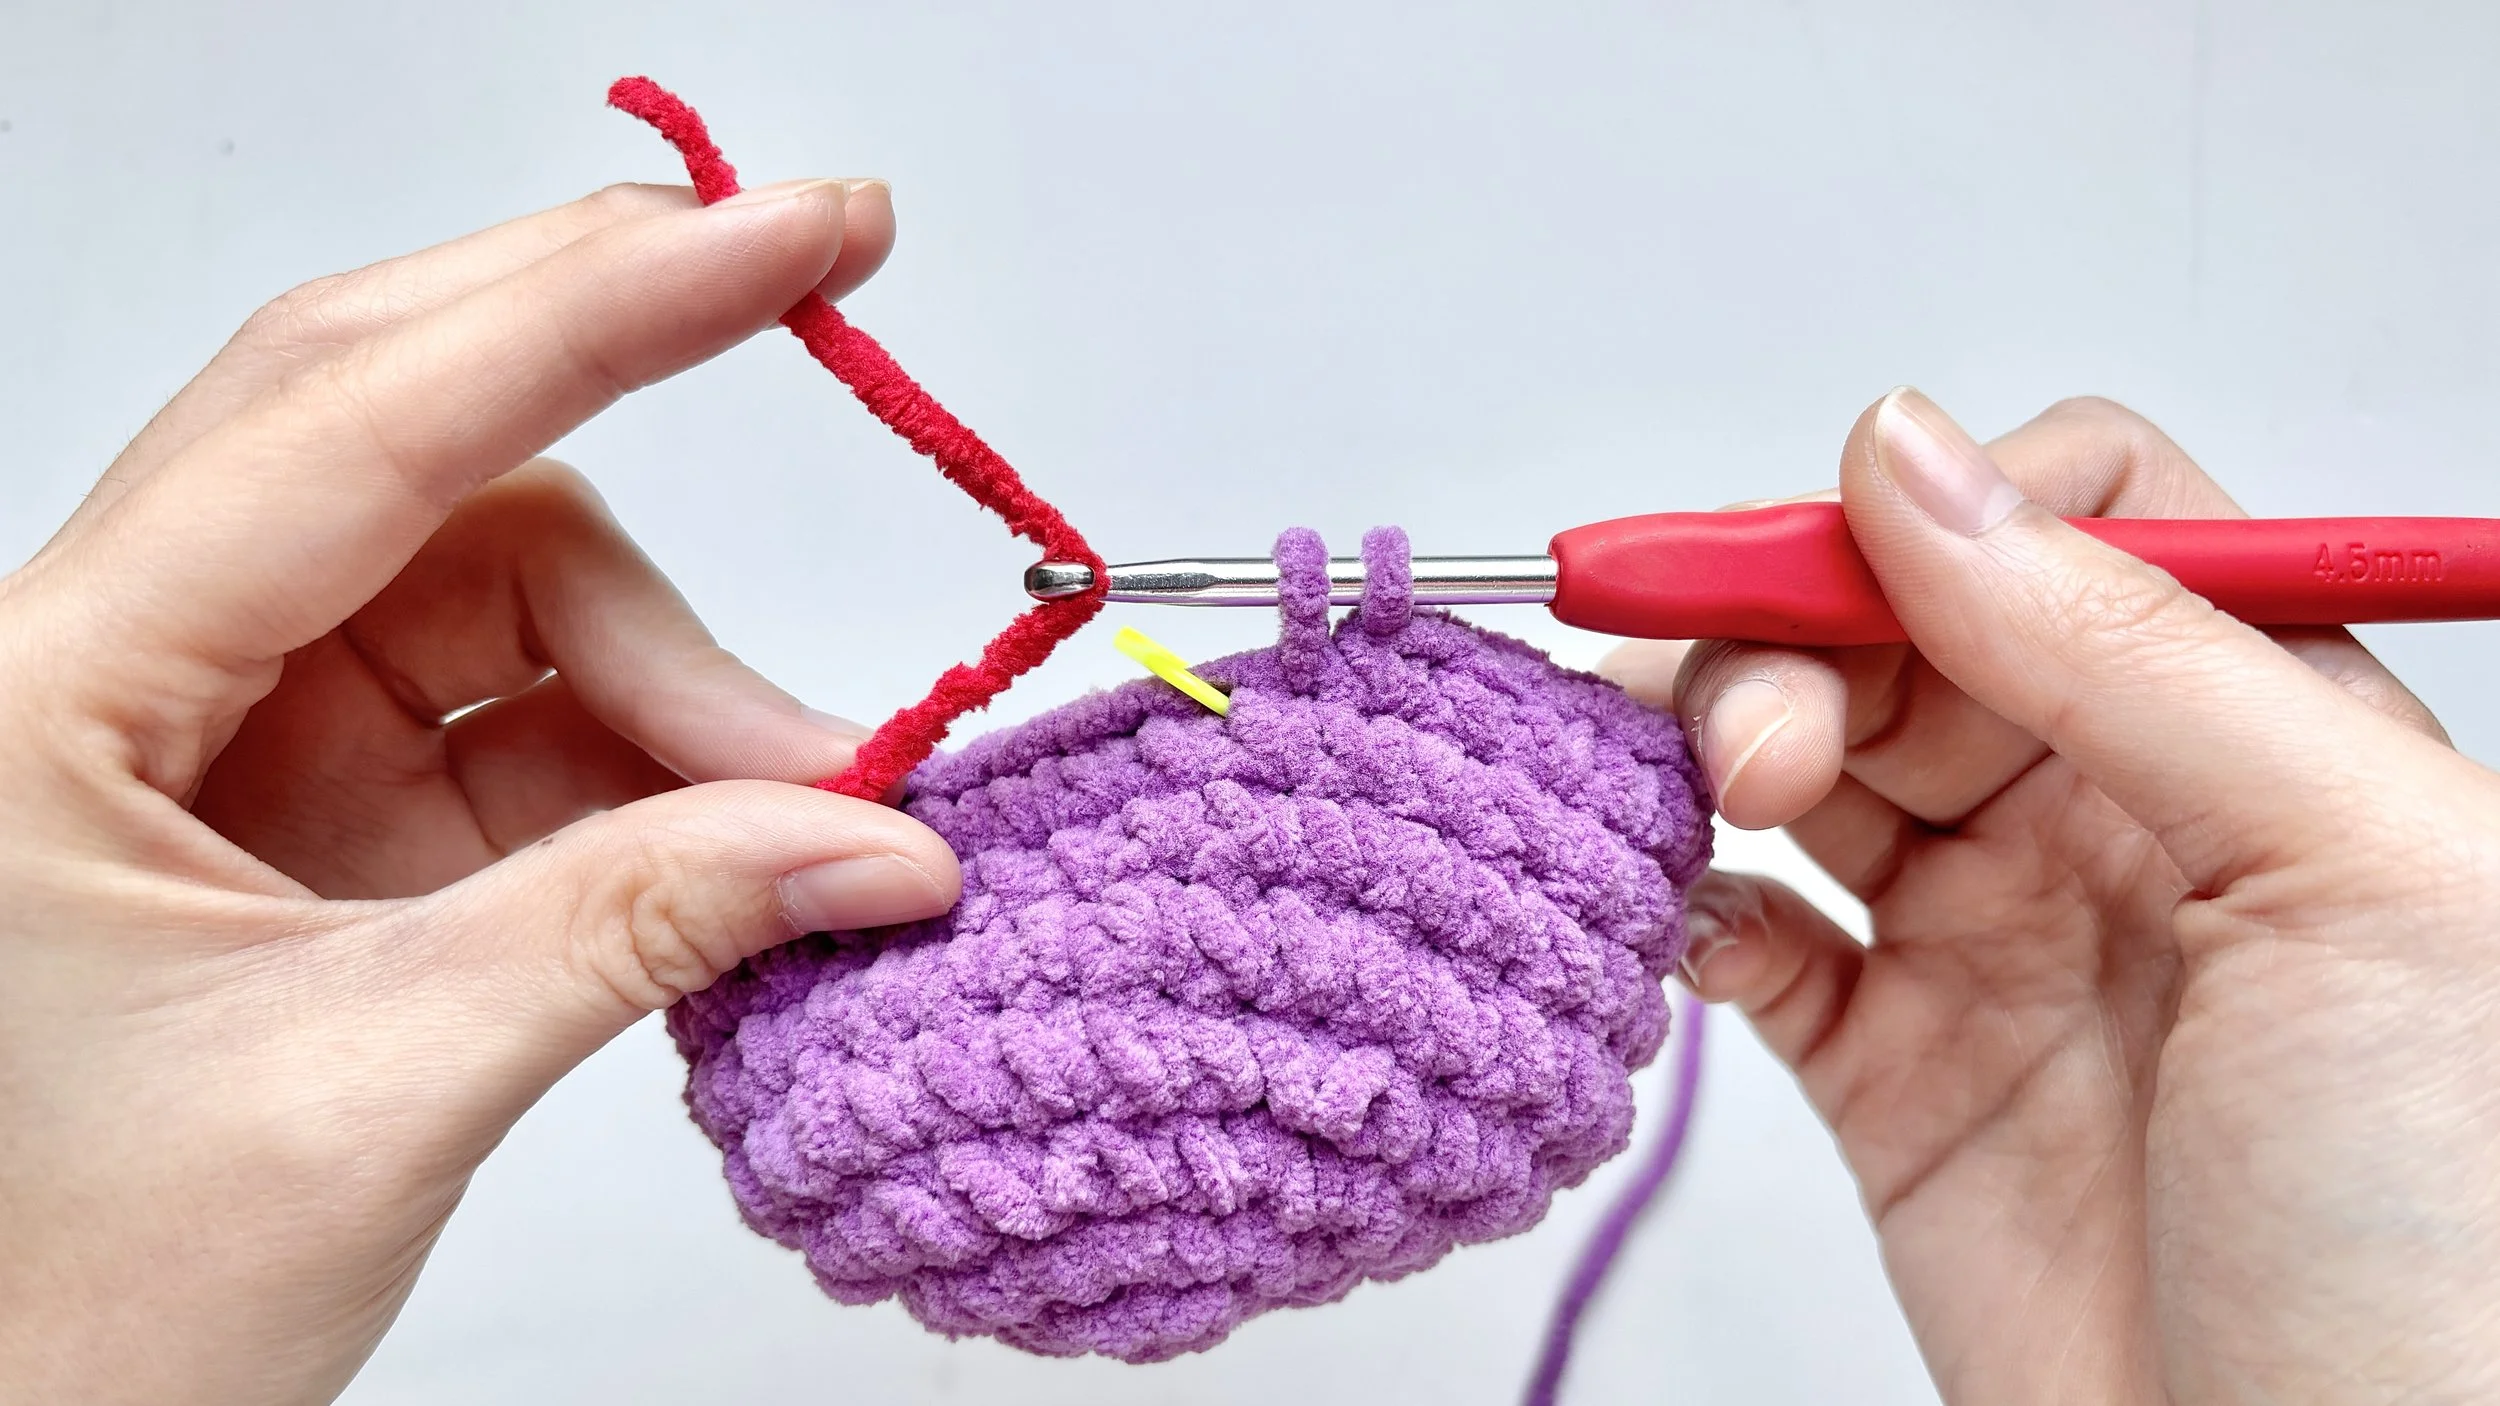
Drape the Color B (red) yarn over your hook.
Step 3:
Make a loop with Color B (red)
Pinch it with your left hand to make a snug loop on the hook.
You’ll now see three loops on your hook.
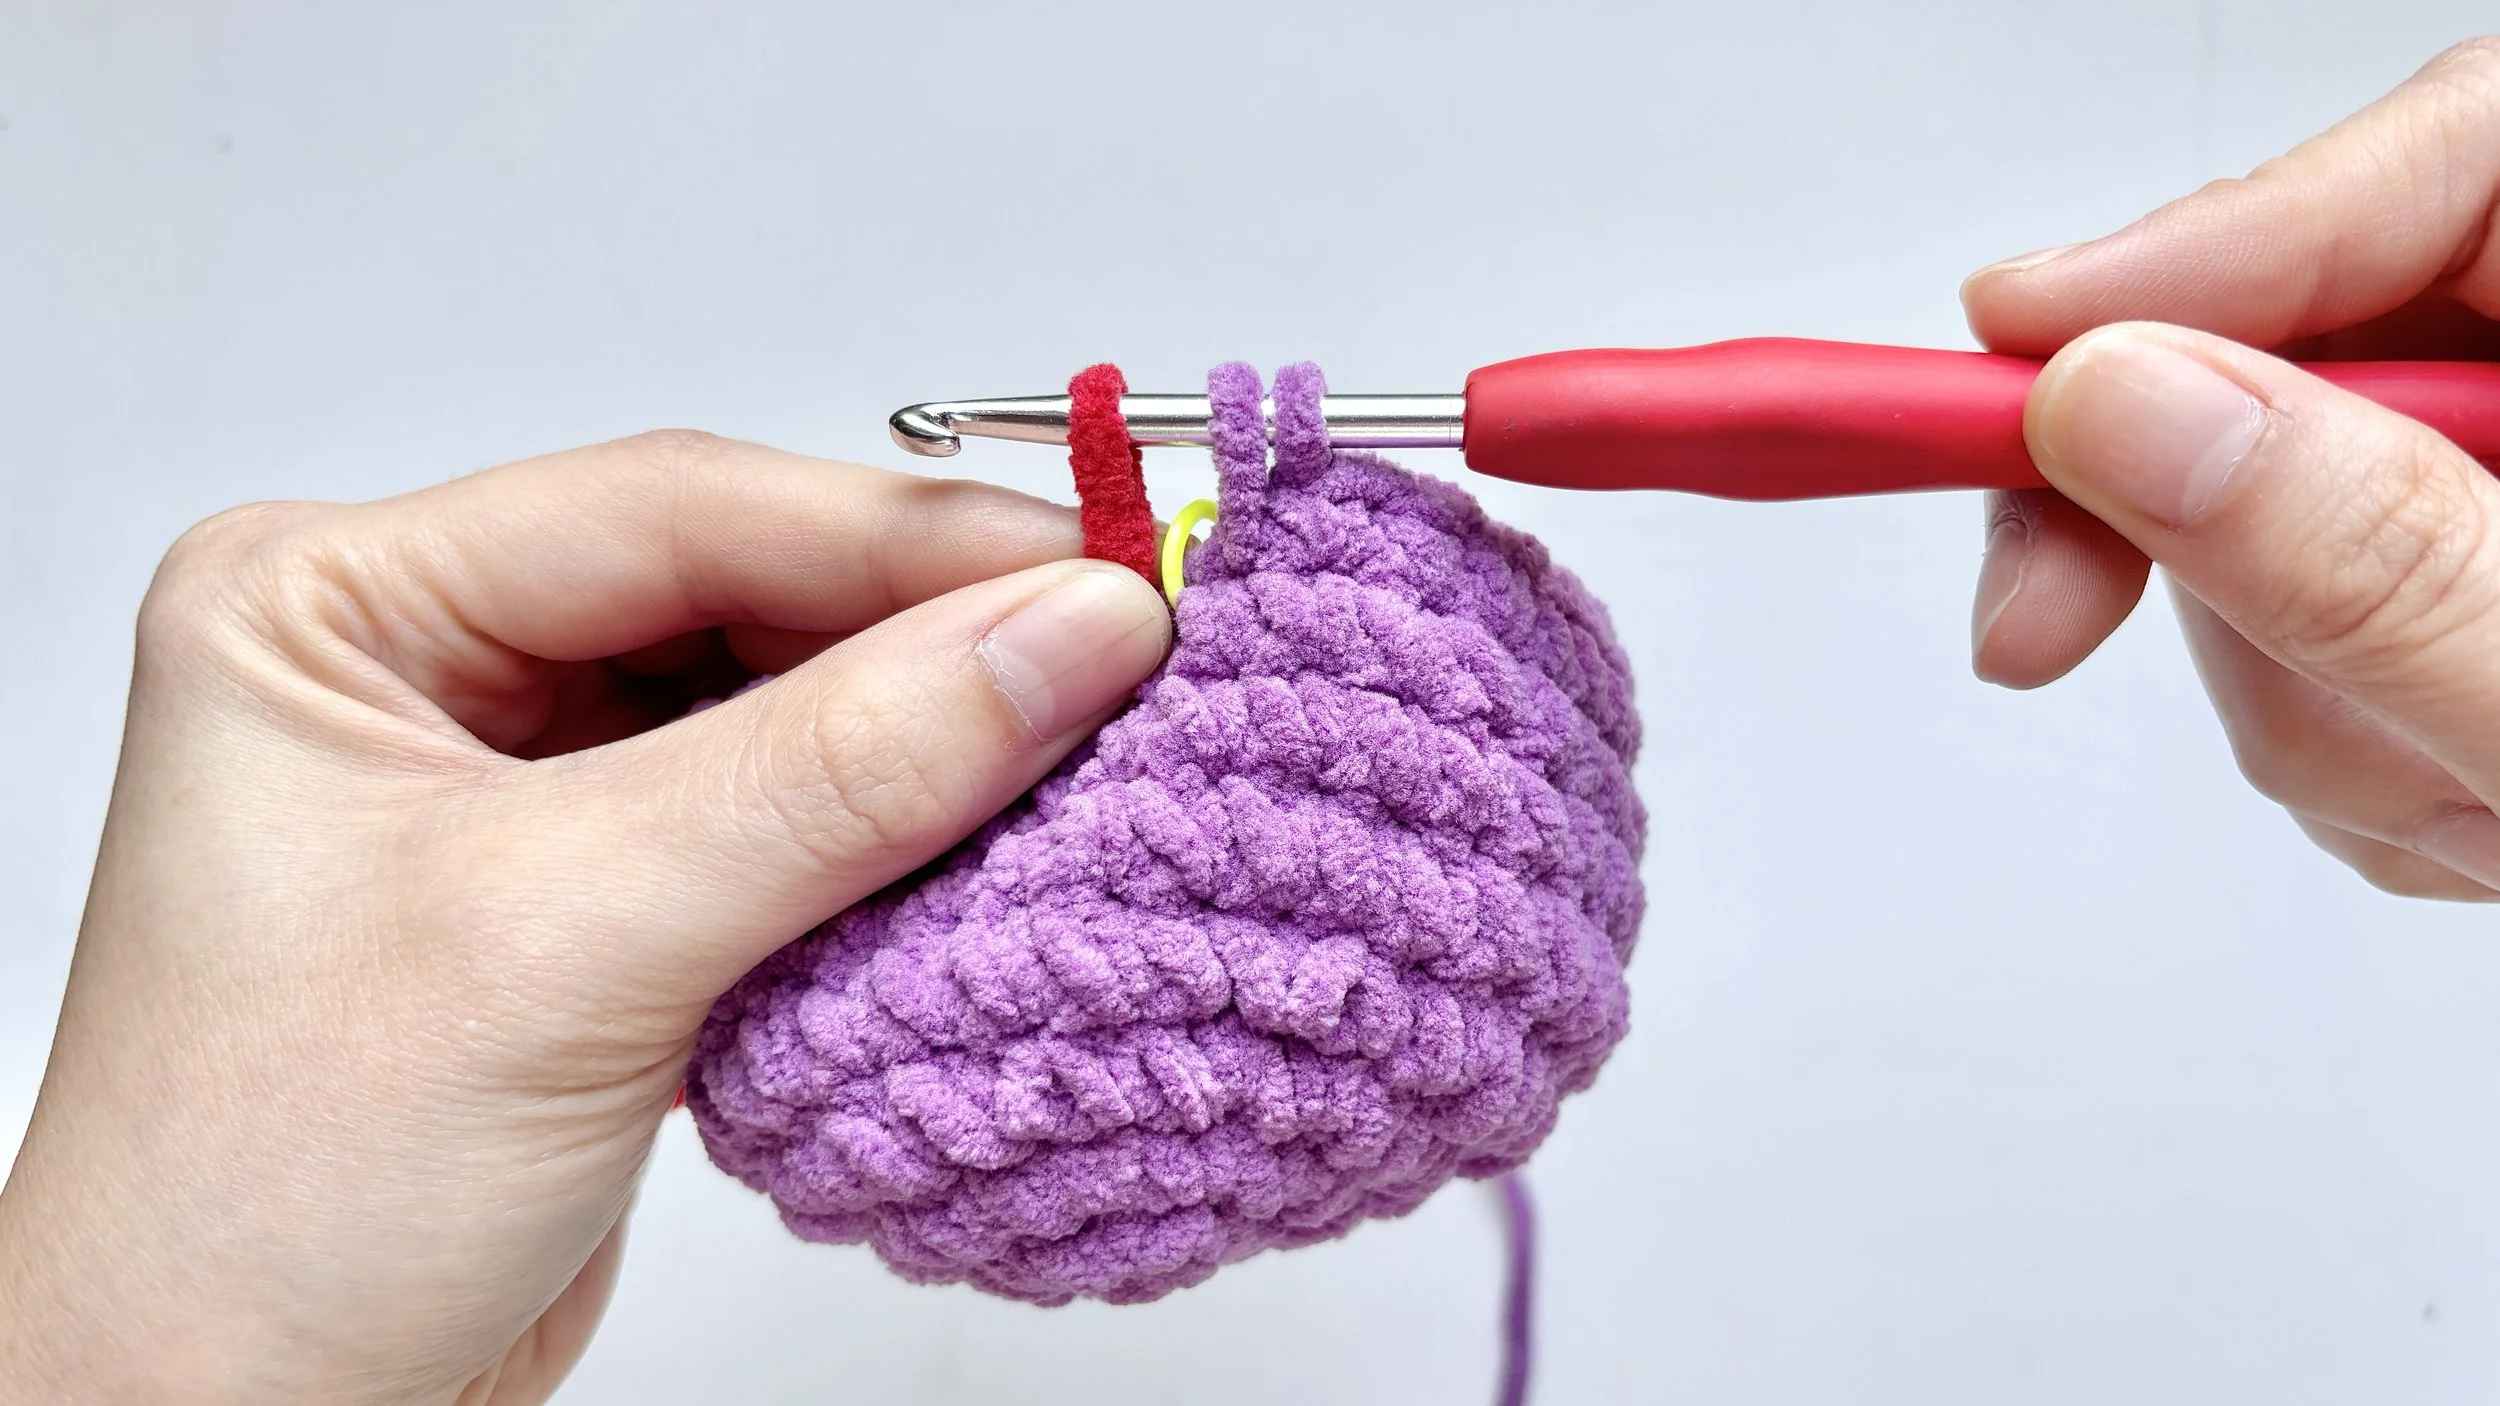
Step 4:
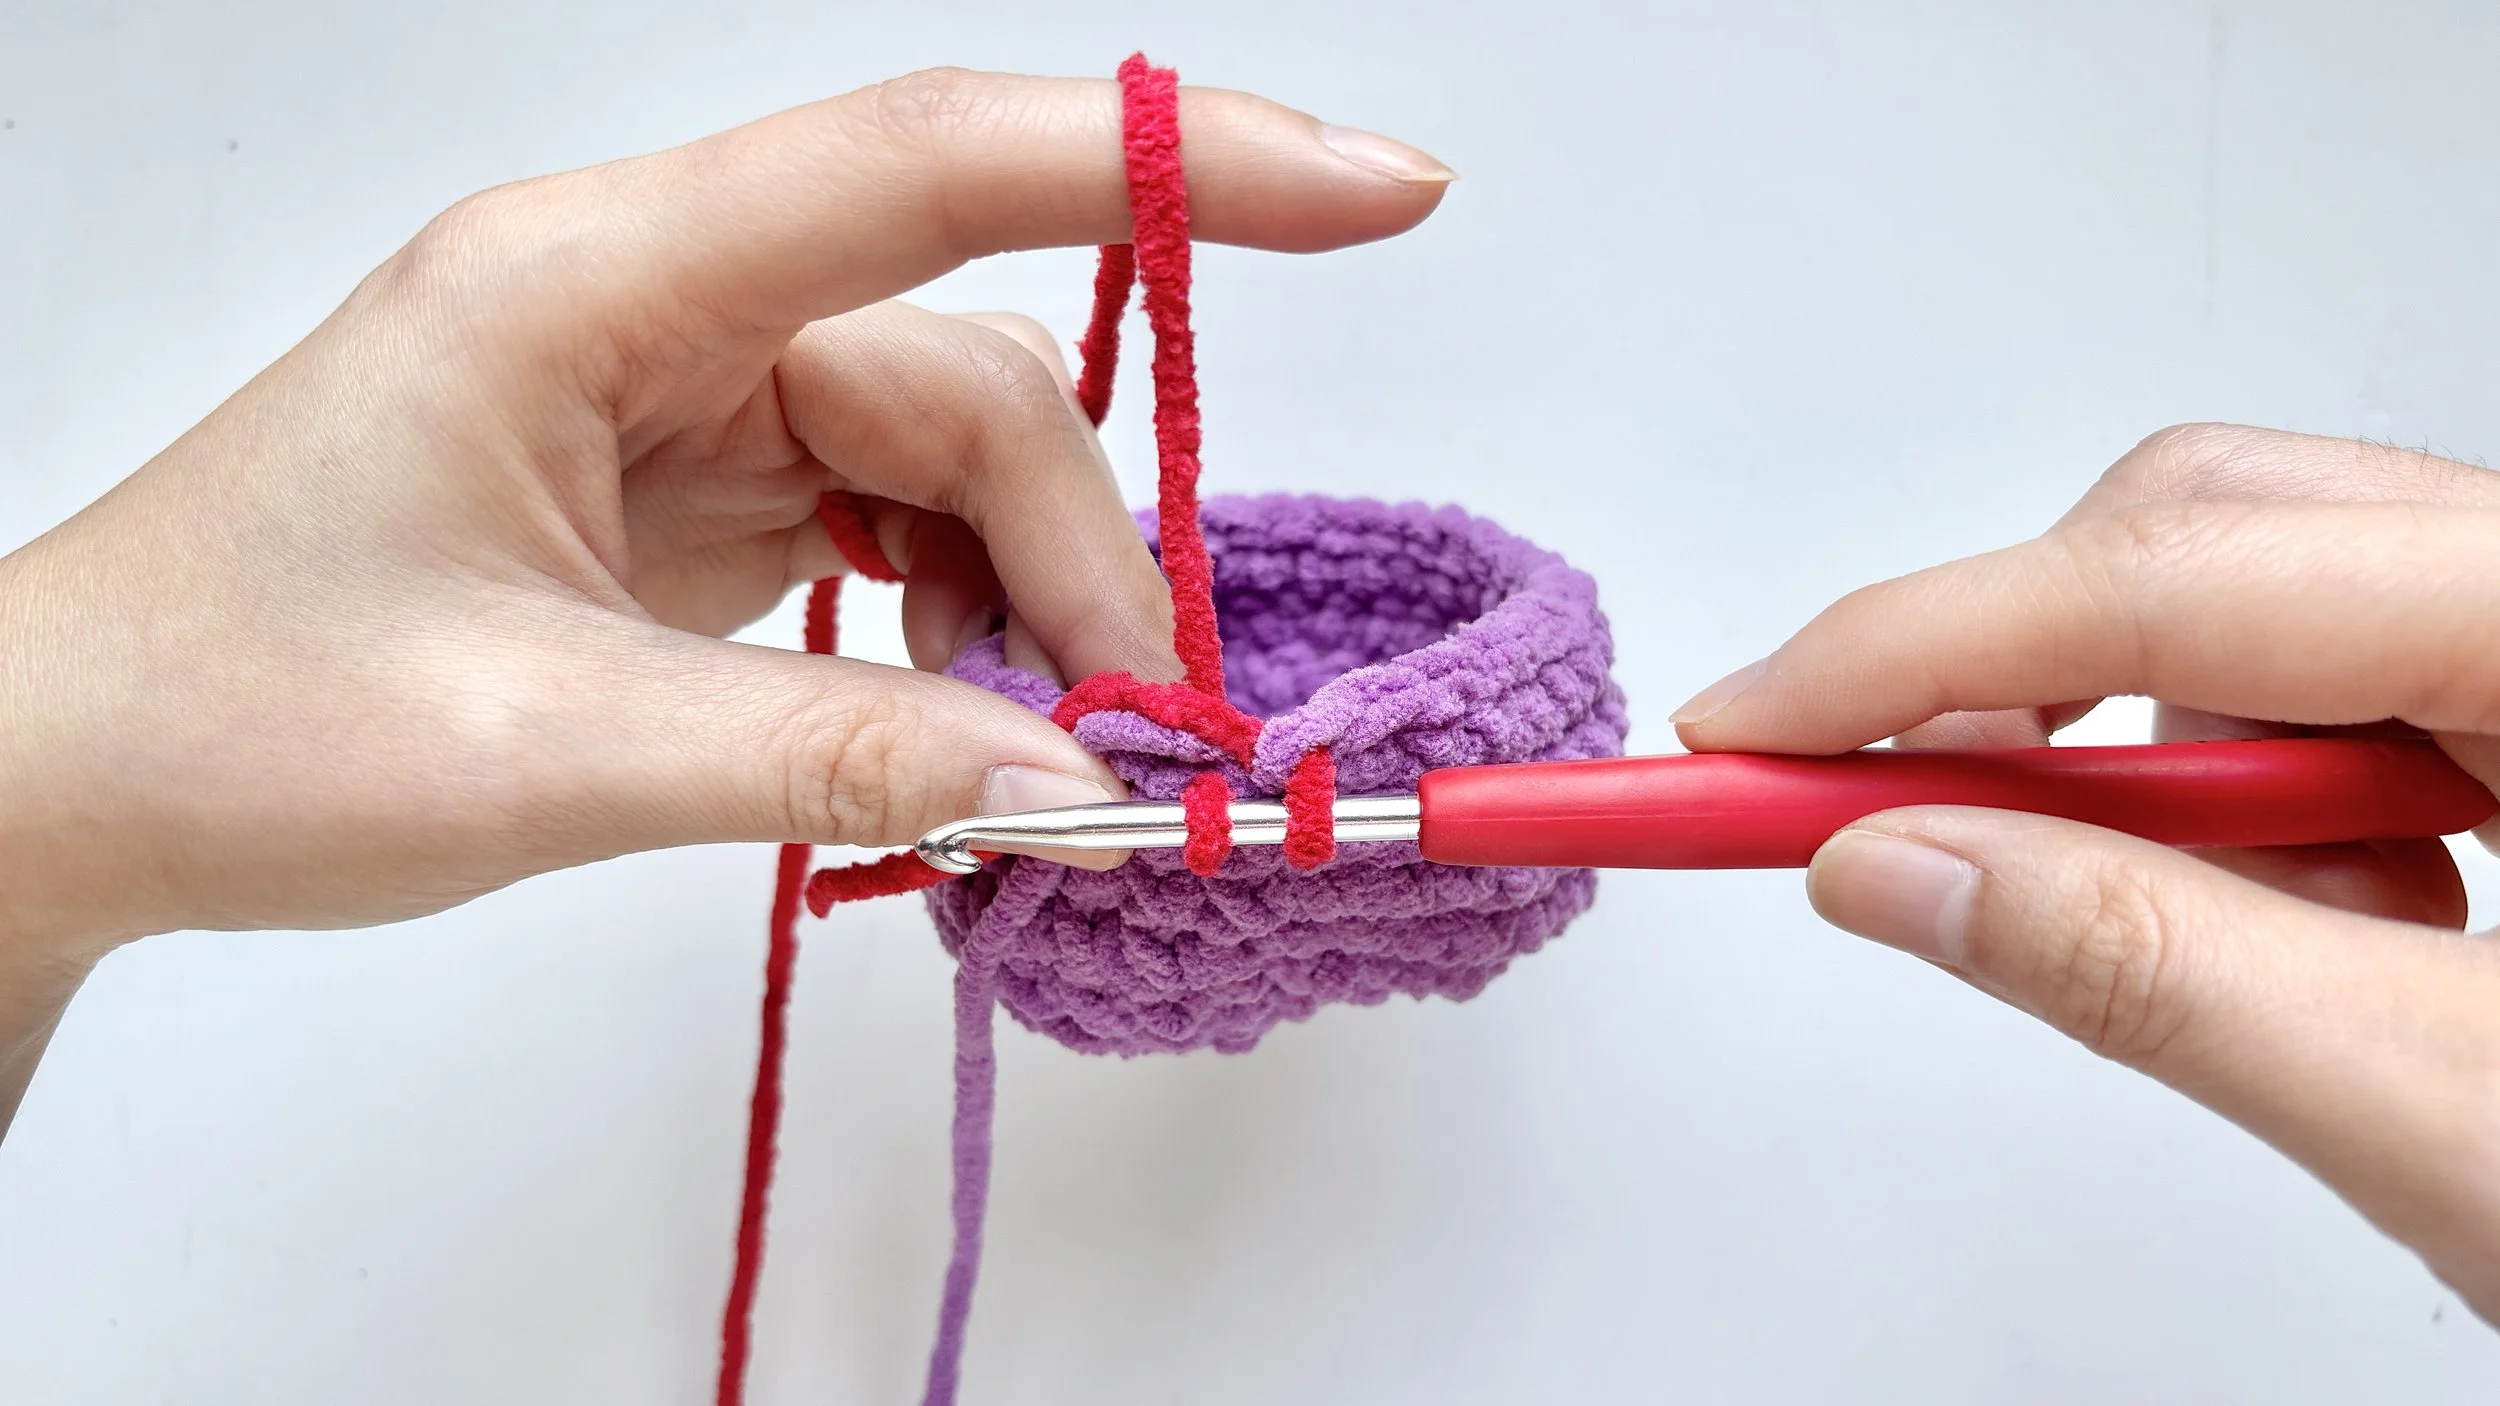
Pull Color B through
Pull the new Color B (red) loop through the two Color A (purple) loops.
You should now have one loop of Color B (red)on your hook.

Step 5:
Start the next stitch in Color B (red)
Start the next single crochet (sc) in the next stitch, now using Color B’s working yarn (refer to the single crochet (sc) lesson, steps 1–2).
Tip: To keep your work neat, hide the unused yarns inside your stitches: lay the Color B (red) tail and the Color A (purple) yarn along the tops of the next stitches and work over them as you go.
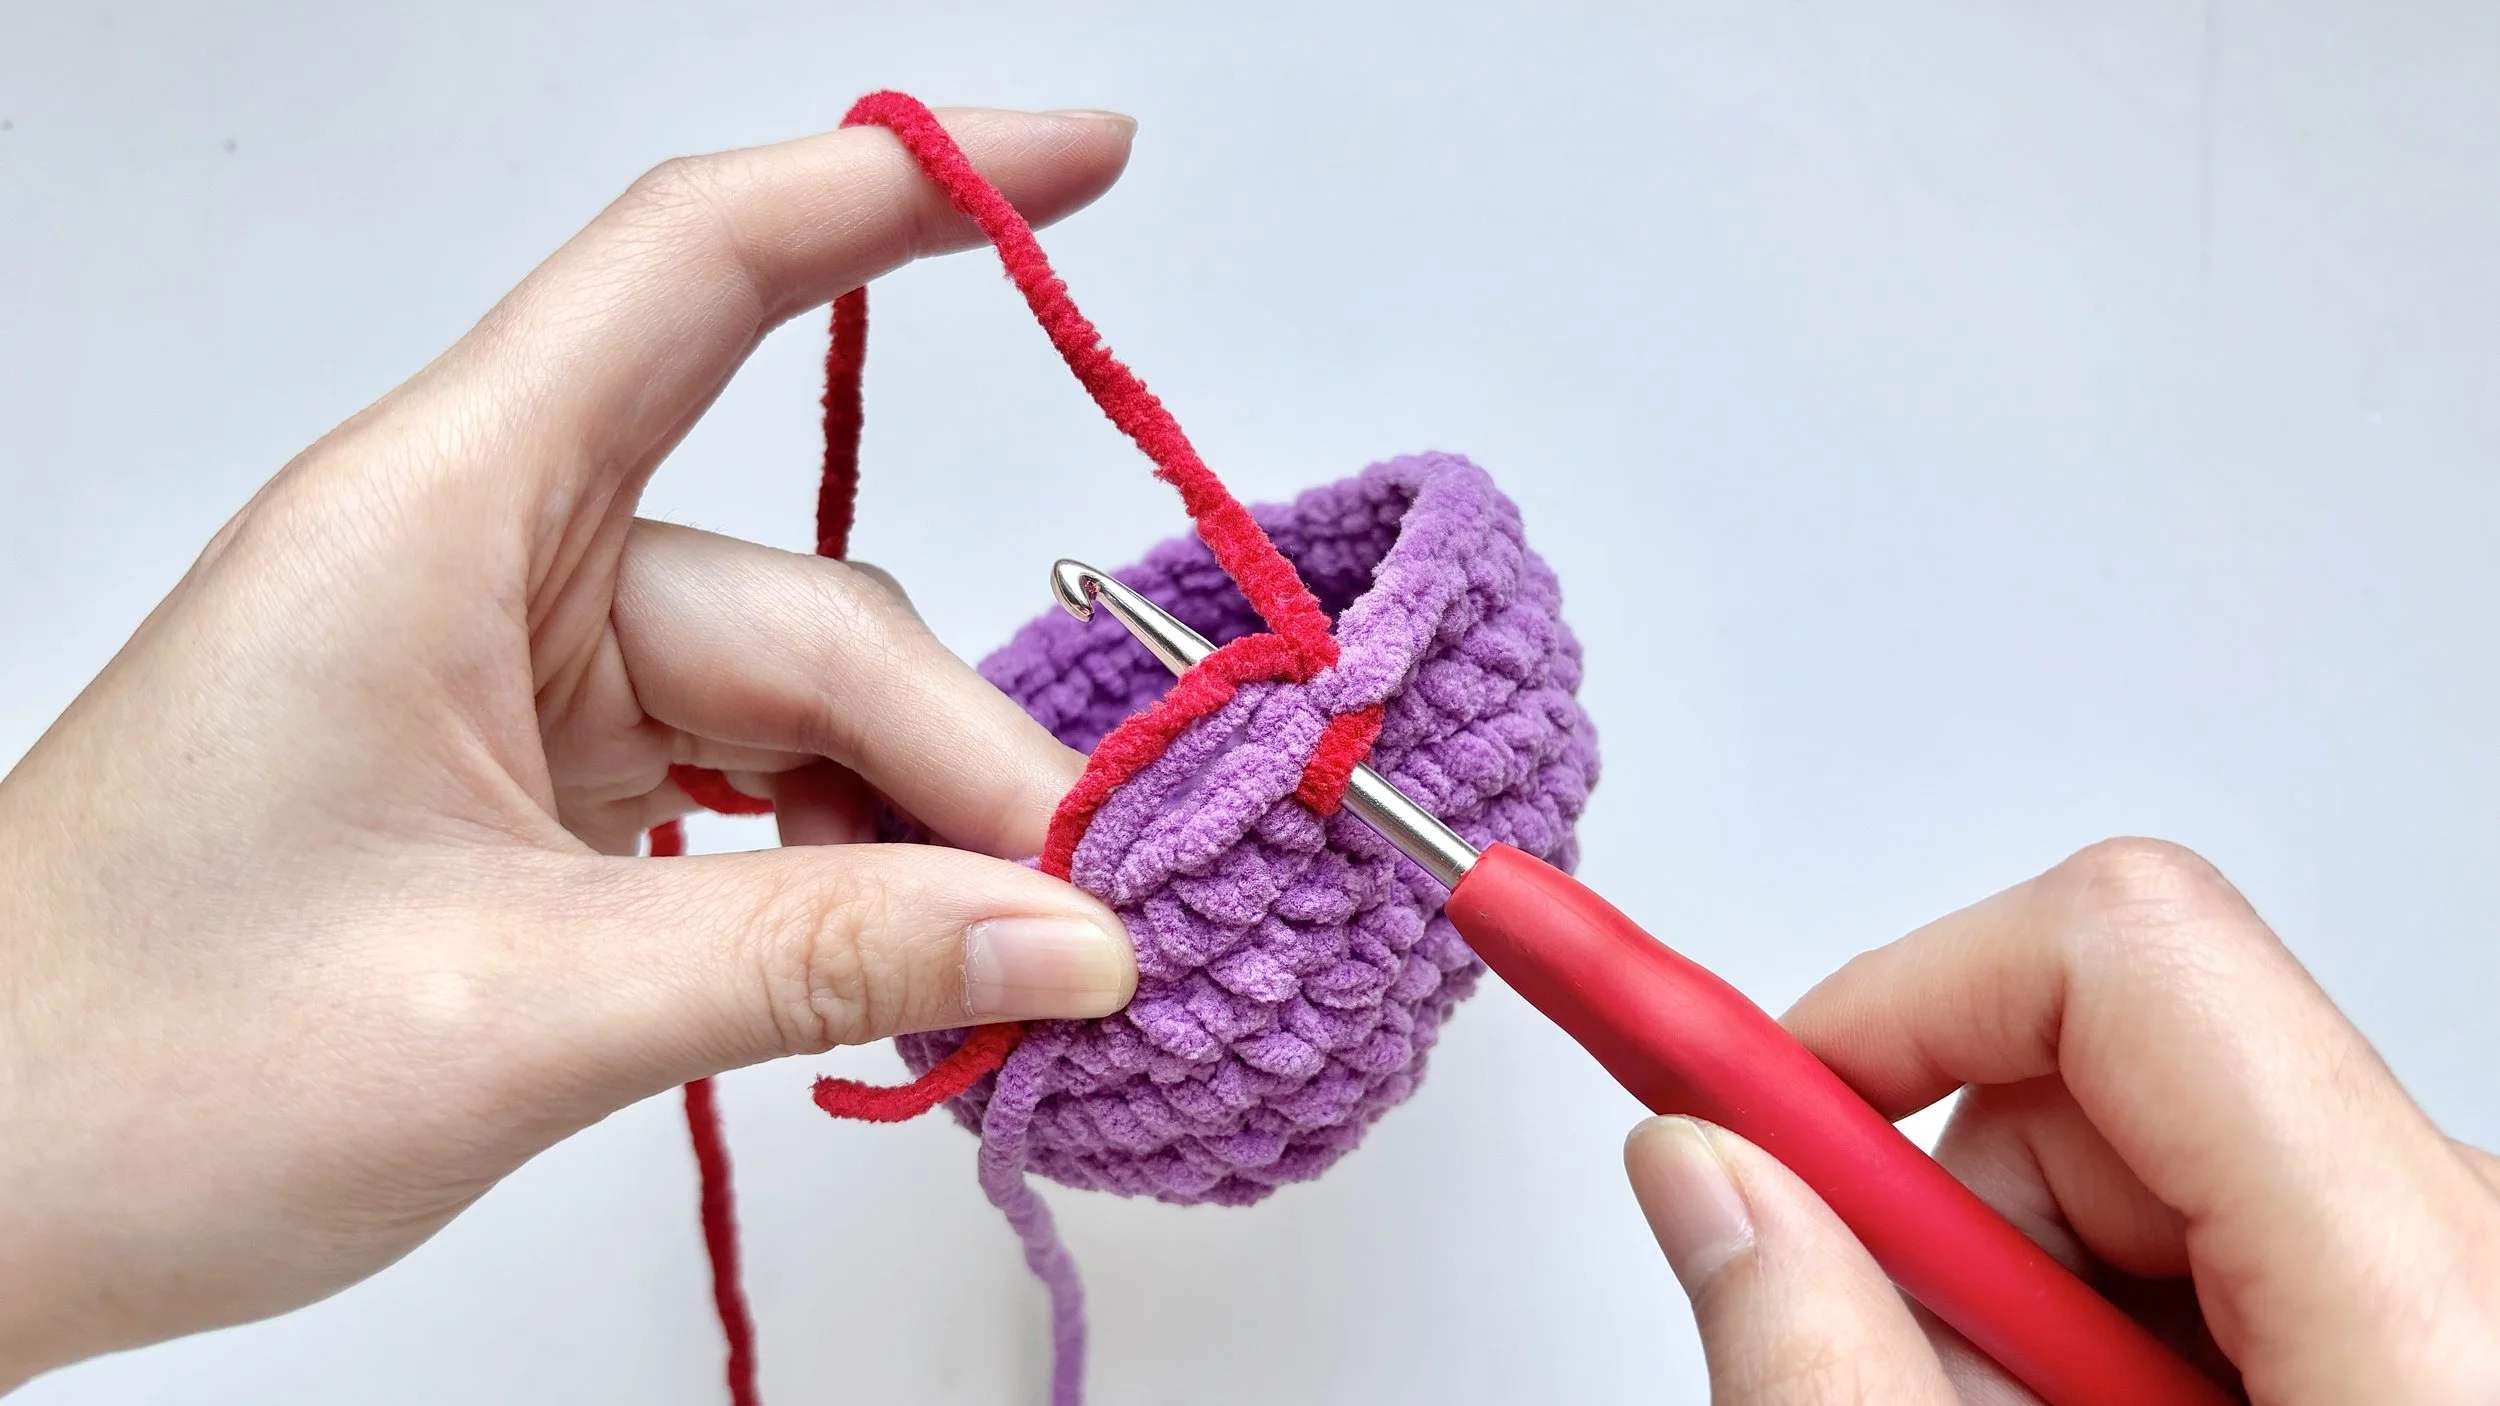
Step 6:
Finish the stitch

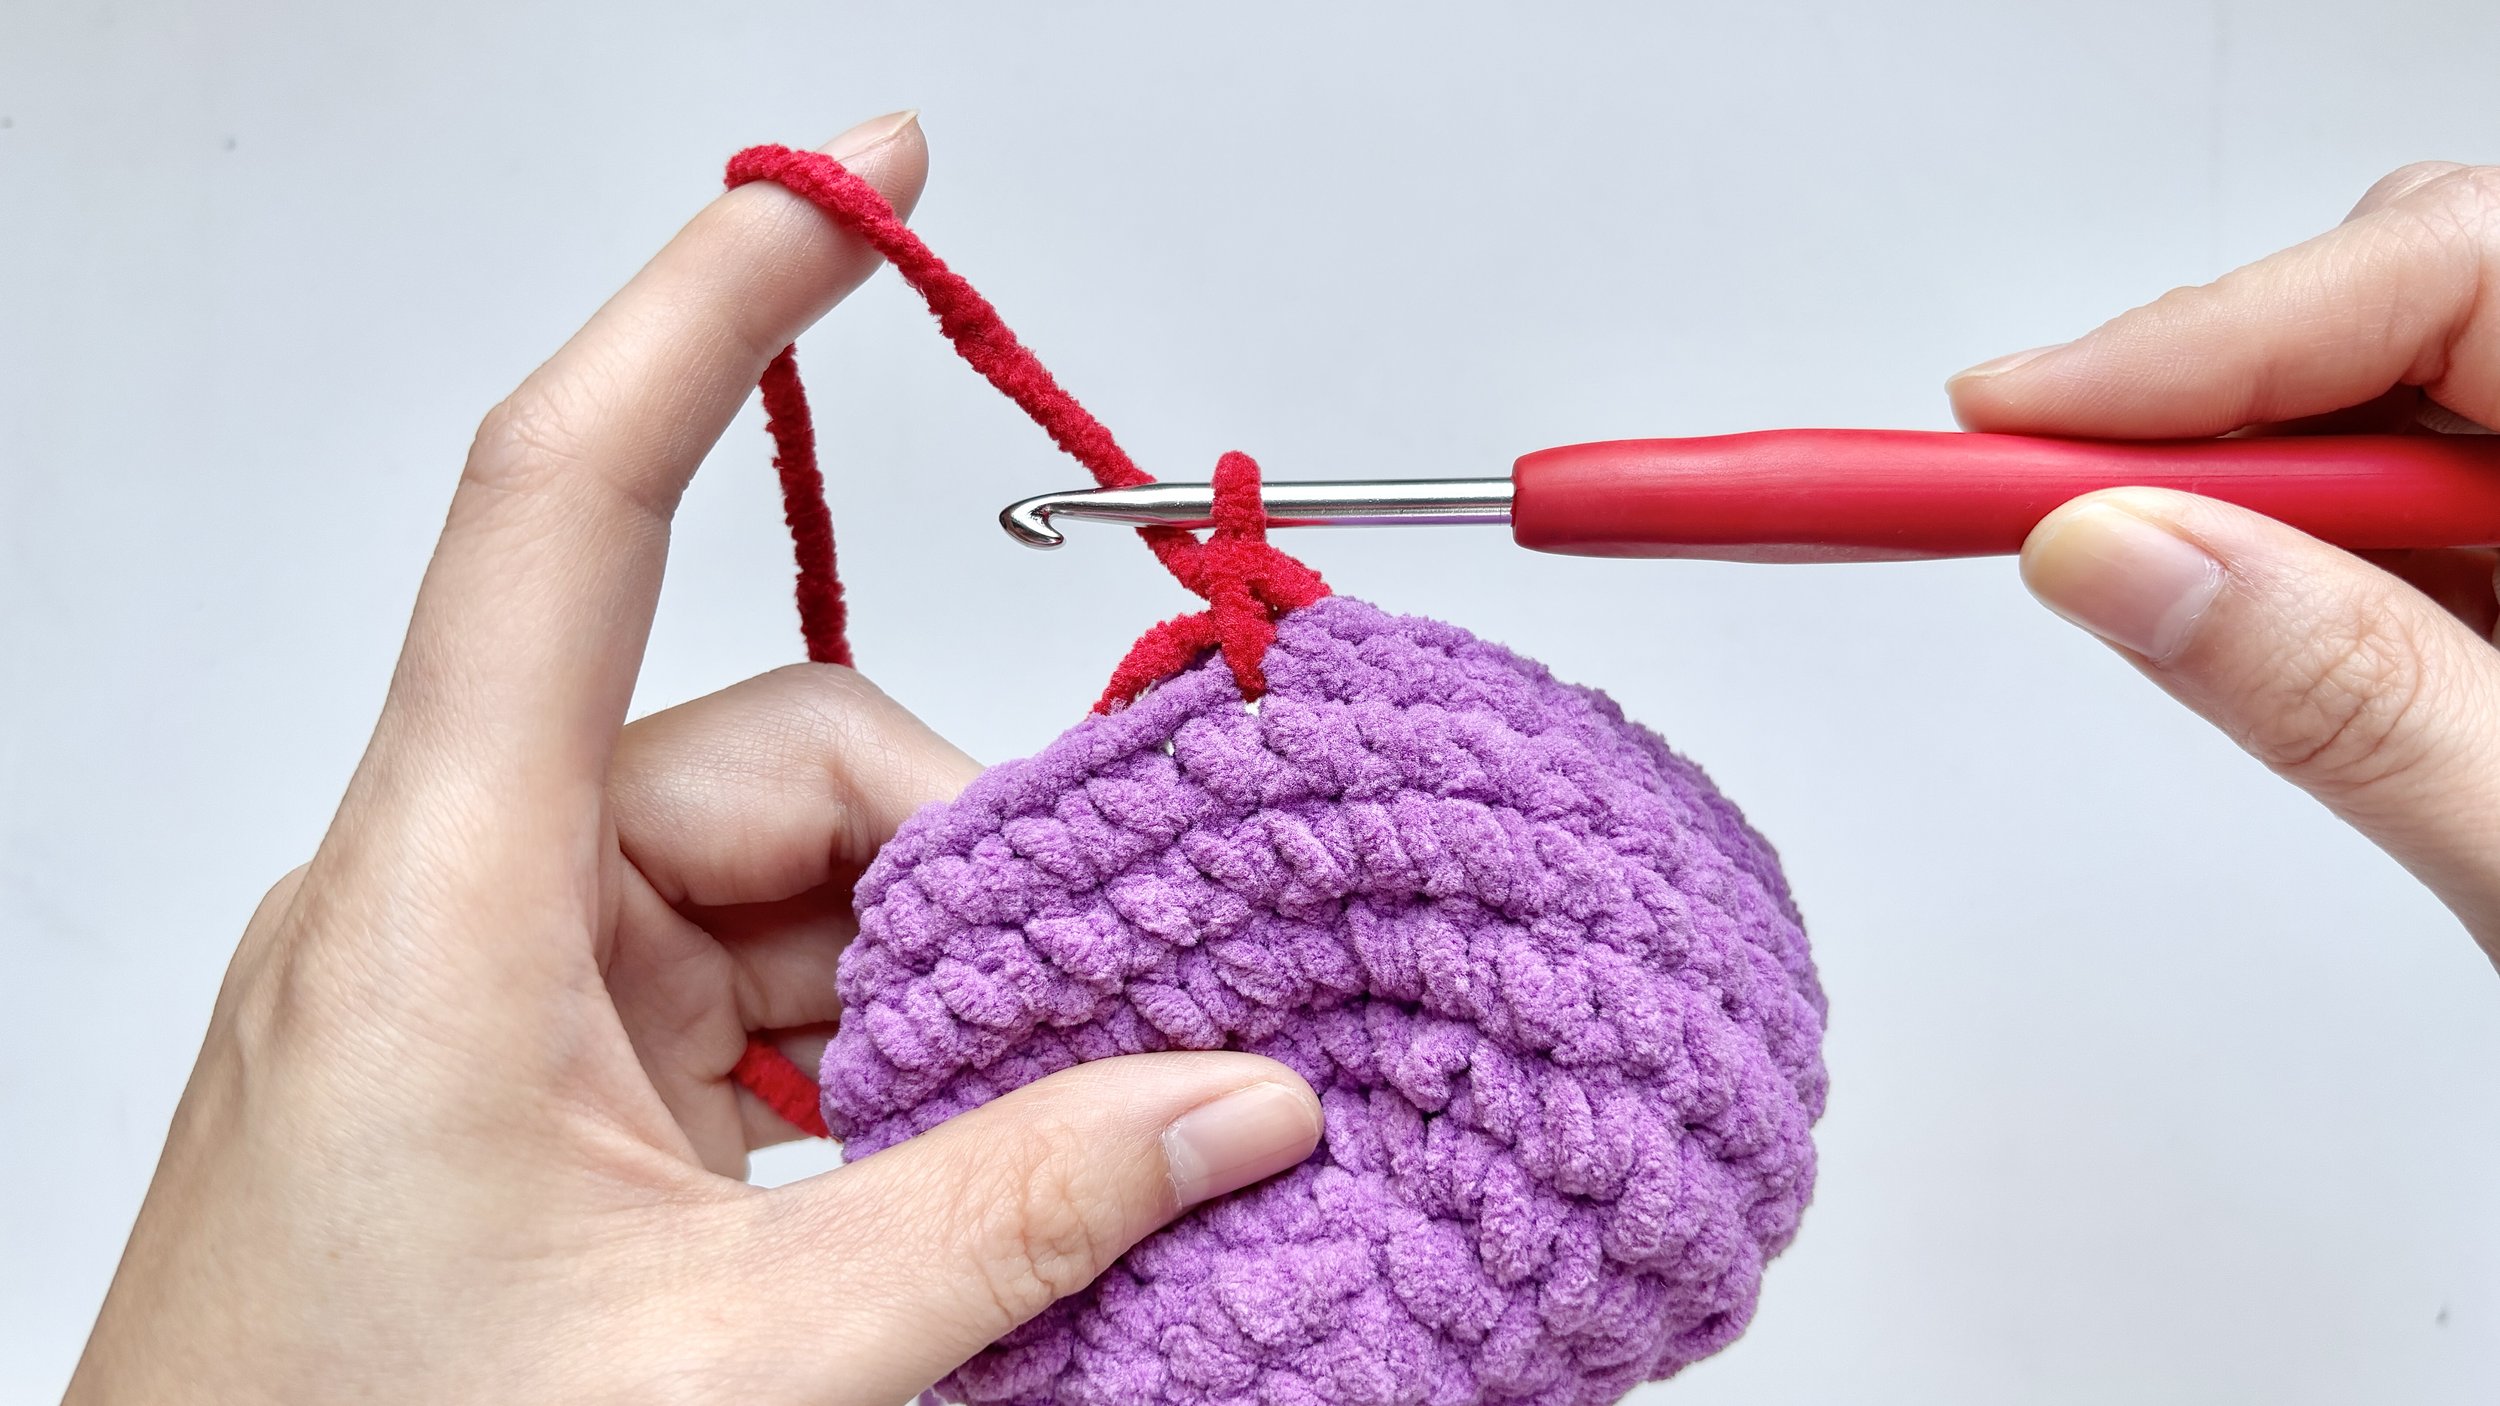
Finish that single crochet (sc) with Color B (red) - yarn over, pull through, and complete it as usual.
You’ll end with one neat loop of Color B on your hook.
That’s a color change - and a tidy way to carry your yarn so the back stays clean.
It feels like a lot of steps the first time and quickly becomes second nature.
We’re right here with you every step of the way.