
How to hold your hook and yarn
Before you make your first stitch, it’s important to find a comfortable way to hold your hook and yarn. By the end of this lesson, you’ll be ready to hold your crochet comfortably and begin learning your first stitches.
There’s no single “right” way to hold your hook and yarn. In this lesson, you’ll learn two common hook grips and one way to hold your yarn. Try both methods and choose the one that feels most comfortable for you.
Watch the lesson
Step-by-step instructions
Holding your hook
Here are two common ways to hold your crochet hook. Try both methods and choose the one that feels most natural and comfortable for you.
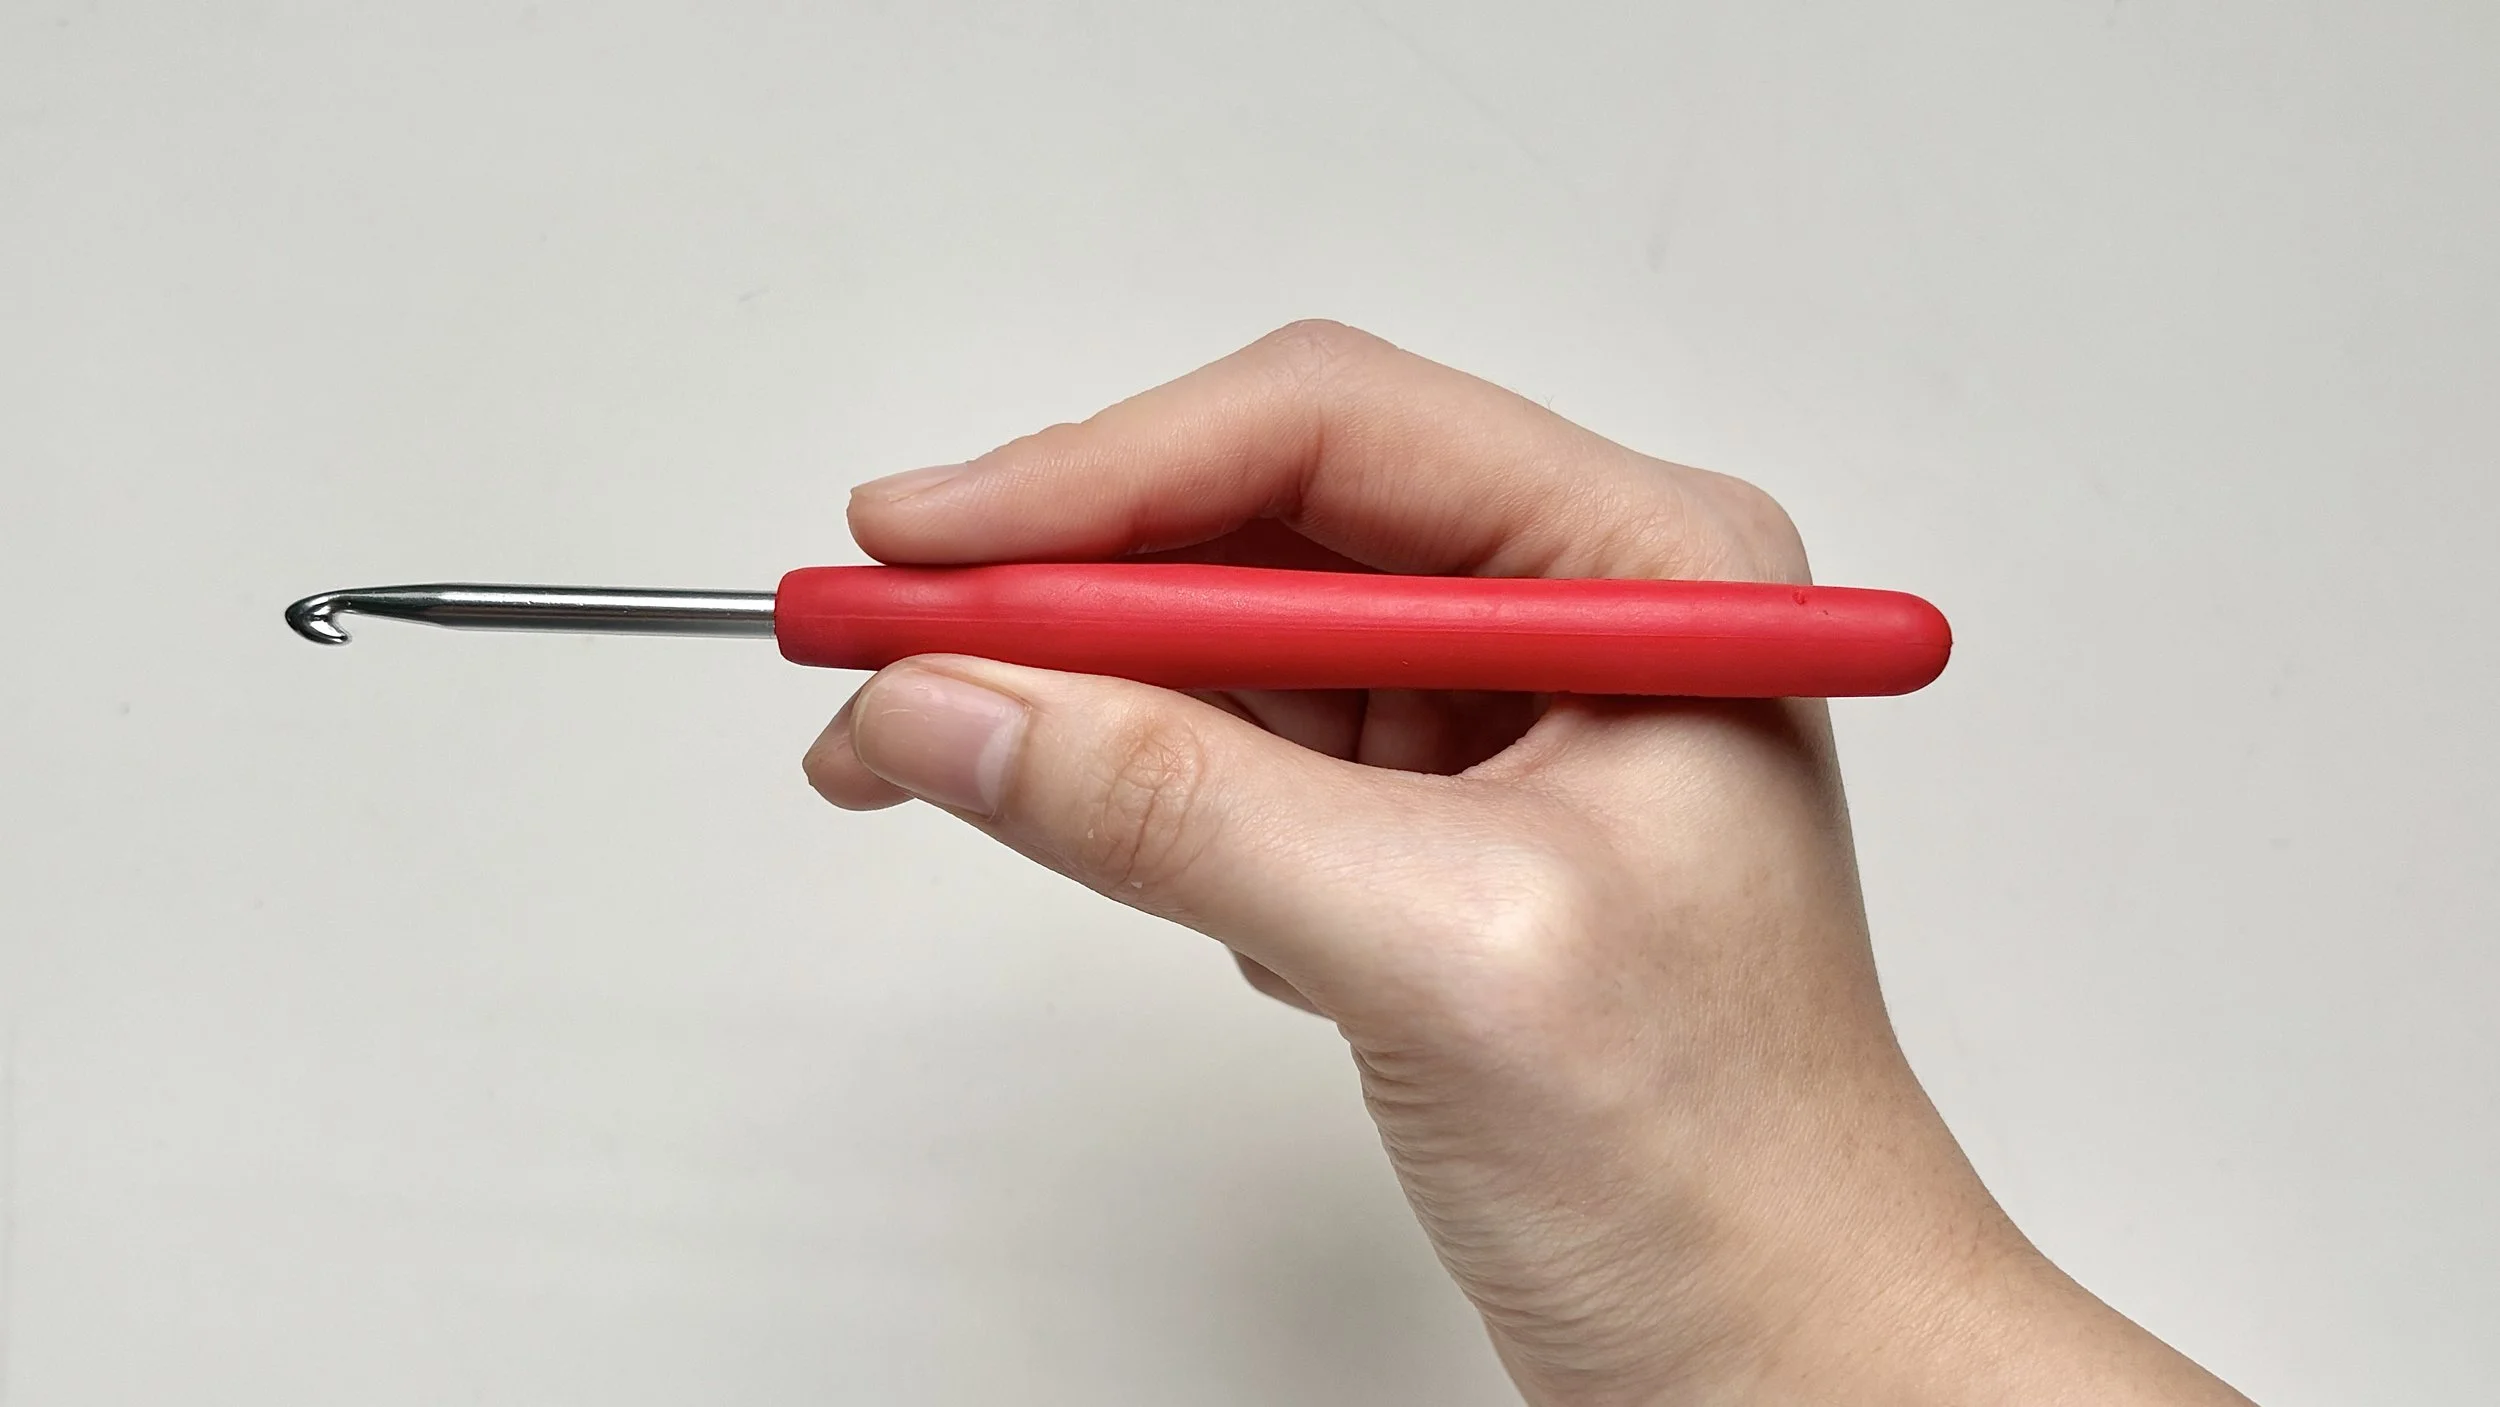
#1 Pencil grip
Hold the crochet hook like a pencil, resting it lightly on your middle finger while guiding it with your thumb and index finger.
#2 Knife grip
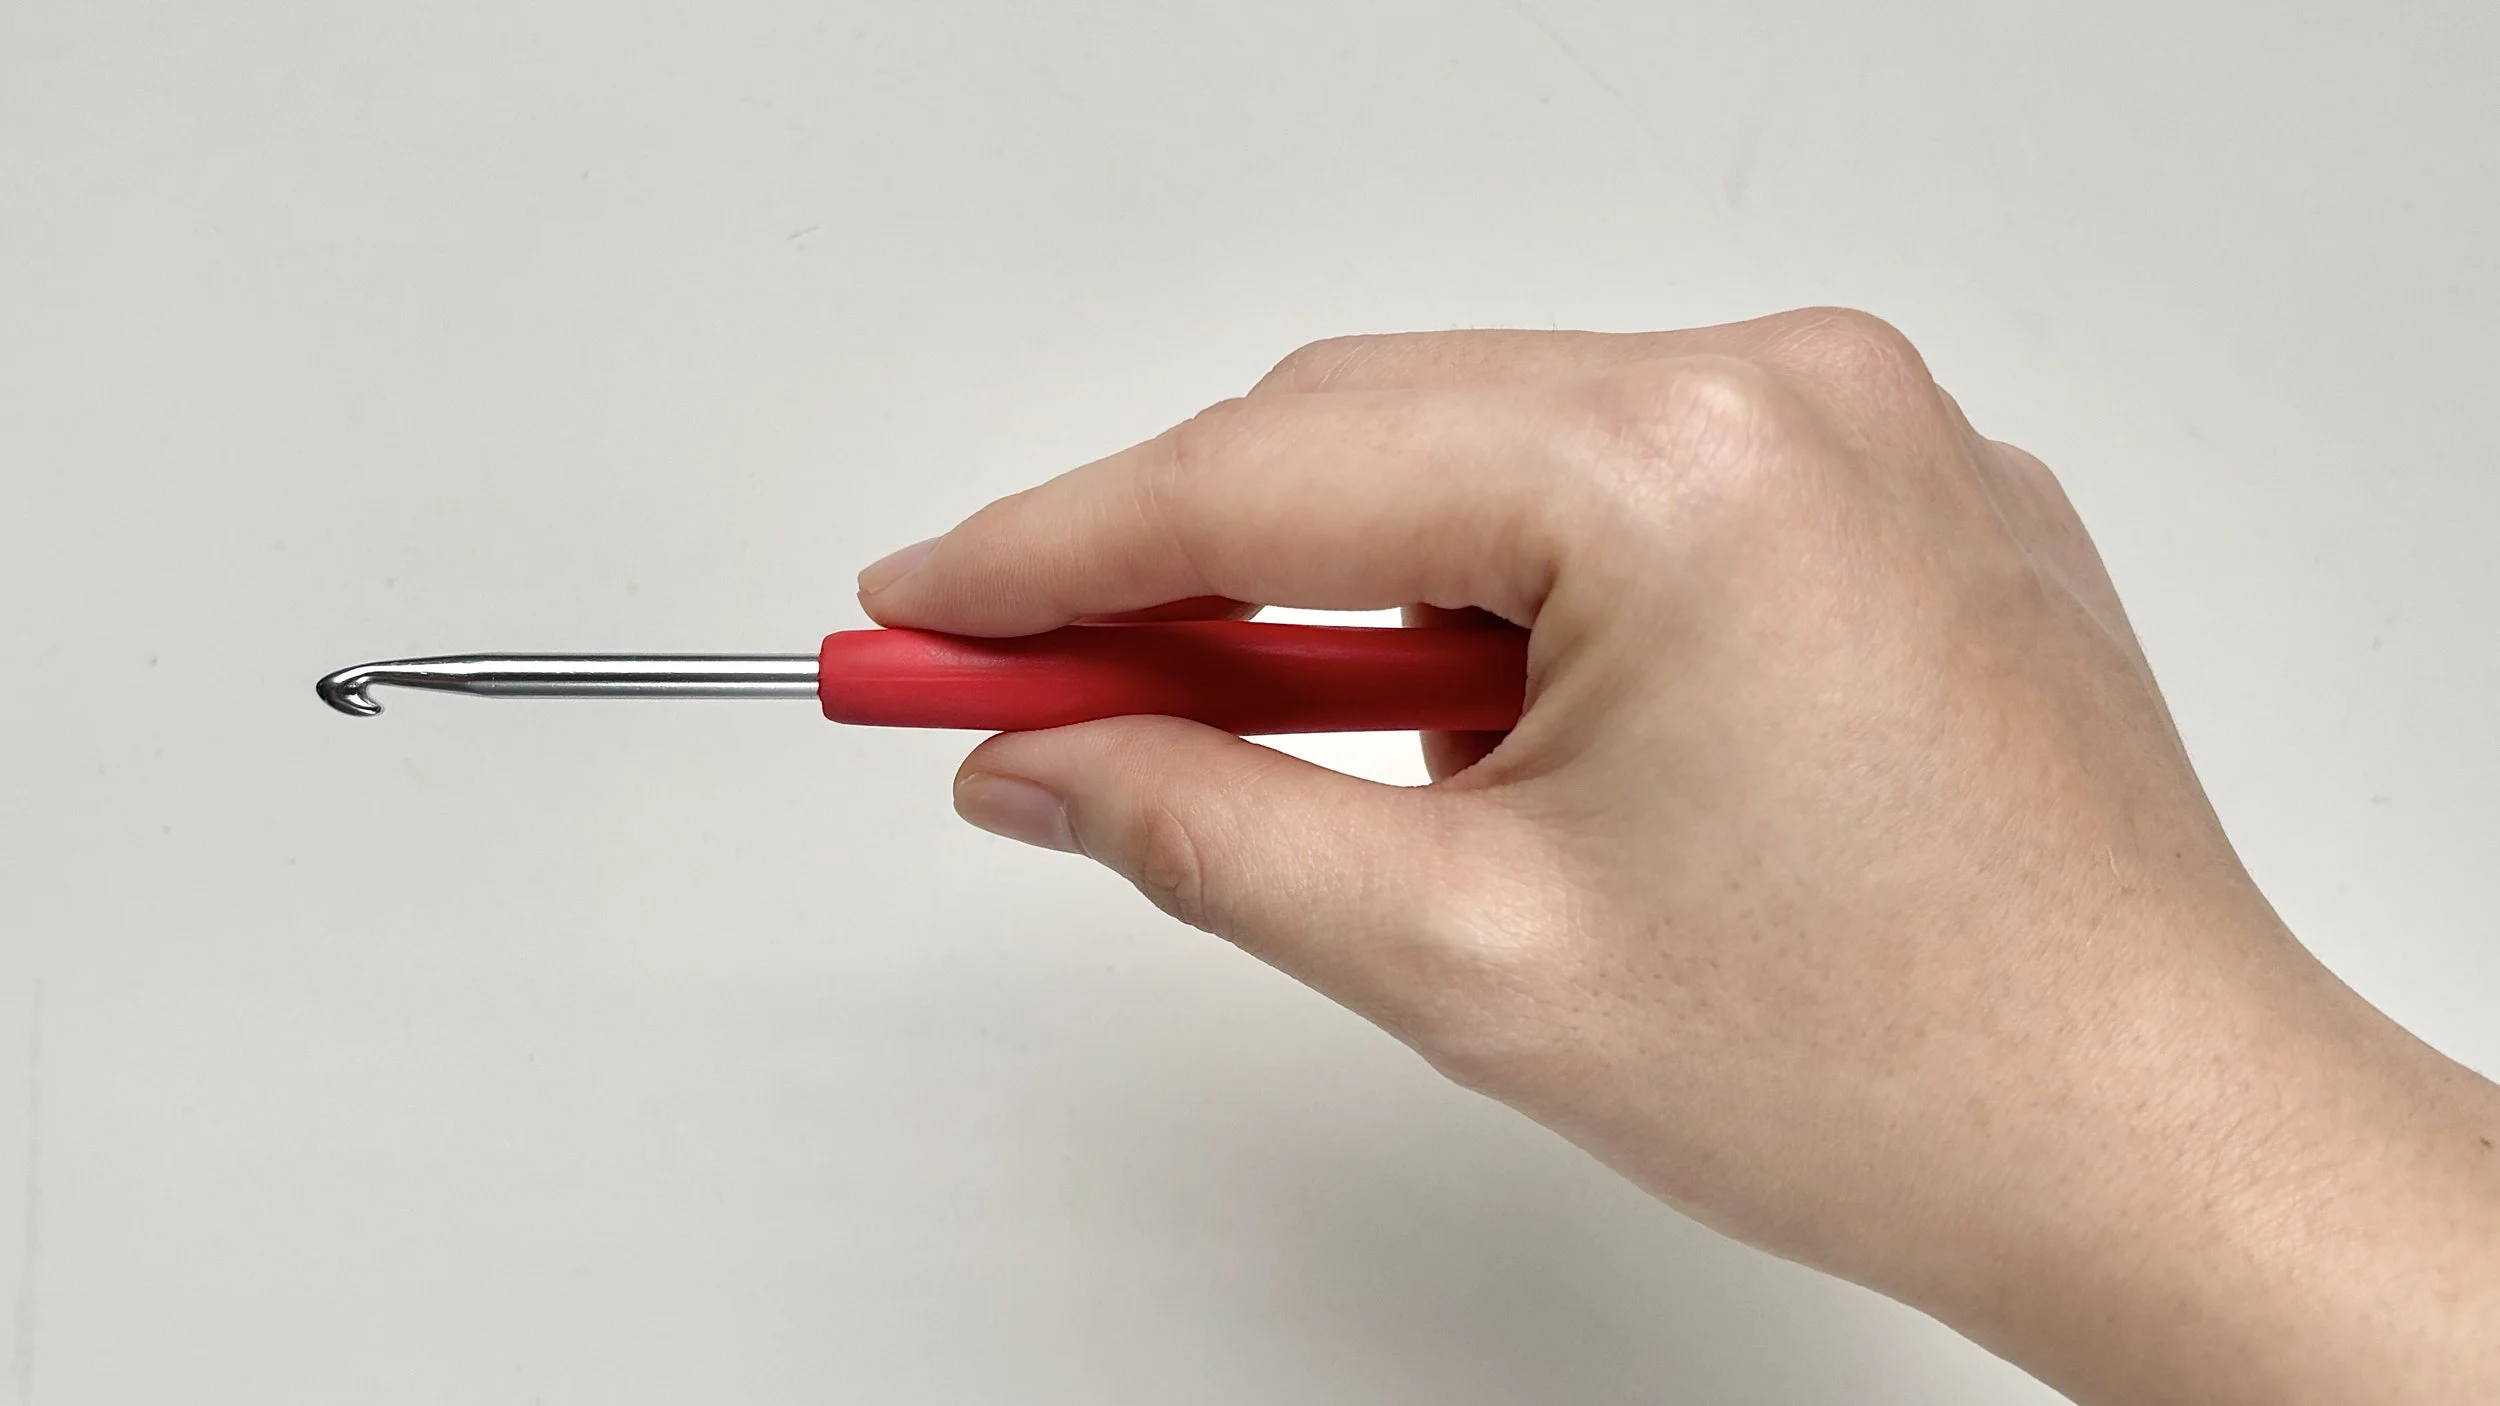
Hold the crochet hook like a knife, wrapping your hand around the handle.
Your middle finger supports the hook underneath, while your thumb and index finger help guide your movement.
Holding your yarn
Before we begin, let’s learn the difference between the two strands of yarn you’ll be working with:
This is the strand still connected to your yarn ball. You'll use the working yarn to make every stitch as you crochet.
Working yarn
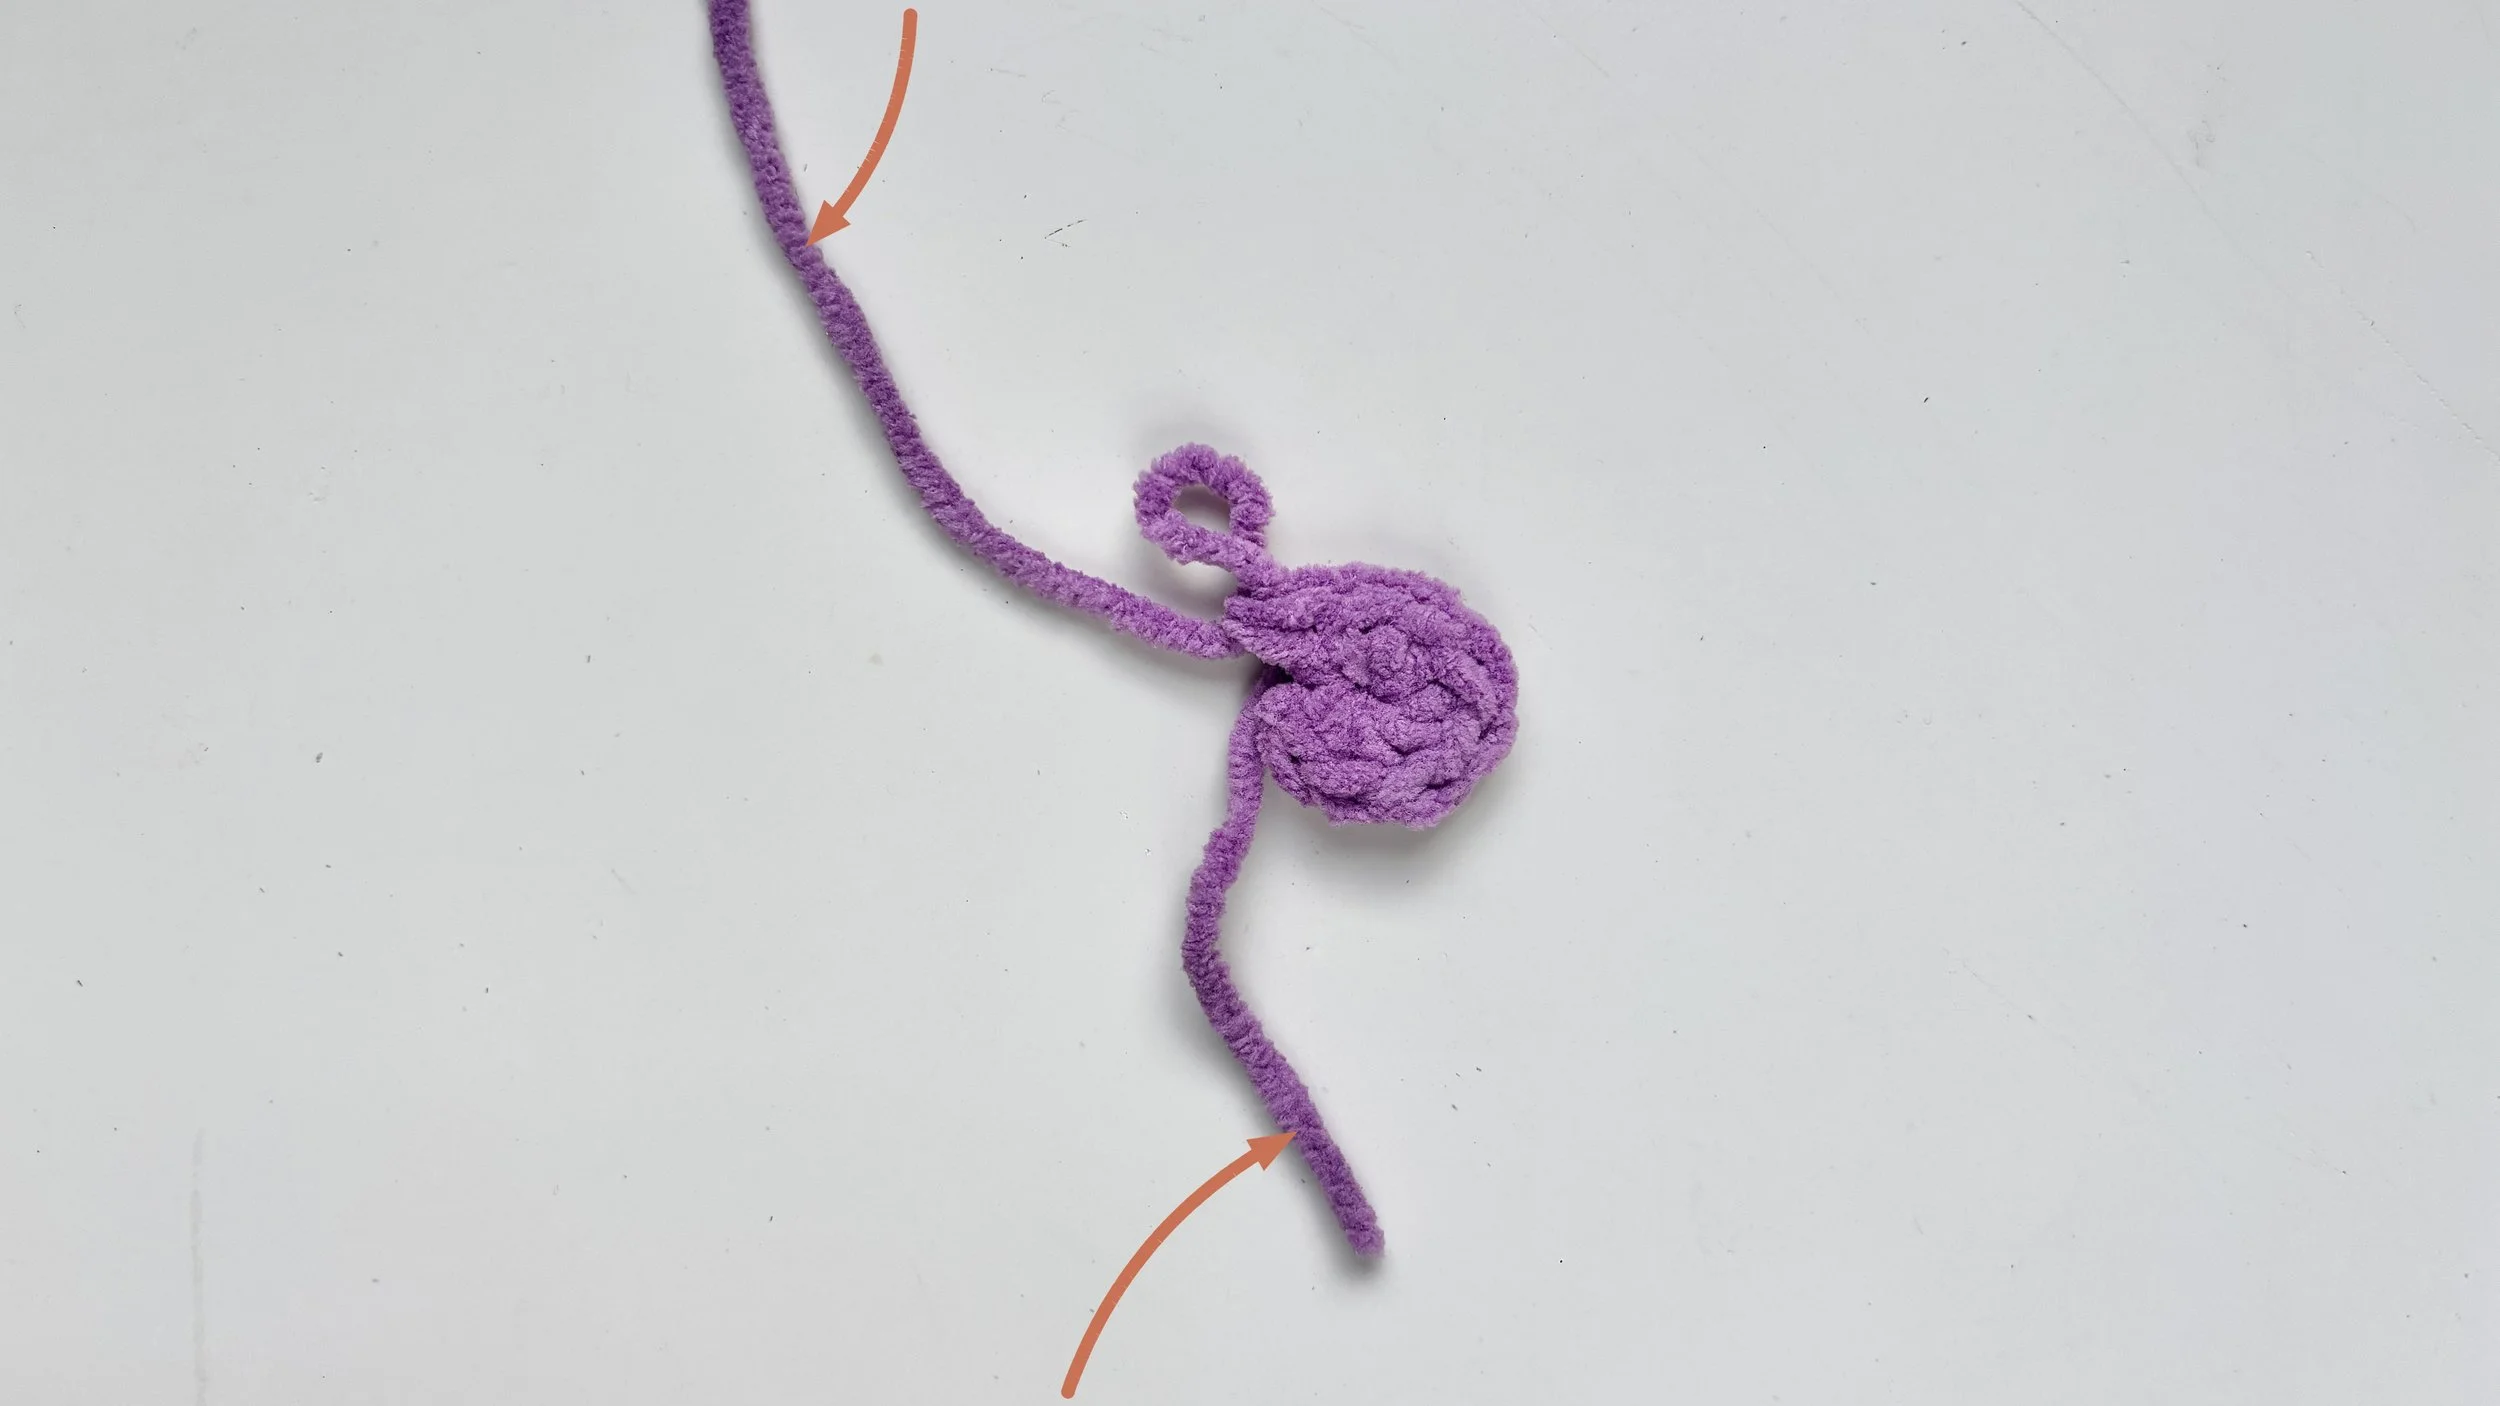
This is the loose end from where you began your project. It stays outside your stitches and isn’t worked into your crochet.
Yarn tail
Now let’s set up your yarn
You've now tried both ways to hold your hook and met the two strands of yarn, the working yarn and the yarn tail. The last piece is setting up the yarn in your hand so it feeds smoothly while you crochet. Let's do that now, one small step at a time.
Get into position:
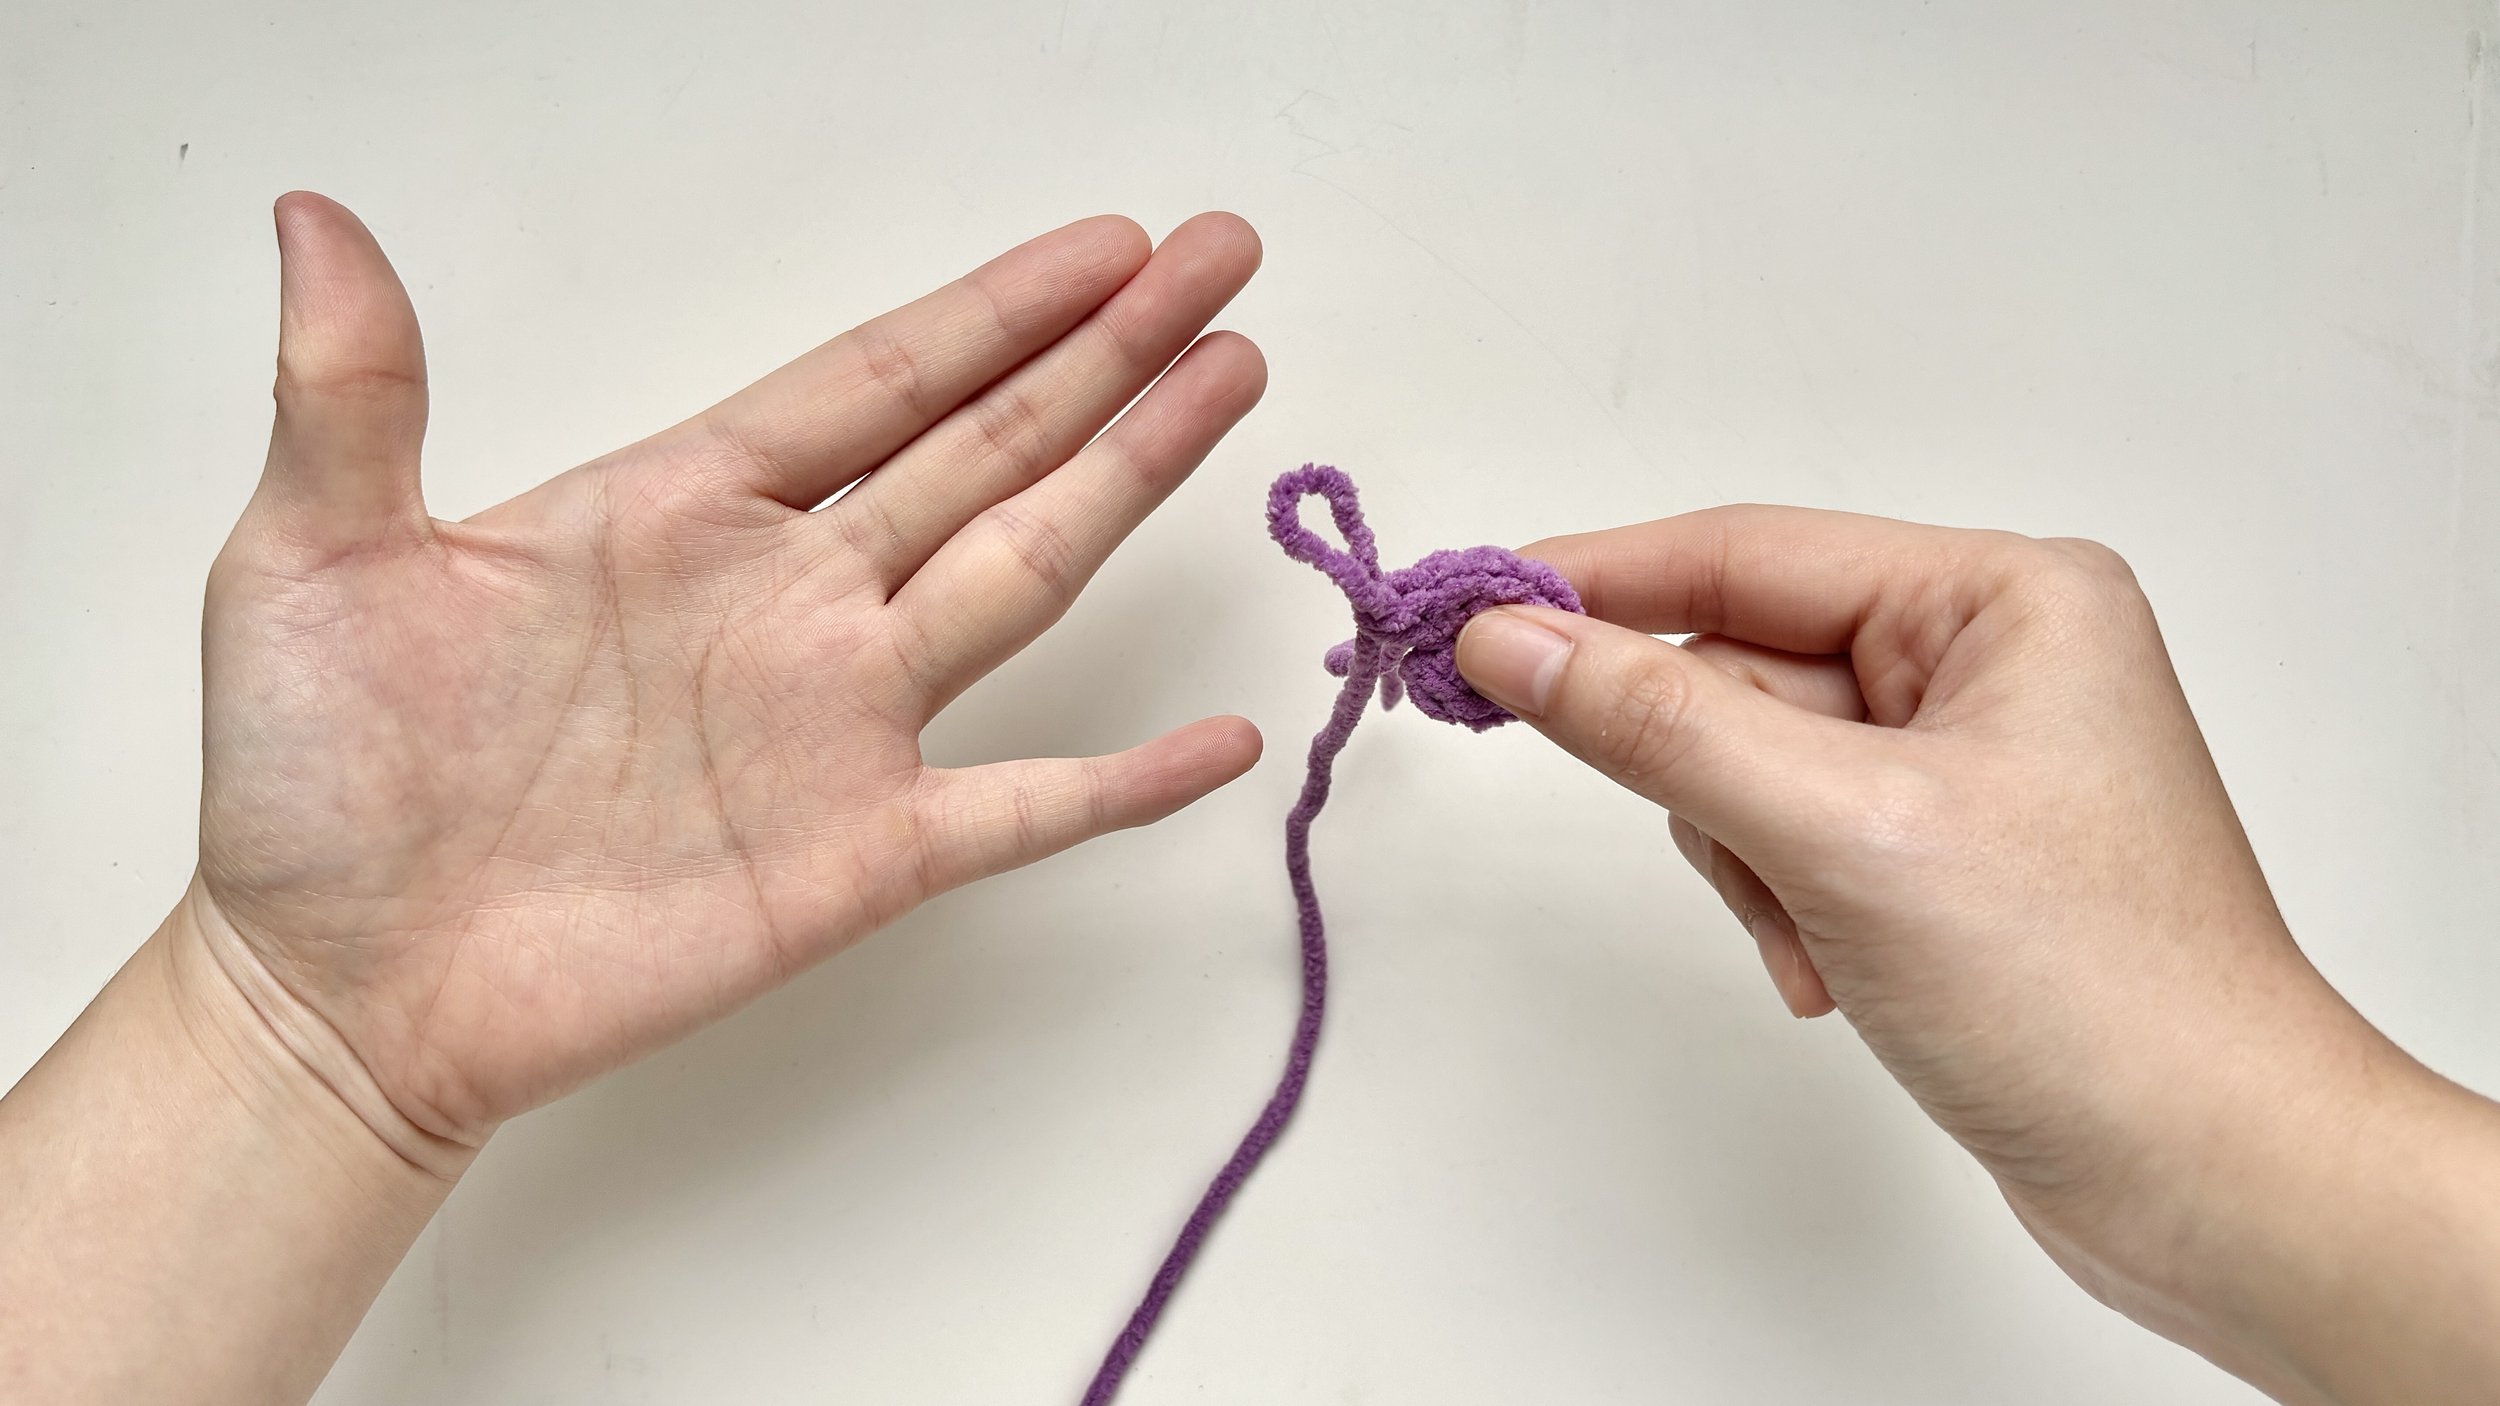
Hold your yarn in your left hand and your crochet piece in your right hand. Don’t worry if it feels a little awkward at first - that’s completely normal.
Turn your palm to face you:
Turn your left palm to face you and position your crochet piece in front of your hand.
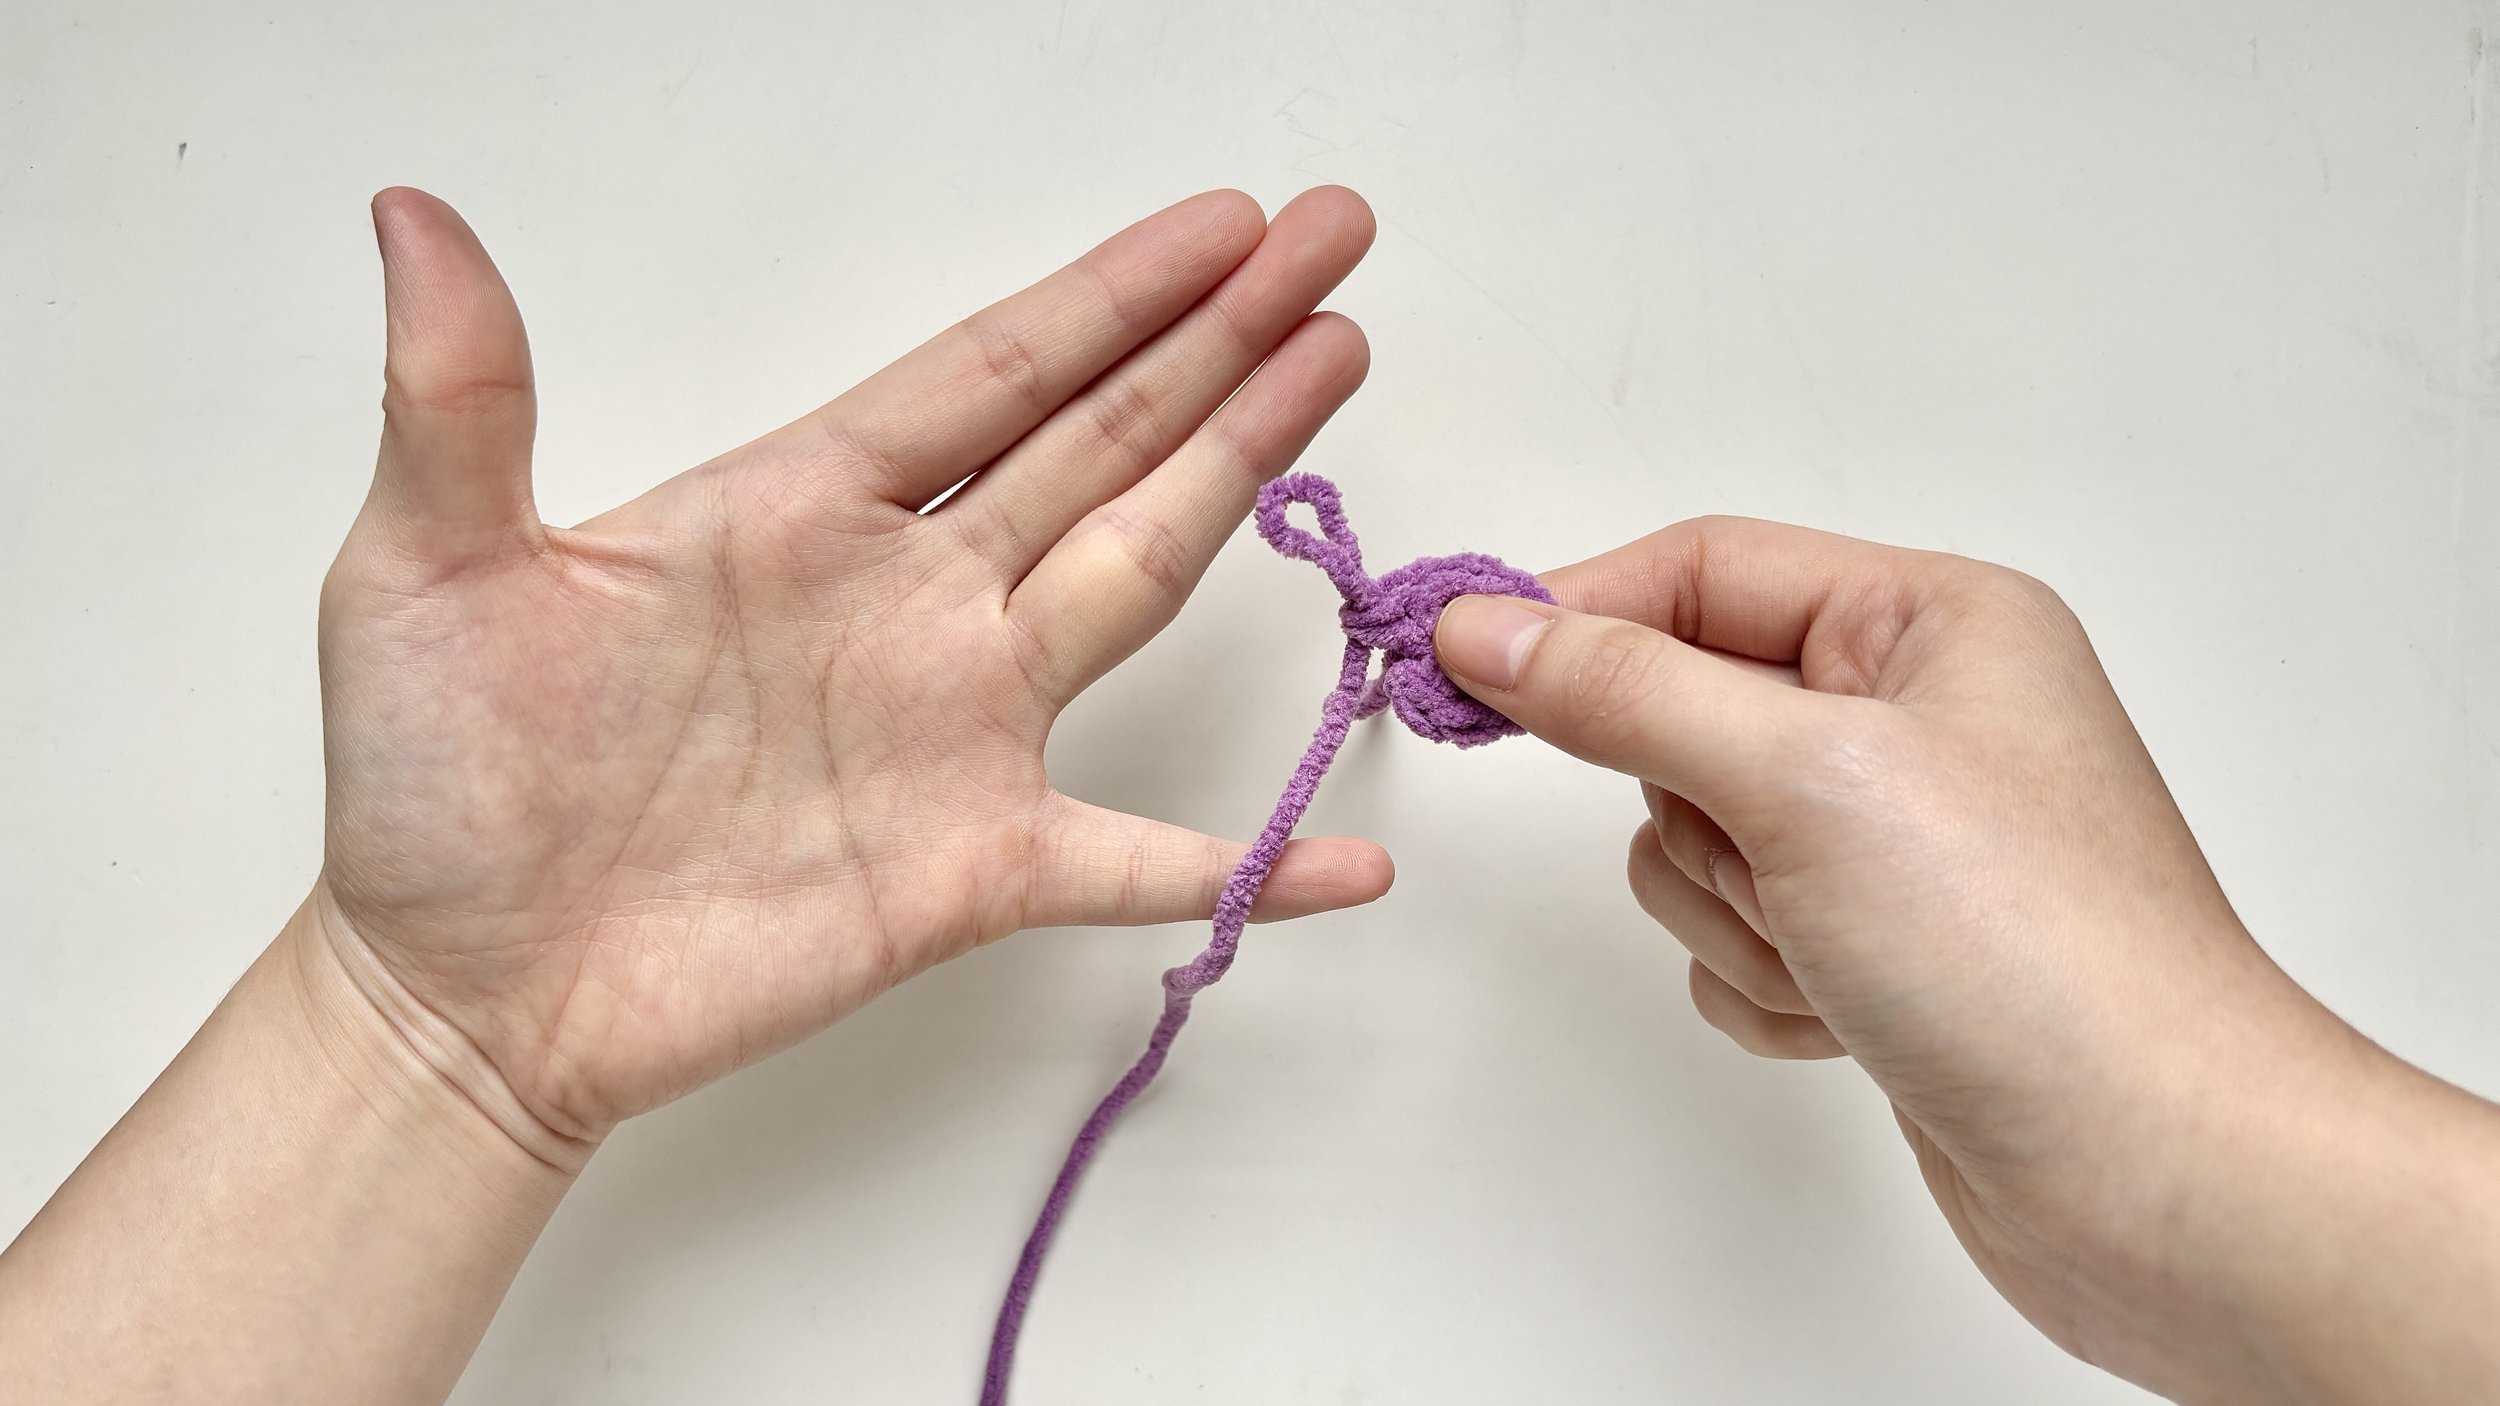
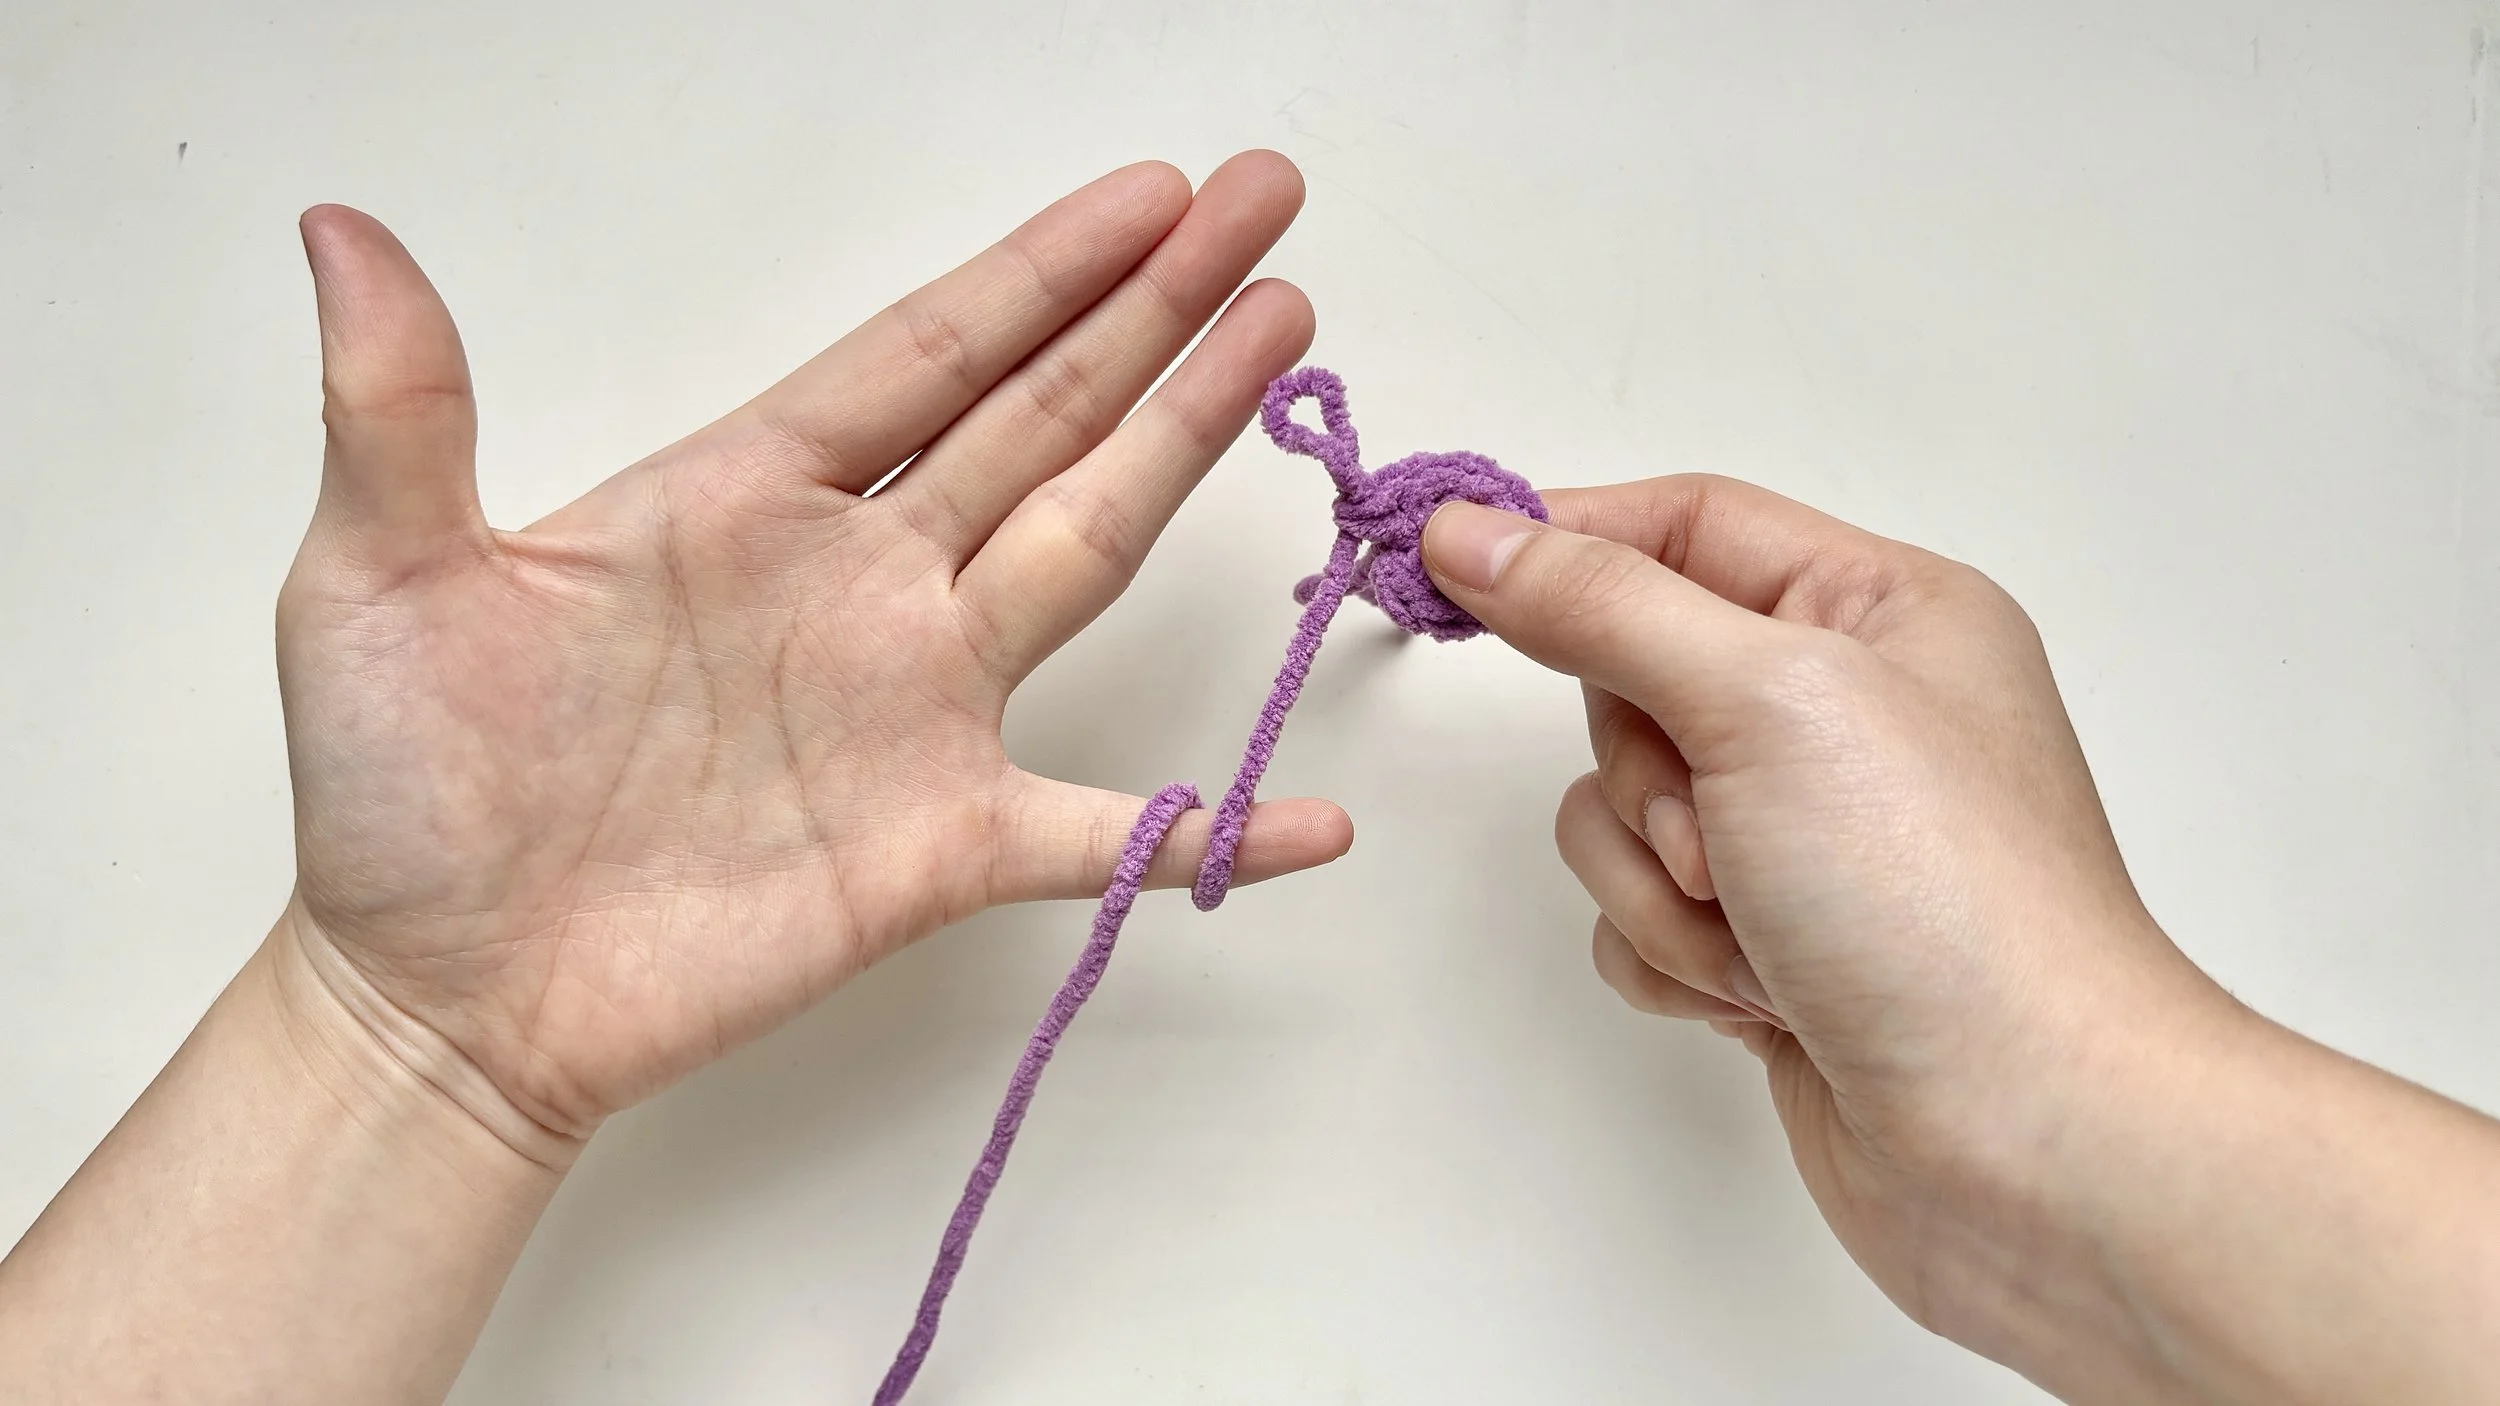
Wrap your pinky:
Wrap the working yarn once around your pinky finger.
Up and over your index finger:
Bring the yarn behind your hand, then guide it up and over your index finger. Your index finger will help control the yarn as you crochet.
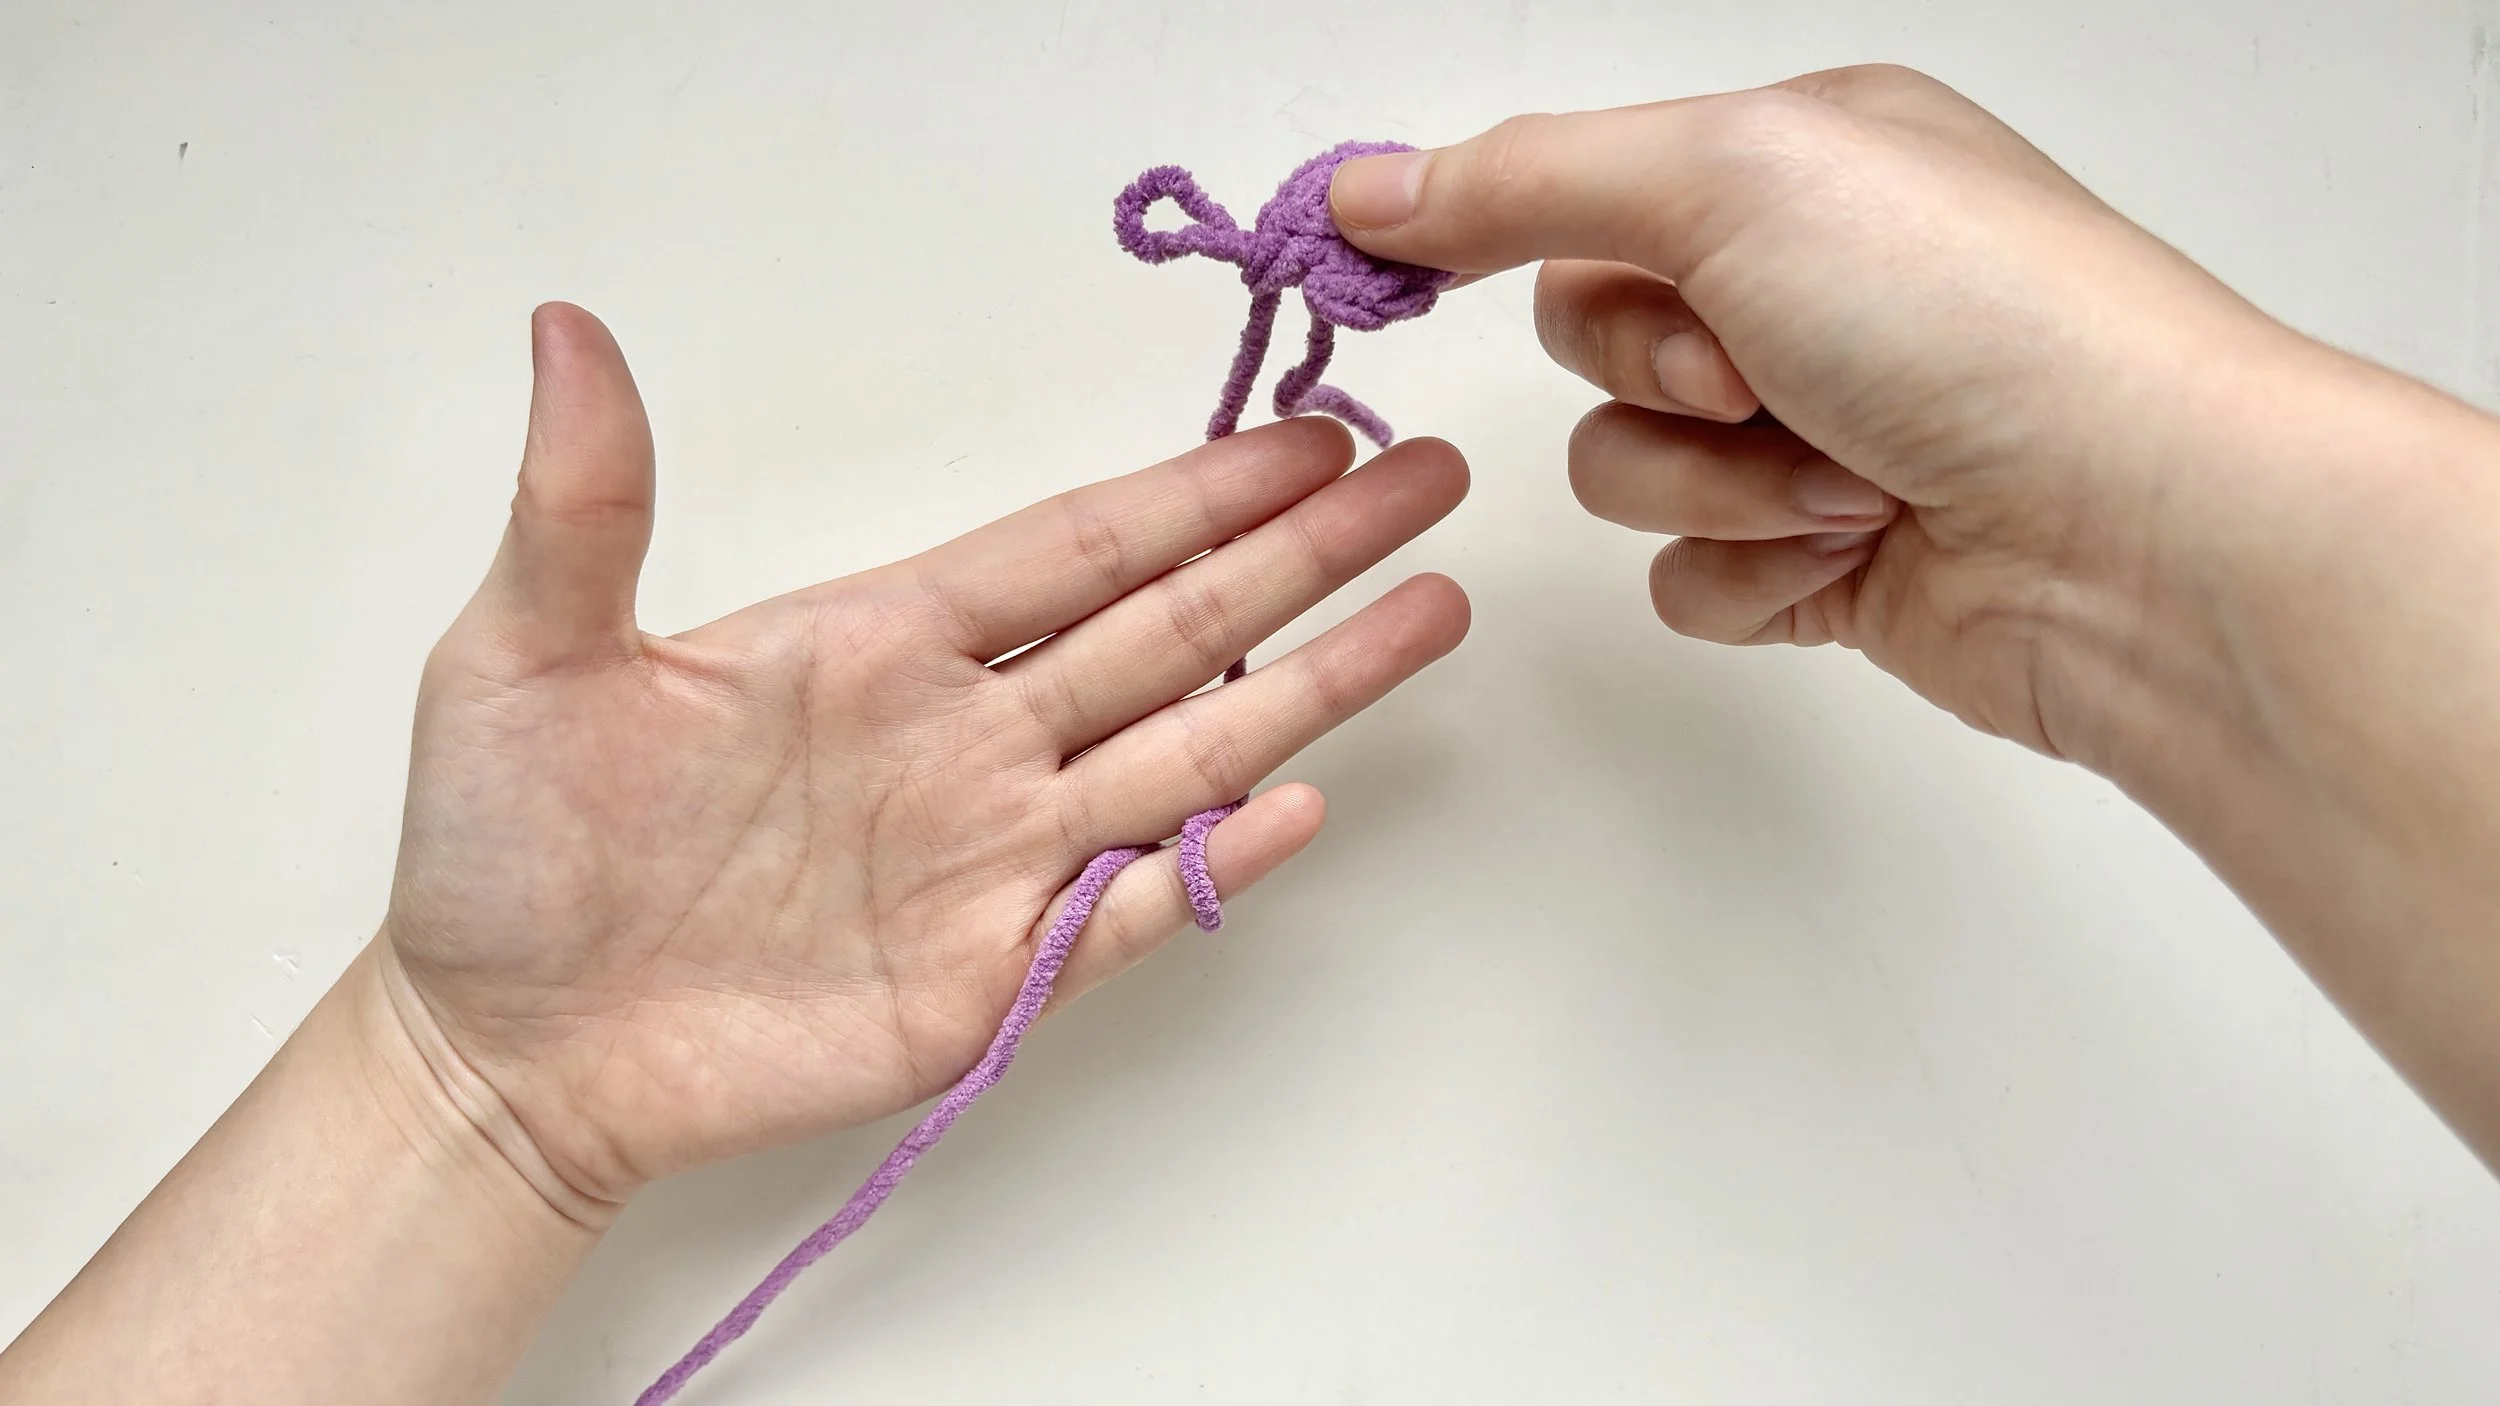
Hold your work steady:
Use your thumb, middle finger, and ring finger to gently hold your crochet piece in place. This helps keep your work steady while your index finger controls the yarn tension.
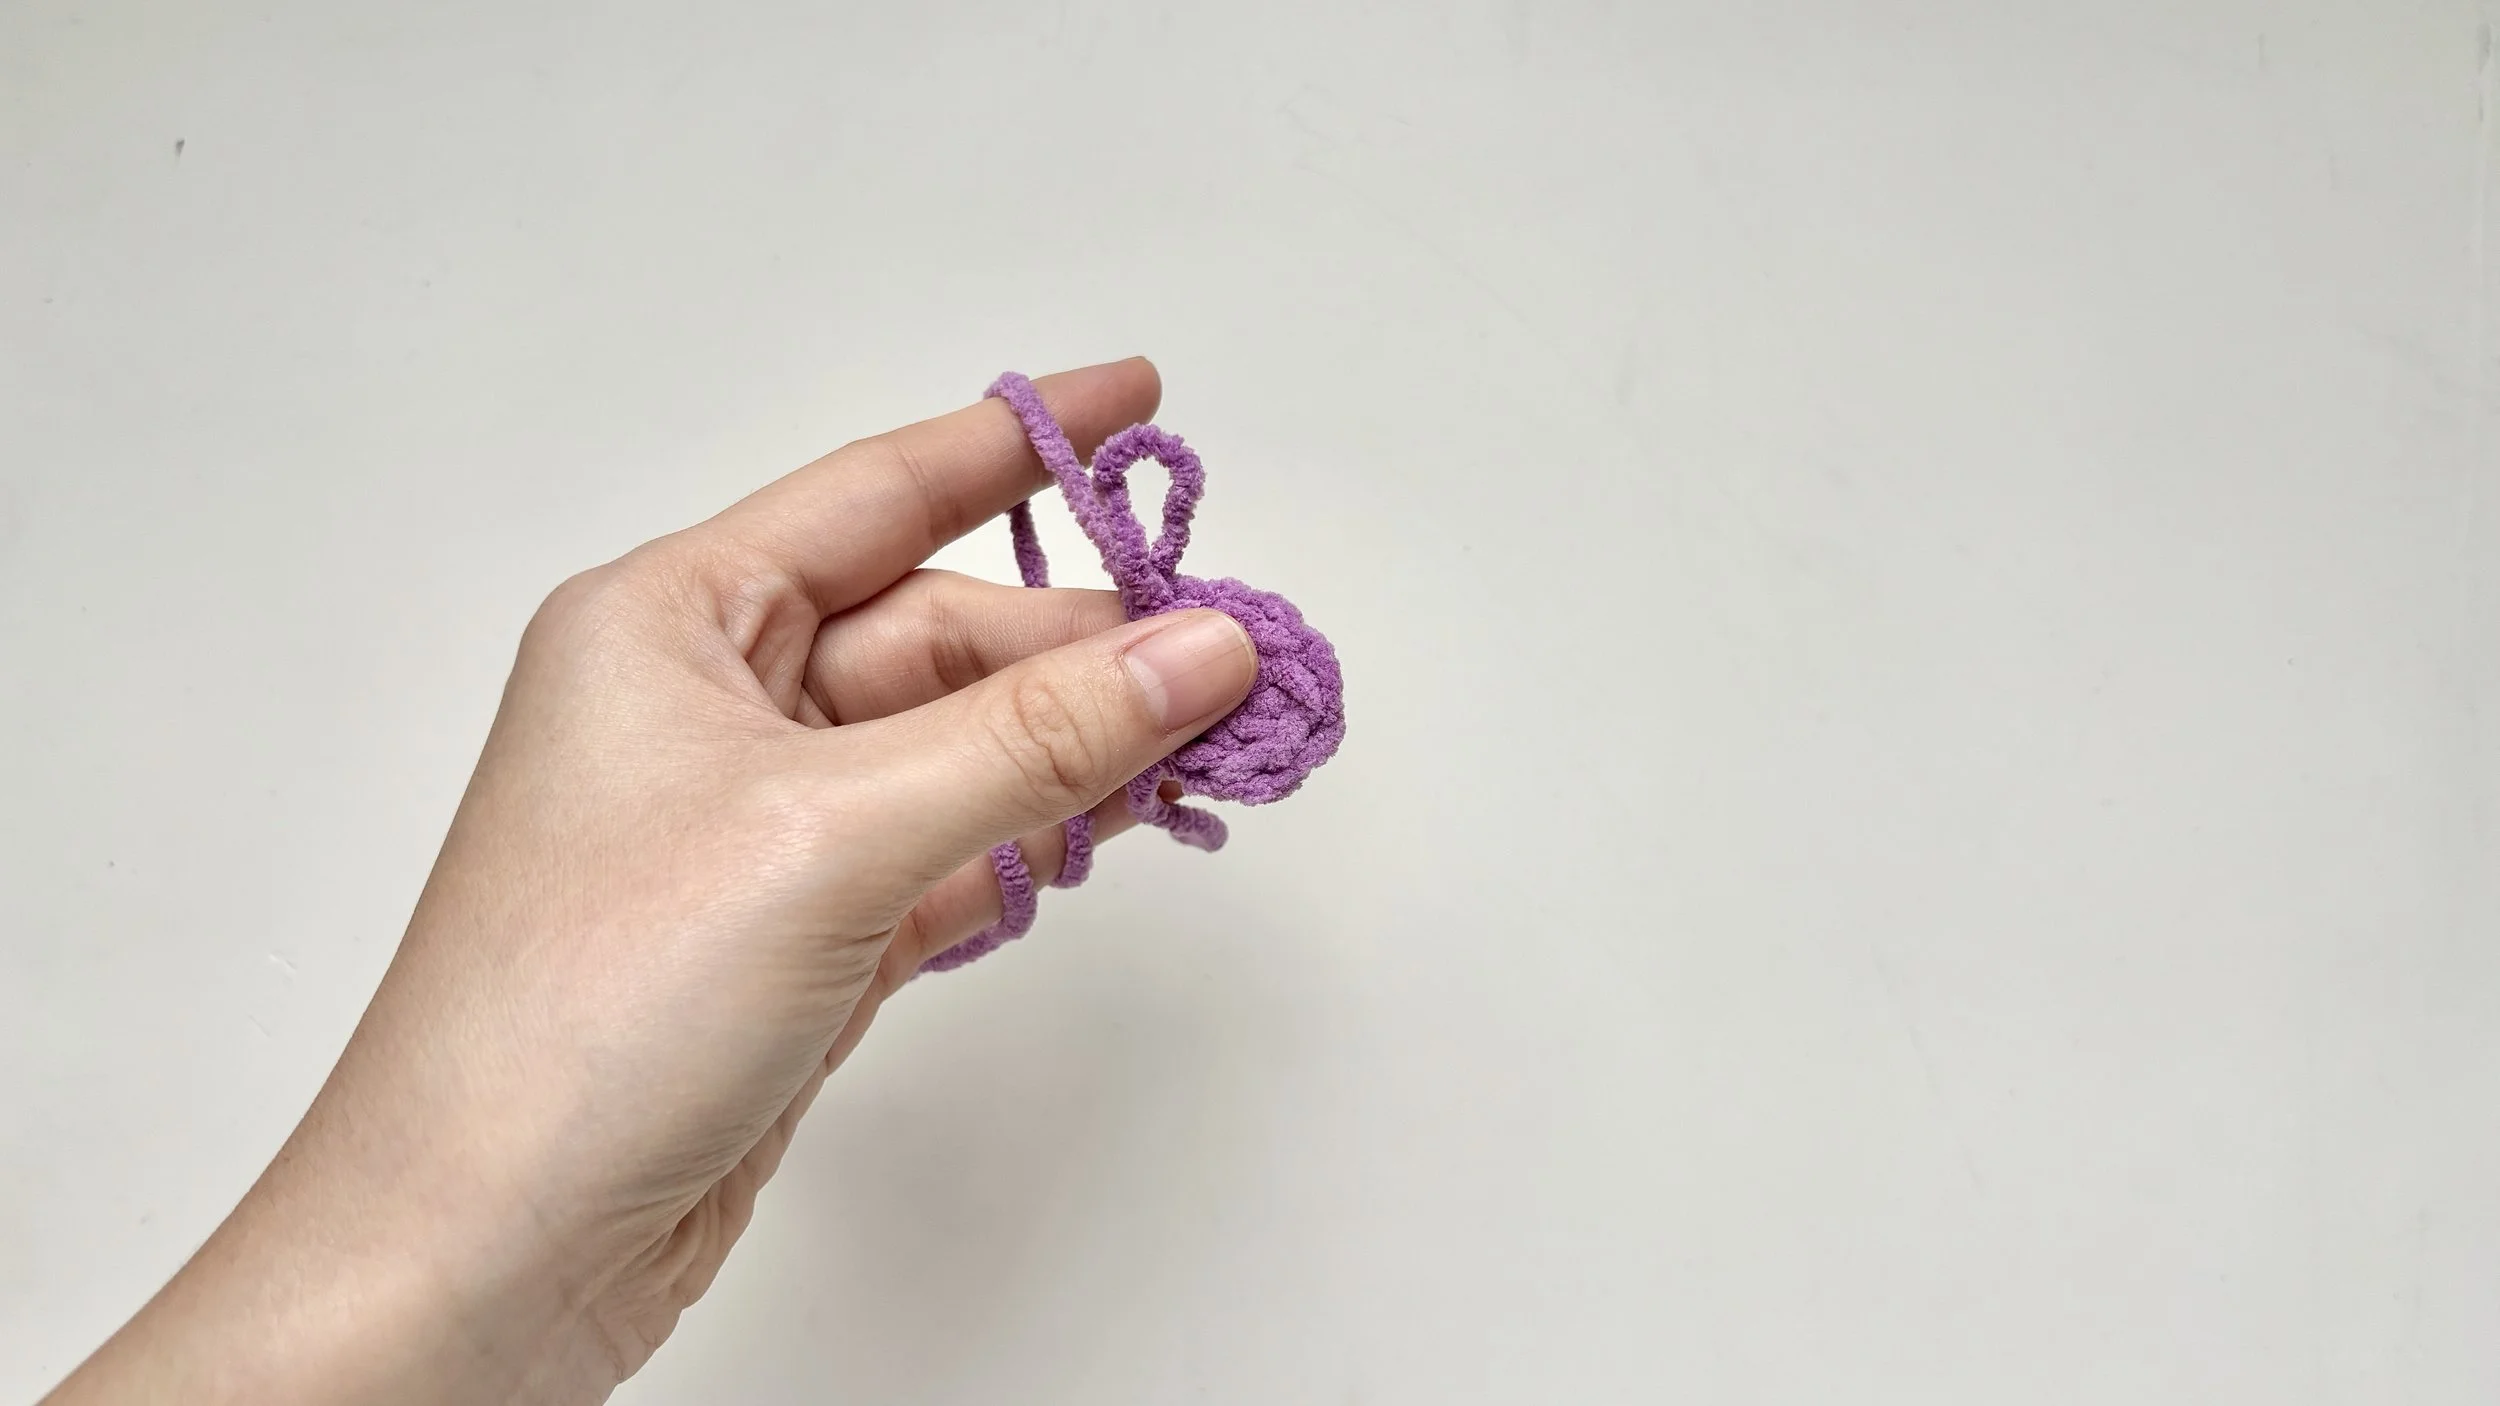

Tip: If your yarn feels too tight or too loose, try moving your index finger slightly closer to or farther away from your hand.
If it doesn't feel natural straight away, that's okay. Every crocheter develops their own comfortable style with practice. You're now ready to learn your first crochet stitches, and we're right here with you every step of the way.

You've got it when: The yarn slides through your fingers with gentle, even tension, and your hook feels steady in your grip.