
Step 10 of 10:
Assembling Pip
You've made all the pieces, well done!
Now comes the most satisfying part: bringing Pip to life. You'll sew each piece onto the Body in this order: Nose first, then Wings, then Feet, and finally the Bow as the finishing touch.
Take your time with each one, getting the placement right is what gives Pip her personality. Before you start, lay all your pieces out in front of you.

Watch: Prefer to follow along? The video below shows how to attach all of Pip's parts, from start to finish.
Attaching the Nose
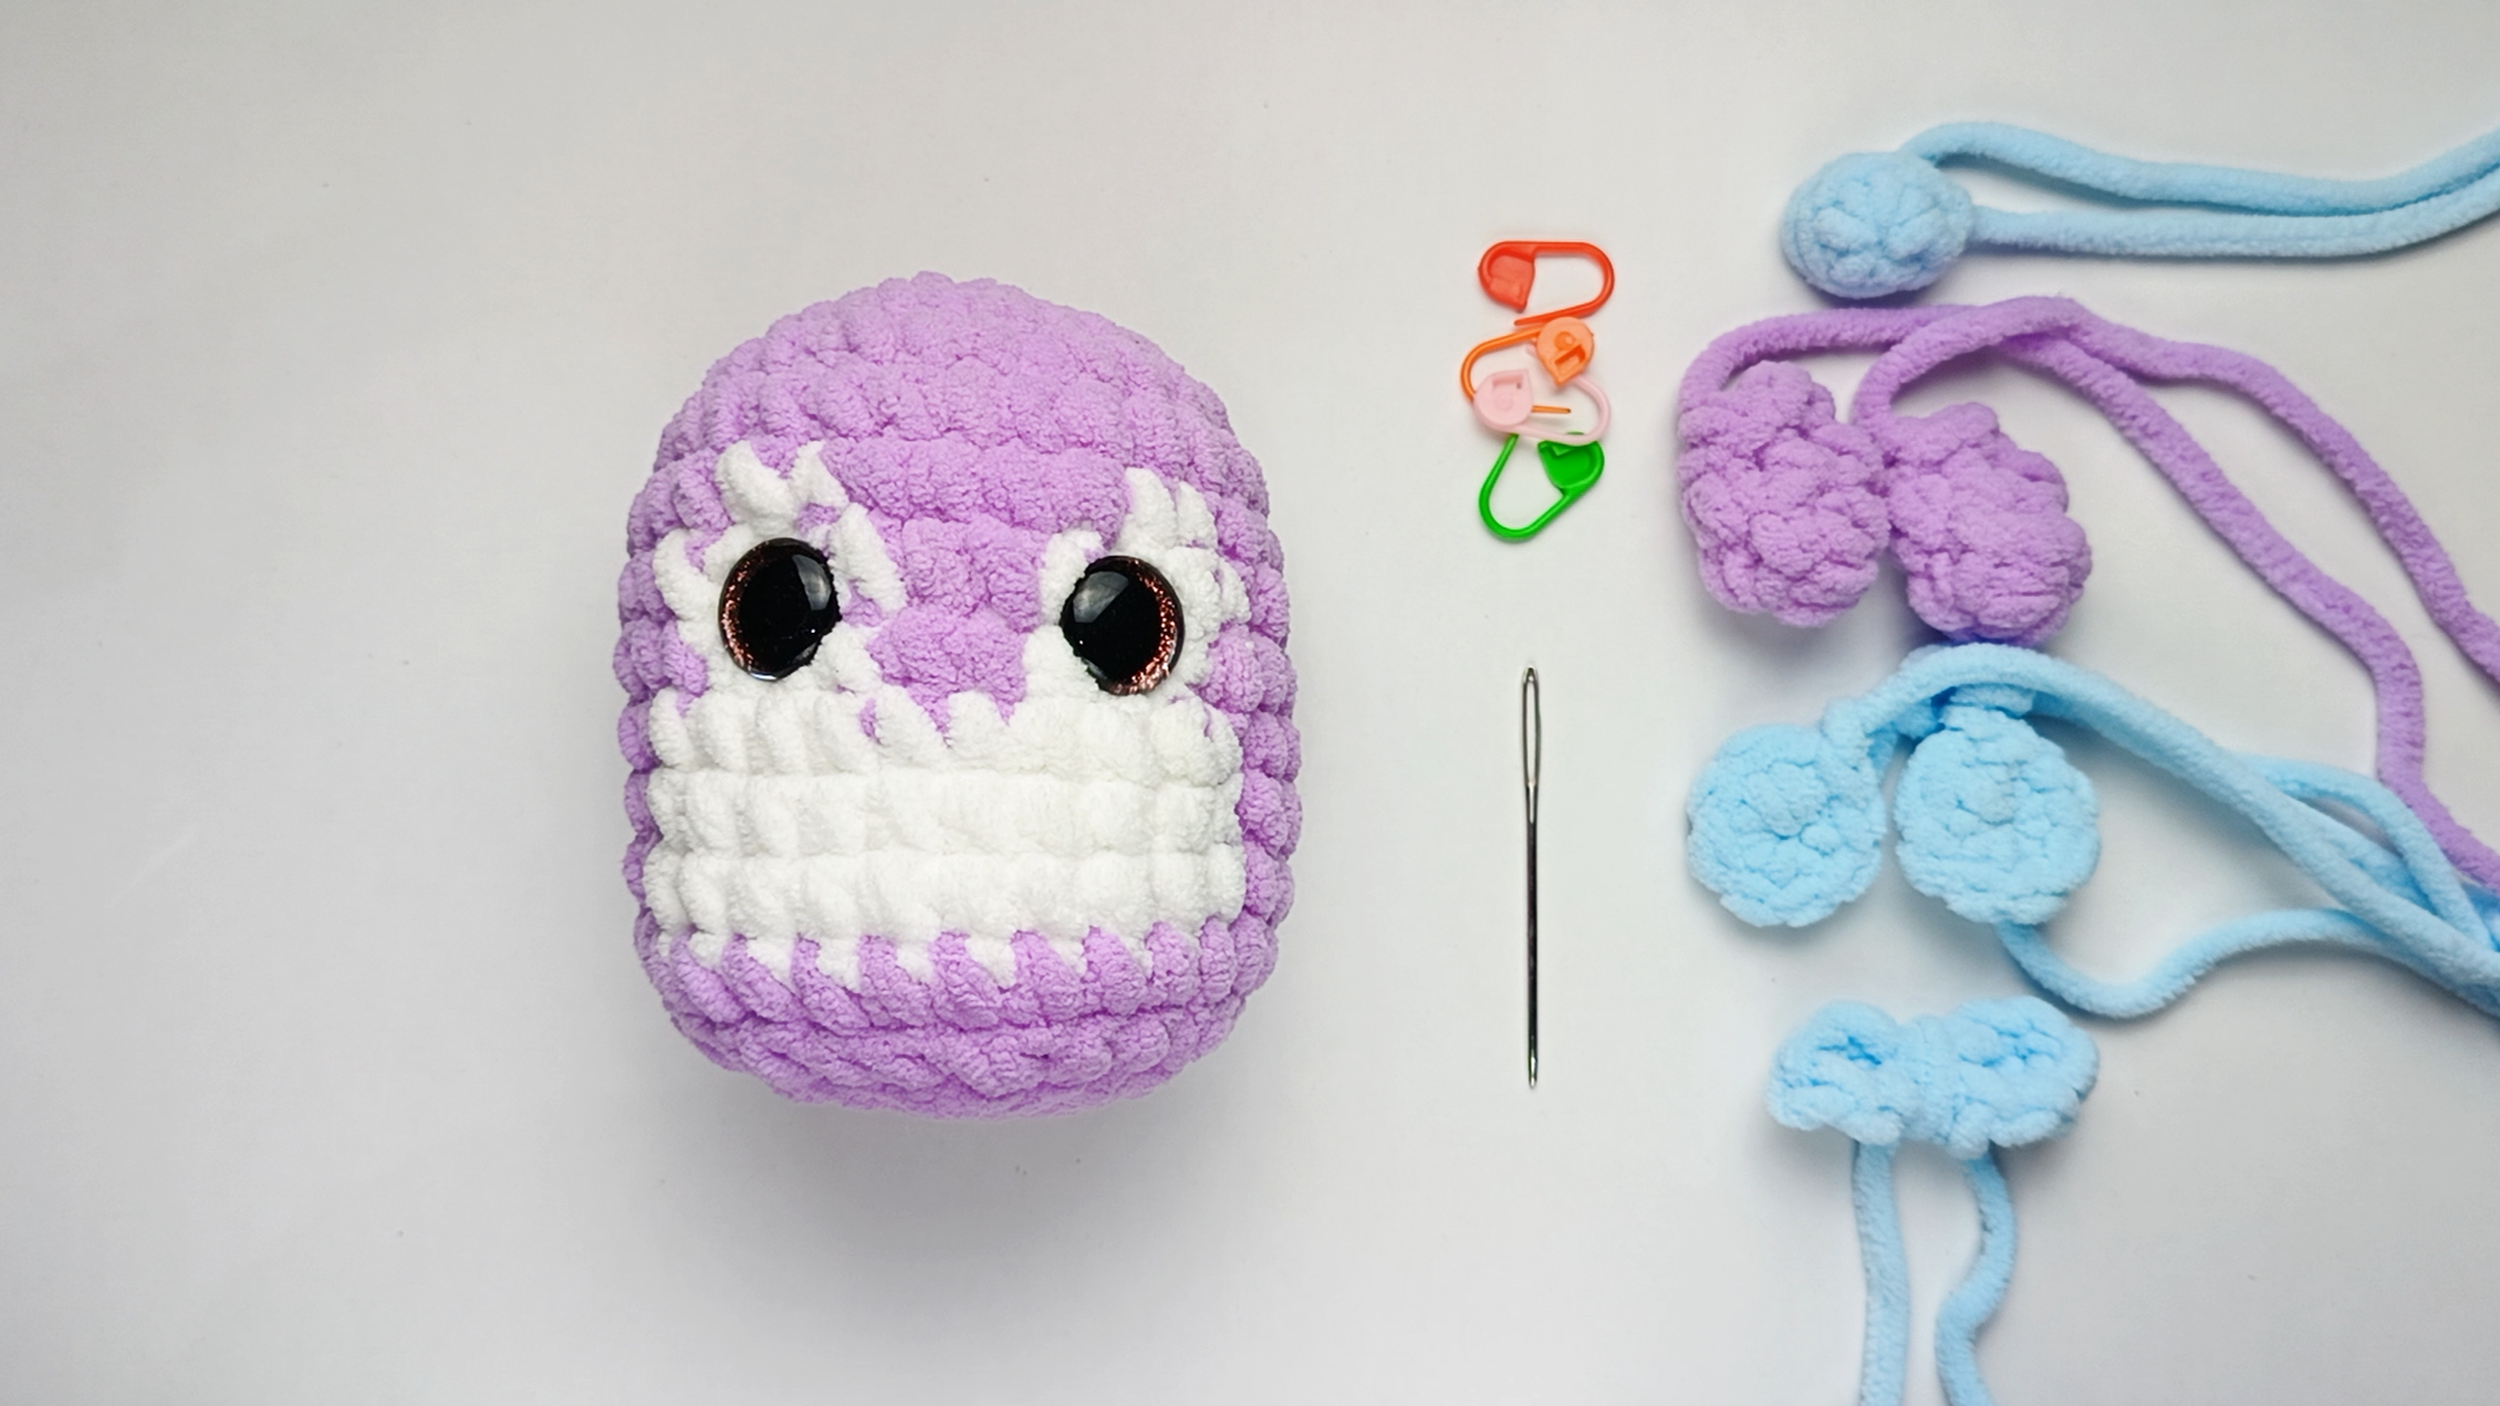
Lay all the pieces:
Before you start, lay all your pieces out in front of you. This is the first time you’ll see Pip’s whole world in one place!
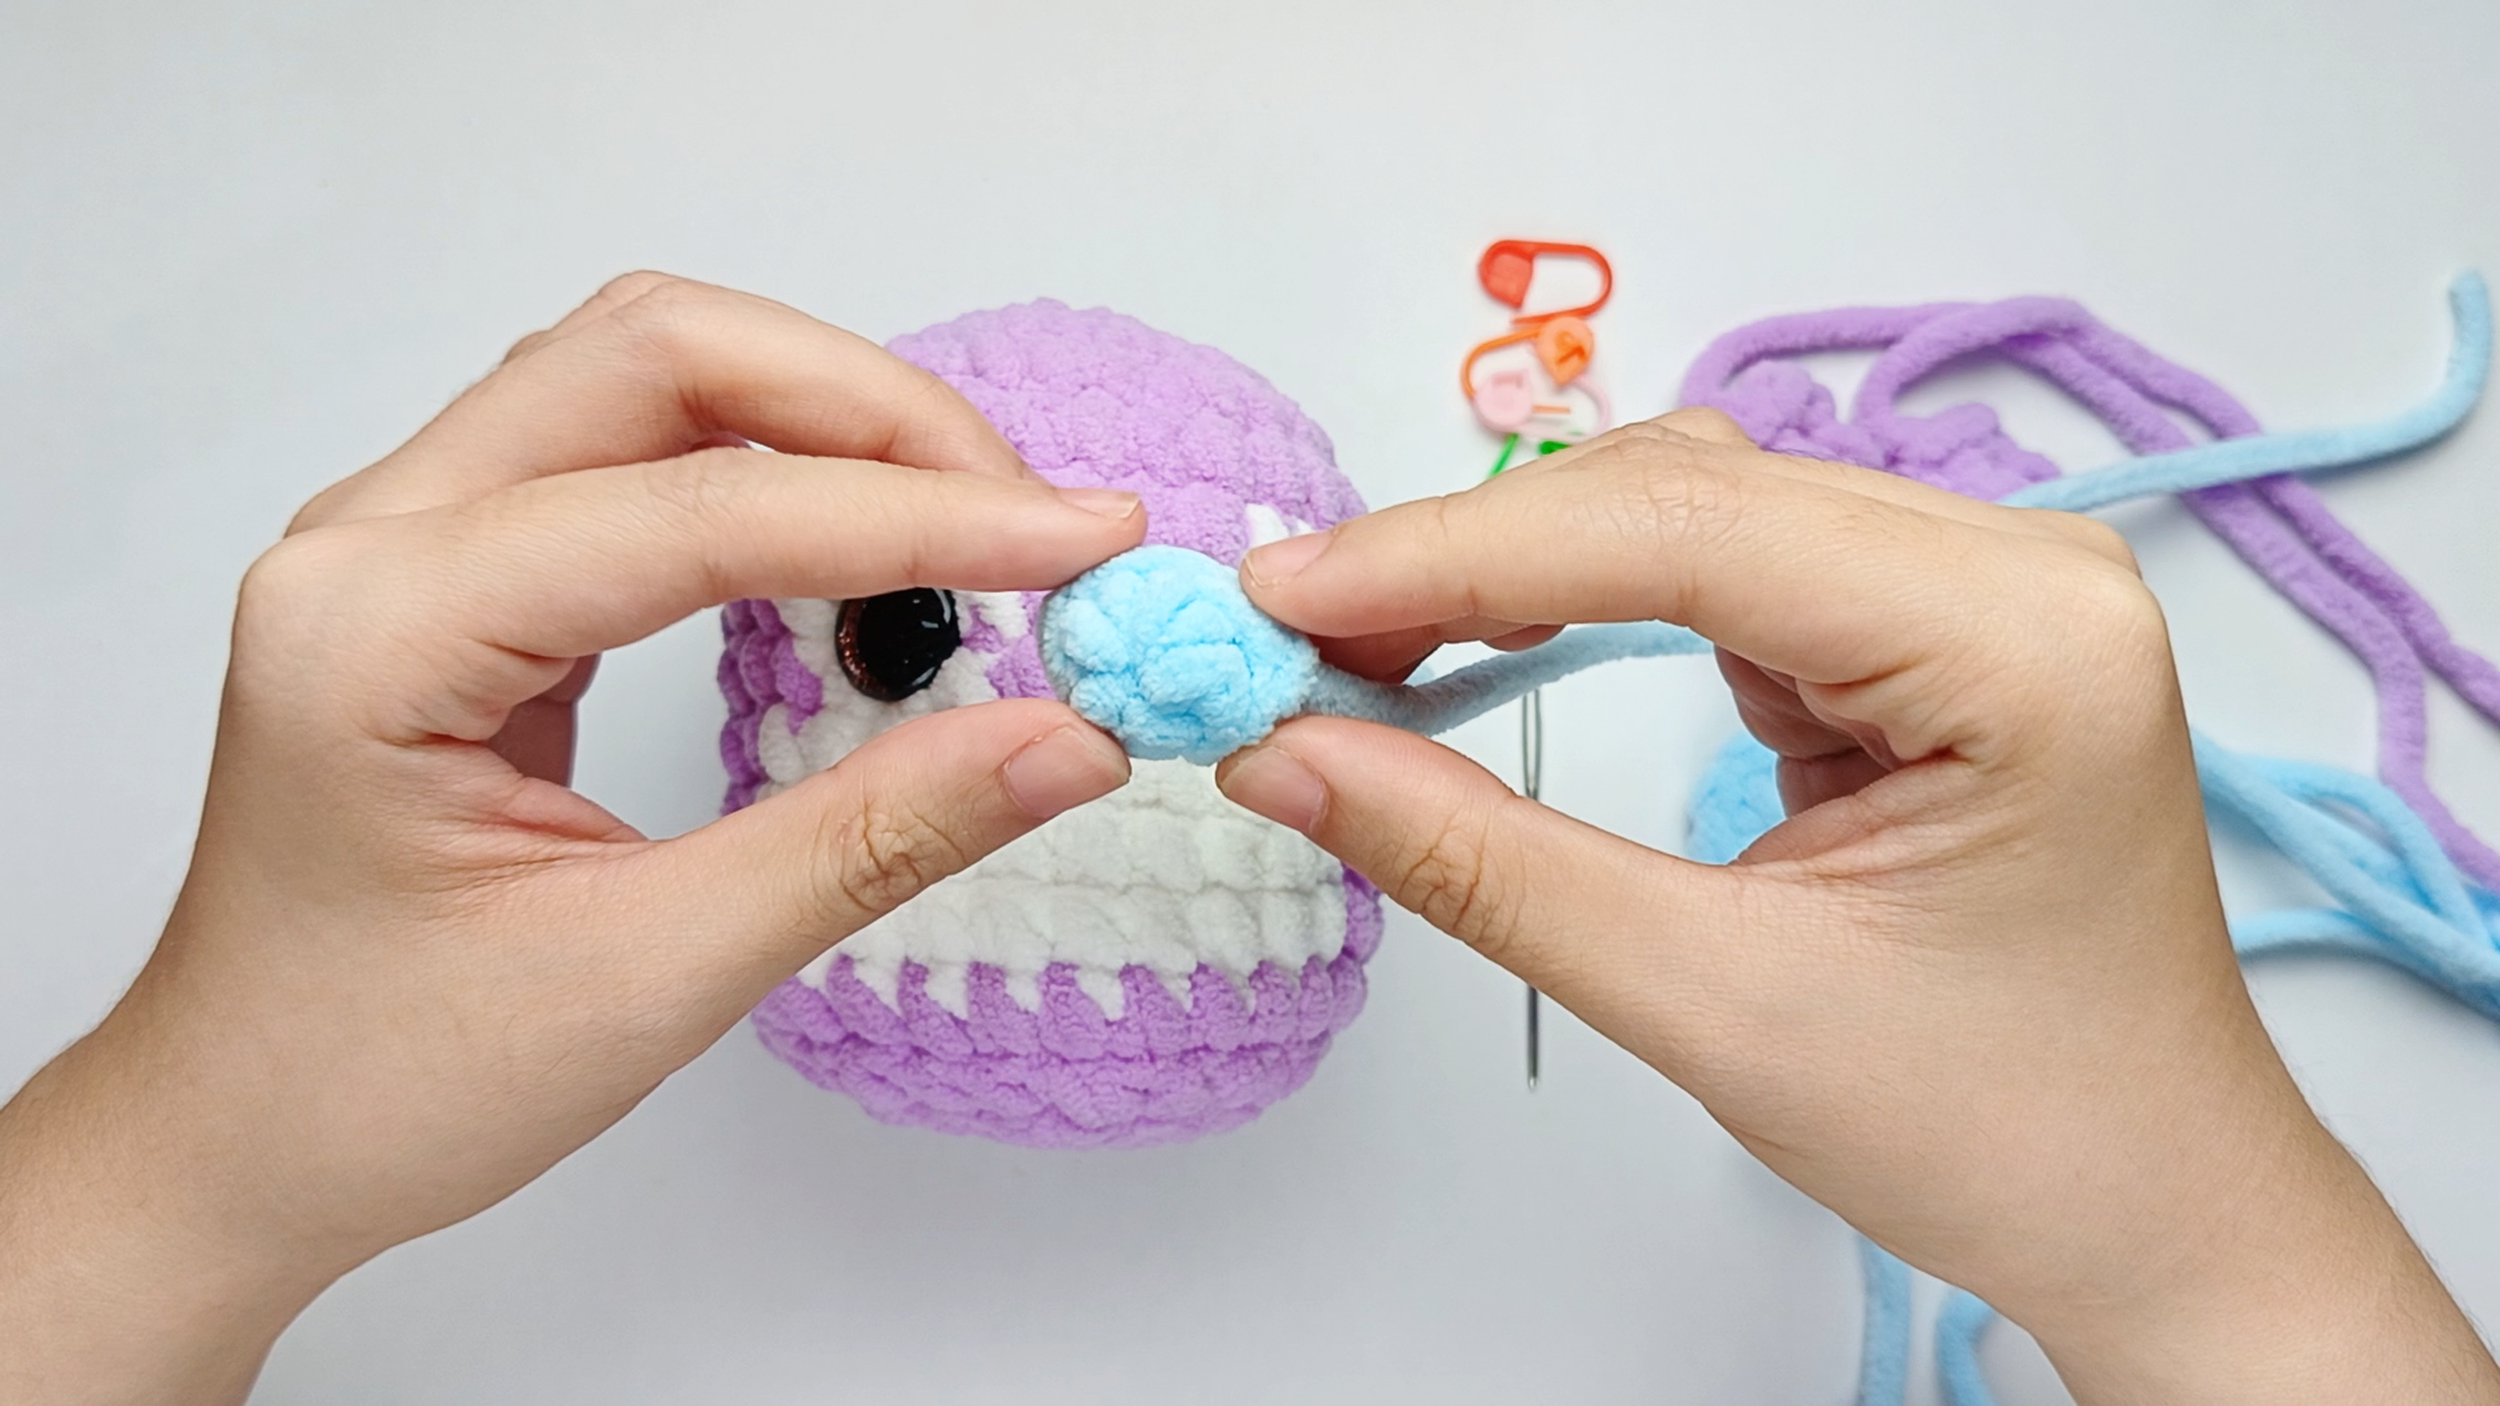
Fold the Nose:
Fold the small circle in half so it lies flat, forming an oval shape.
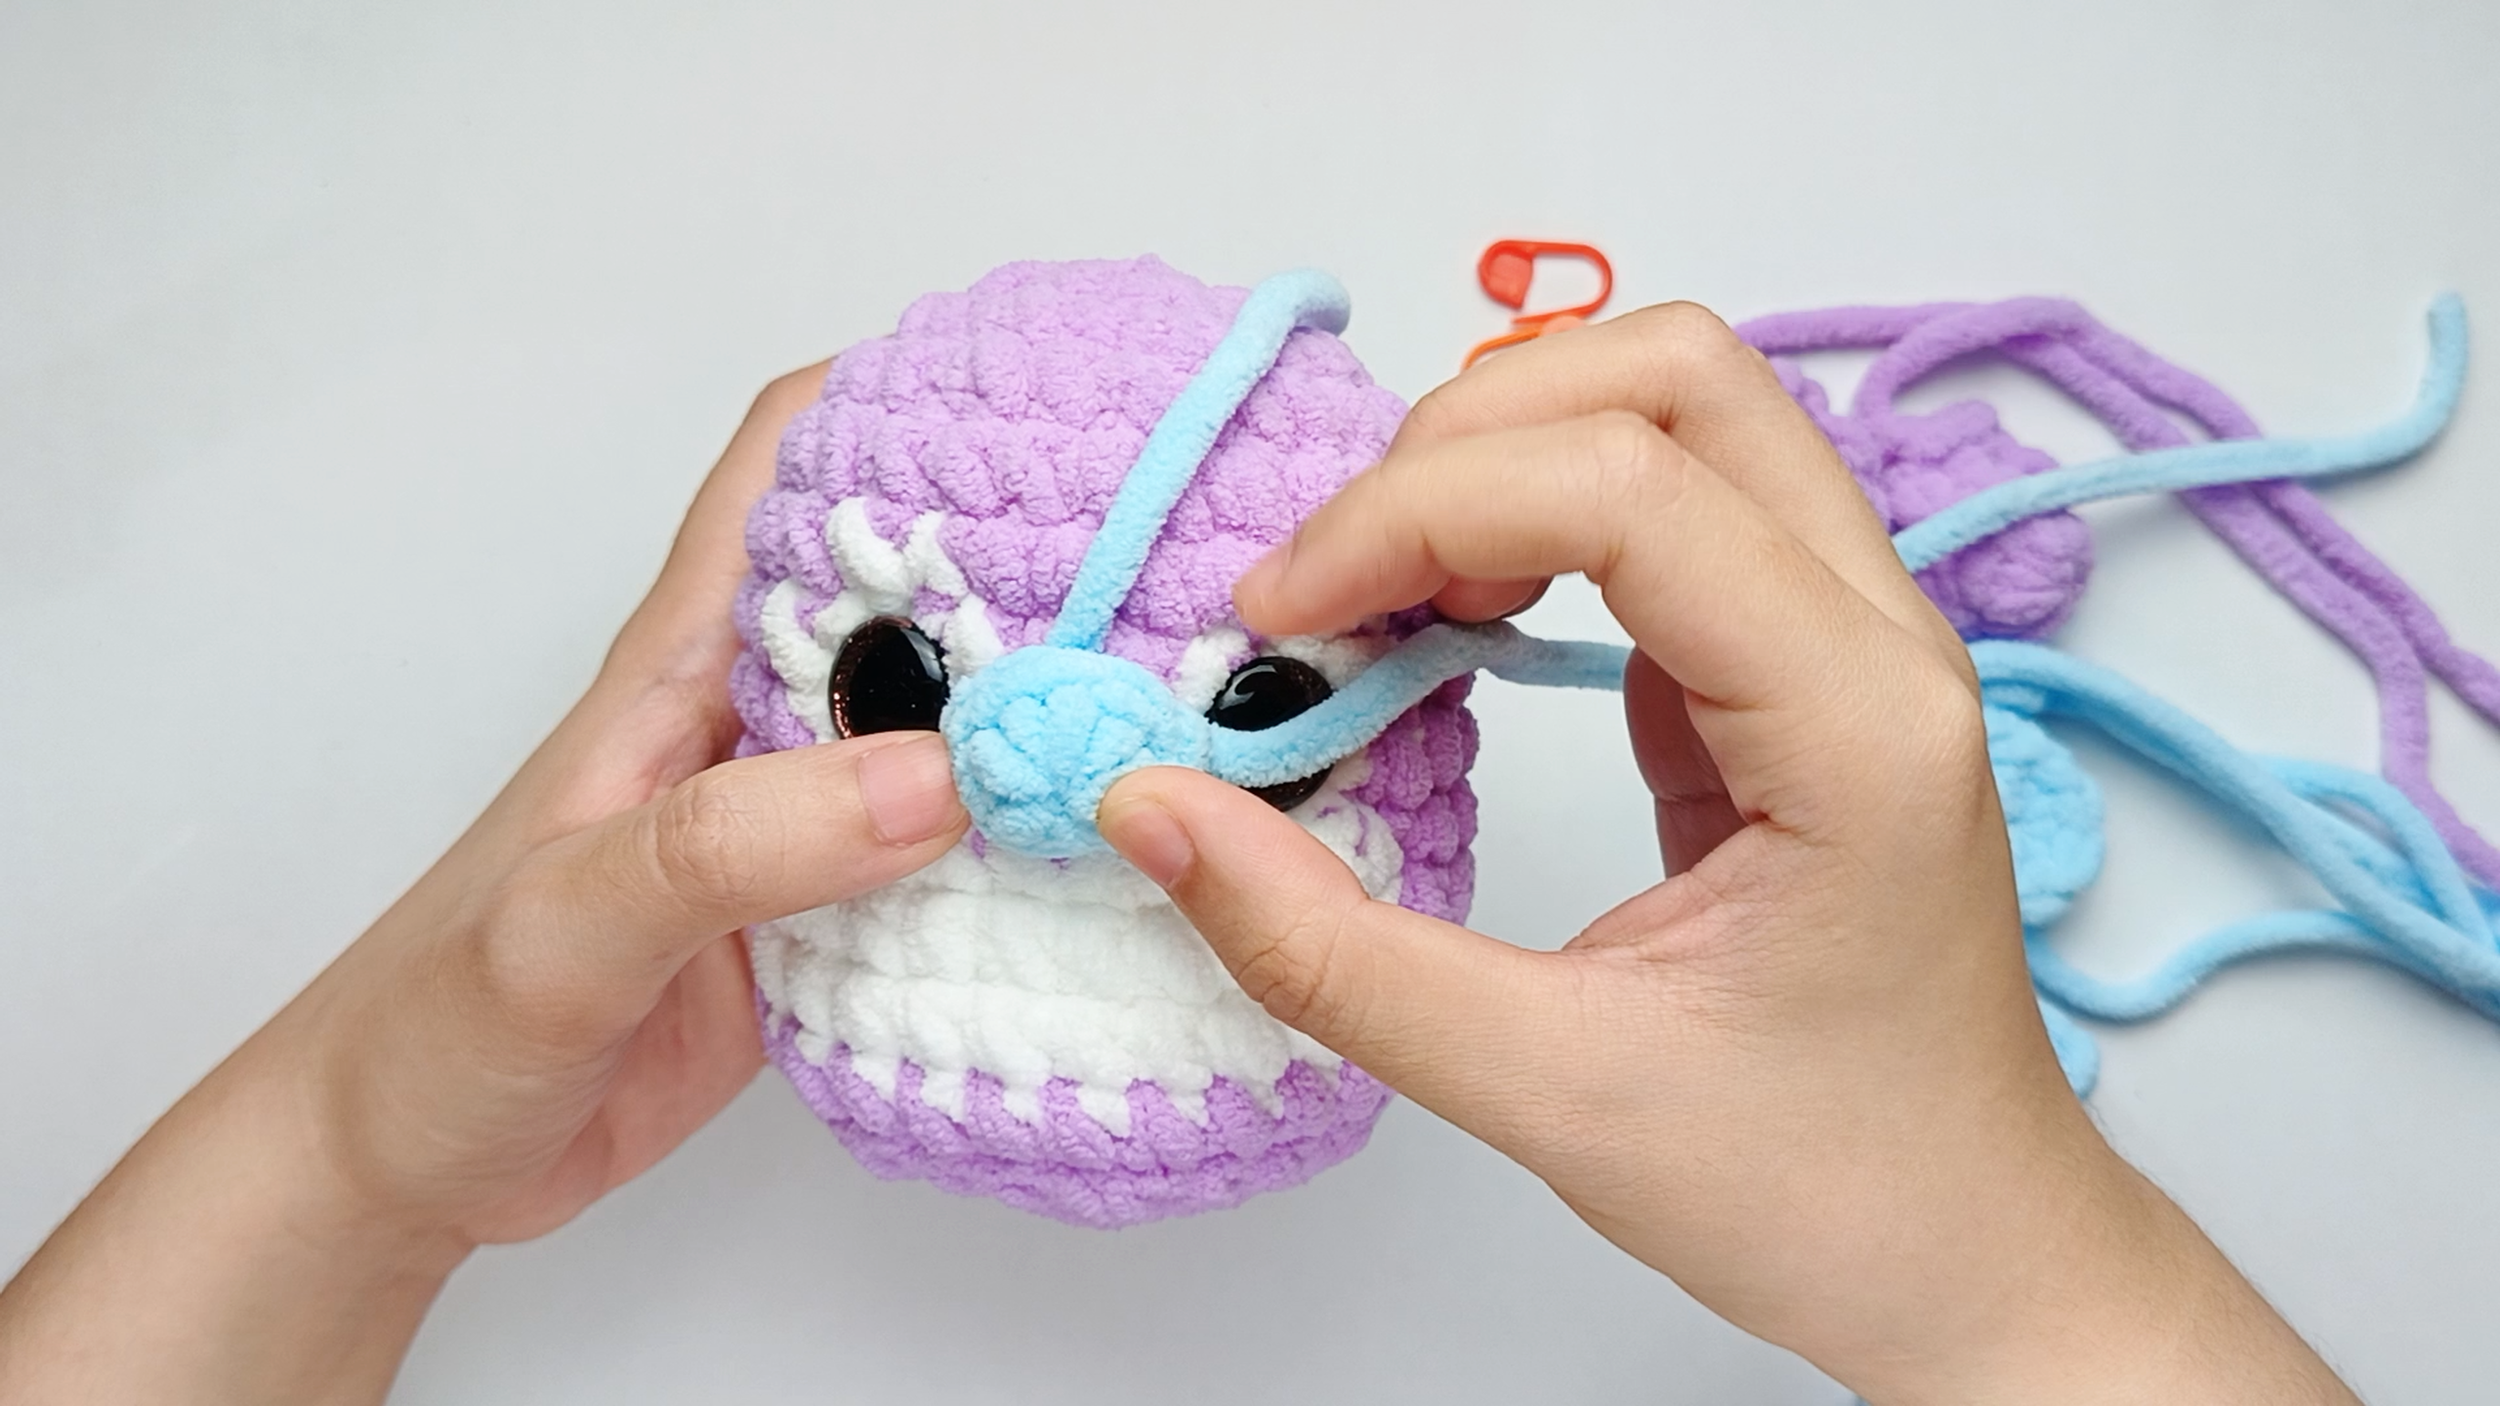
Position the Nose:
Place the Nose centered between the two Eyes and level with them, where Round 7 meets Round 8. You can also locate the position by counting from the first round.
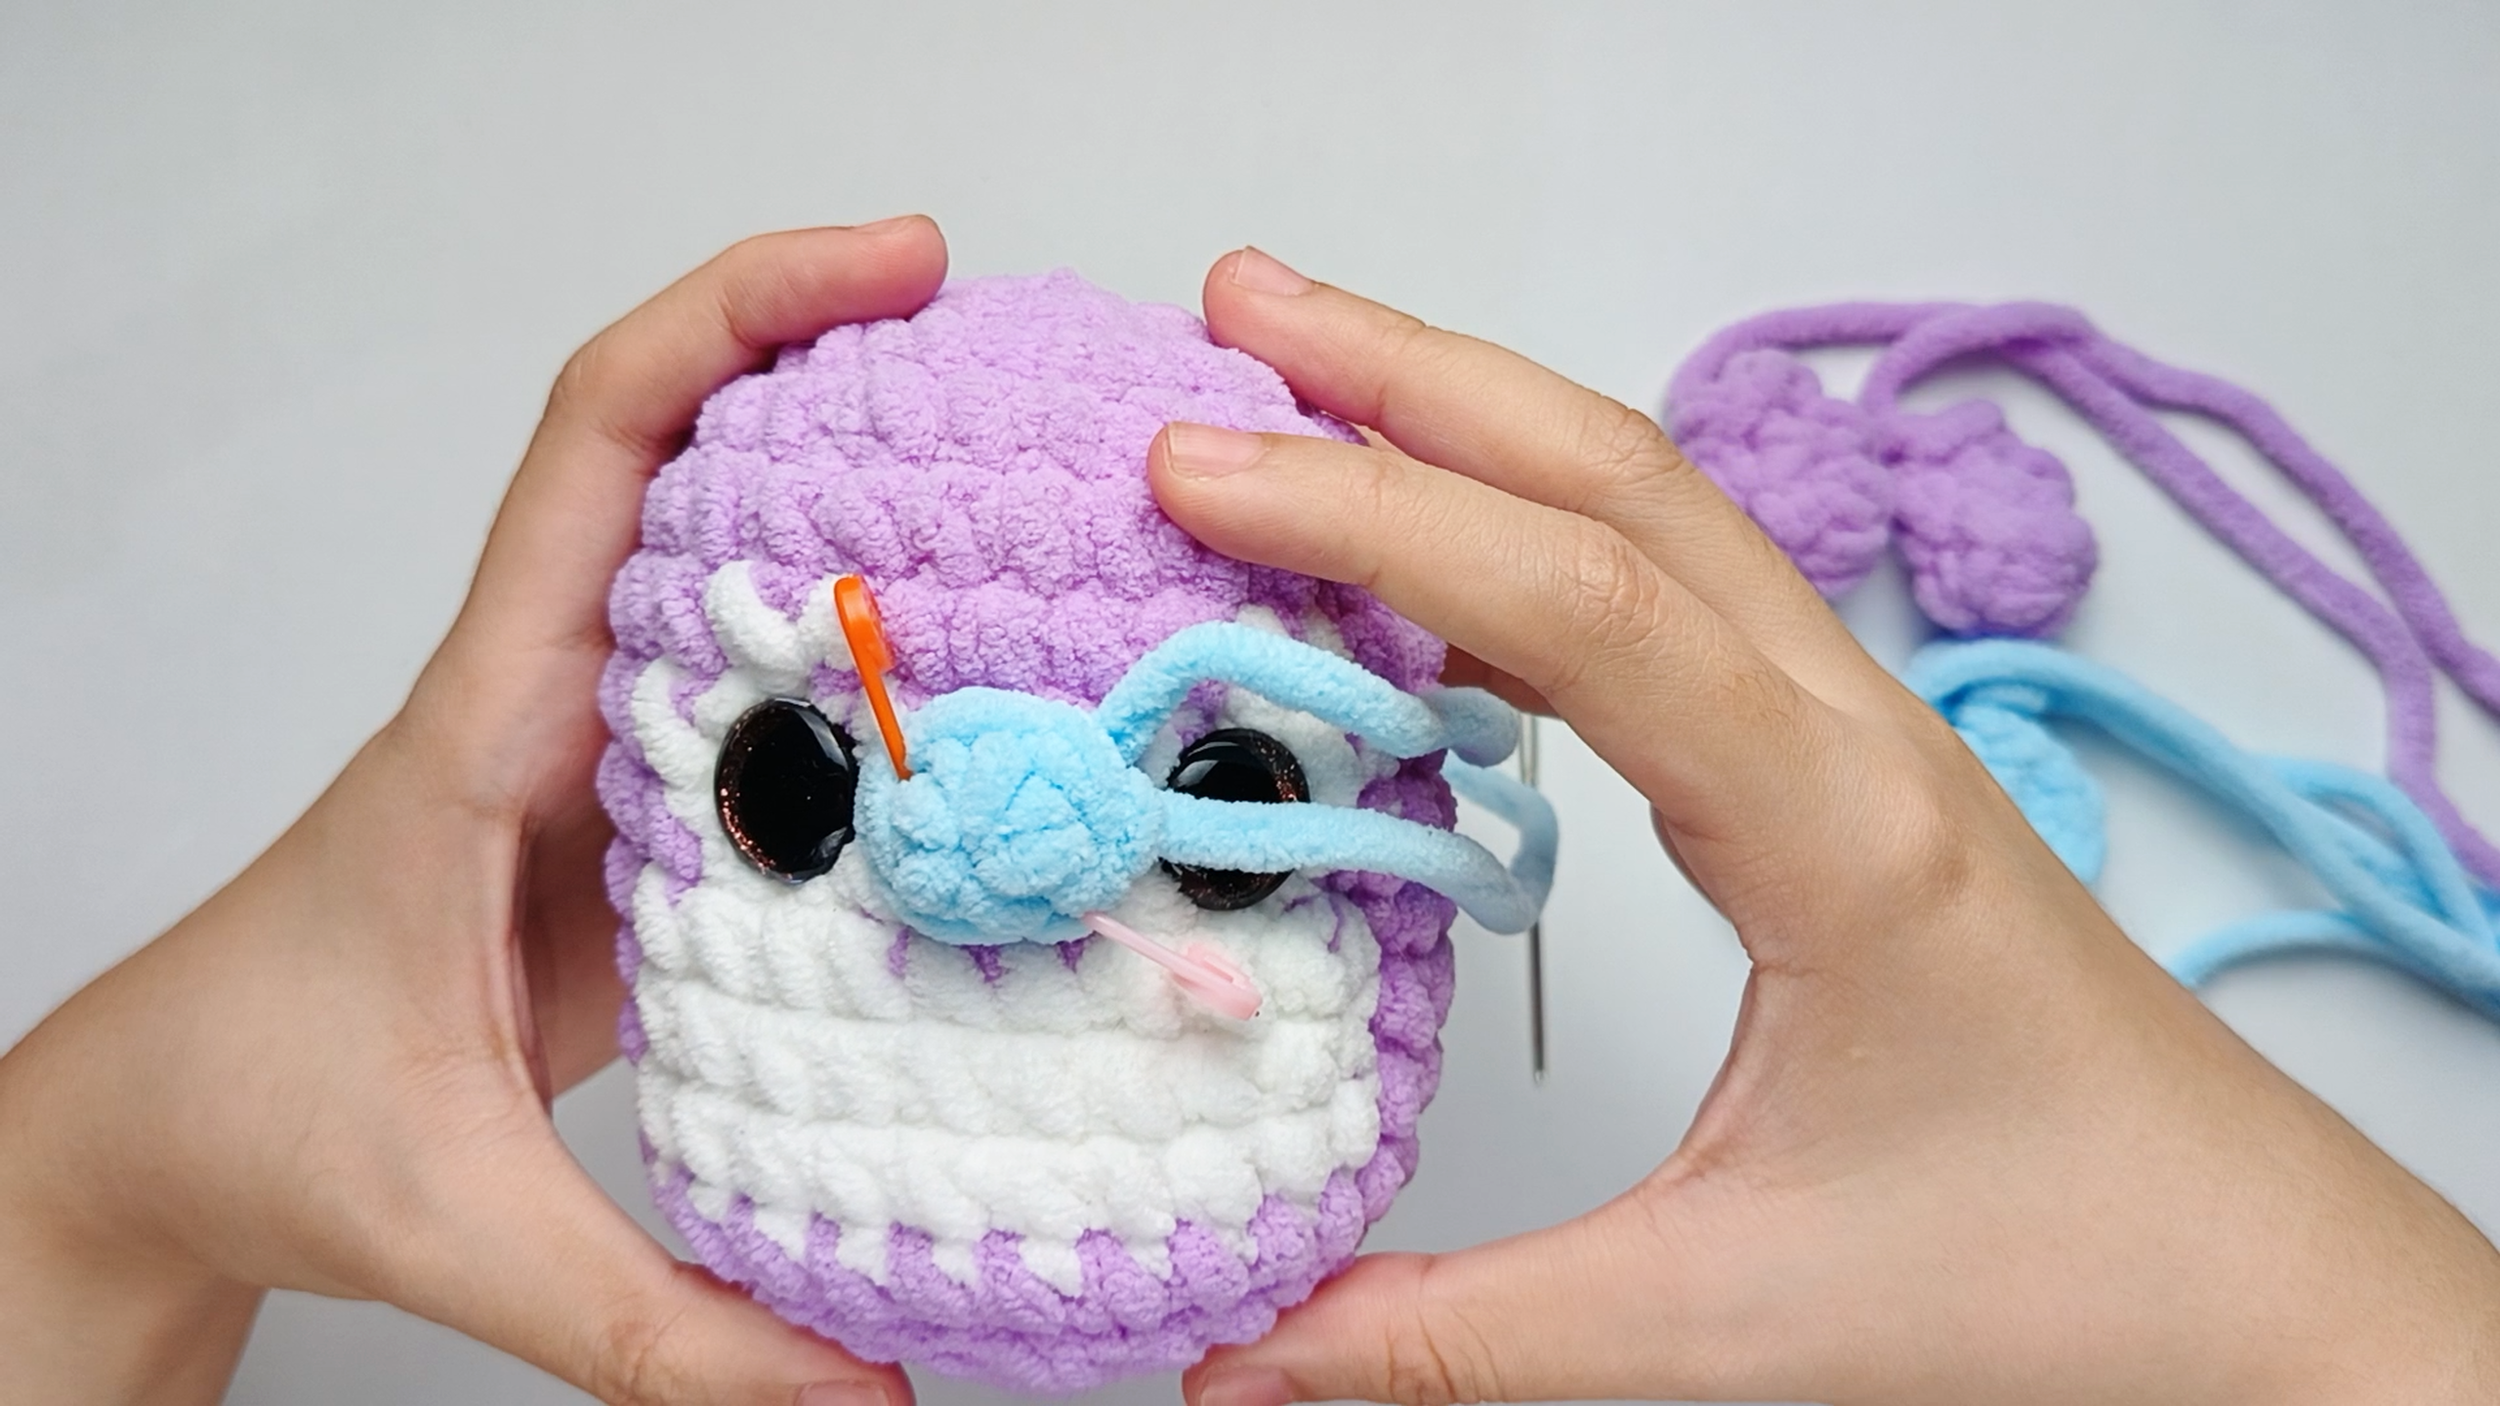
Secure with stitch markers:
Pin it with stitch markers to check the position before sewing.
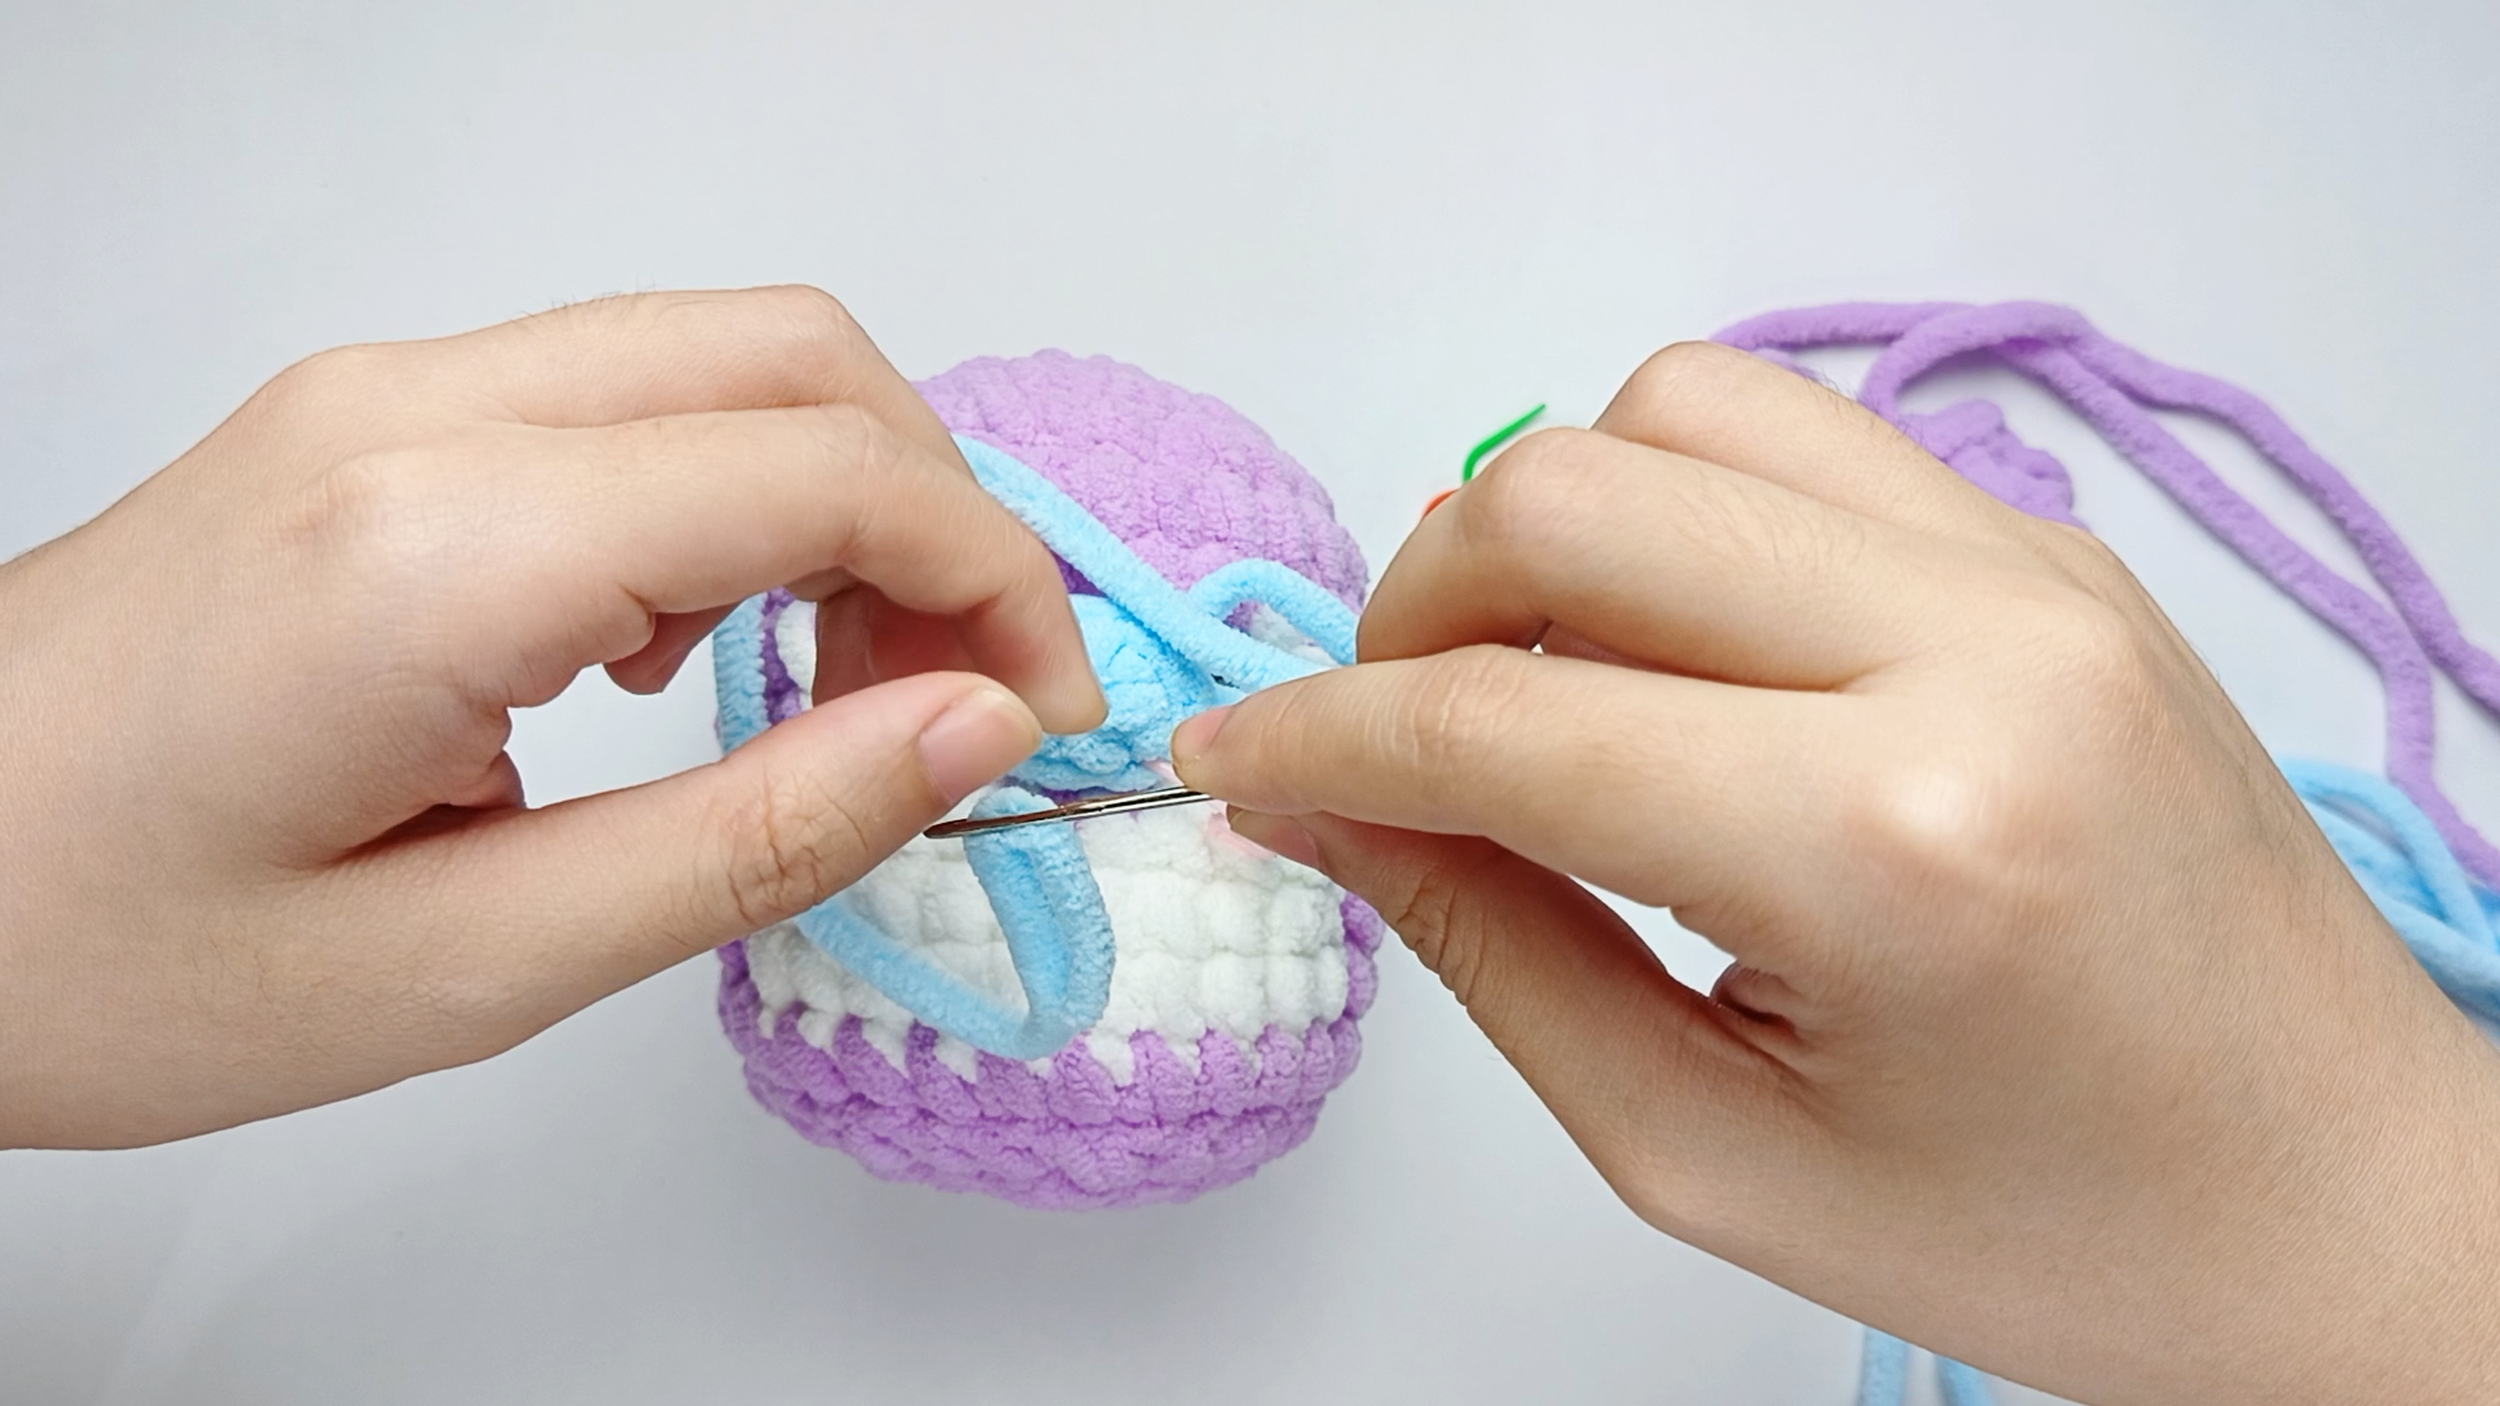
Thread the needle:
Thread the yarn tail from the Nose onto your yarn needle.
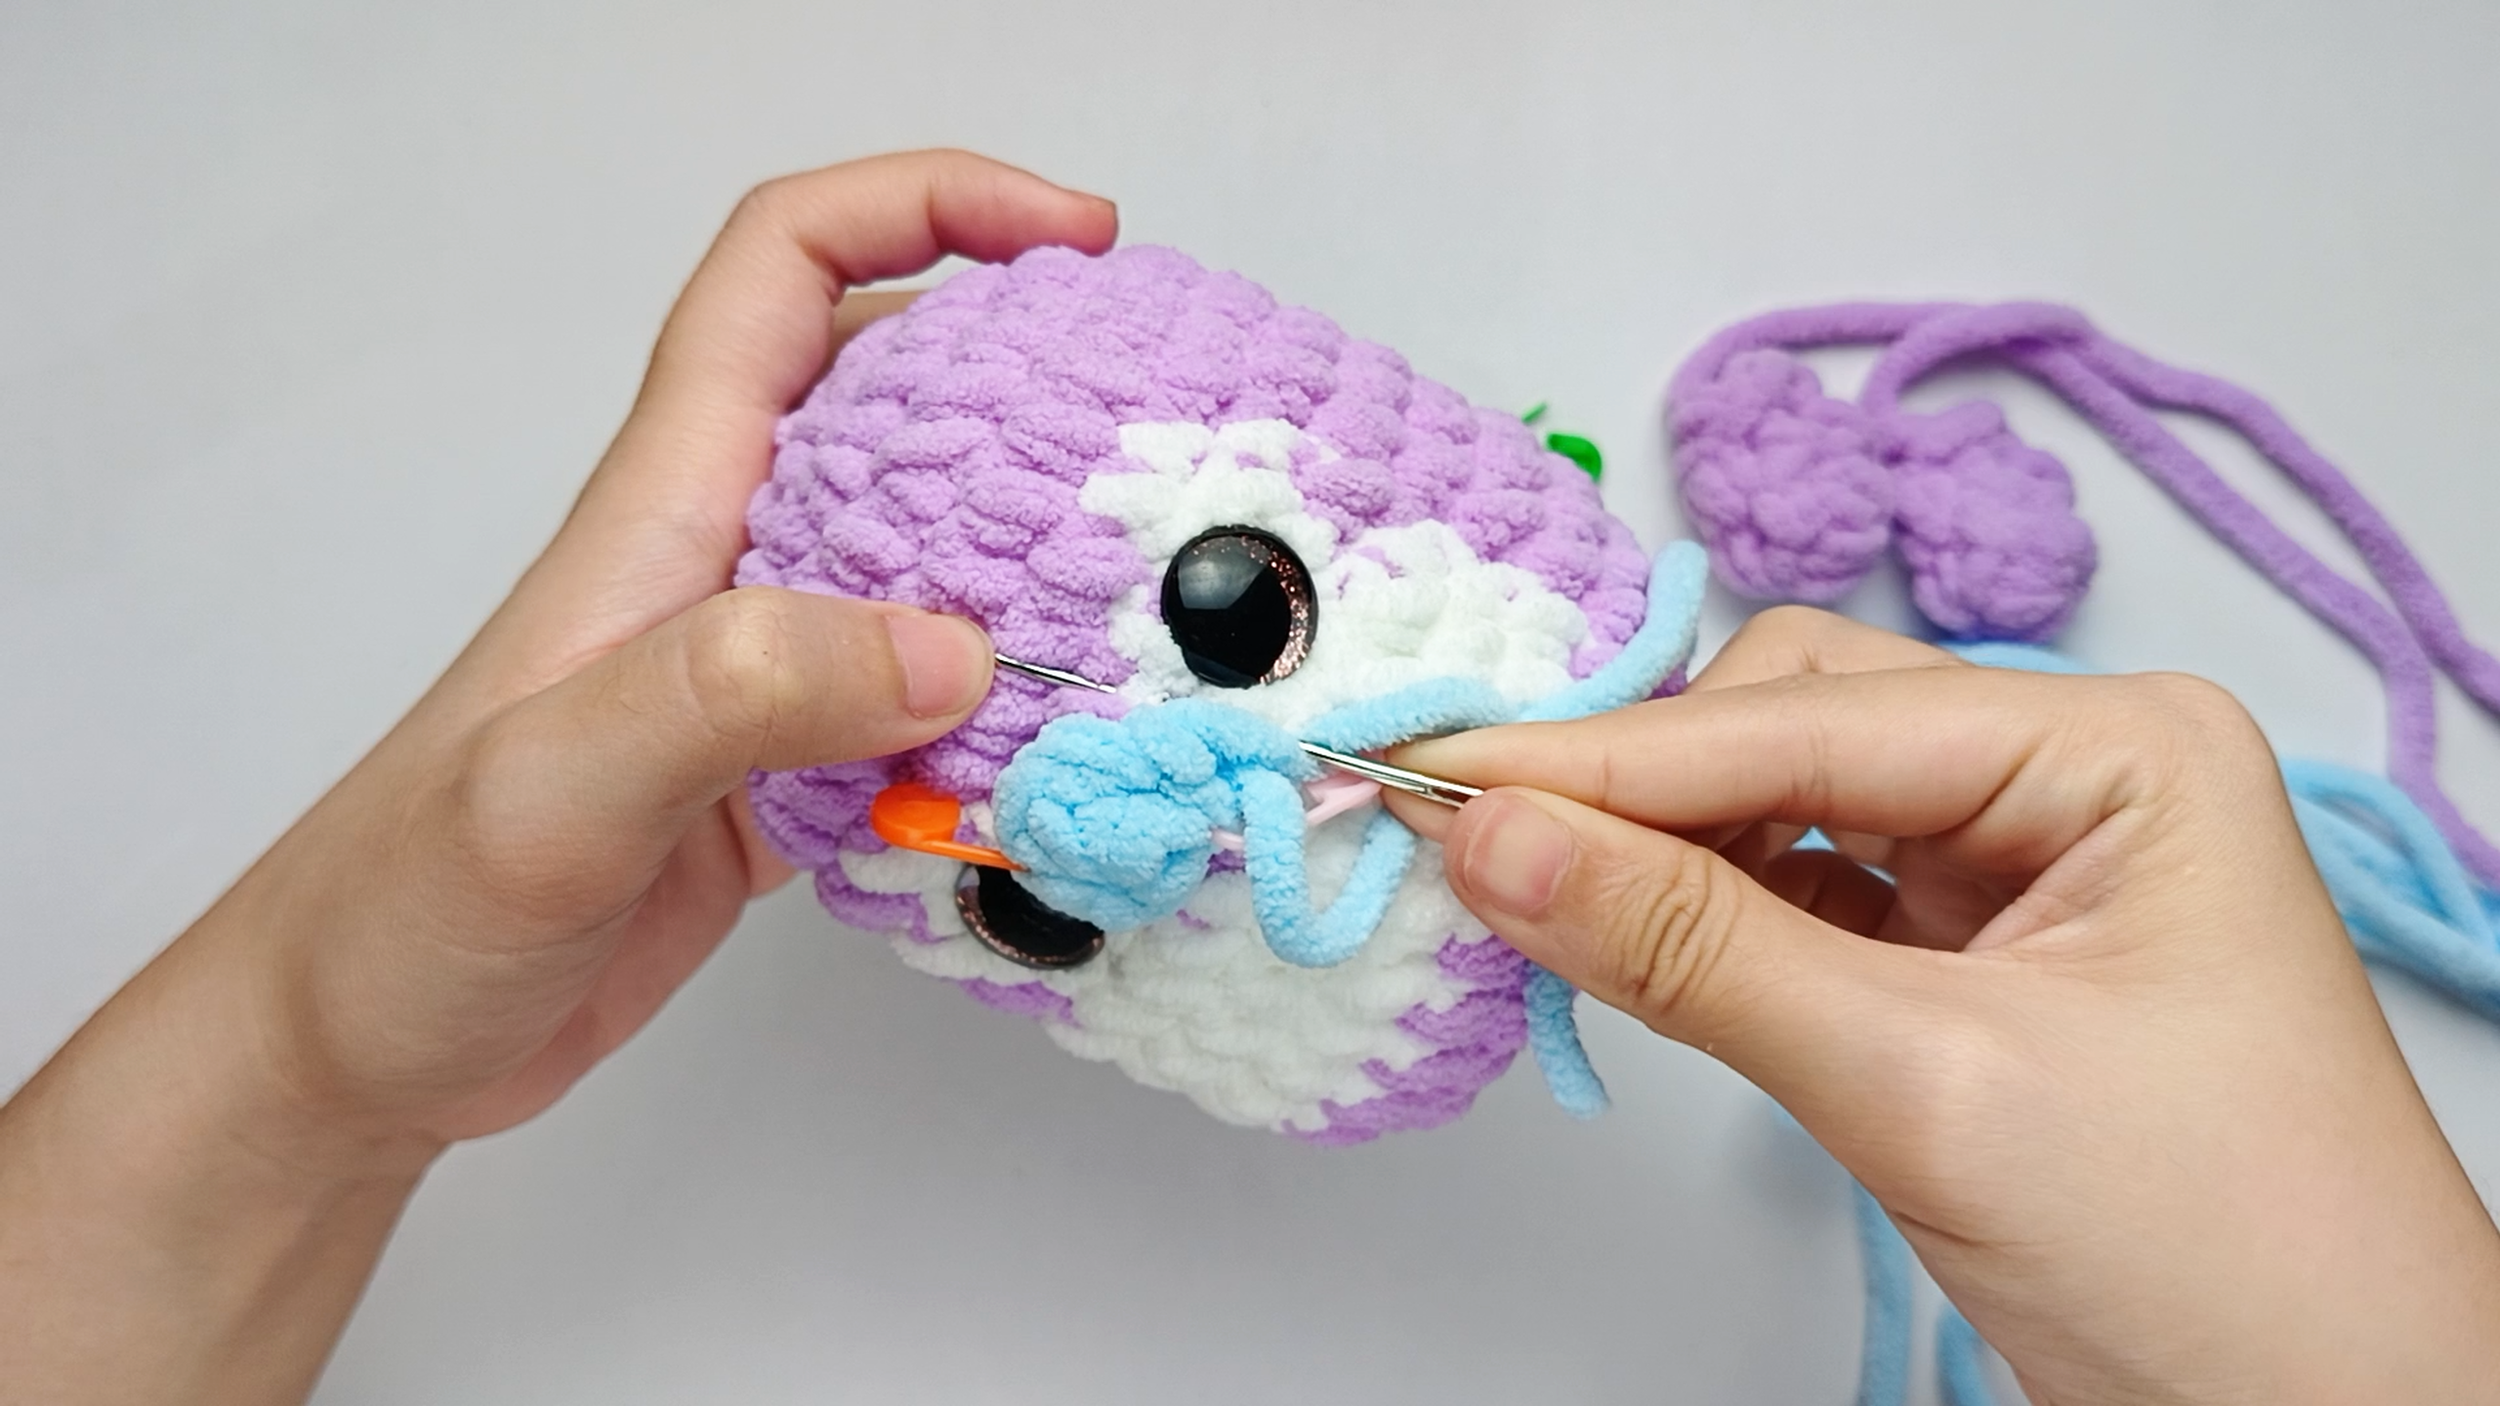
Into the Body:
Insert the needle into one stitch of the Body, lining it up with the next stitch on the piece. Pull the yarn all the way through.

Tip: Don't worry if the Nose shifts slightly while sewing, you can gently reposition it as you go. Check that the Nose looks centered before fully tightening your stitches.
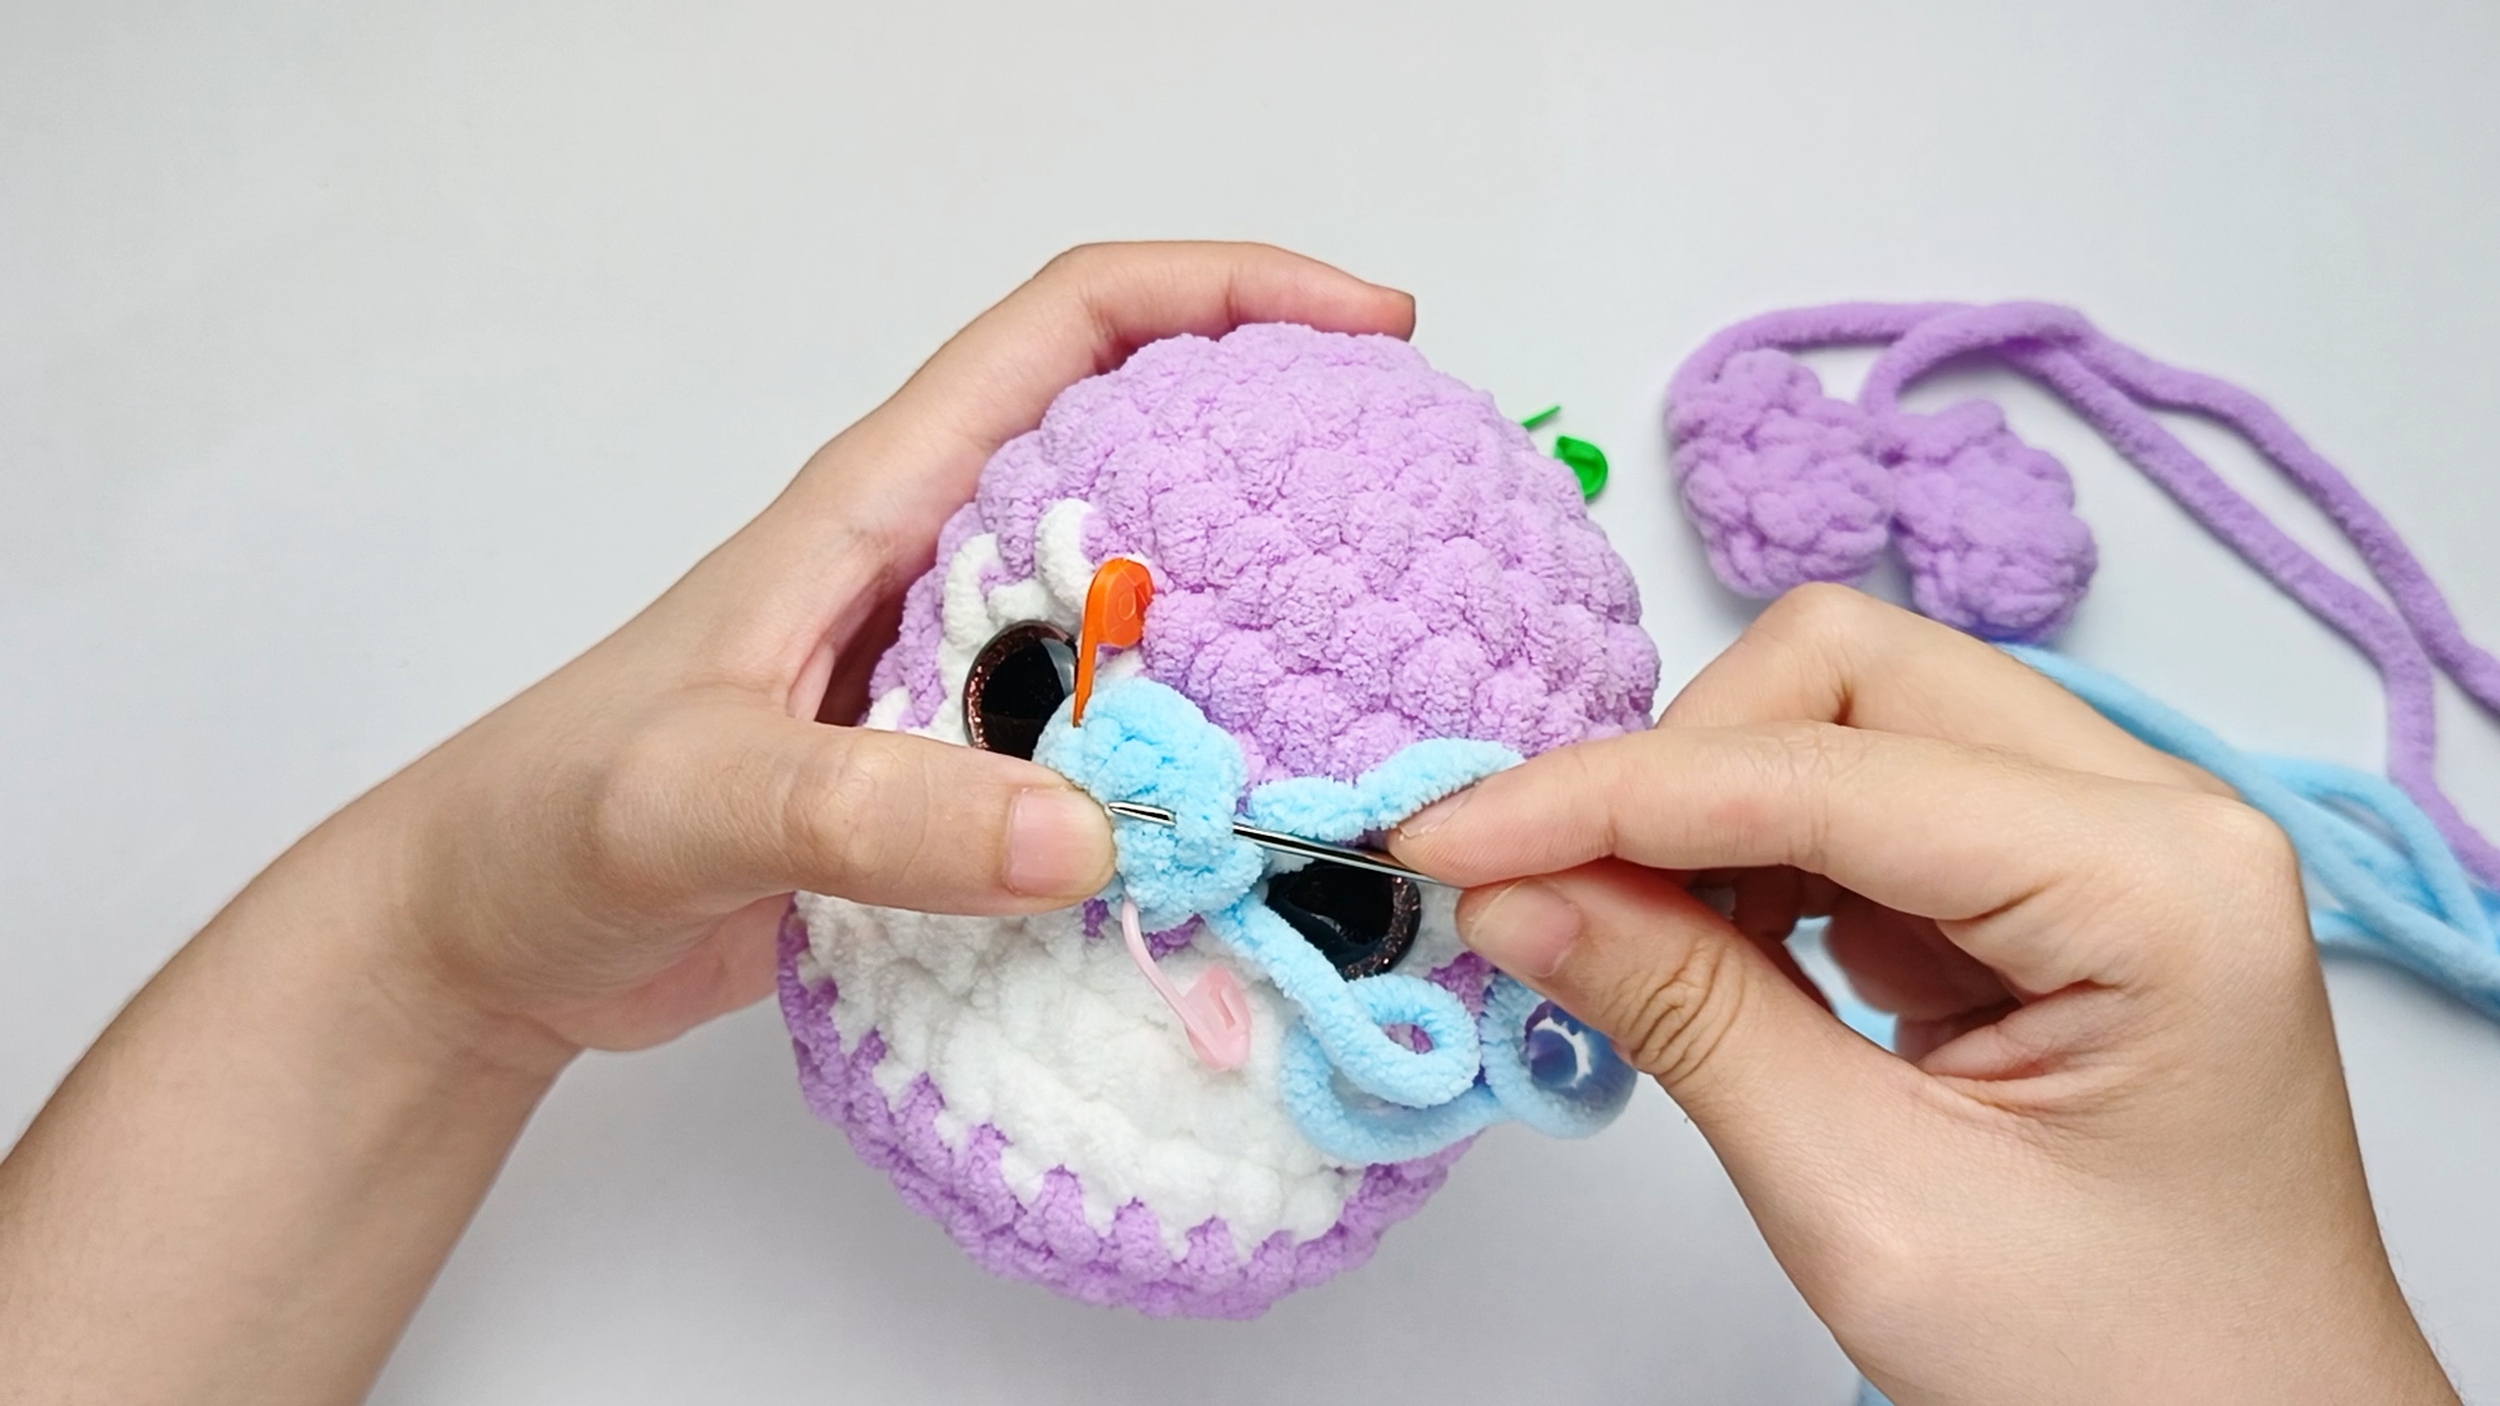
Up through the piece:
Bring the needle up through the next stitch on the piece. Pull the yarn all the way through.
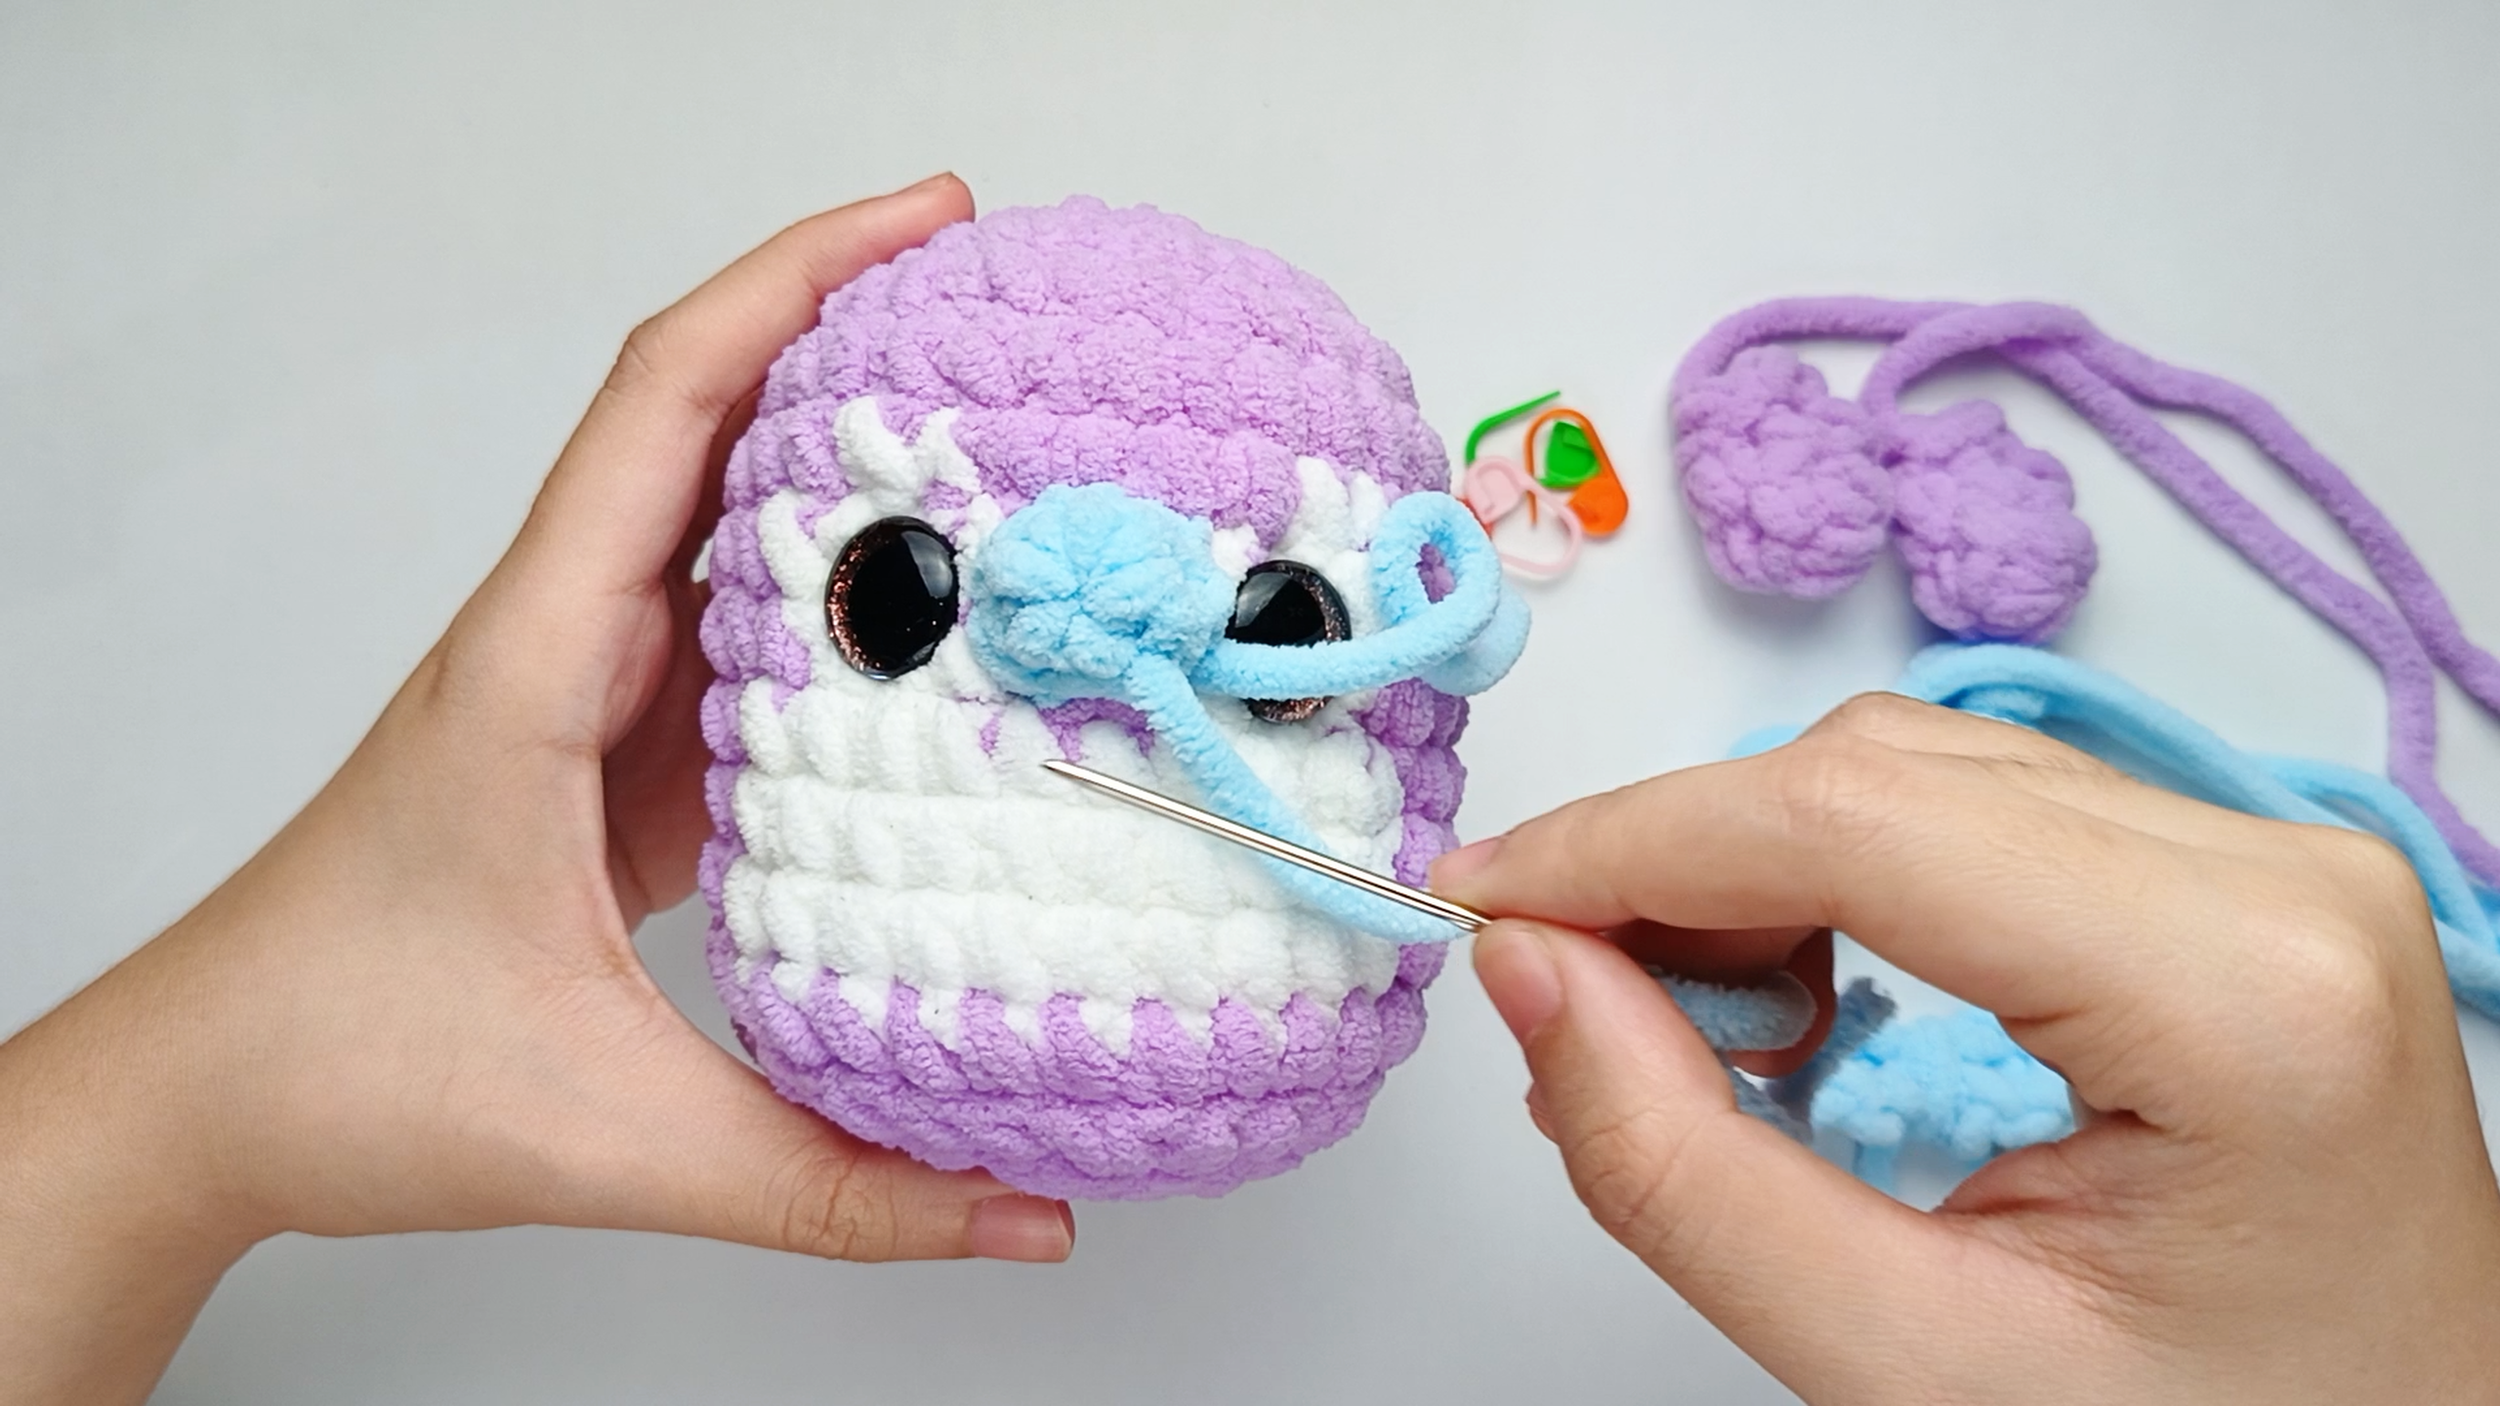
Work all the way around:
Repeat ‘Into the Body’ and ‘Up through the piece’ - one stitch of the piece to one stitch of the Body - until you reach the last stitch and the Nose is fully joined. Remove the stitch markers as you go.
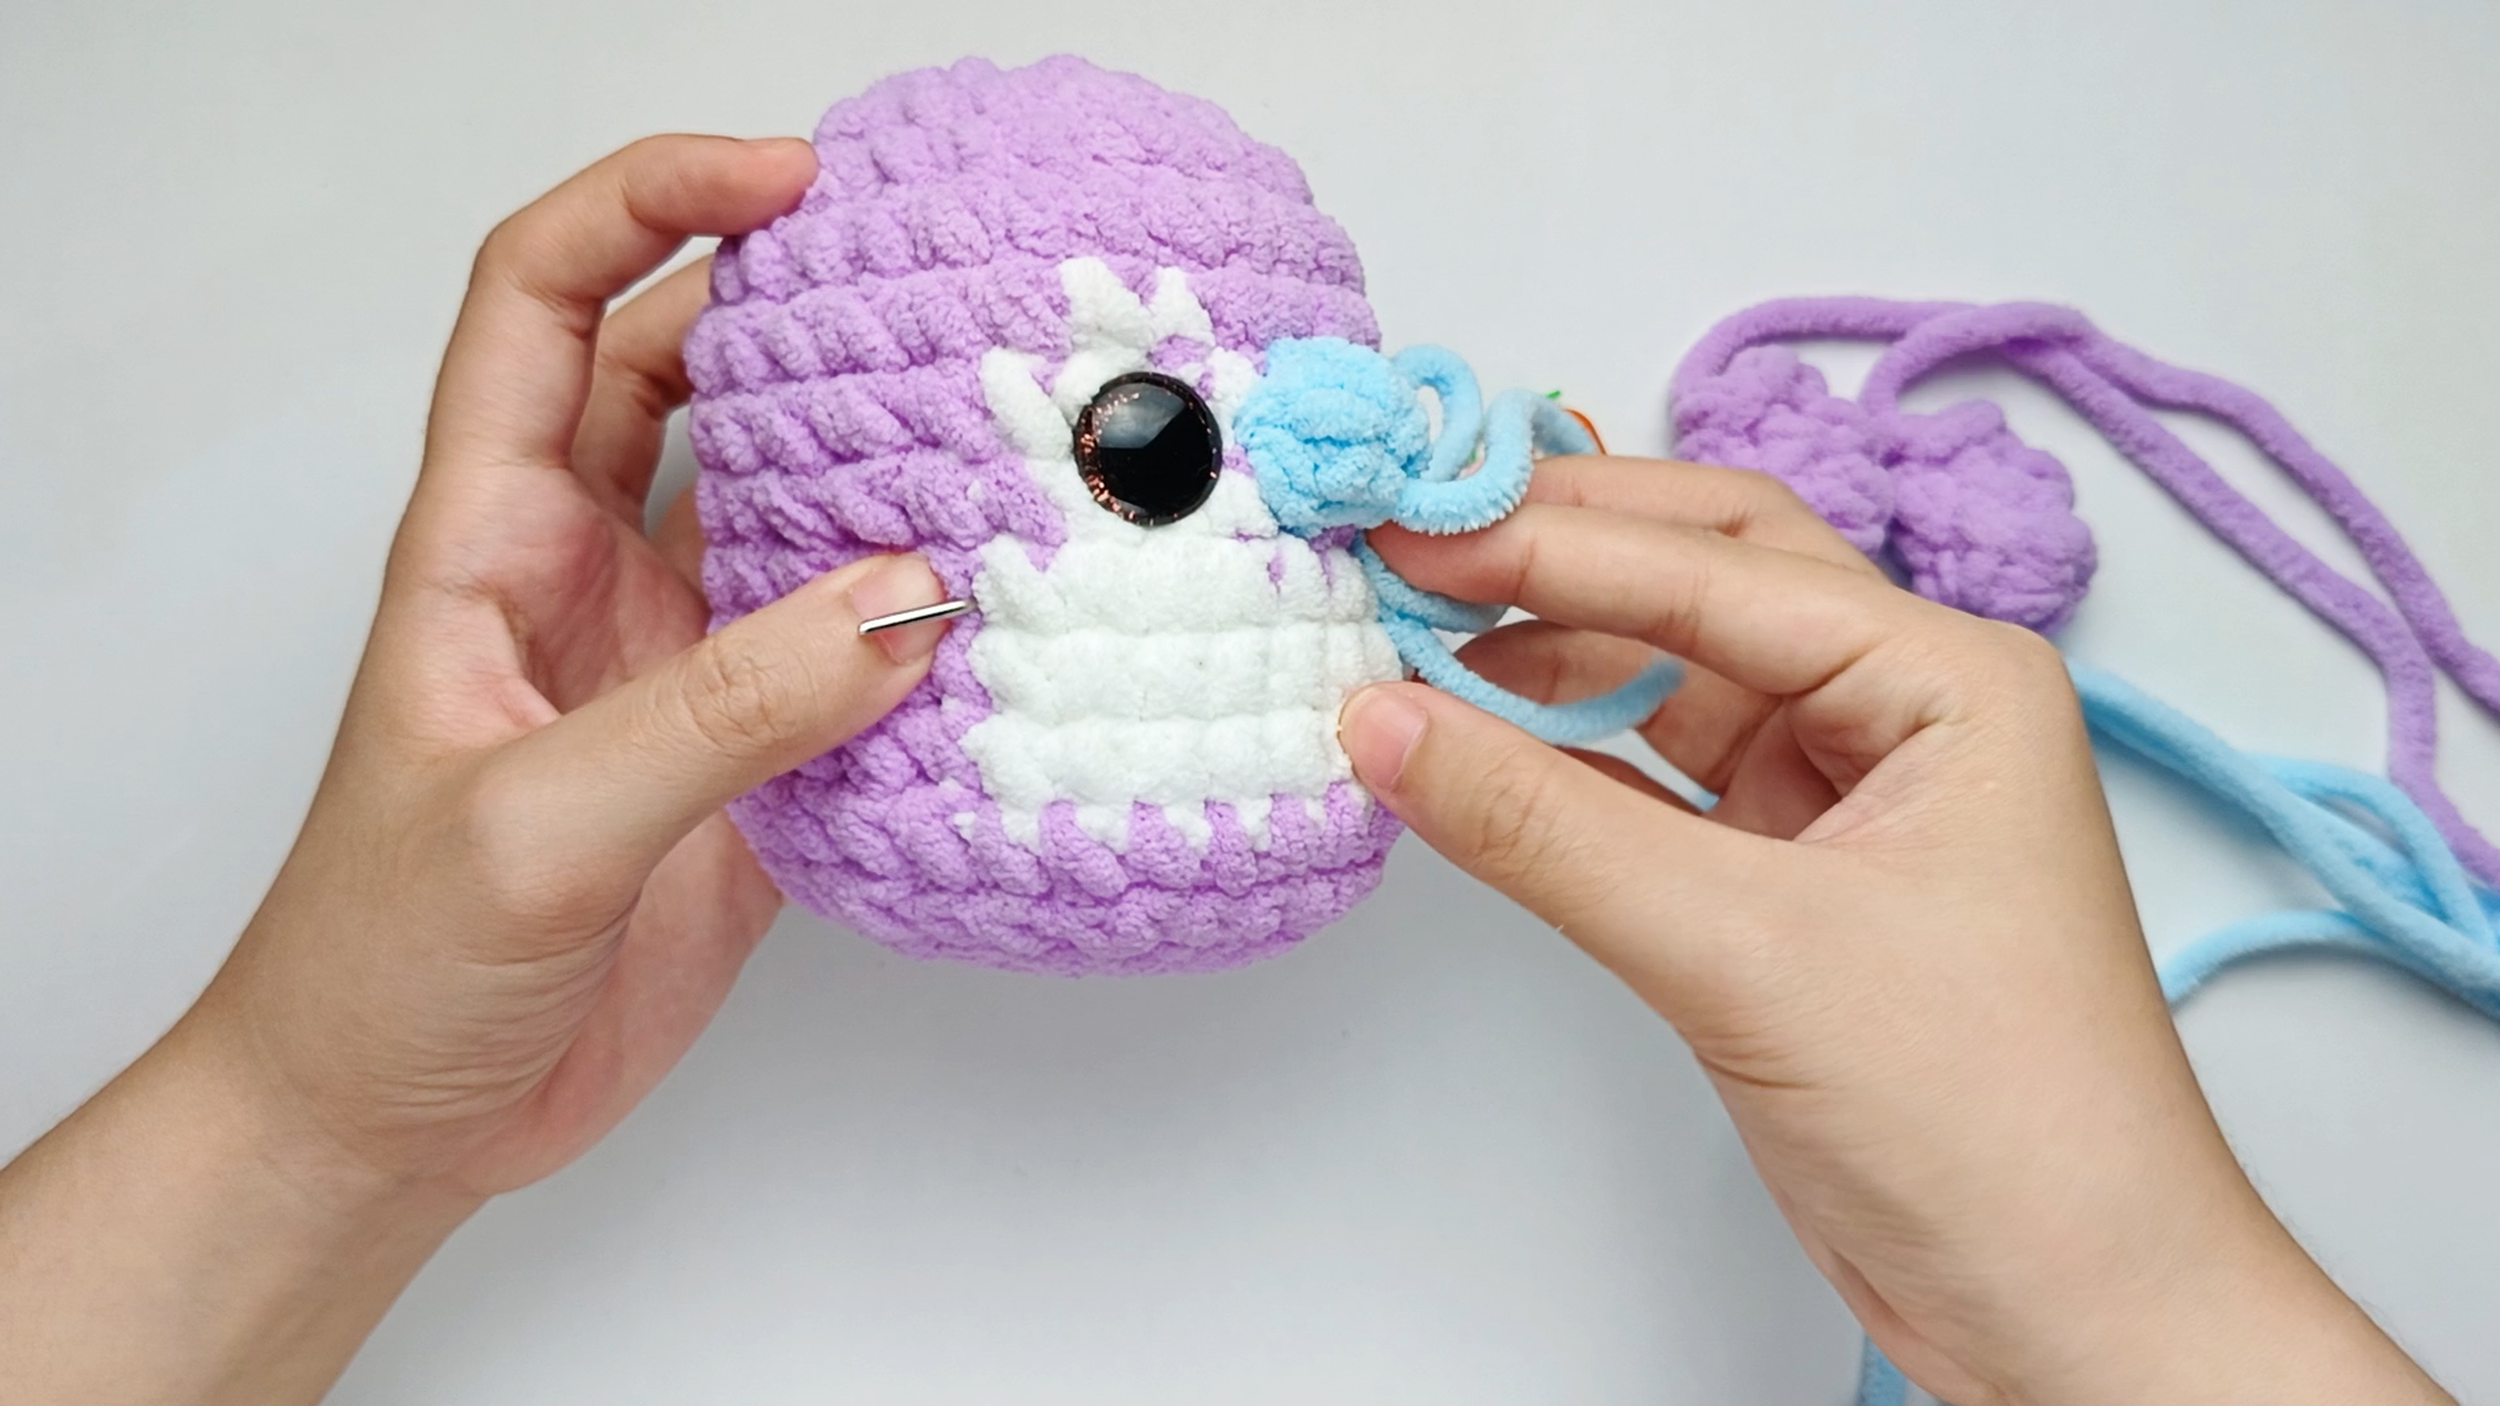
Secure and hide the tail:
To hide the yarn tail, take the needle down into the next stitch and run it through the Body, then pull the yarn through.
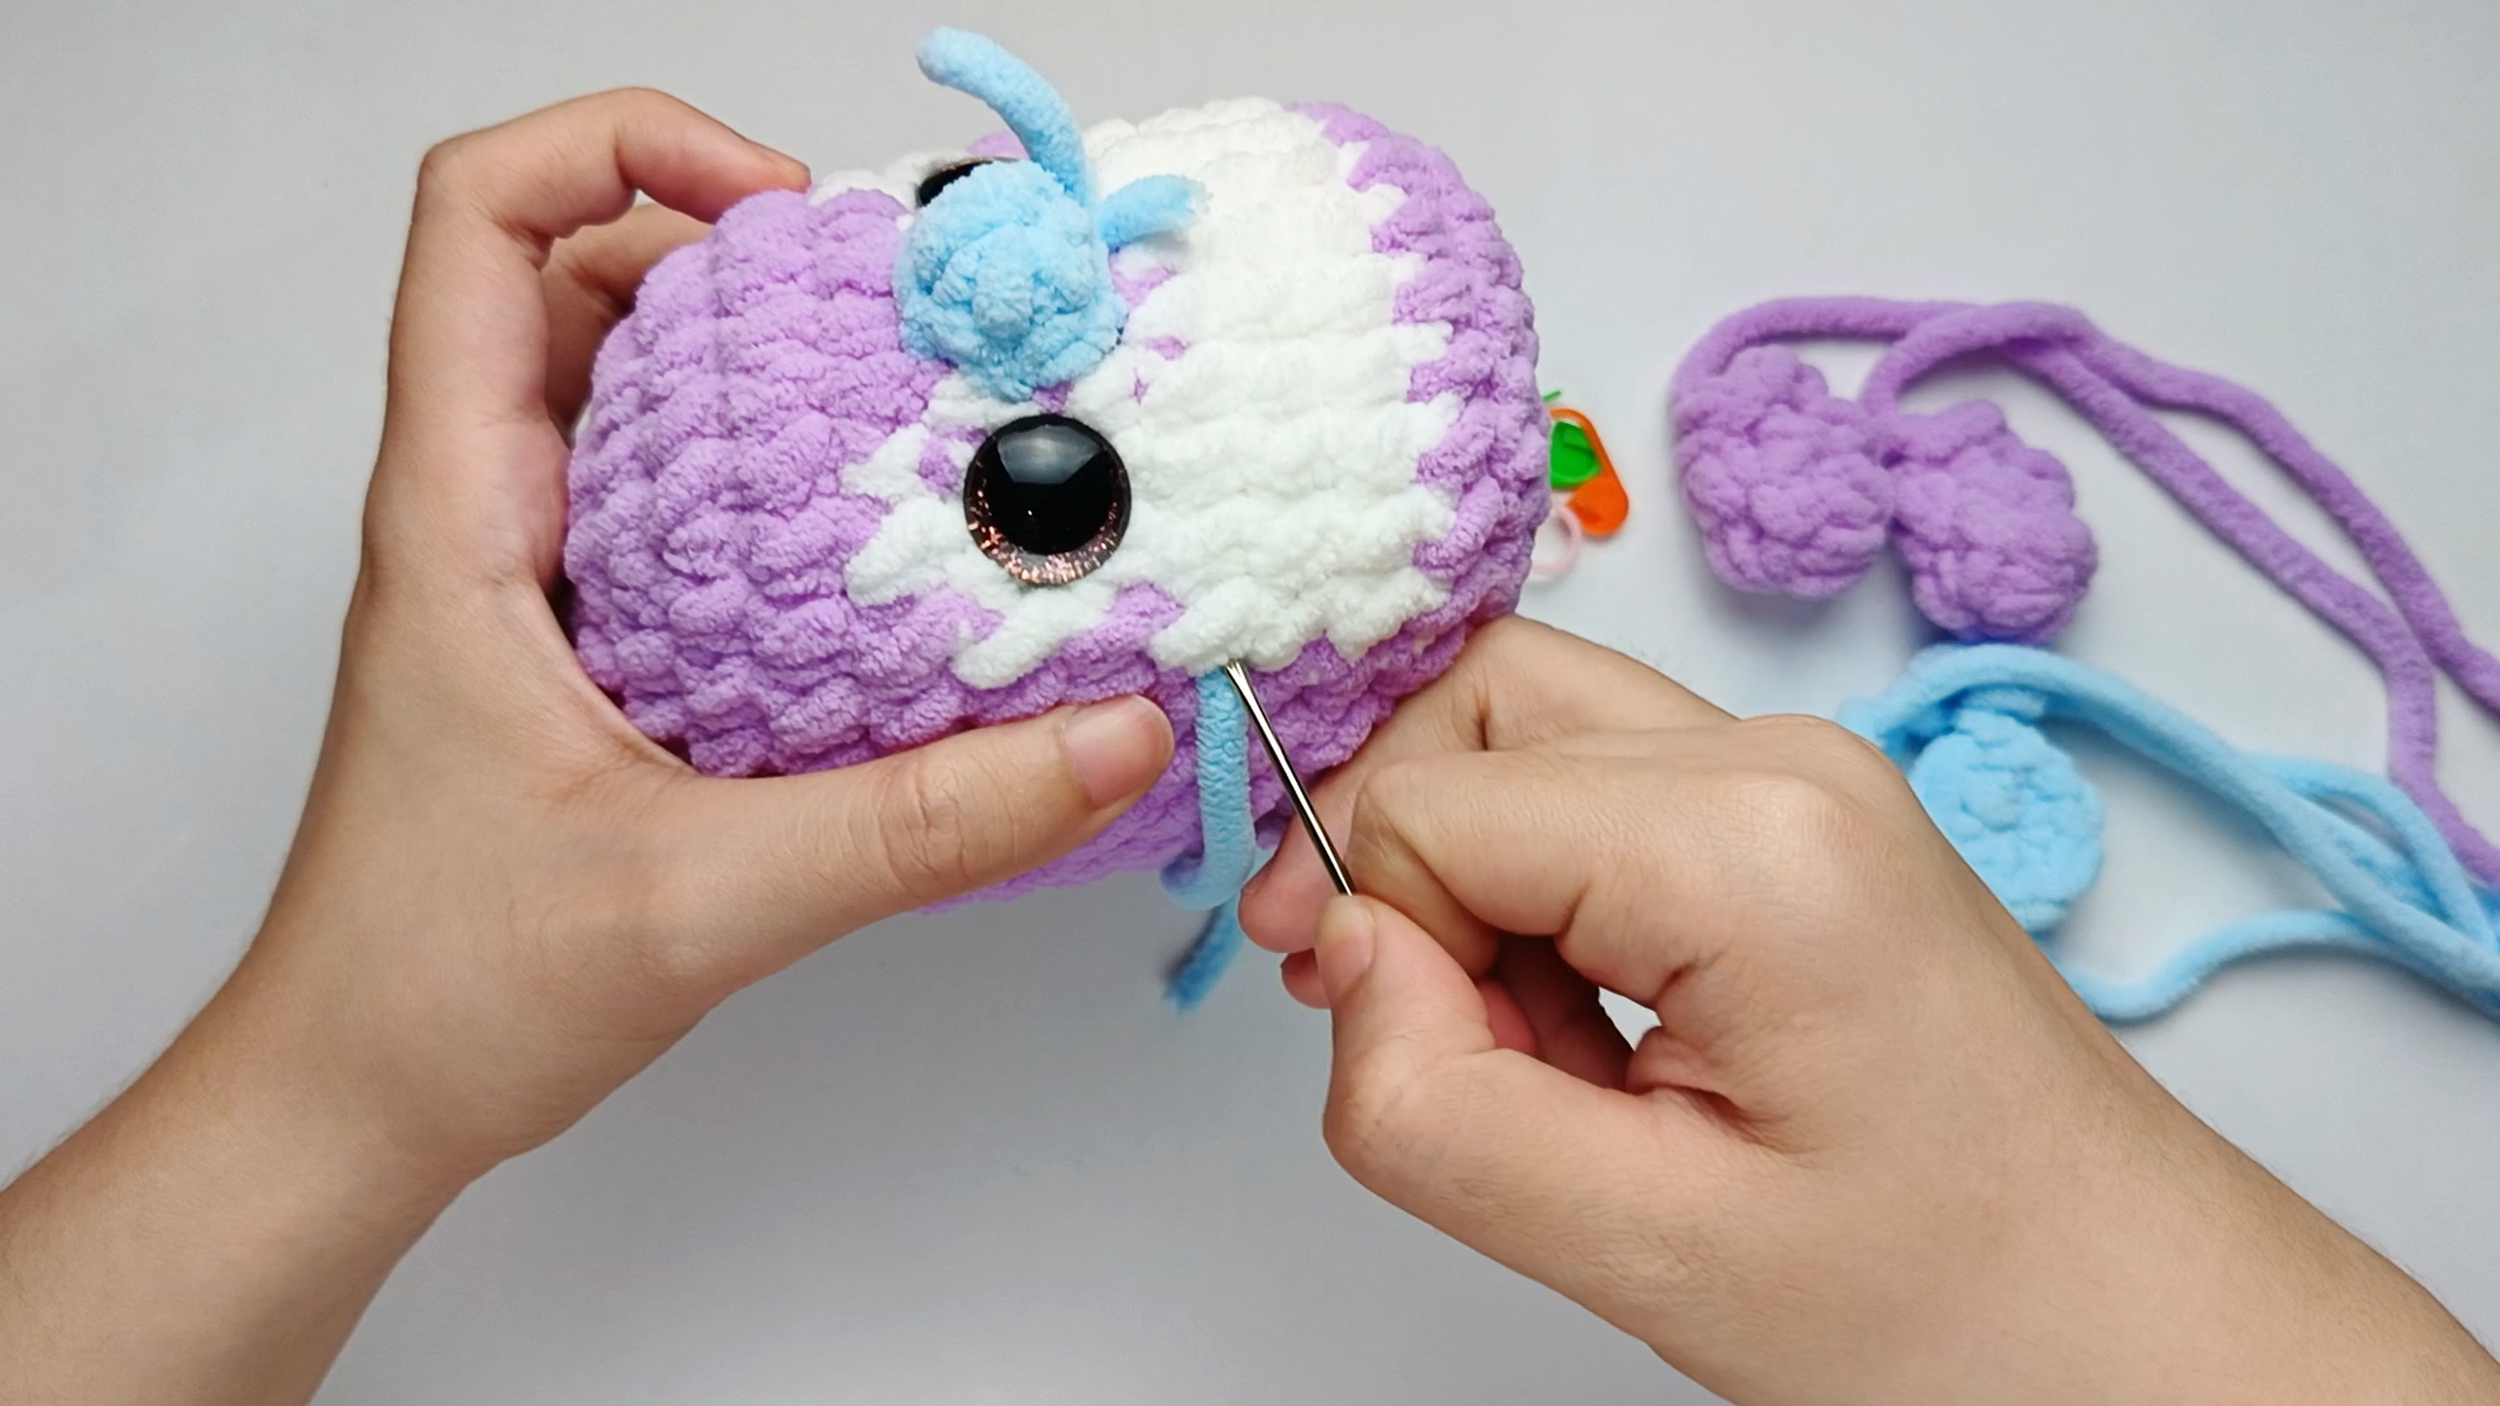
Hide the magic ring (MR) yarn tail:
Let's hide the yarn tail from the magic ring (MR) inside the Body too. Thread the needle, take it down into the next stitch, run it through the Body, then pull the yarn through.
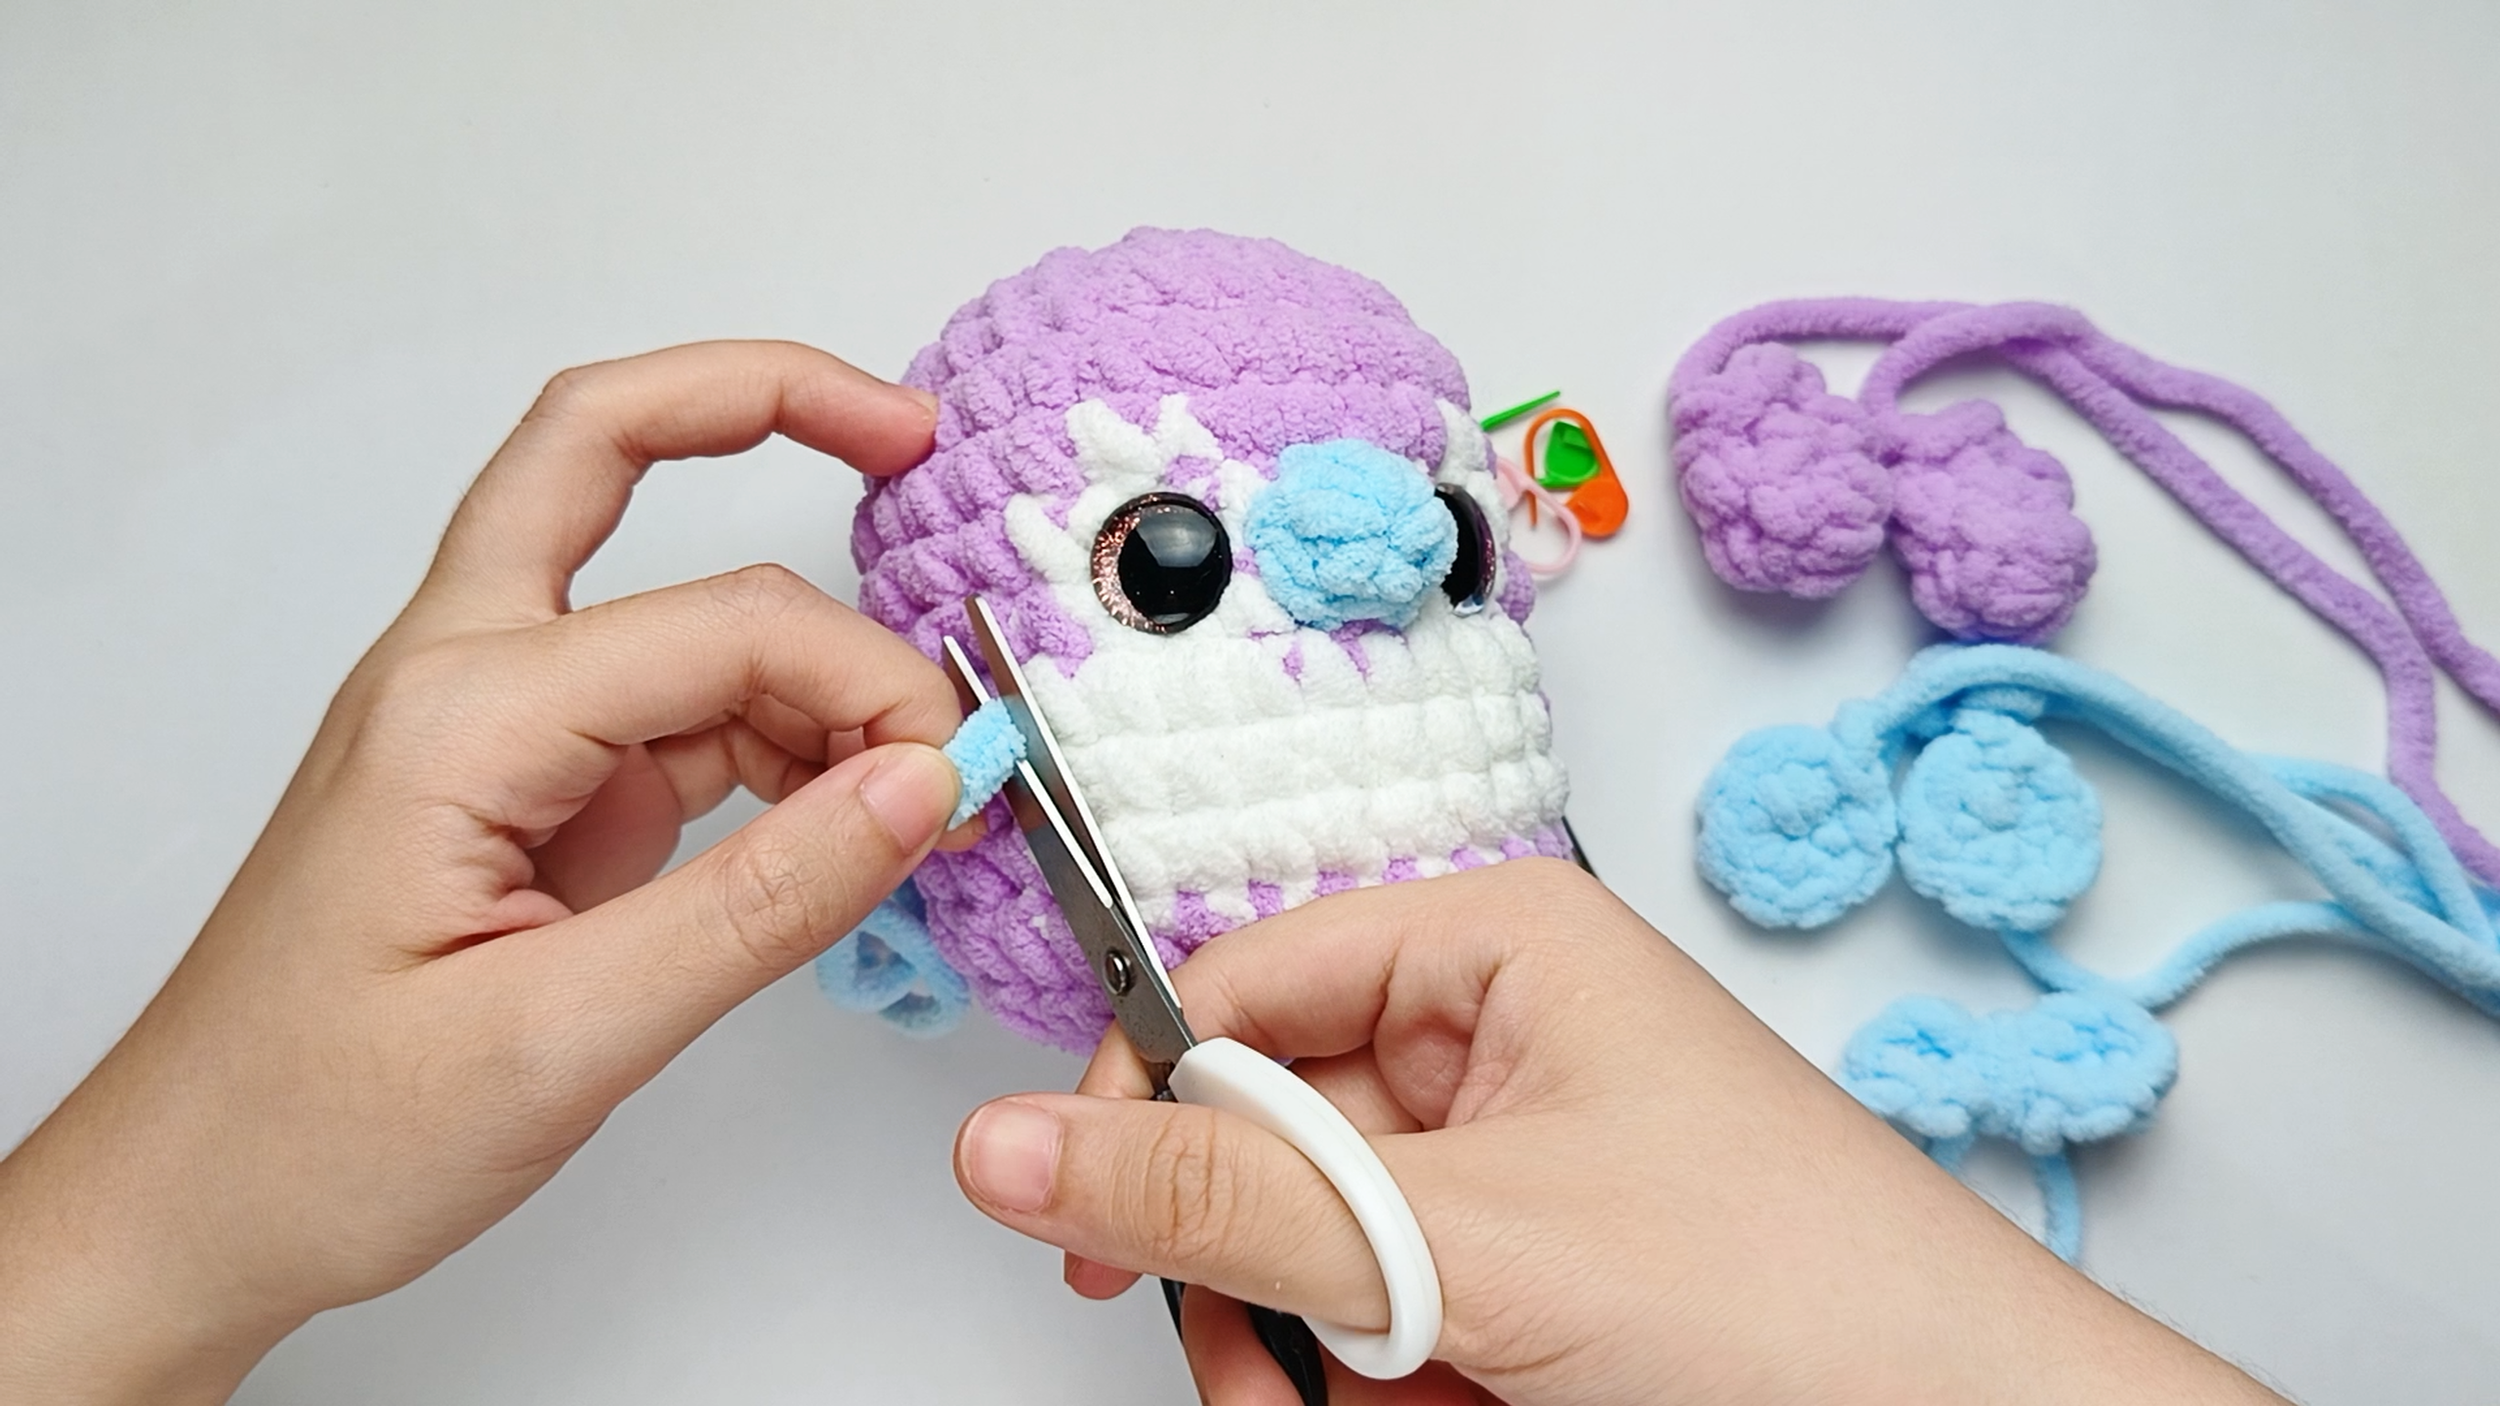
Trim the tails:
Trim the tails close to the surface and gently massage the area so the end disappears inside.
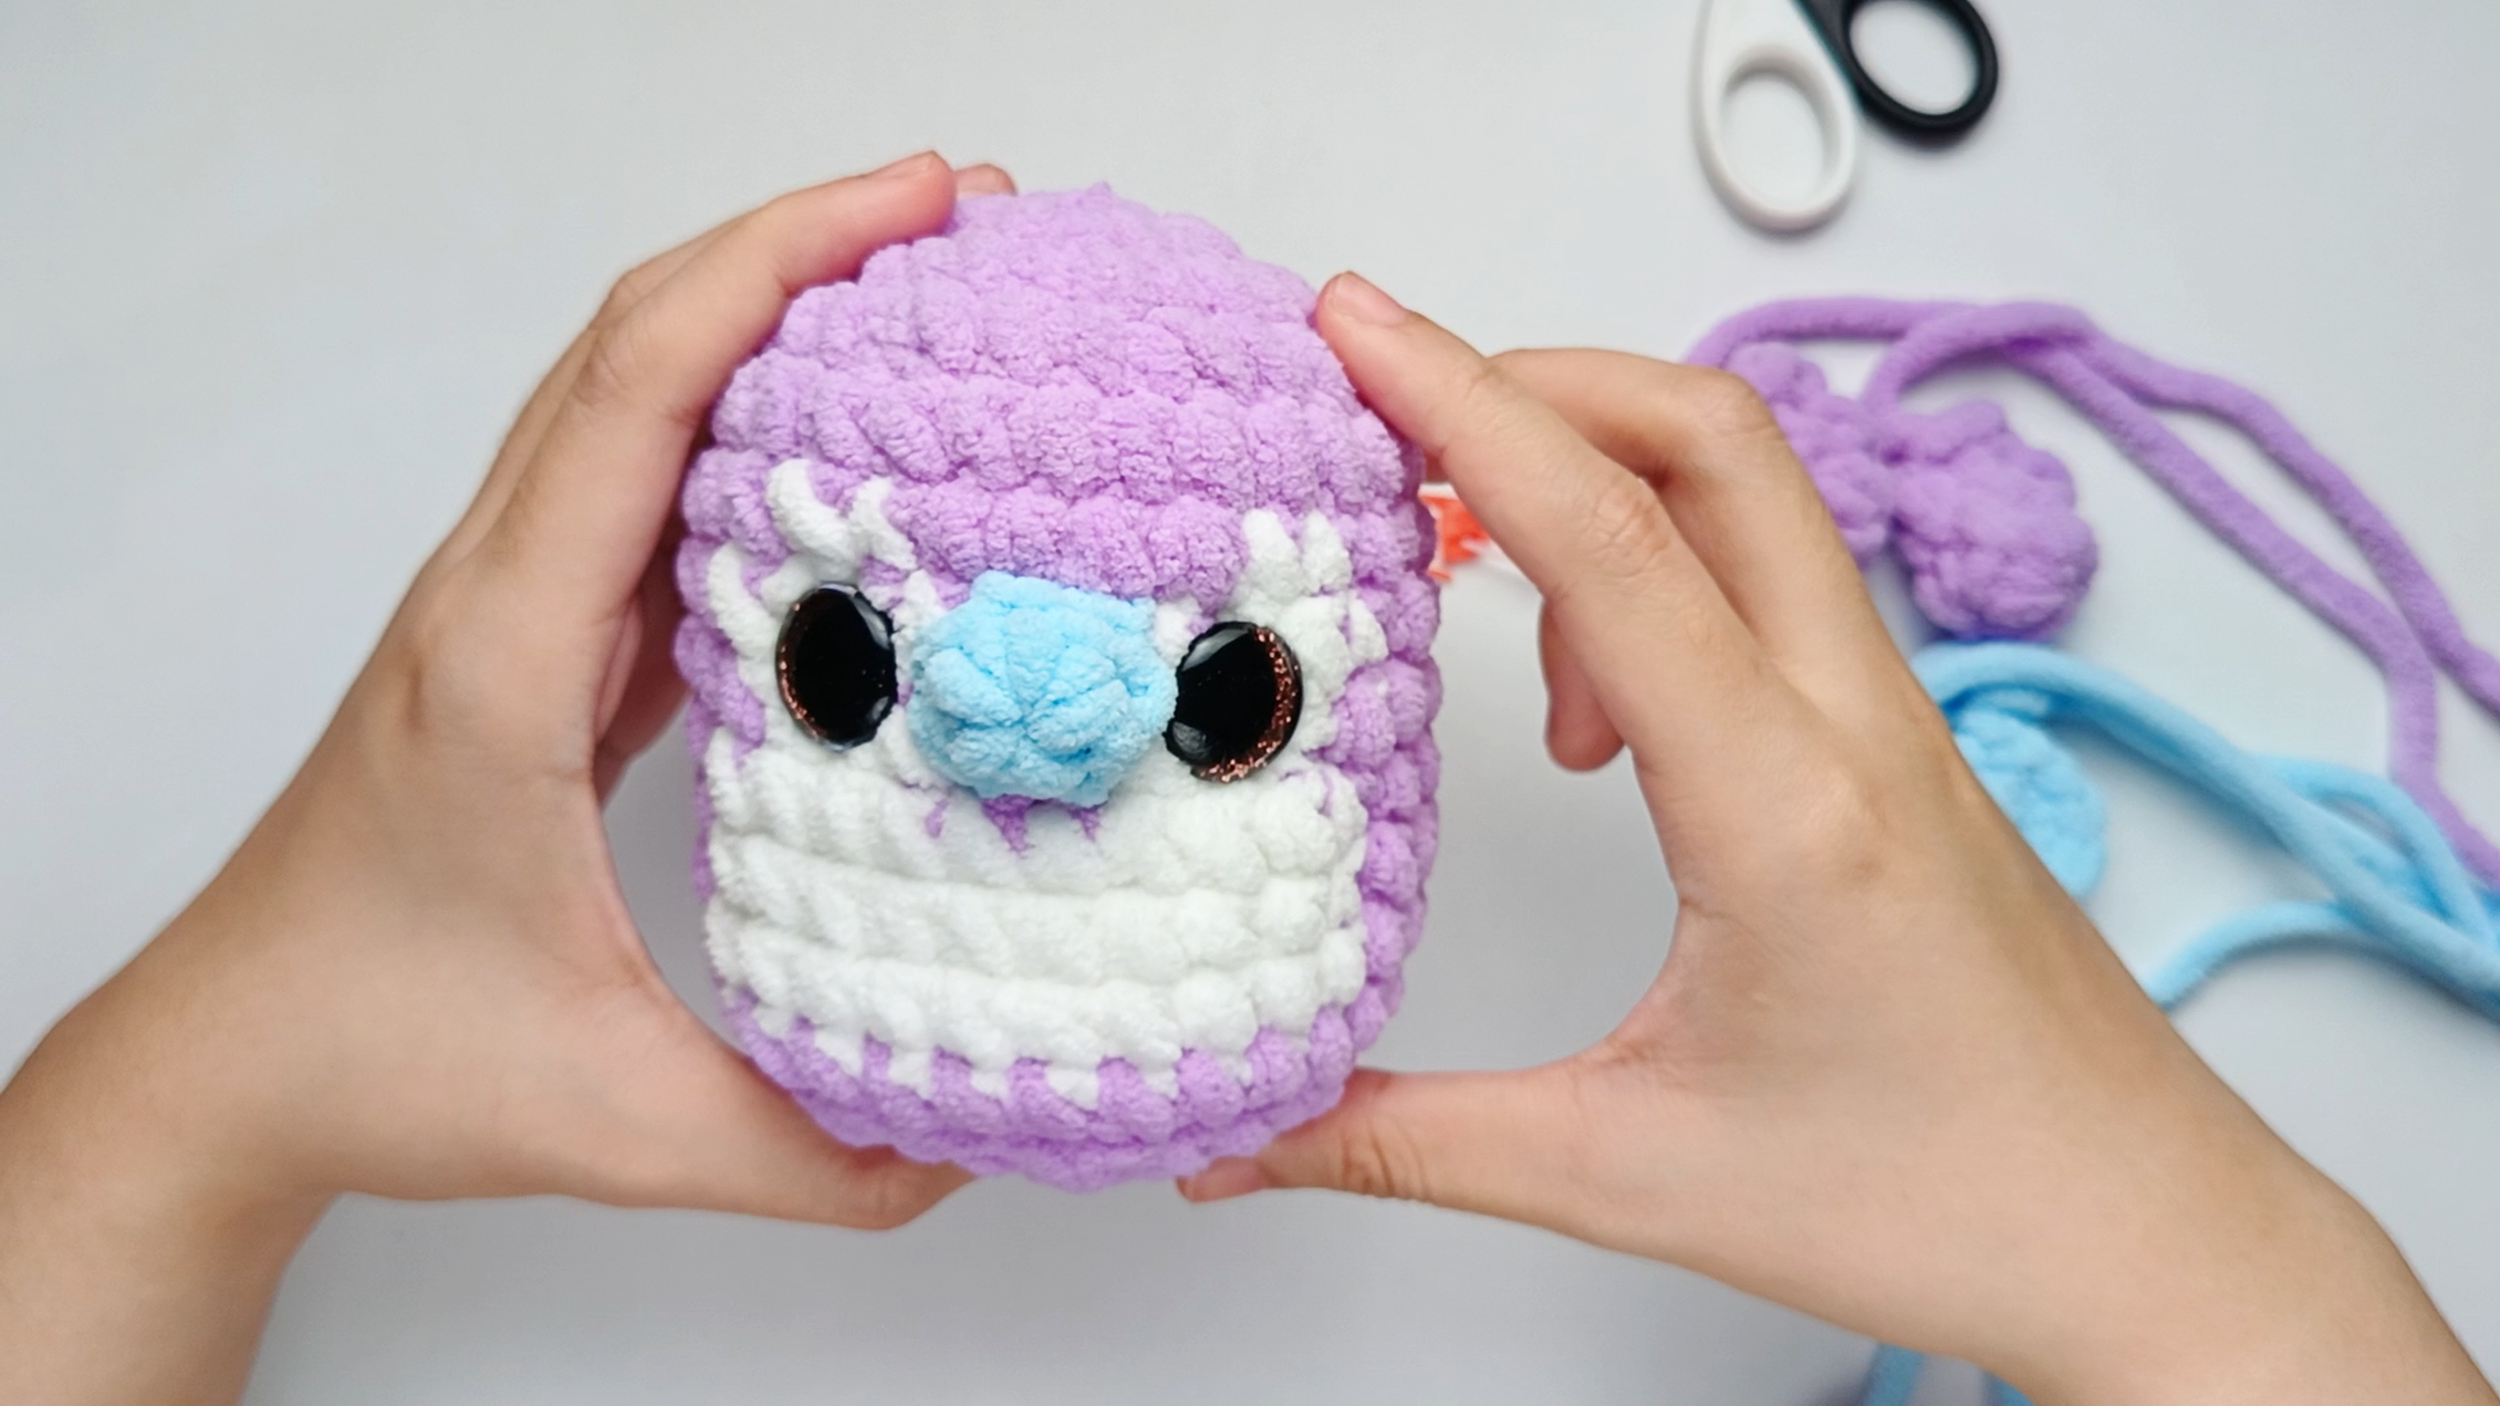
Attached Nose:
The Nose is now fully attached.
Attaching the Wings
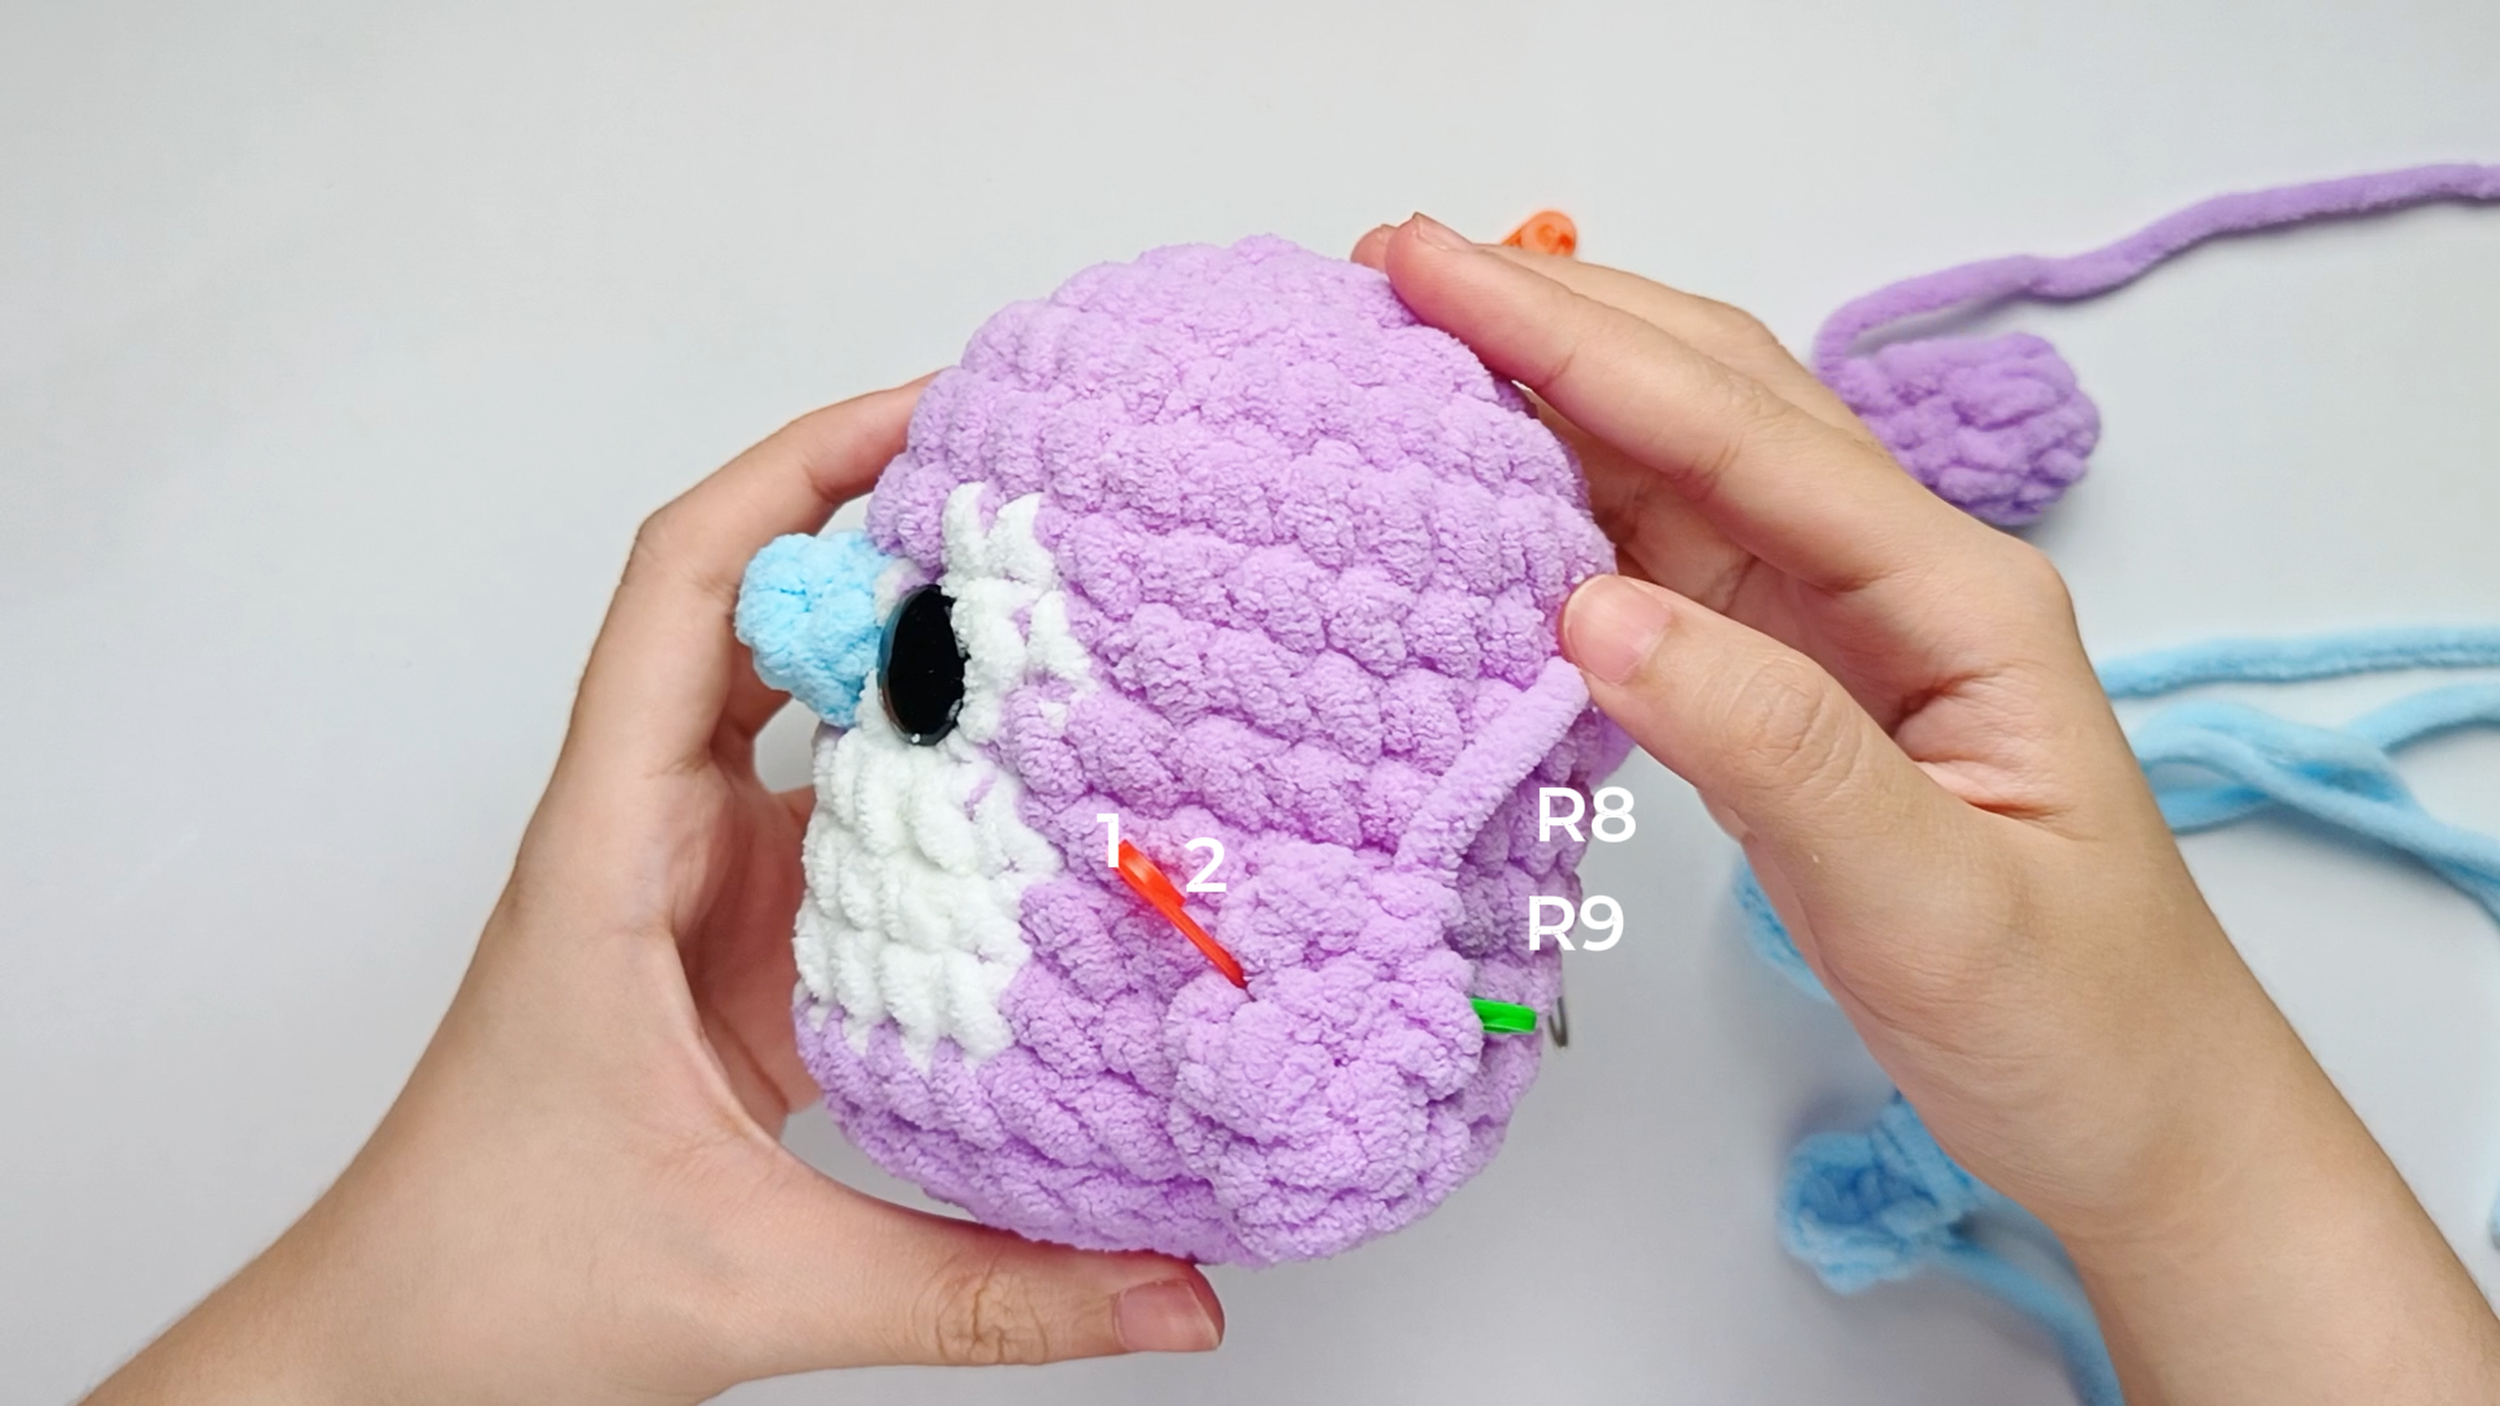
Position and secure the first Wing:
Position the first Wing between Round 8 and Round 9 of the Body, about 2 stitches away from the white Tummy section. Pin it with stitch markers to check the position before sewing.
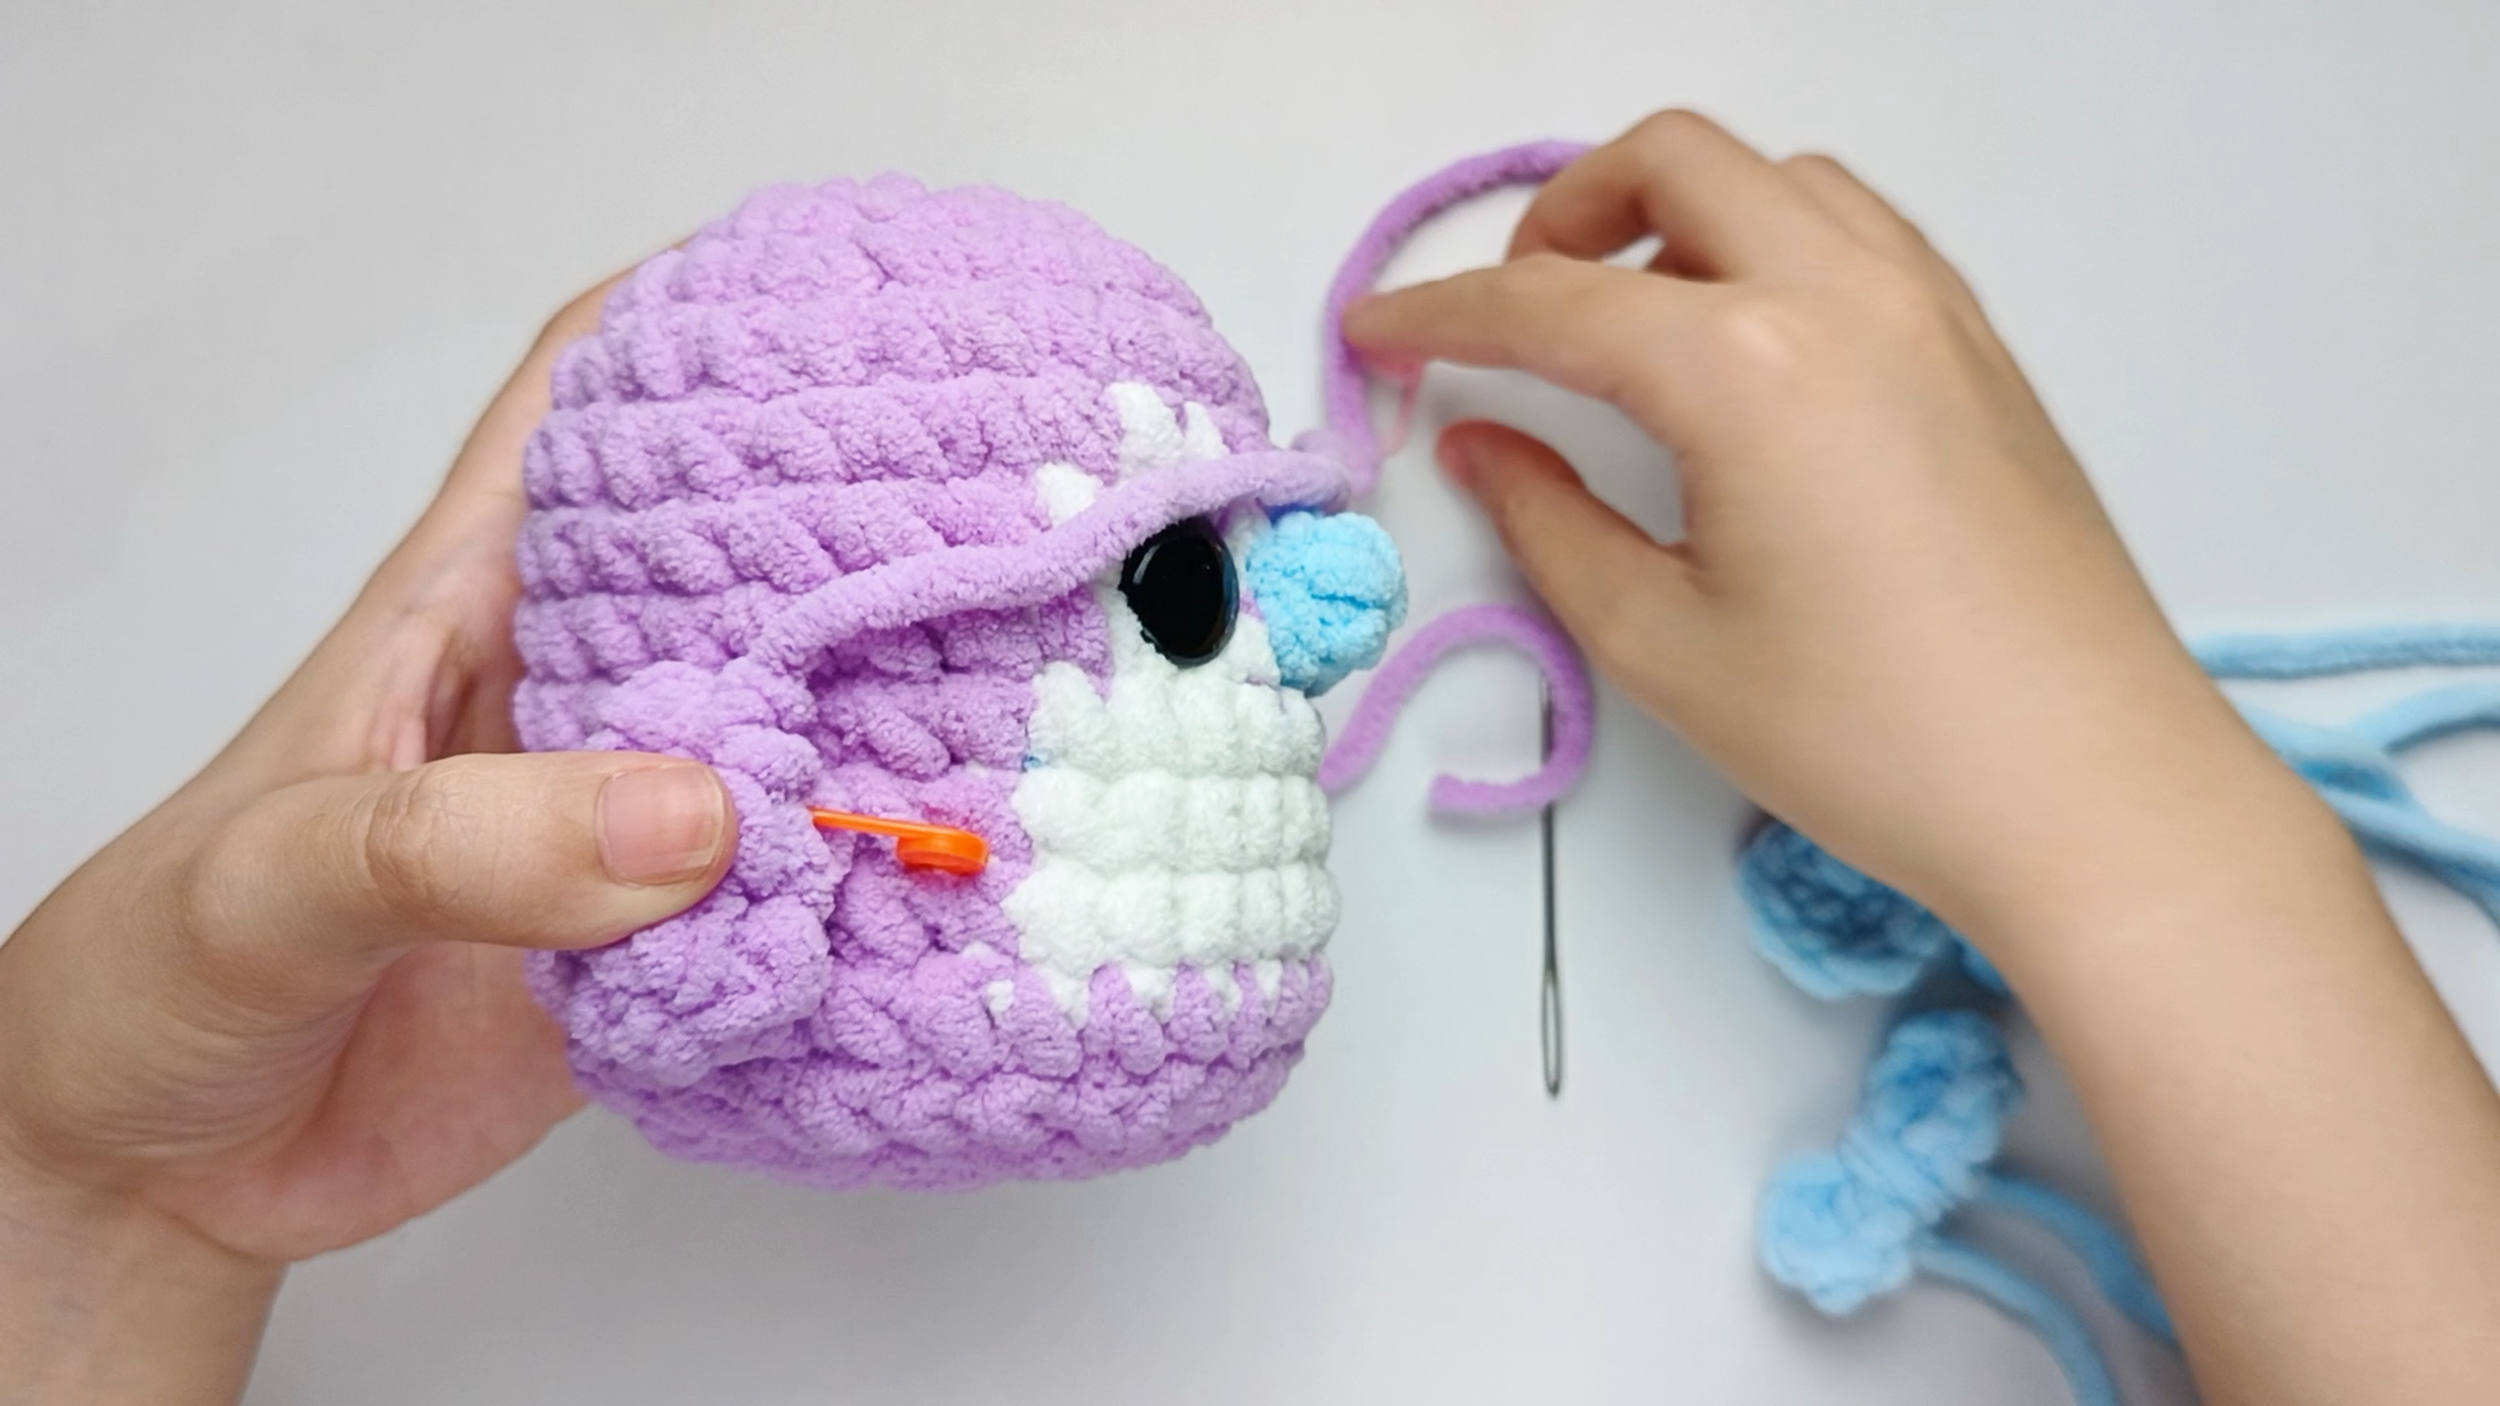
Position and secure the second Wing:
Then, position the second Wing on the opposite side, making sure both Wings look even. Pin it with stitch markers to check the position before sewing.
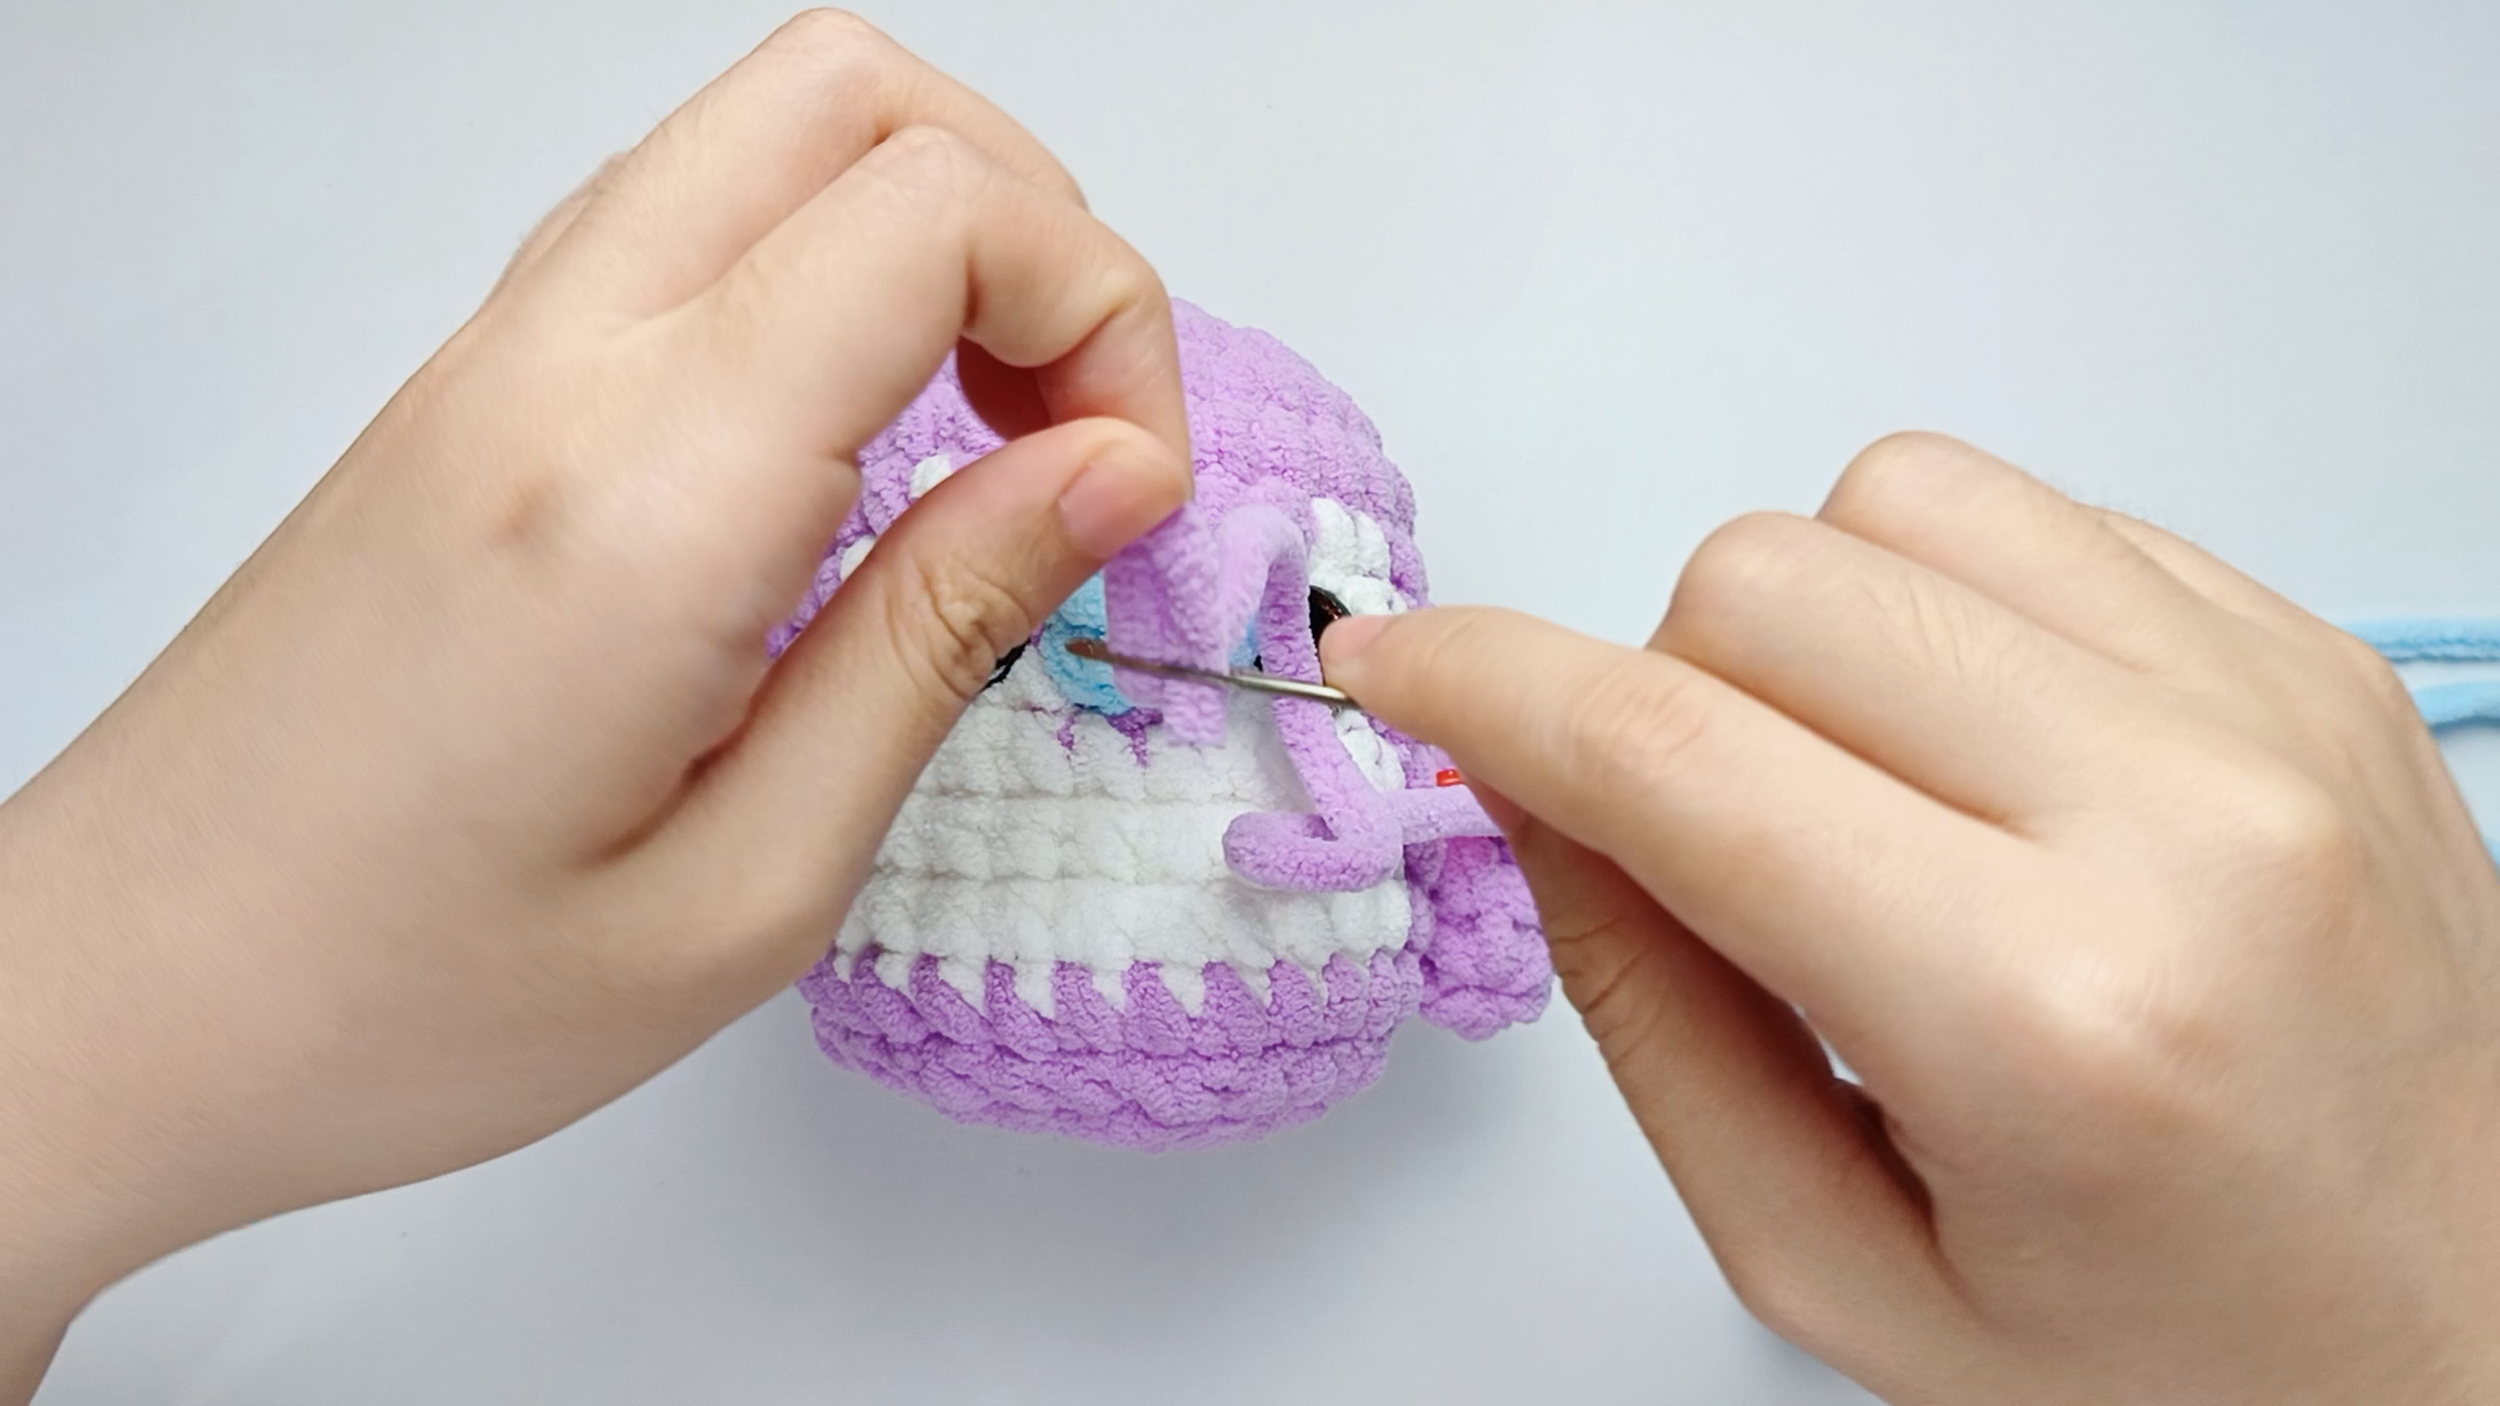
Thread the needle:
Thread the yarn tail from the Wing onto your yarn needle.
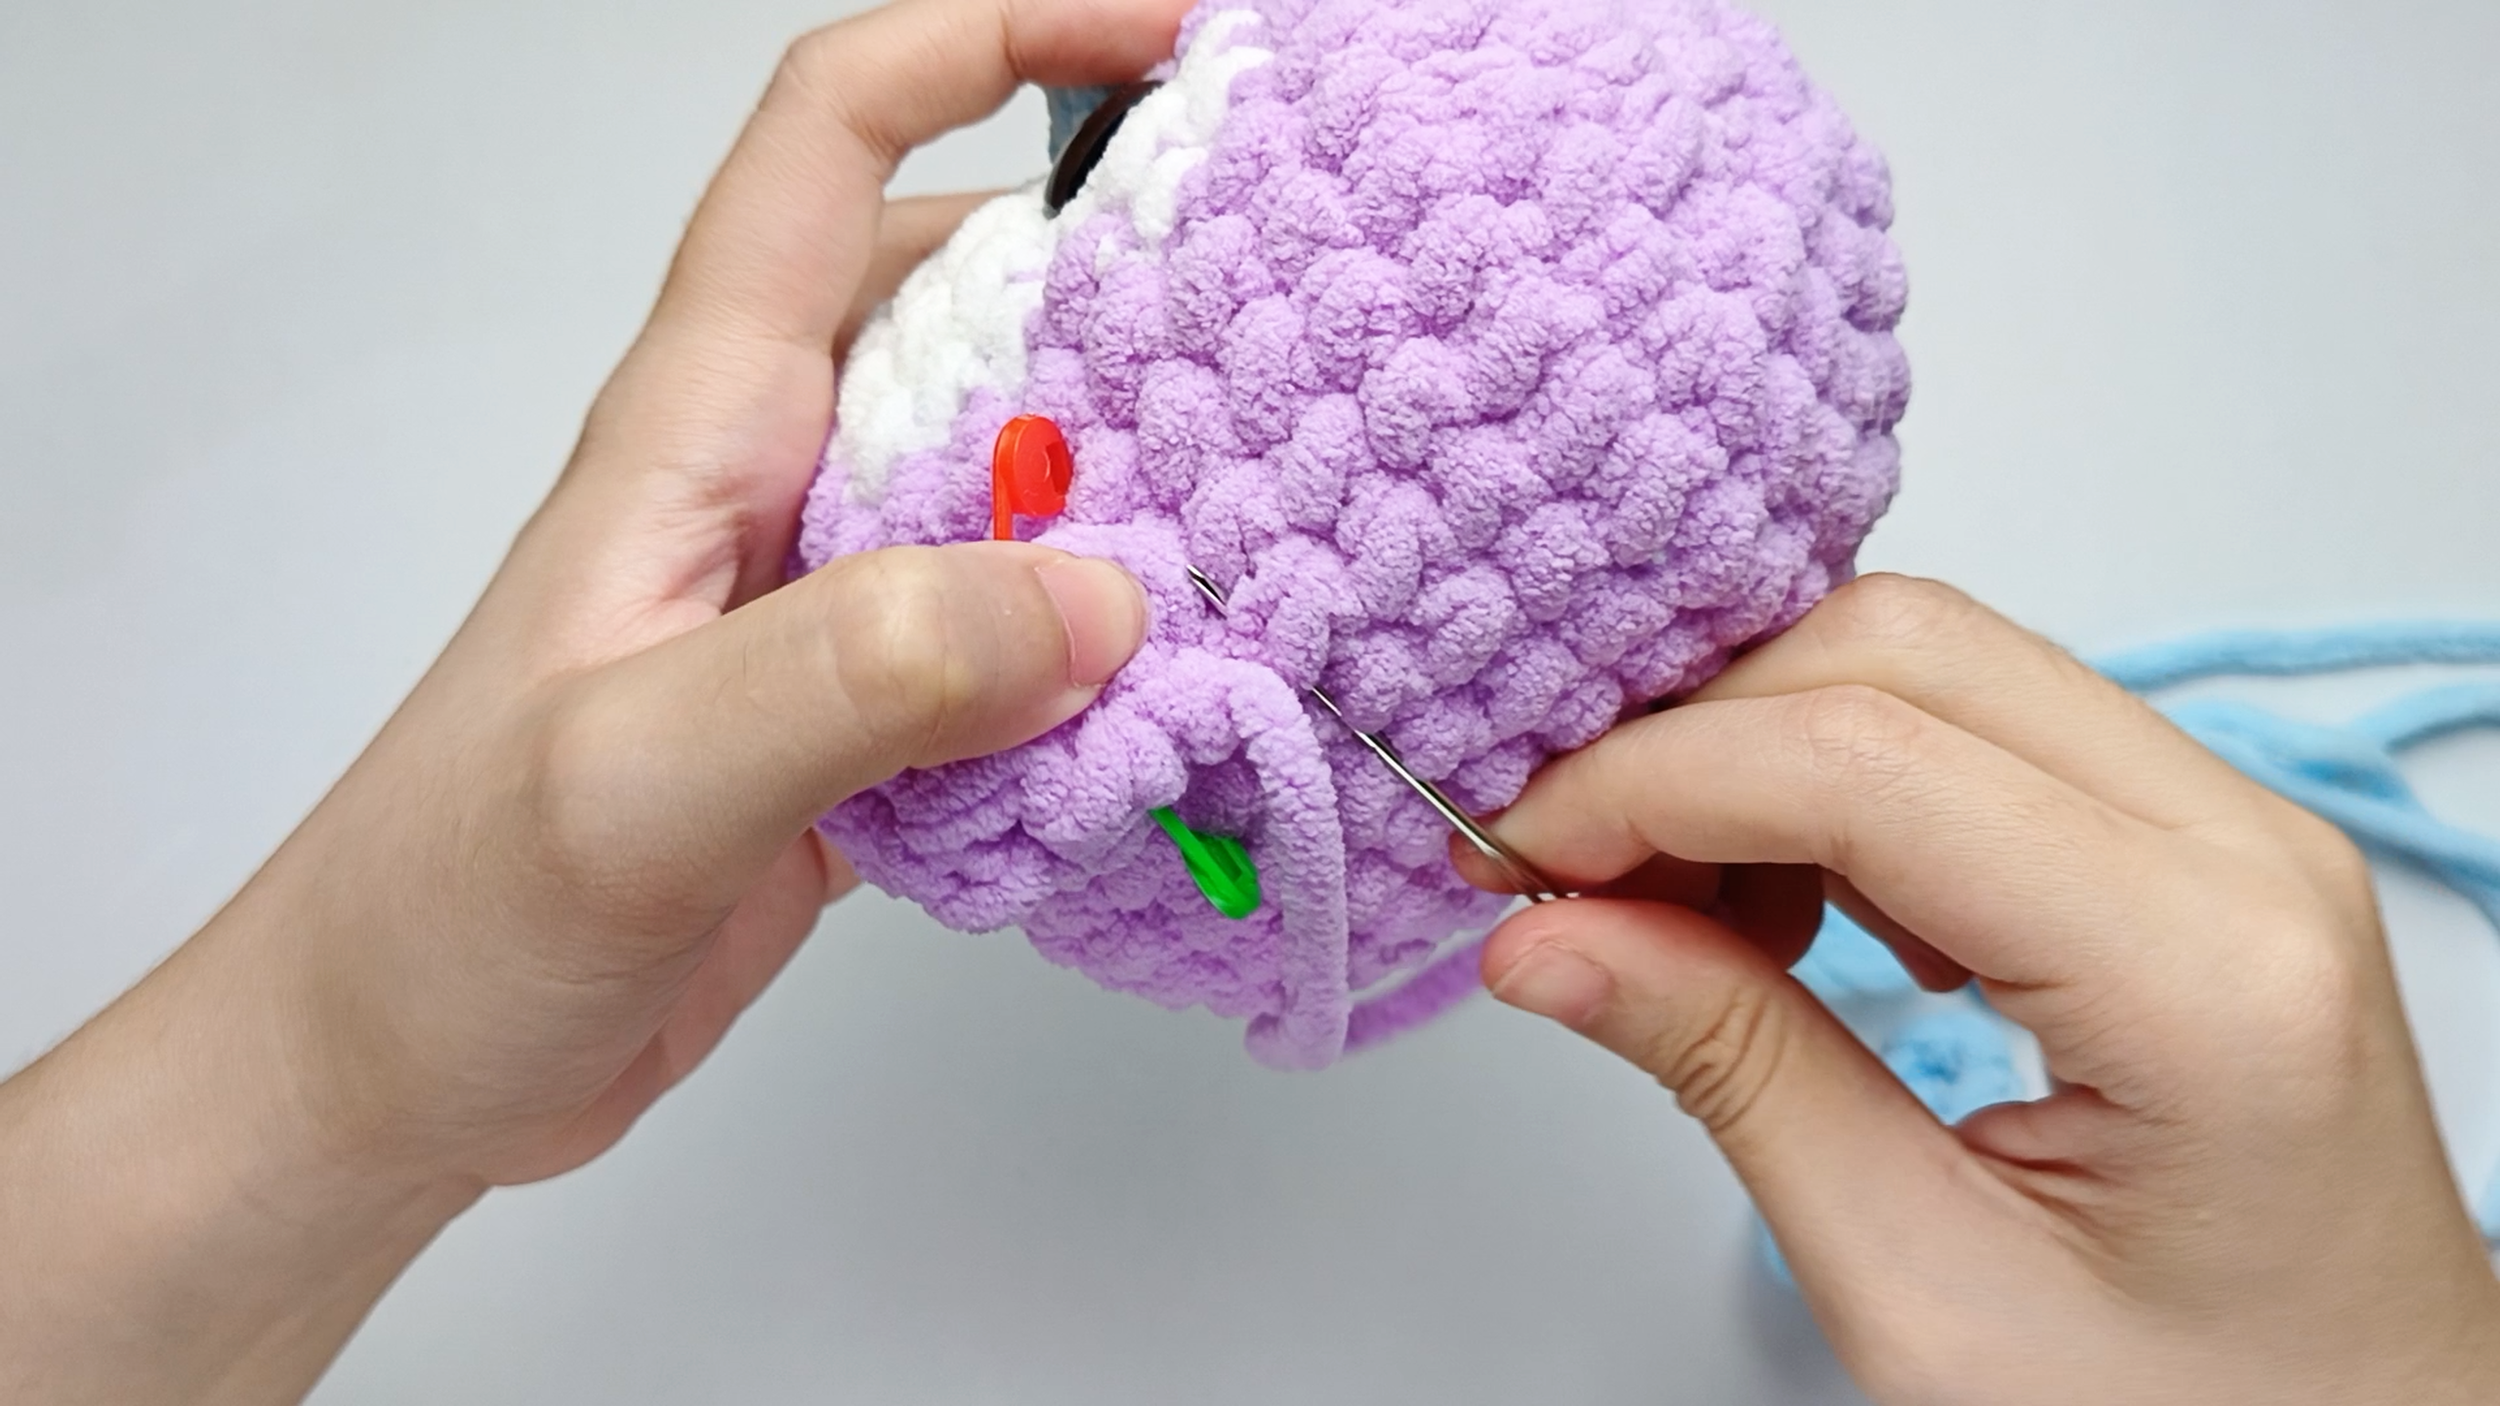
Into the Body:
Insert the needle into one stitch of the Body, lining it up with the next stitch on the piece. Pull the yarn all the way through.
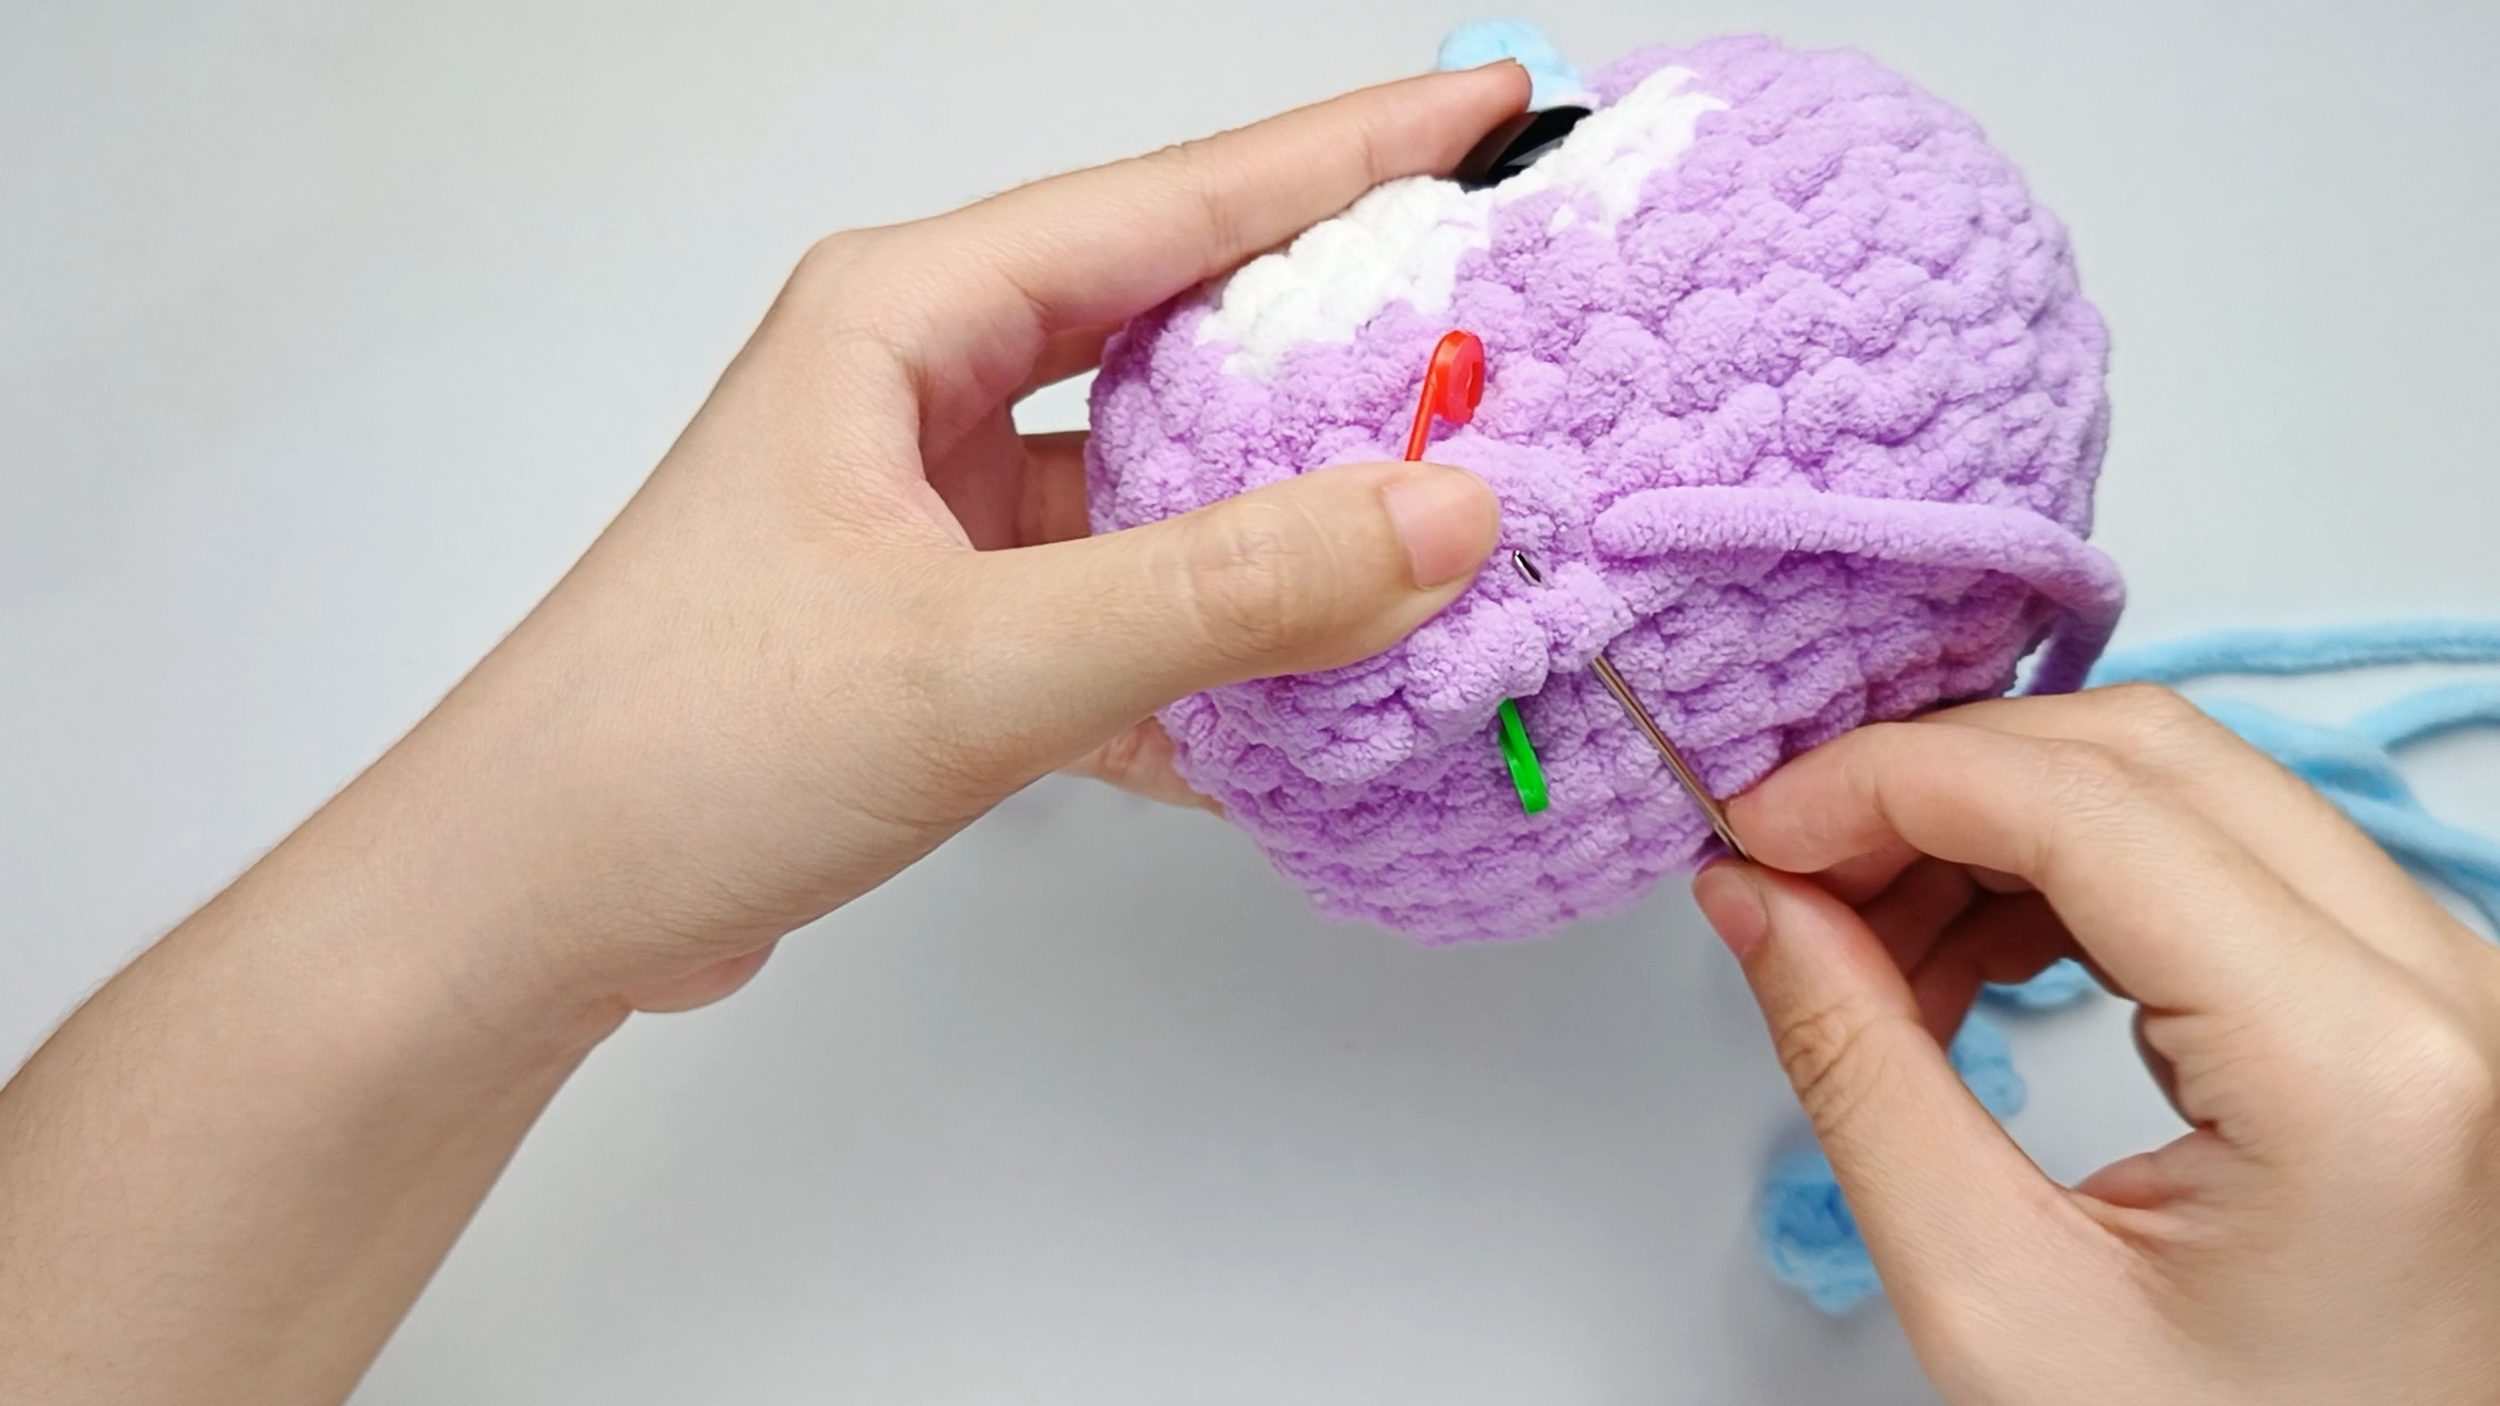
Up through the piece:
Bring the needle up through one slip stitch (sl st) on the Wing. Pull the yarn all the way through.
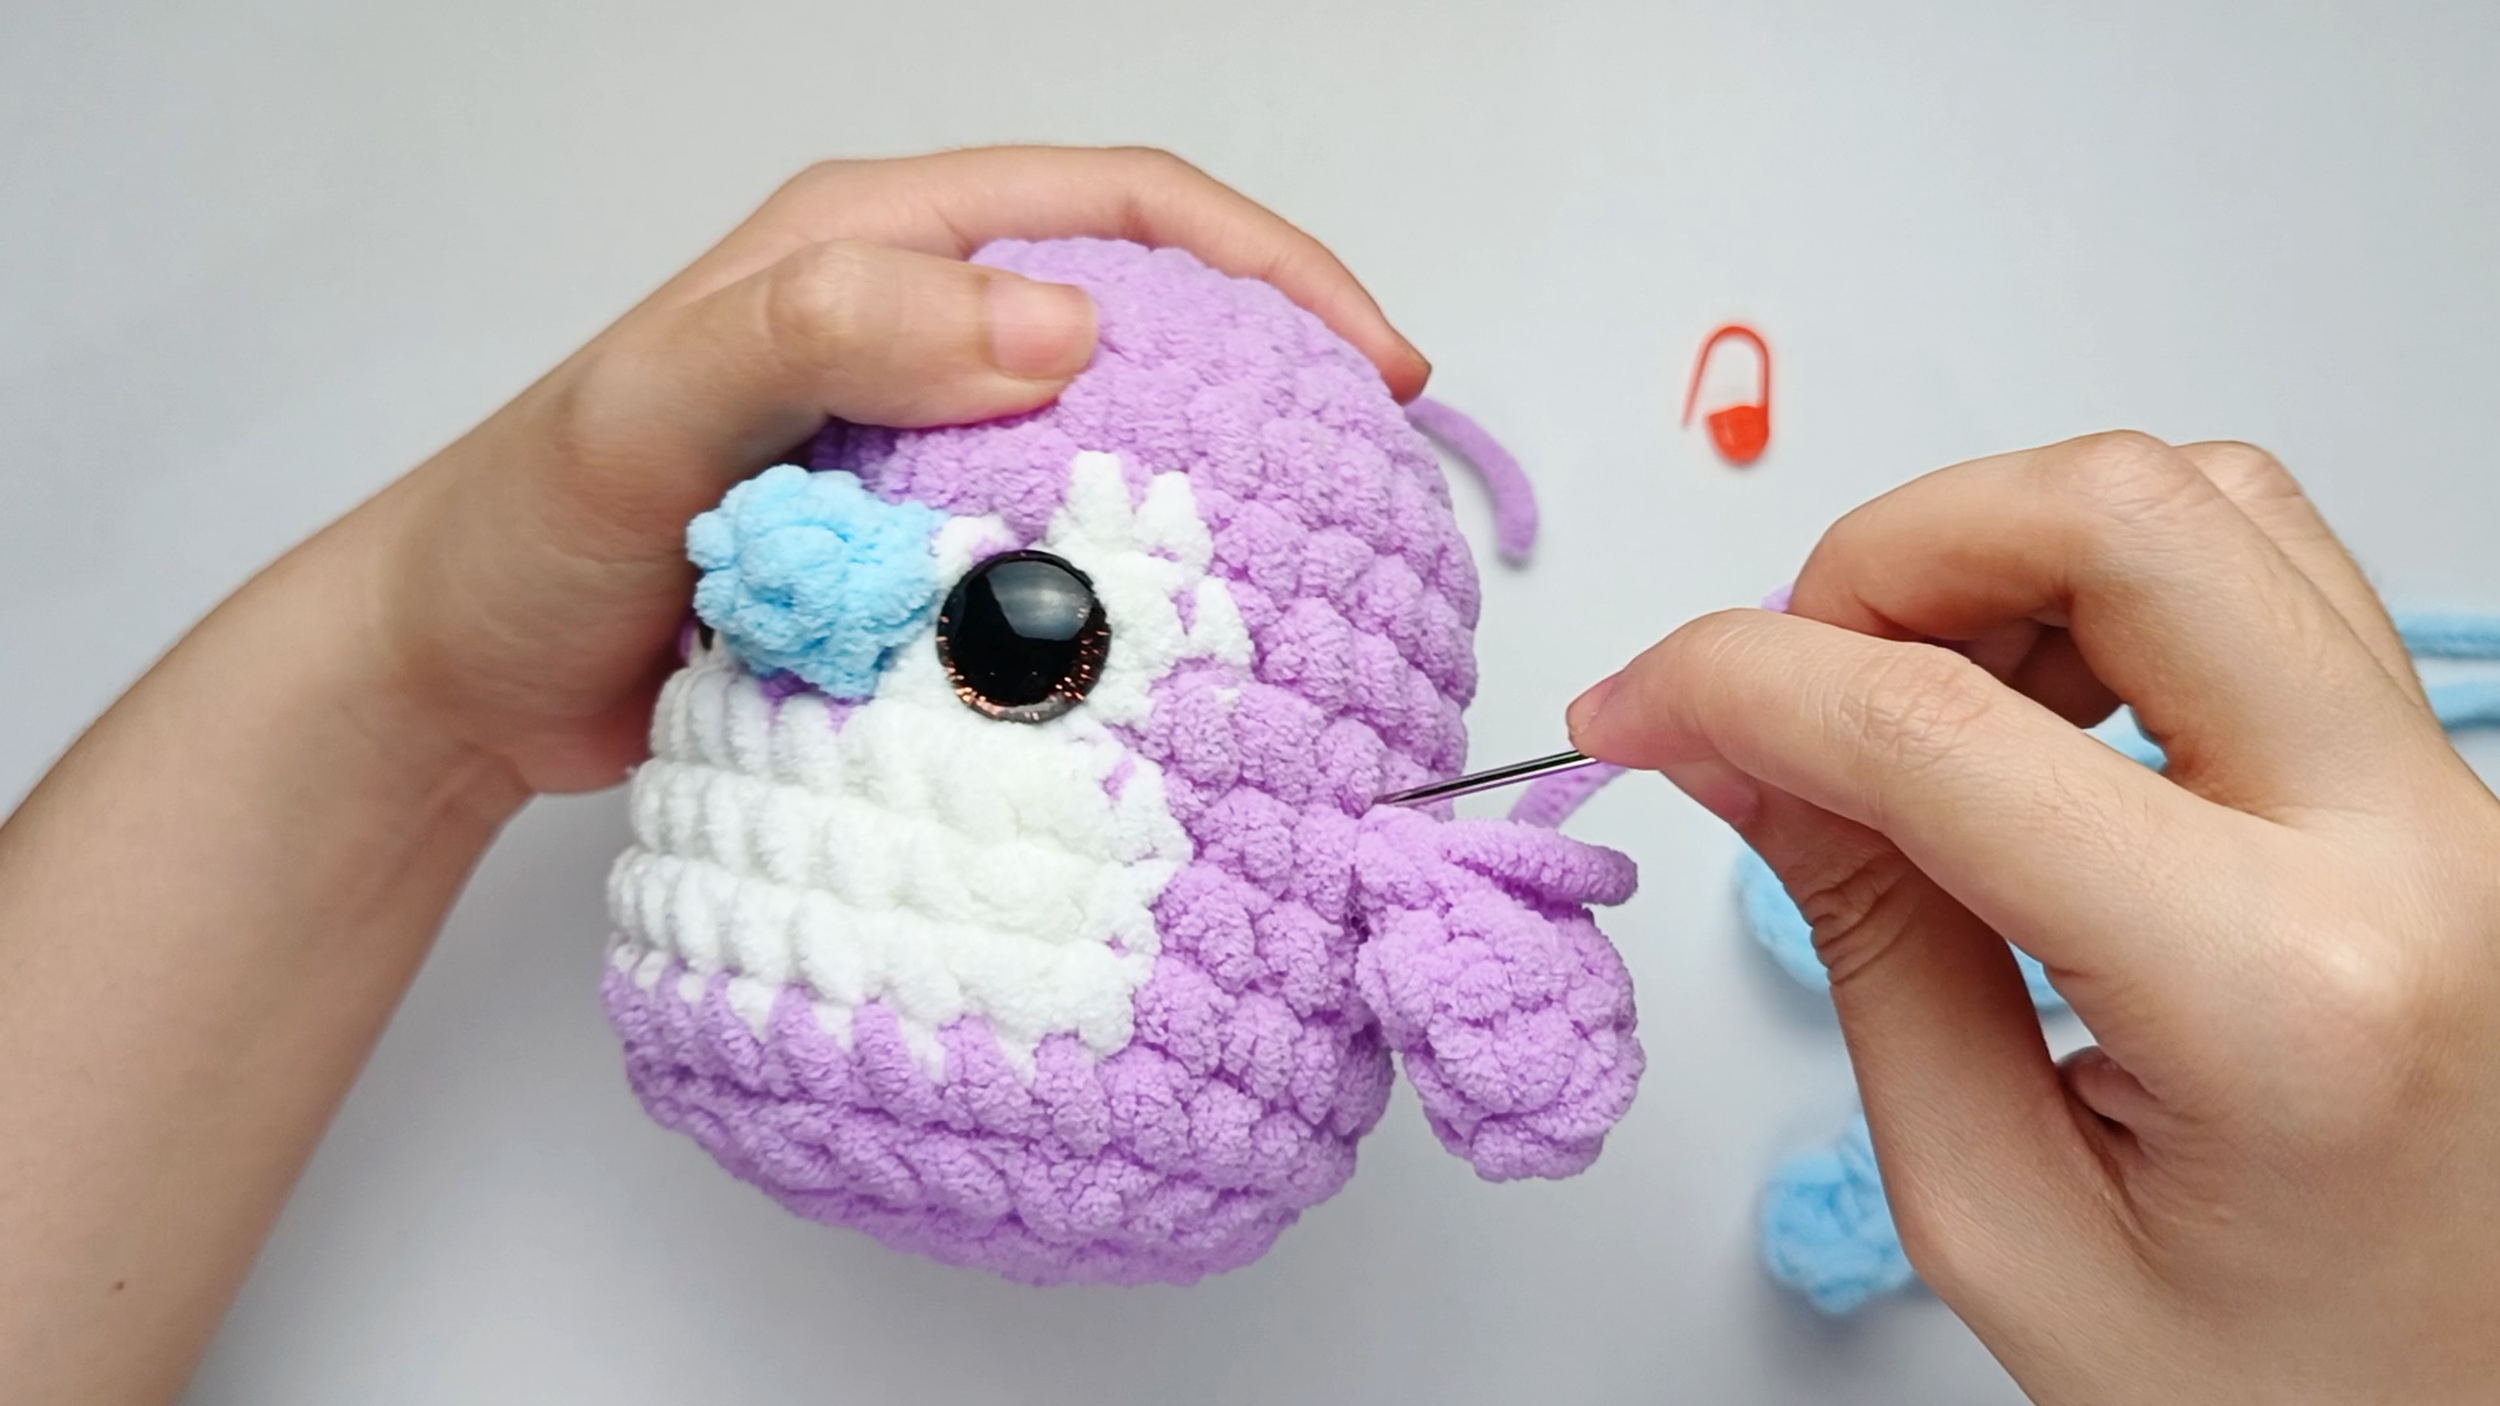
Work all the way around:
Repeat ‘Into the Body’ and ‘Up through the piece’ - one slip stitch (sl st) of the Wing to one stitch of the Body - until you reach the last stitch and the Wing is fully joined. Remove the stitch markers as you go.
Tip: Before fully tightening your stitches, check that both Wings look even when viewed from the front.
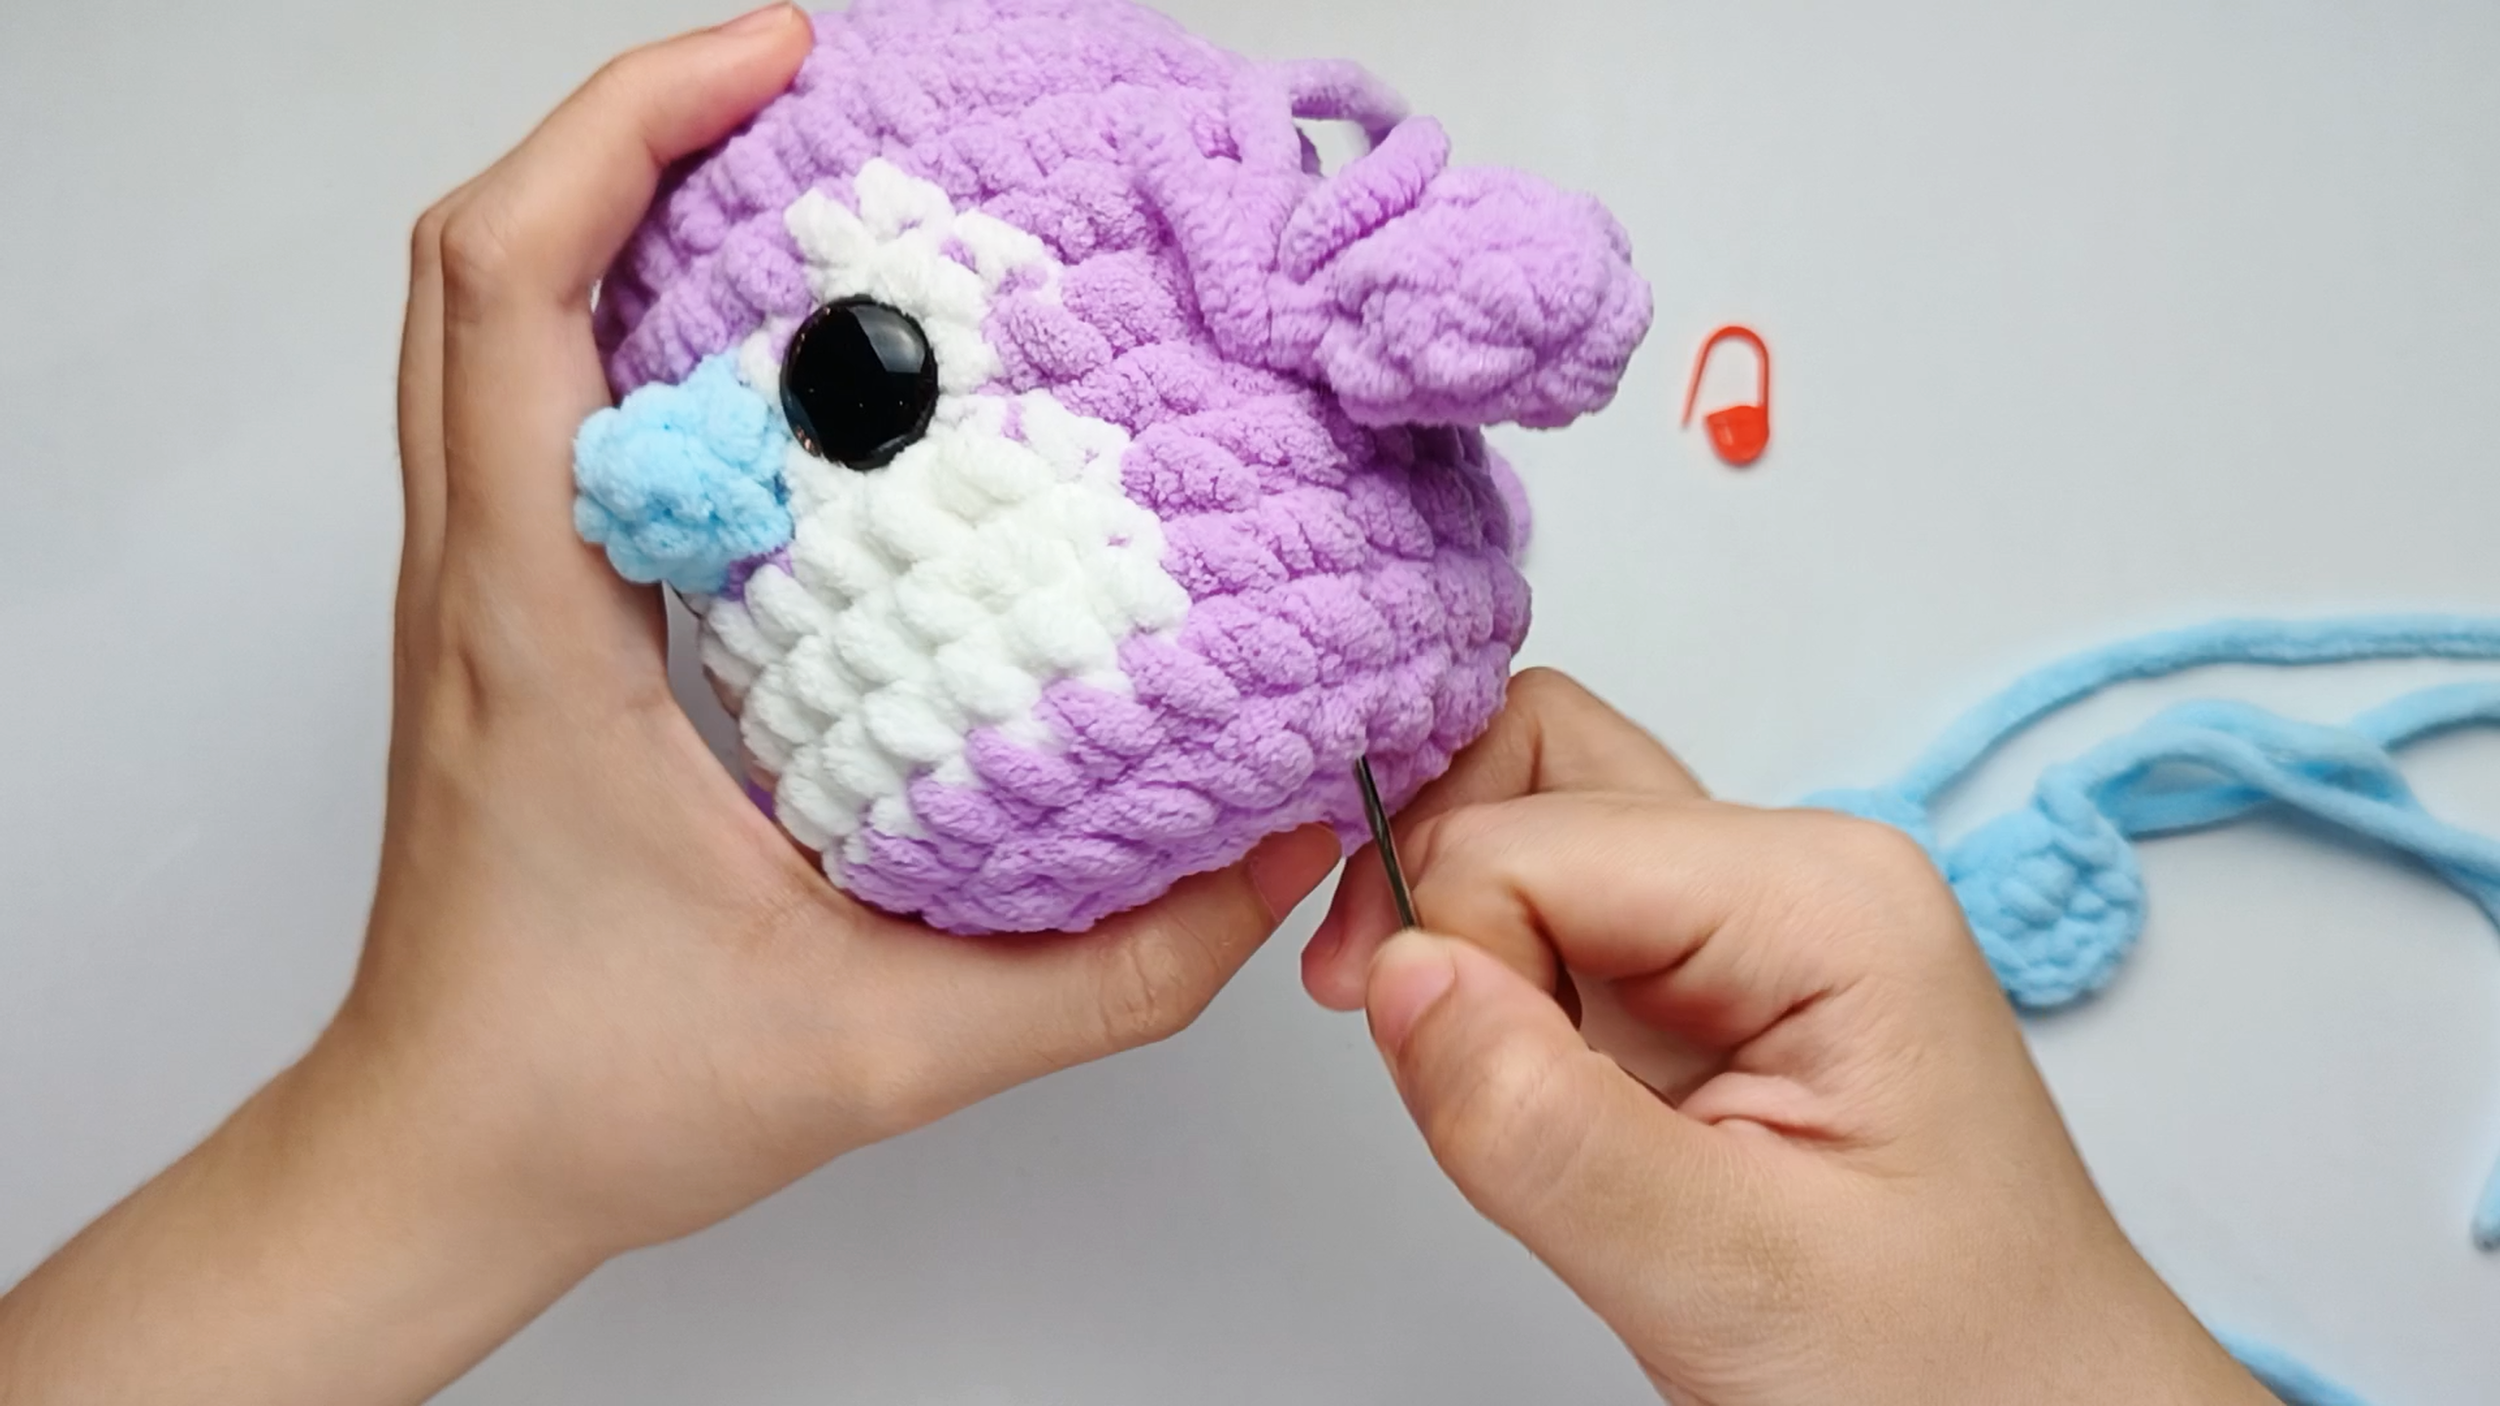
Secure and hide the tail:
To hide the yarn tail, take the needle down into the next stitch and run it through the Body, then pull the yarn through.
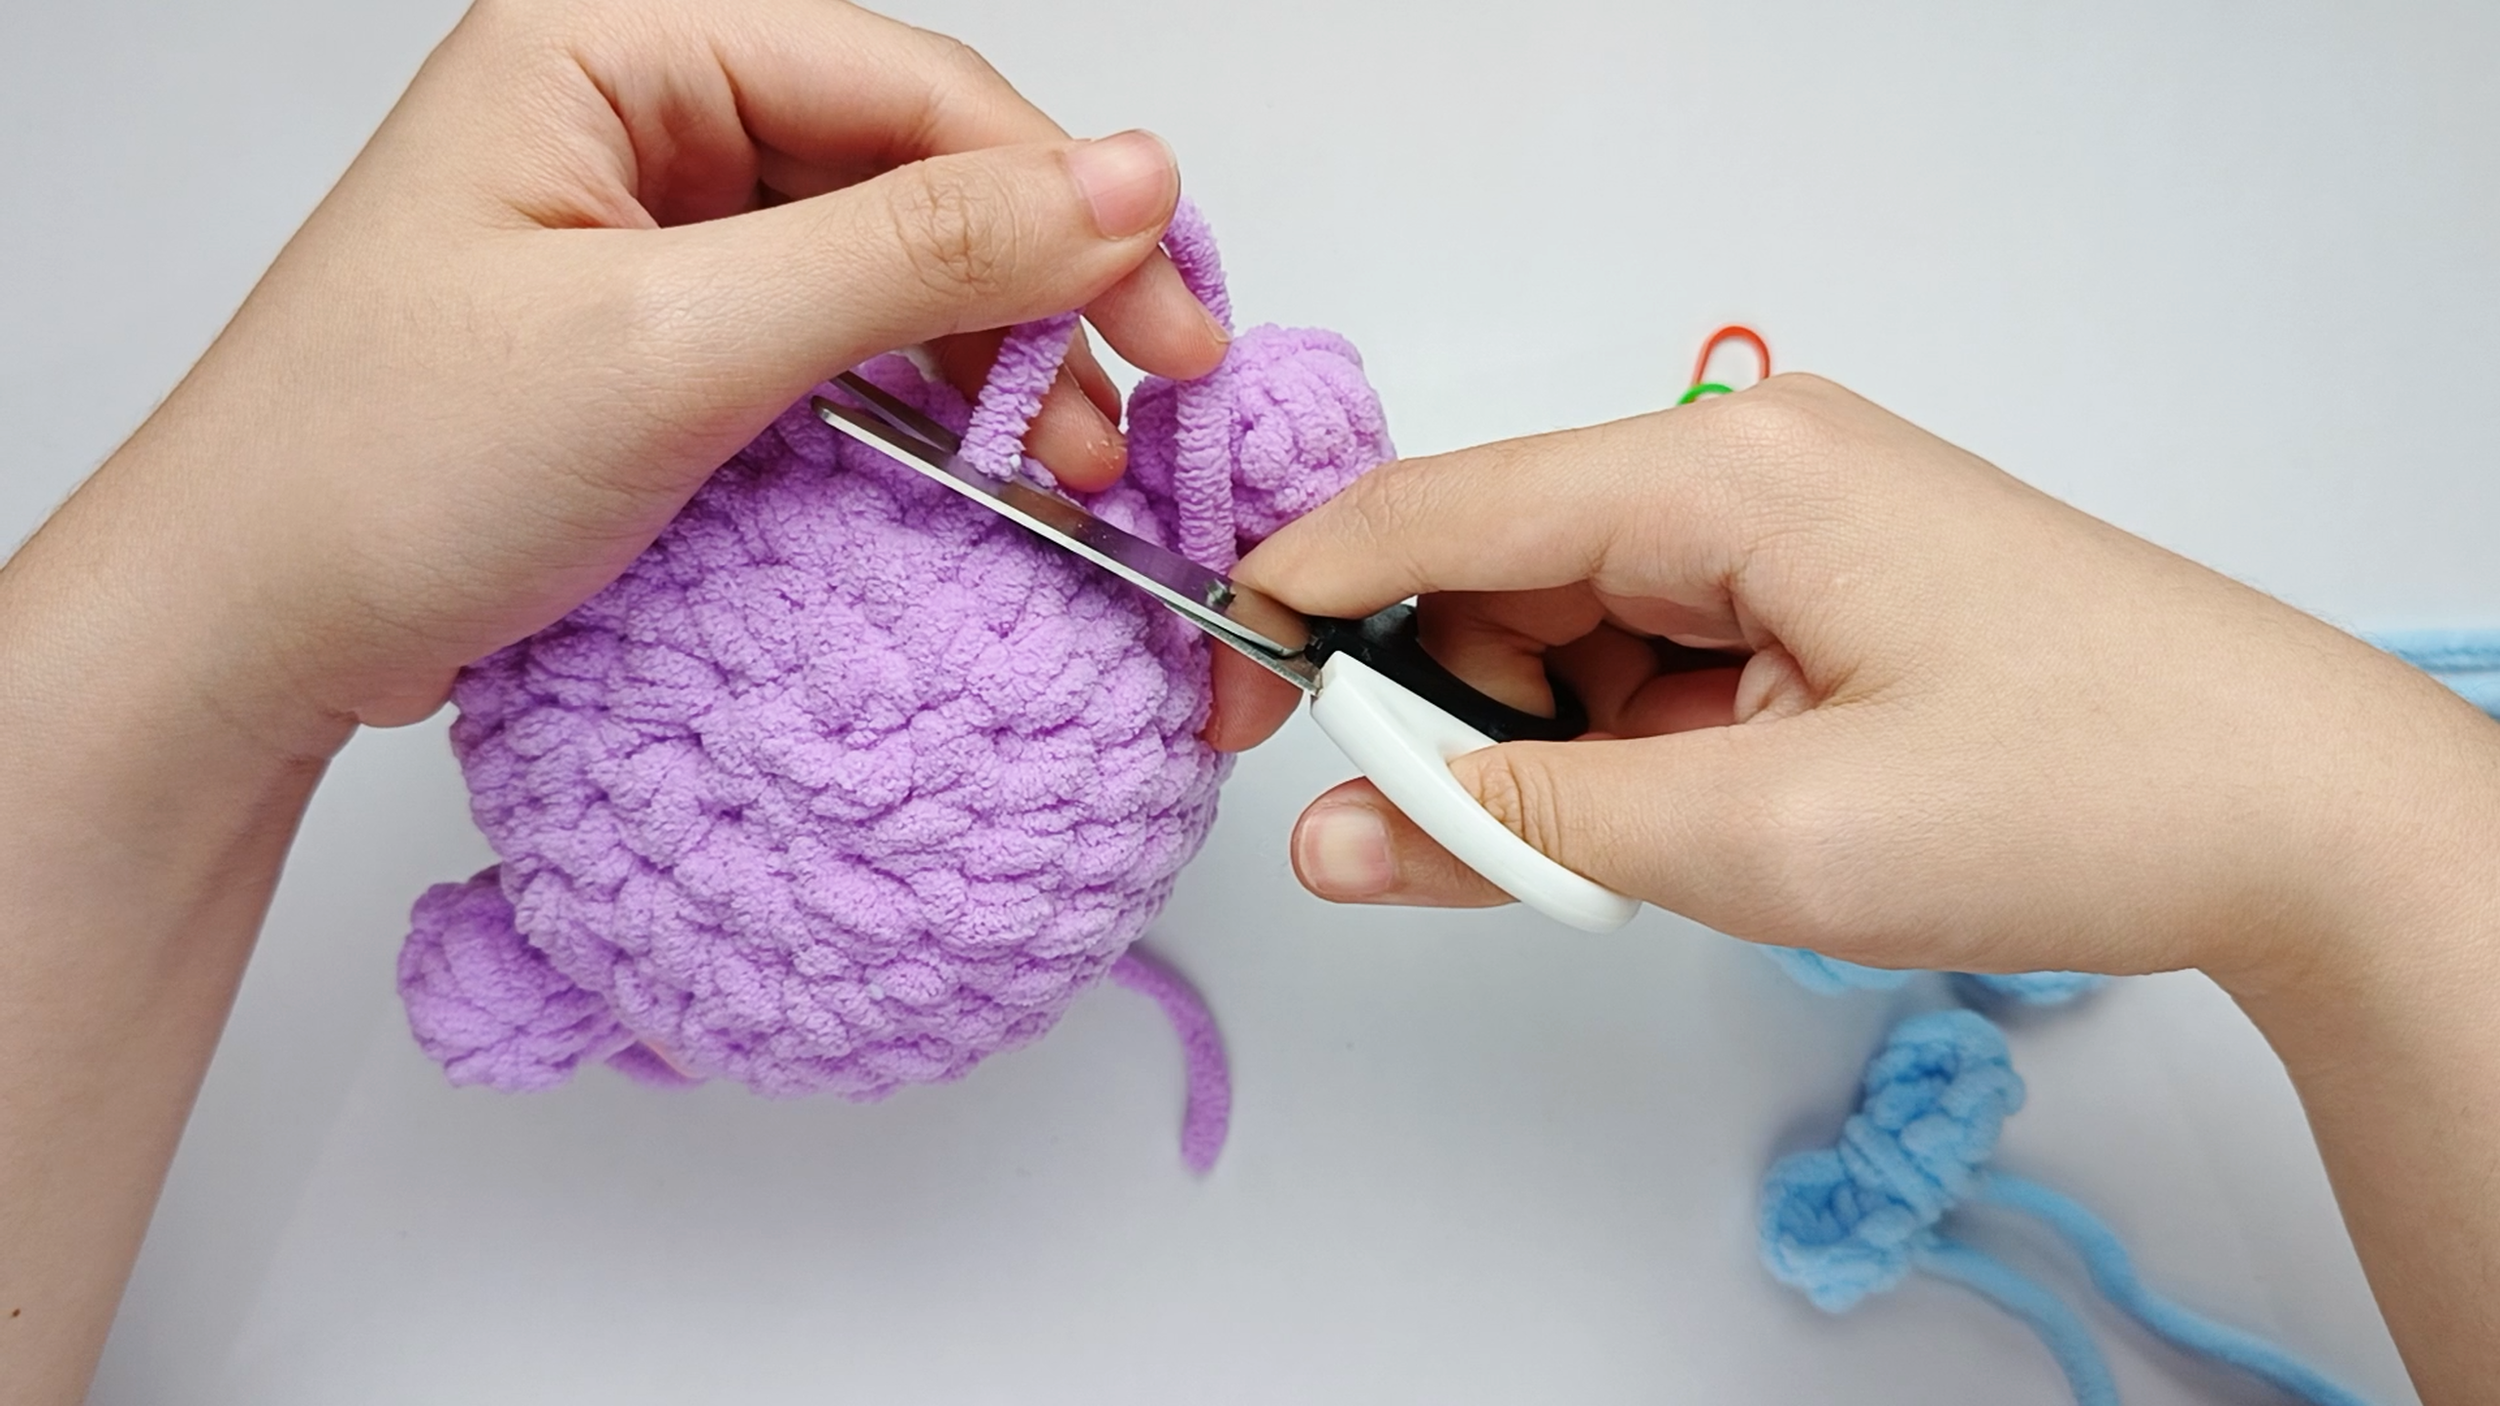
Trim the tail:
Trim the tail close to the surface and gently massage the area so the end disappears inside.
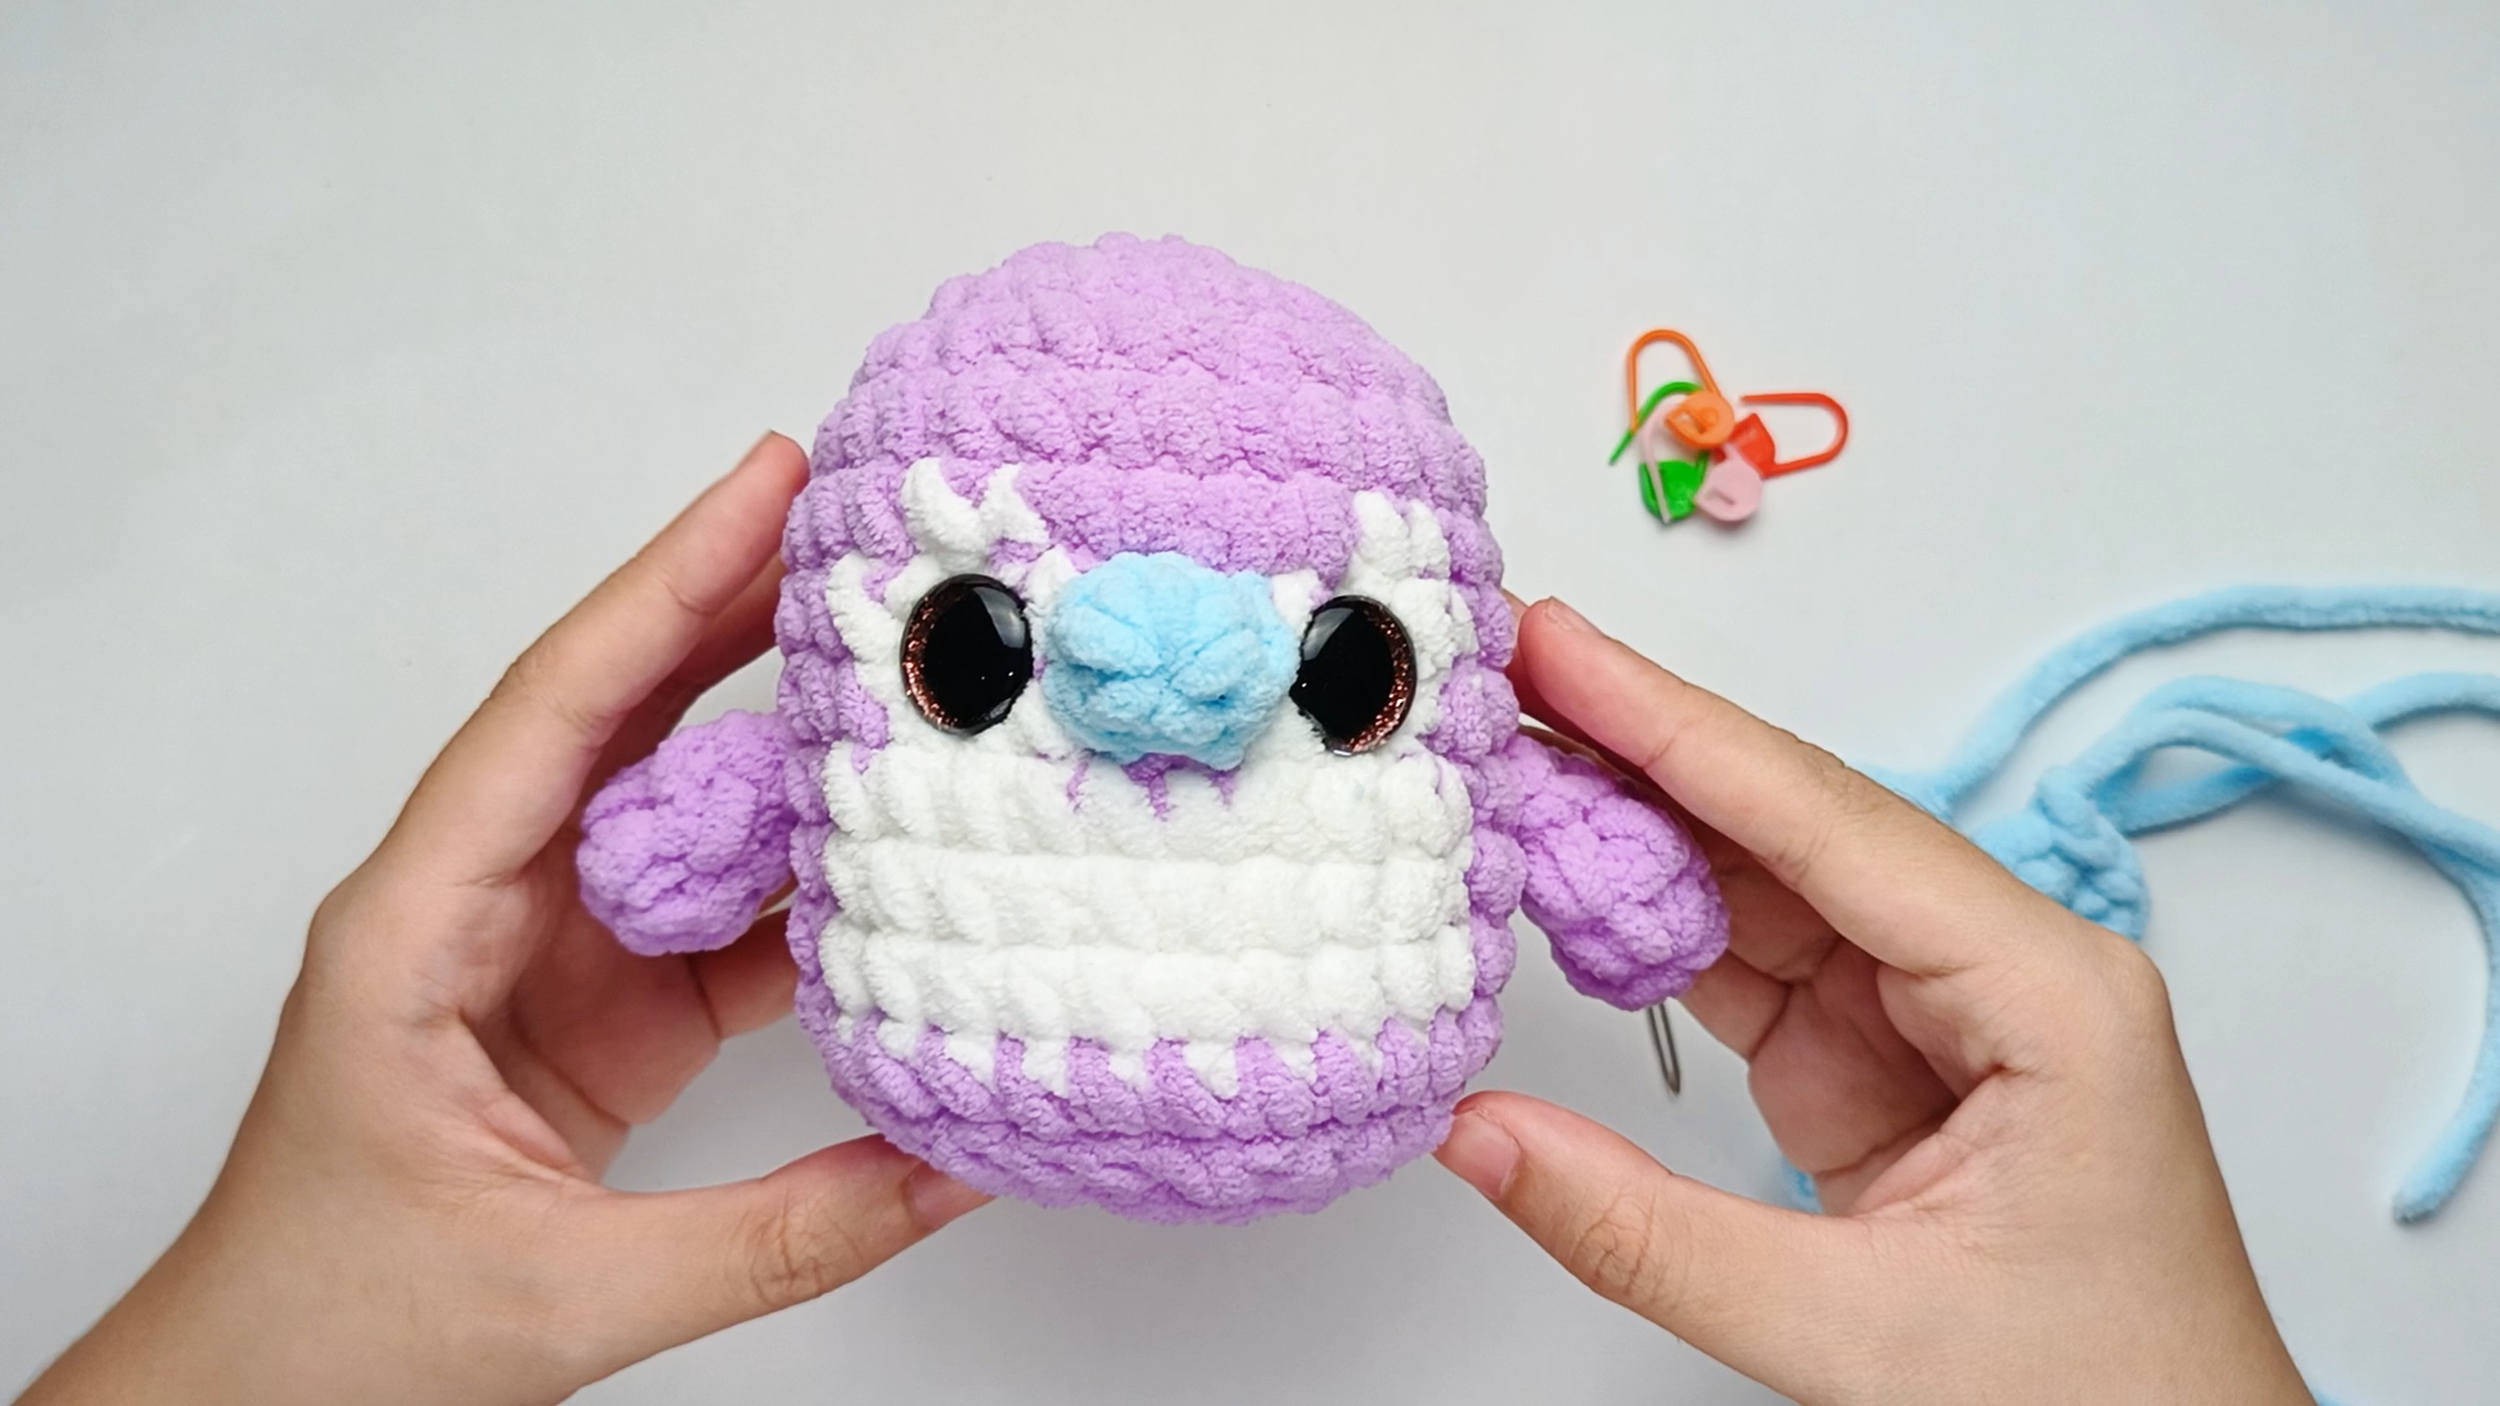
Attach the second Wing:
Repeat the same threading-and-sewing process for the second Wing on the opposite side. The Wings are now fully attached.
Attaching the Feet
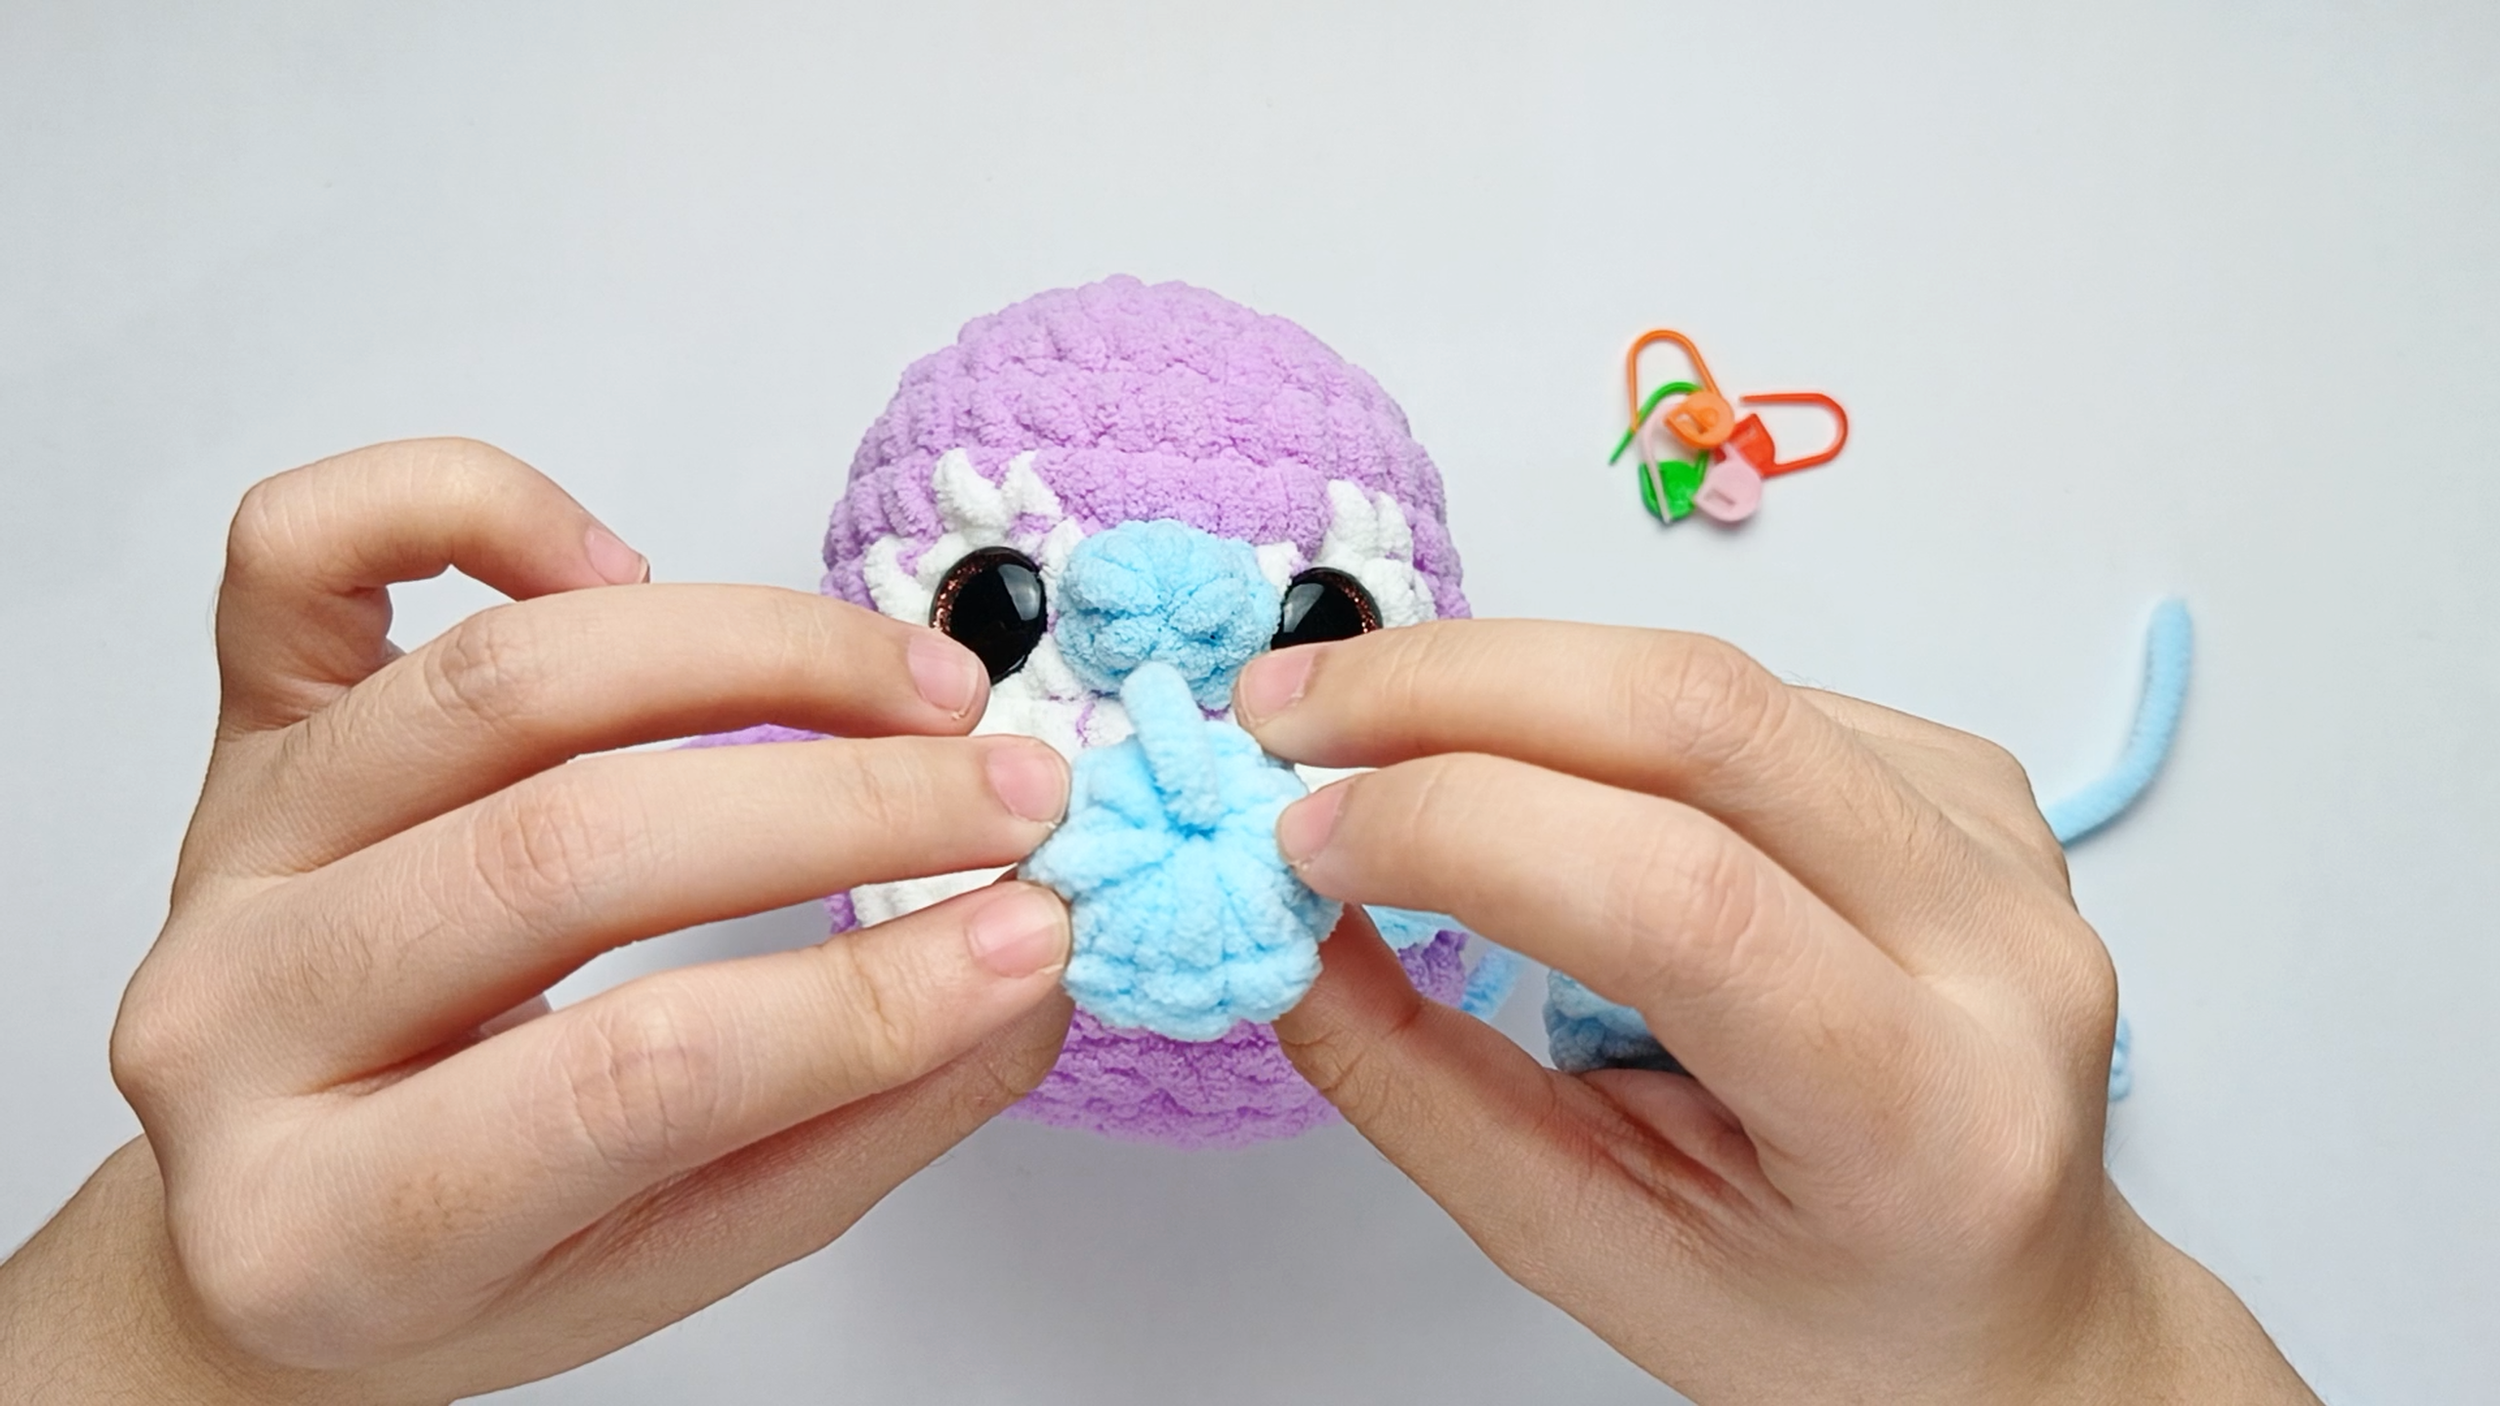
Position check:
The protruding side of the Feet should face upward, and the flat side downward. The Feet should sit near the front of the Body rather than directly underneath.
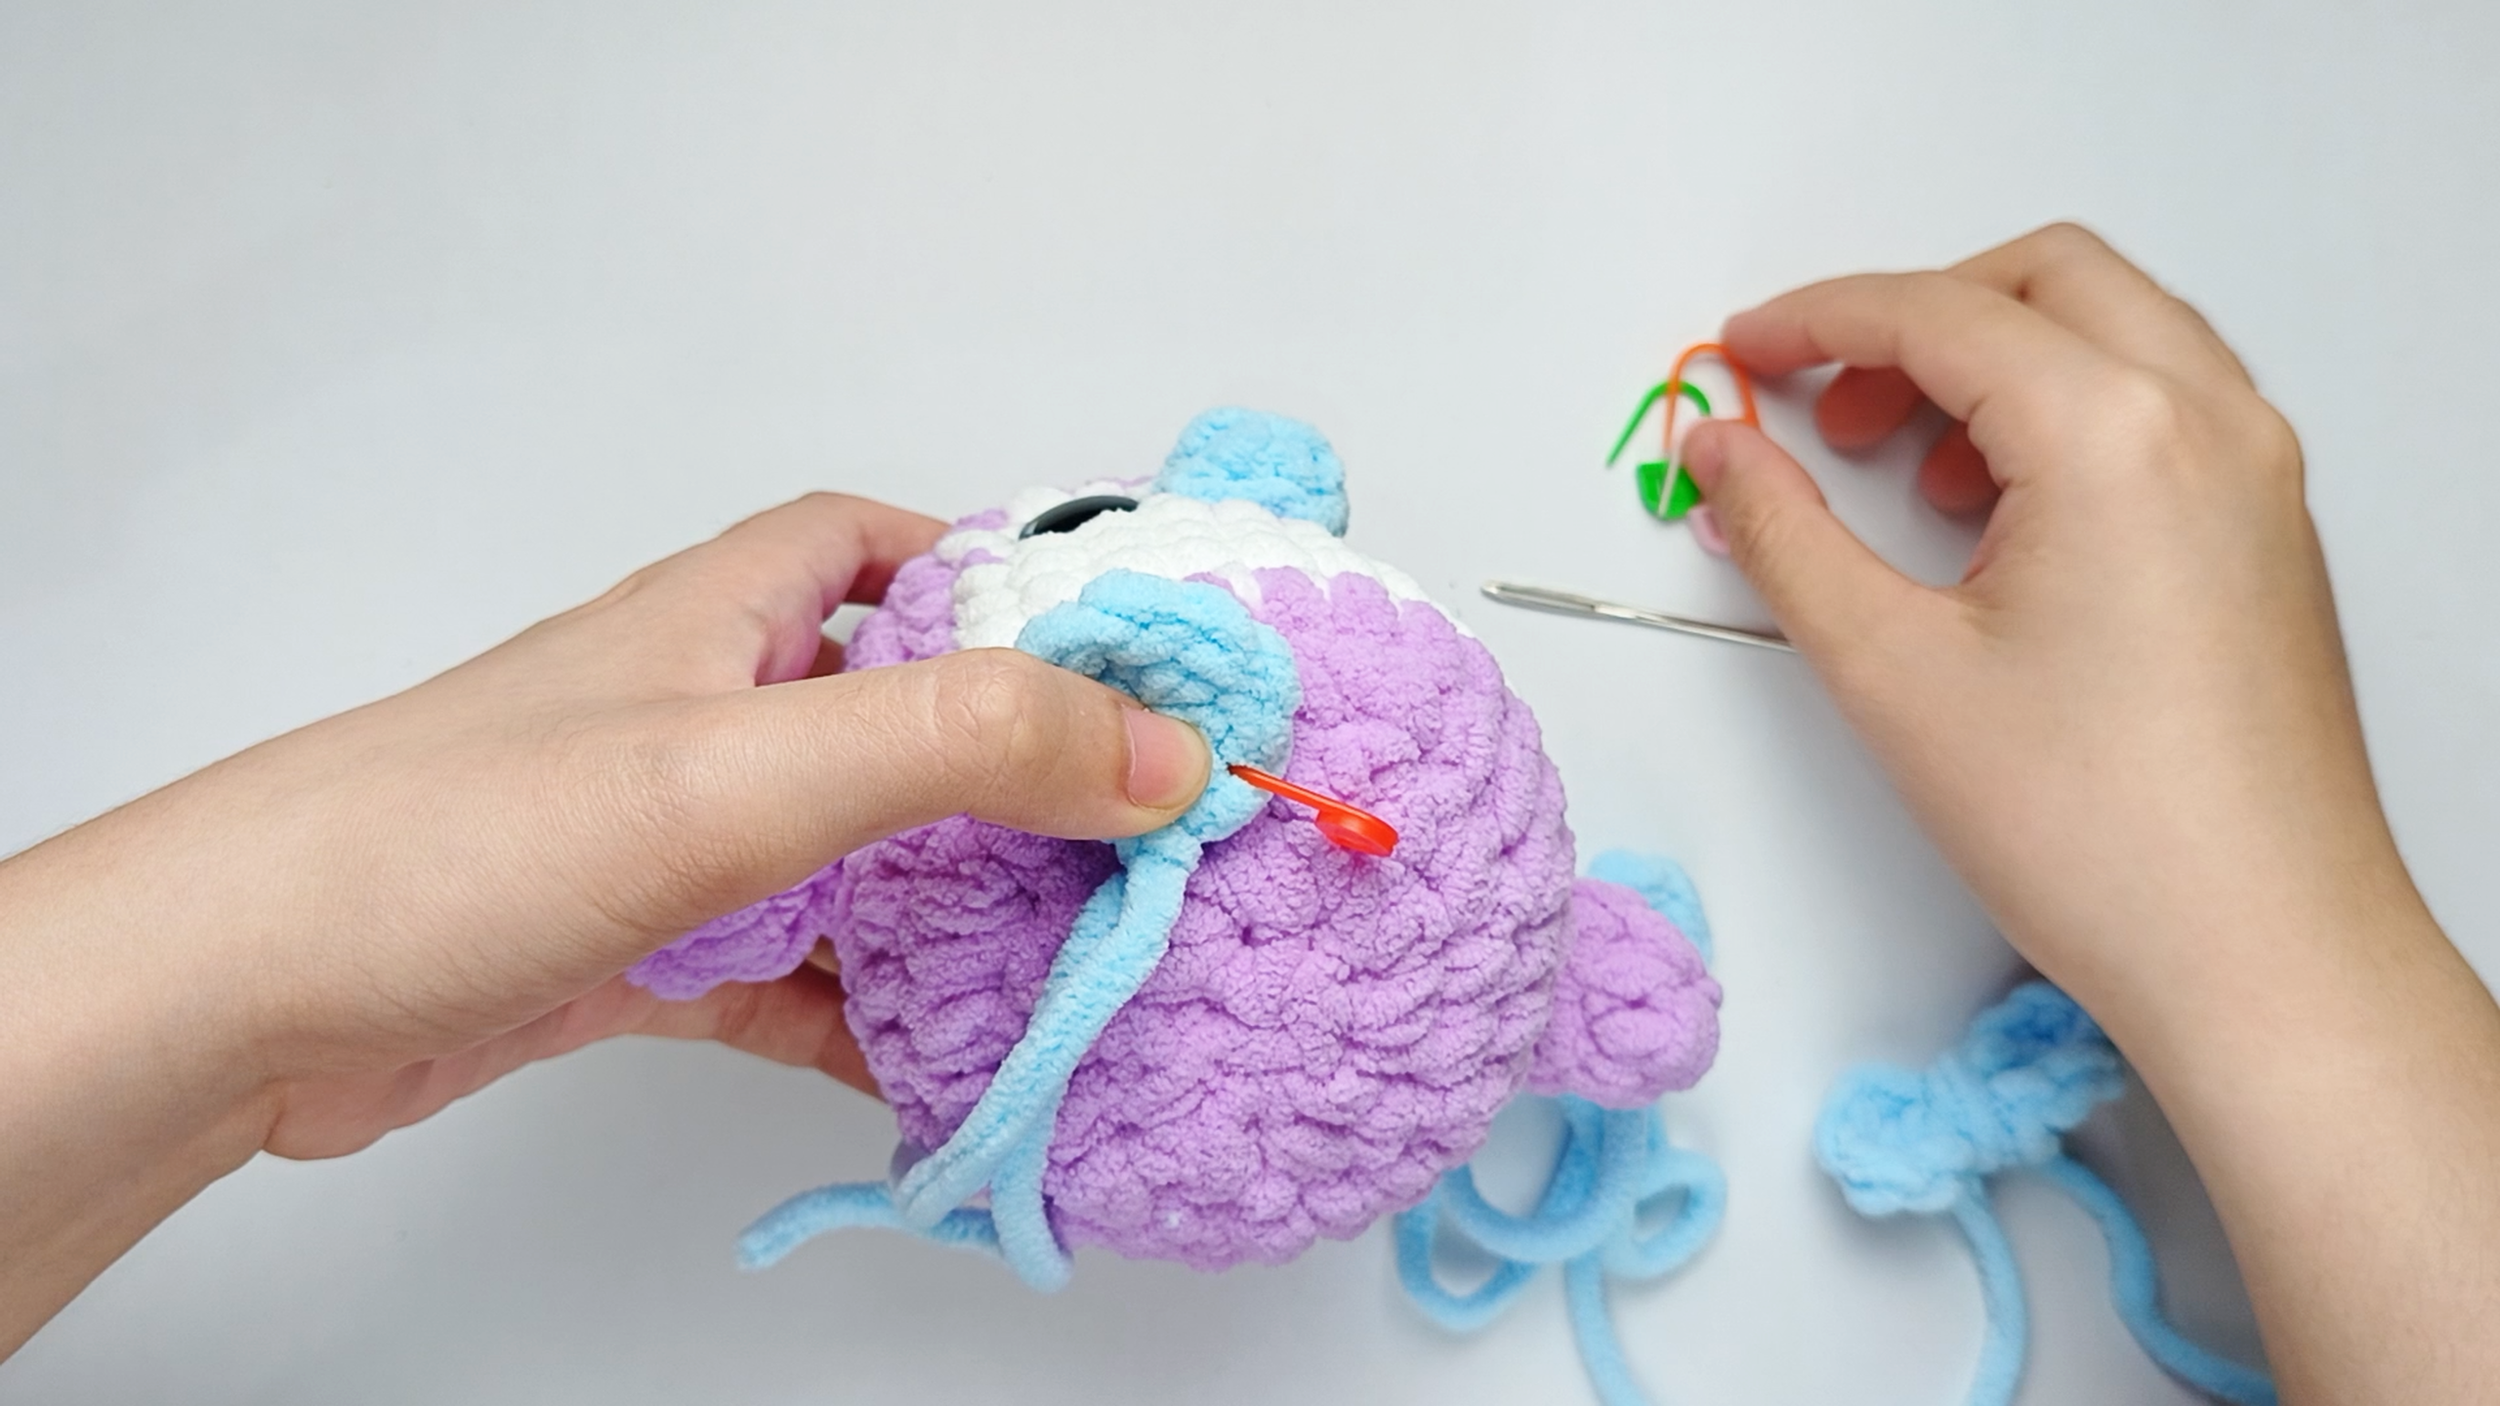
Position and secure the first Foot:
Position the first Foot underneath the Body, leaving about 2 stitches of space between the Feet so they look balanced. Pin it with stitch markers to check the position before sewing.
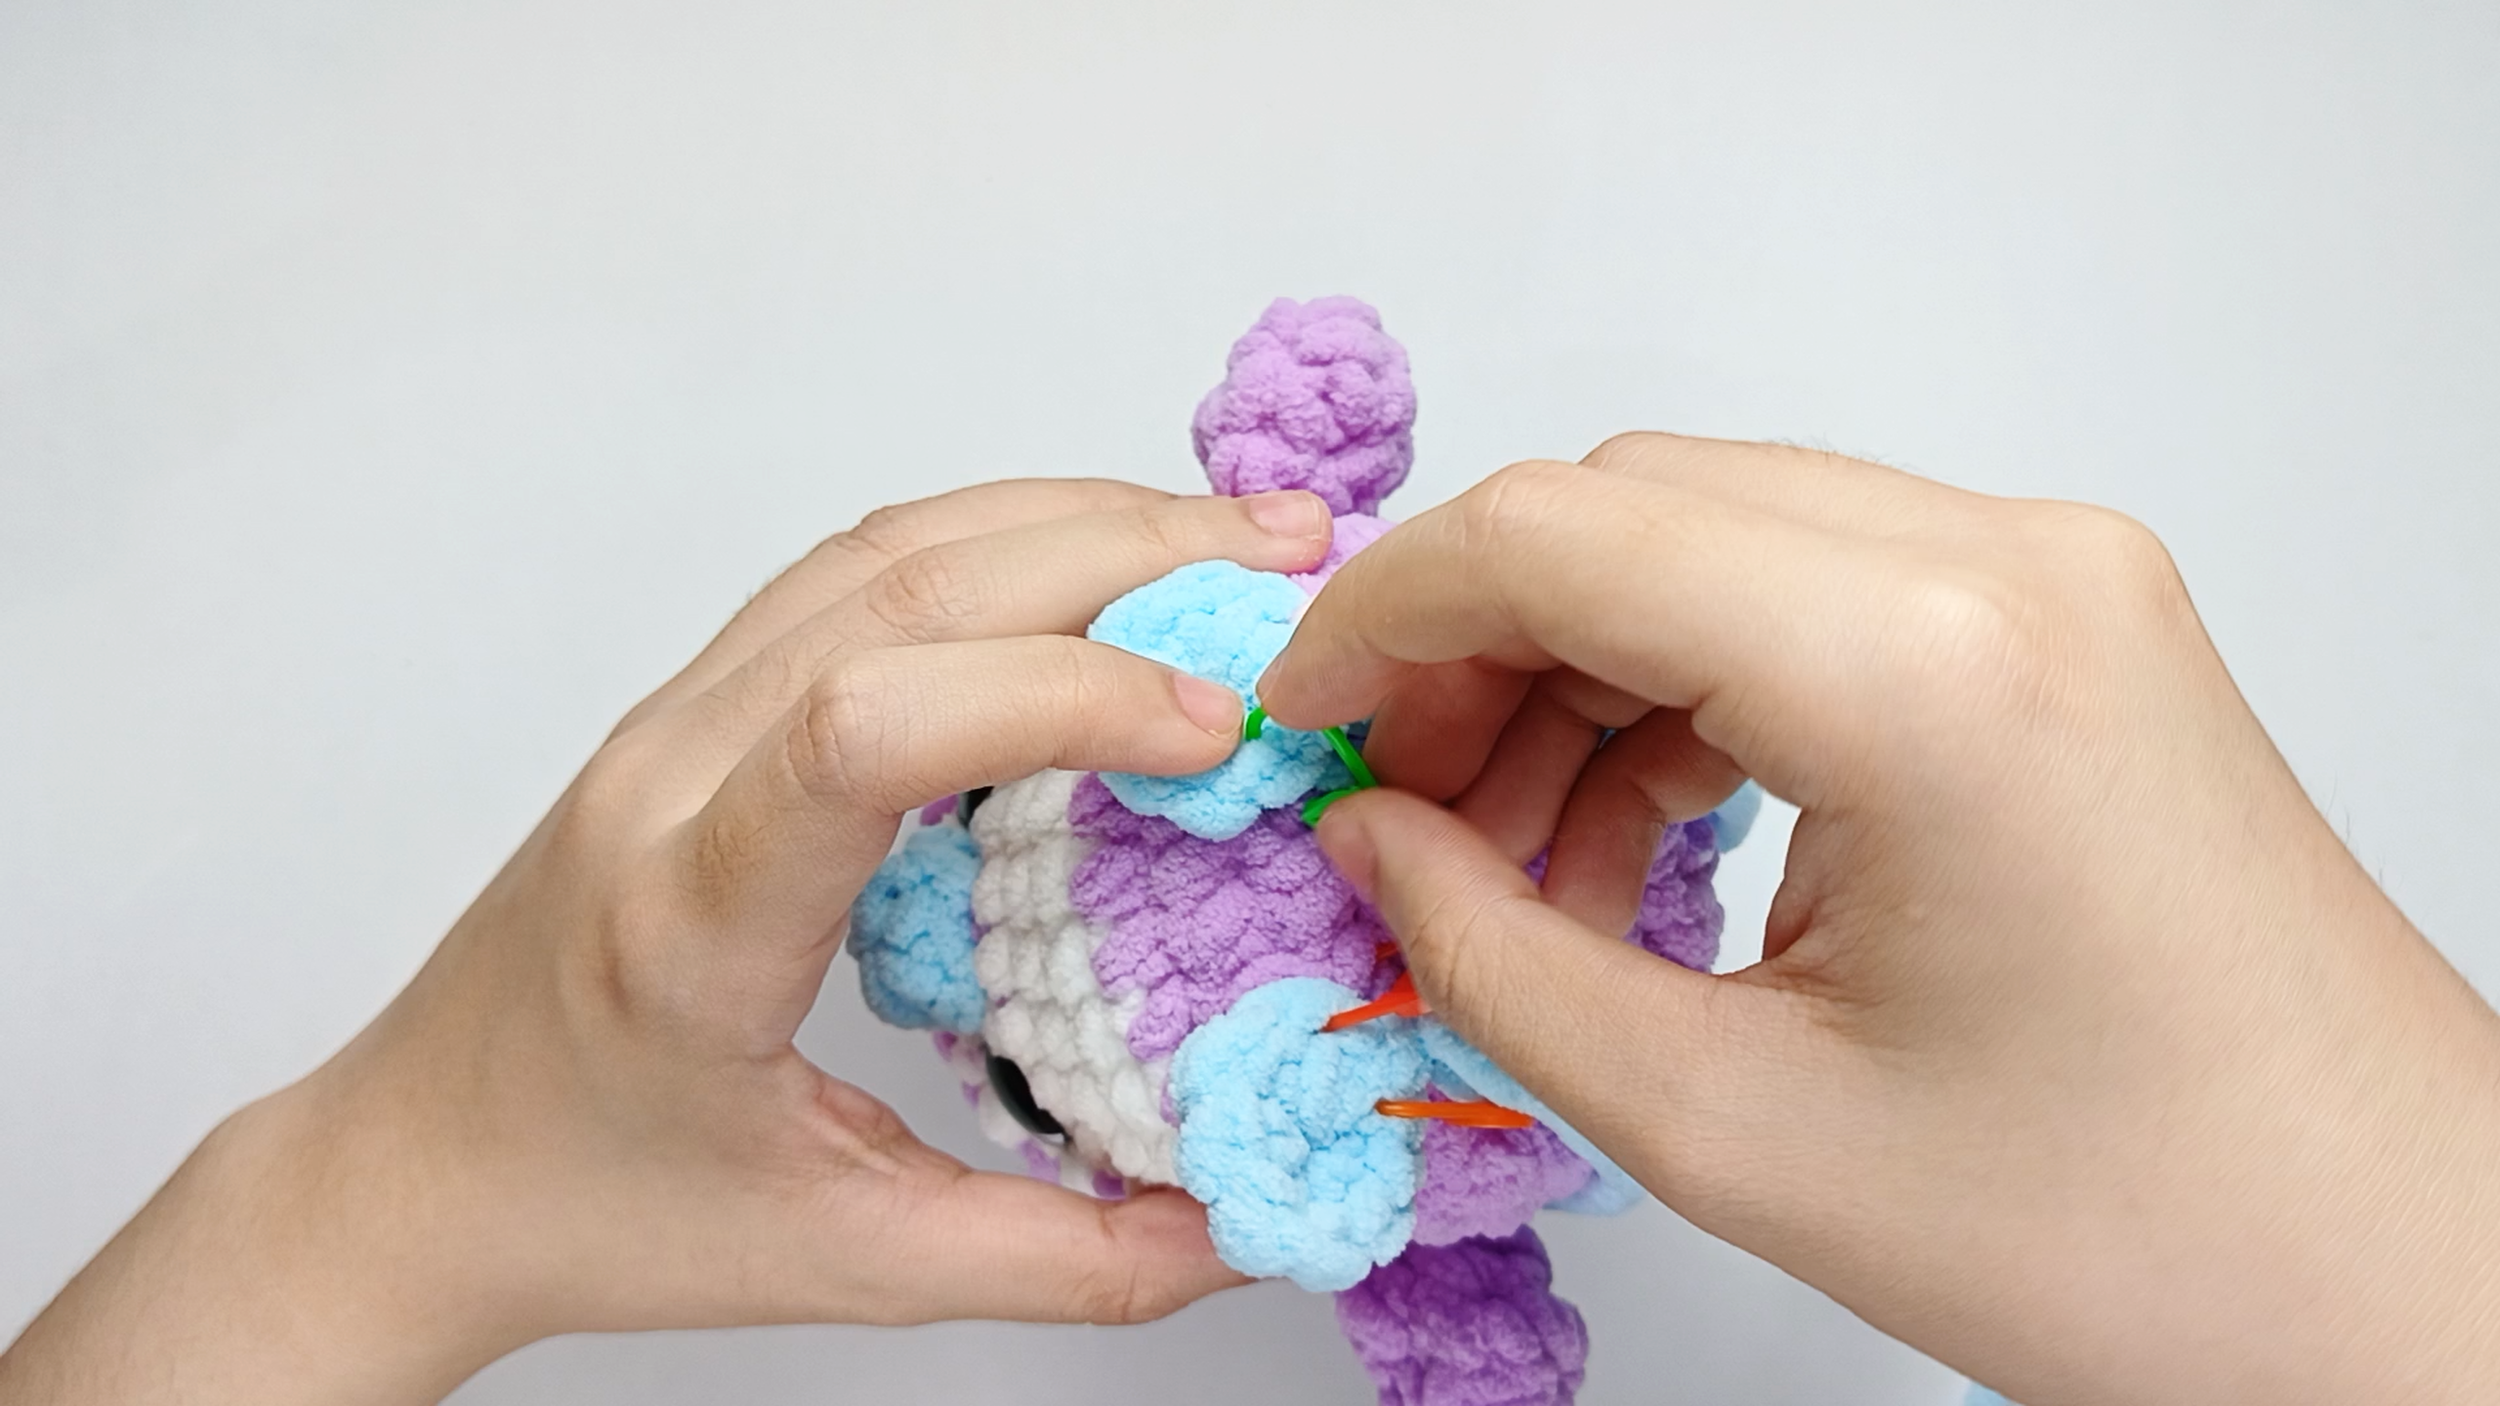
Position and secure the second Foot:
Position the second Foot on the opposite side, about 2 stitches away from the first Foot. Pin it with stitch markers to check the position before sewing.
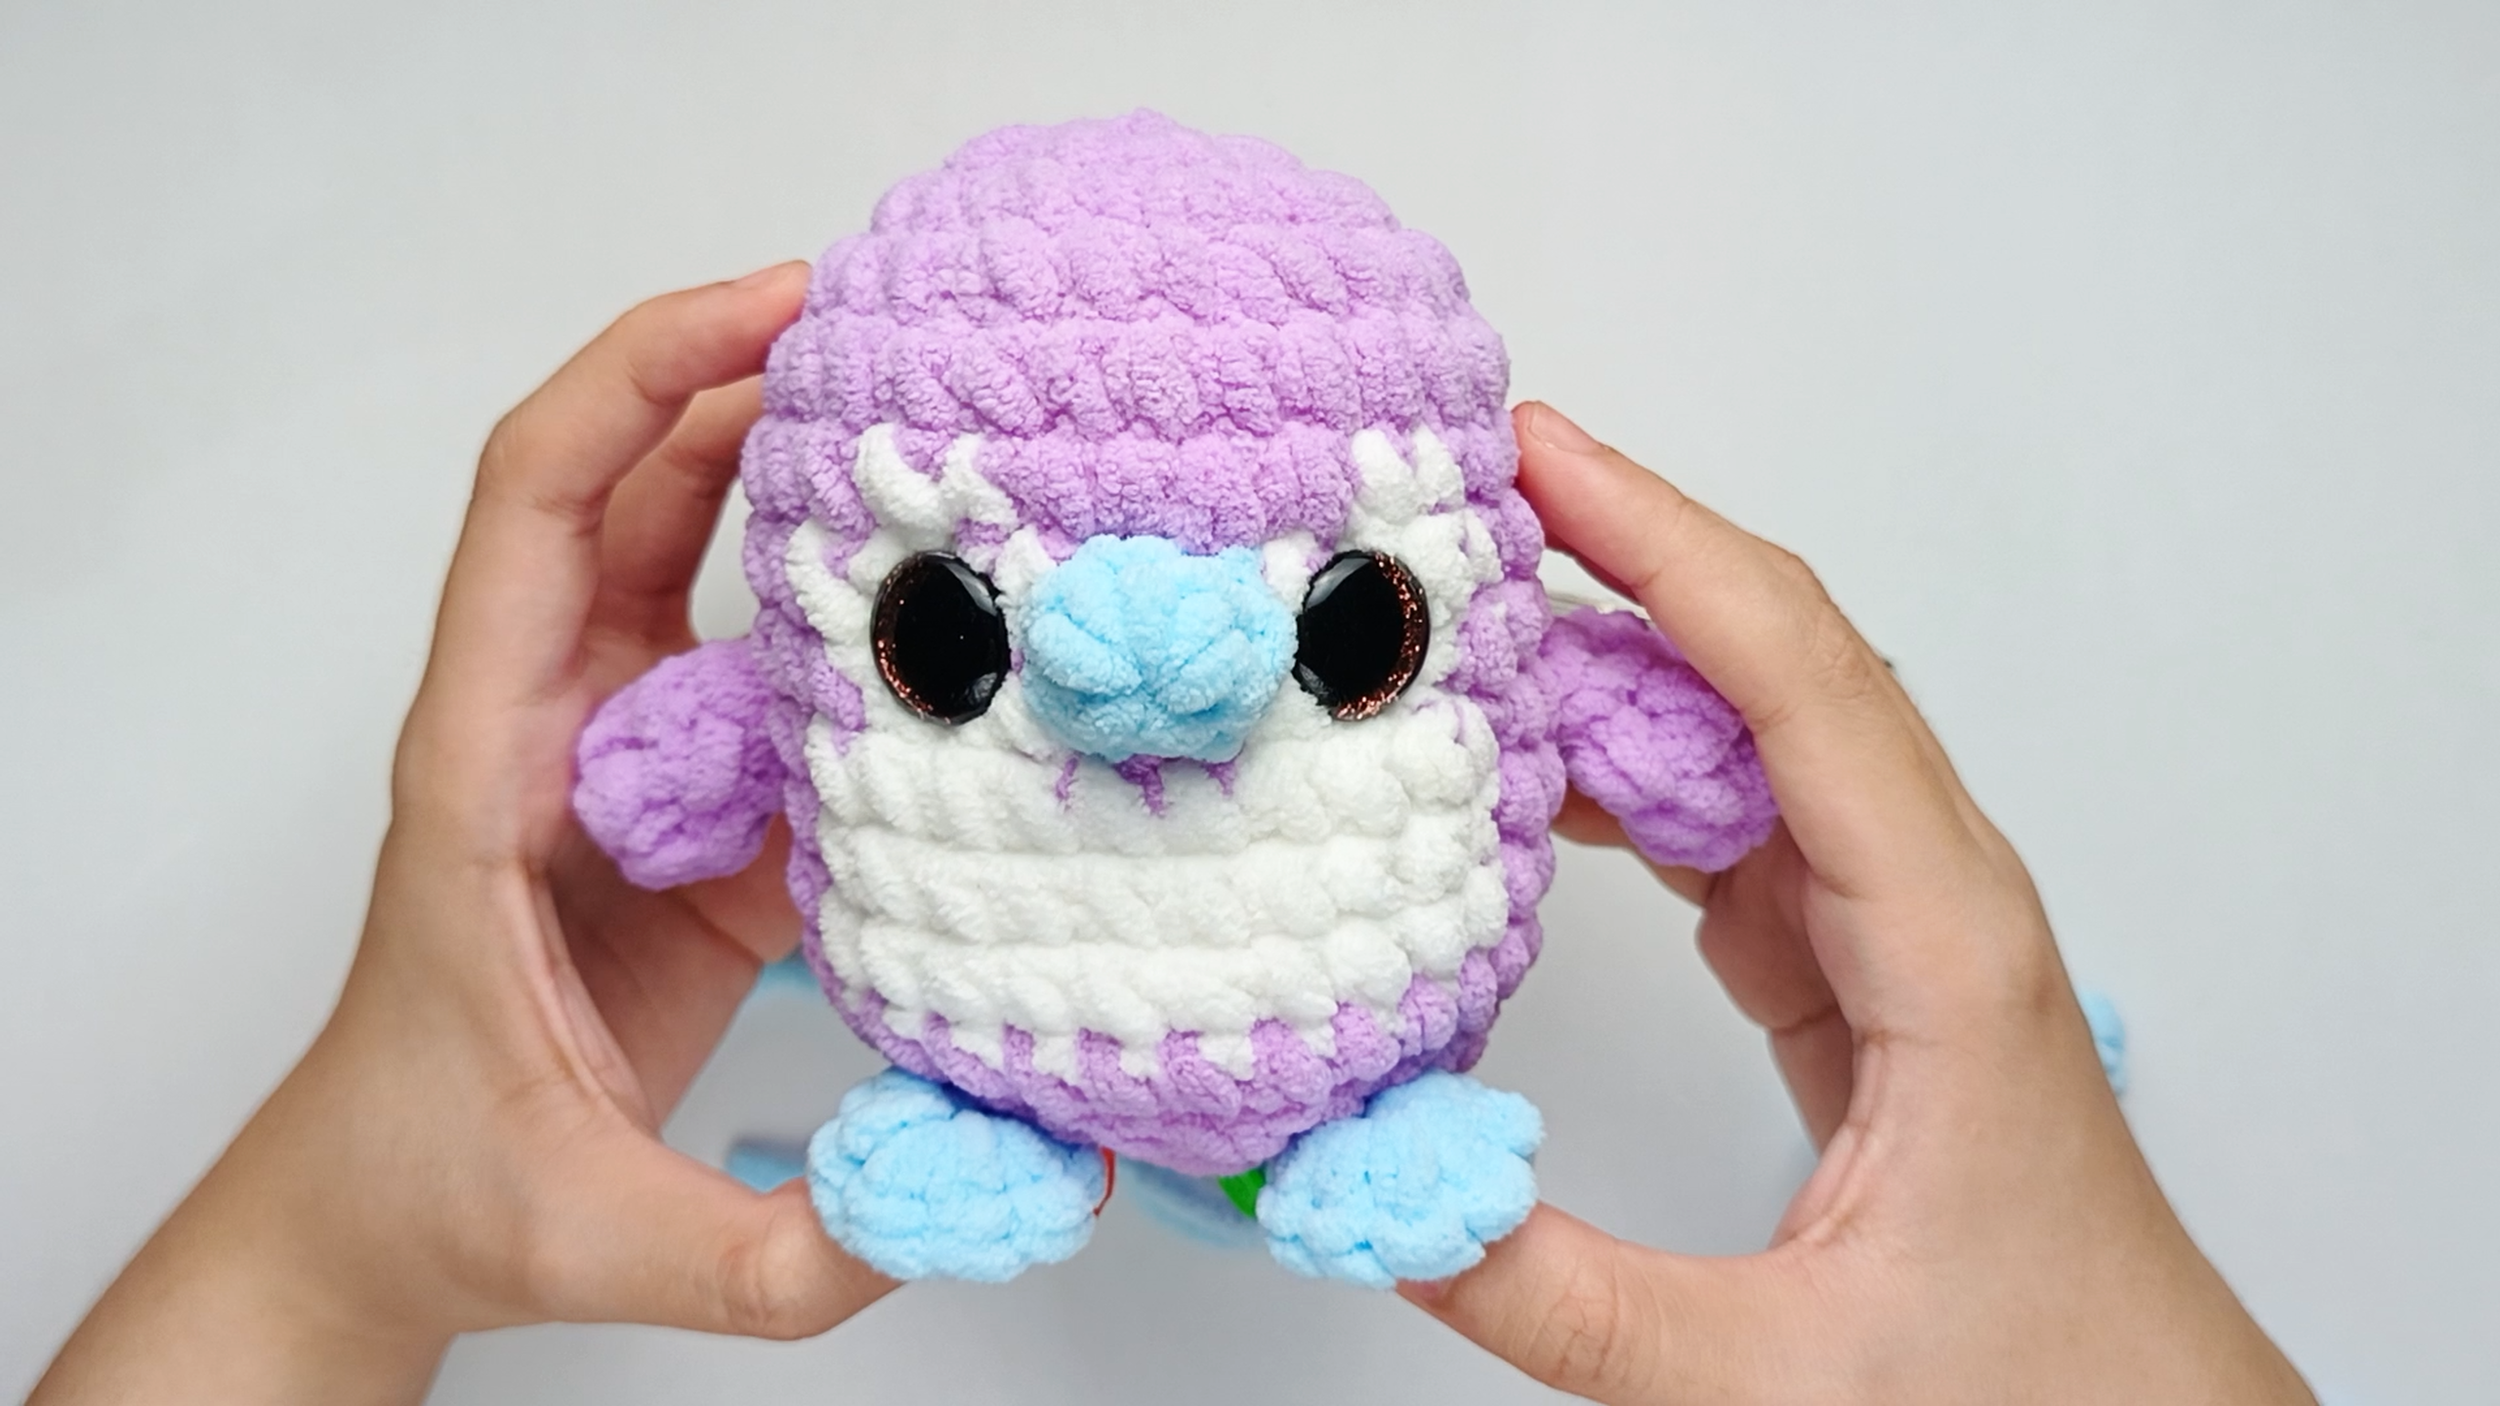
Tip: You can also line each Foot up underneath each eye for a balanced look. The Feet should sit near the front of the Body rather than directly underneath. Pin them with stitch markers first so you can check the position.
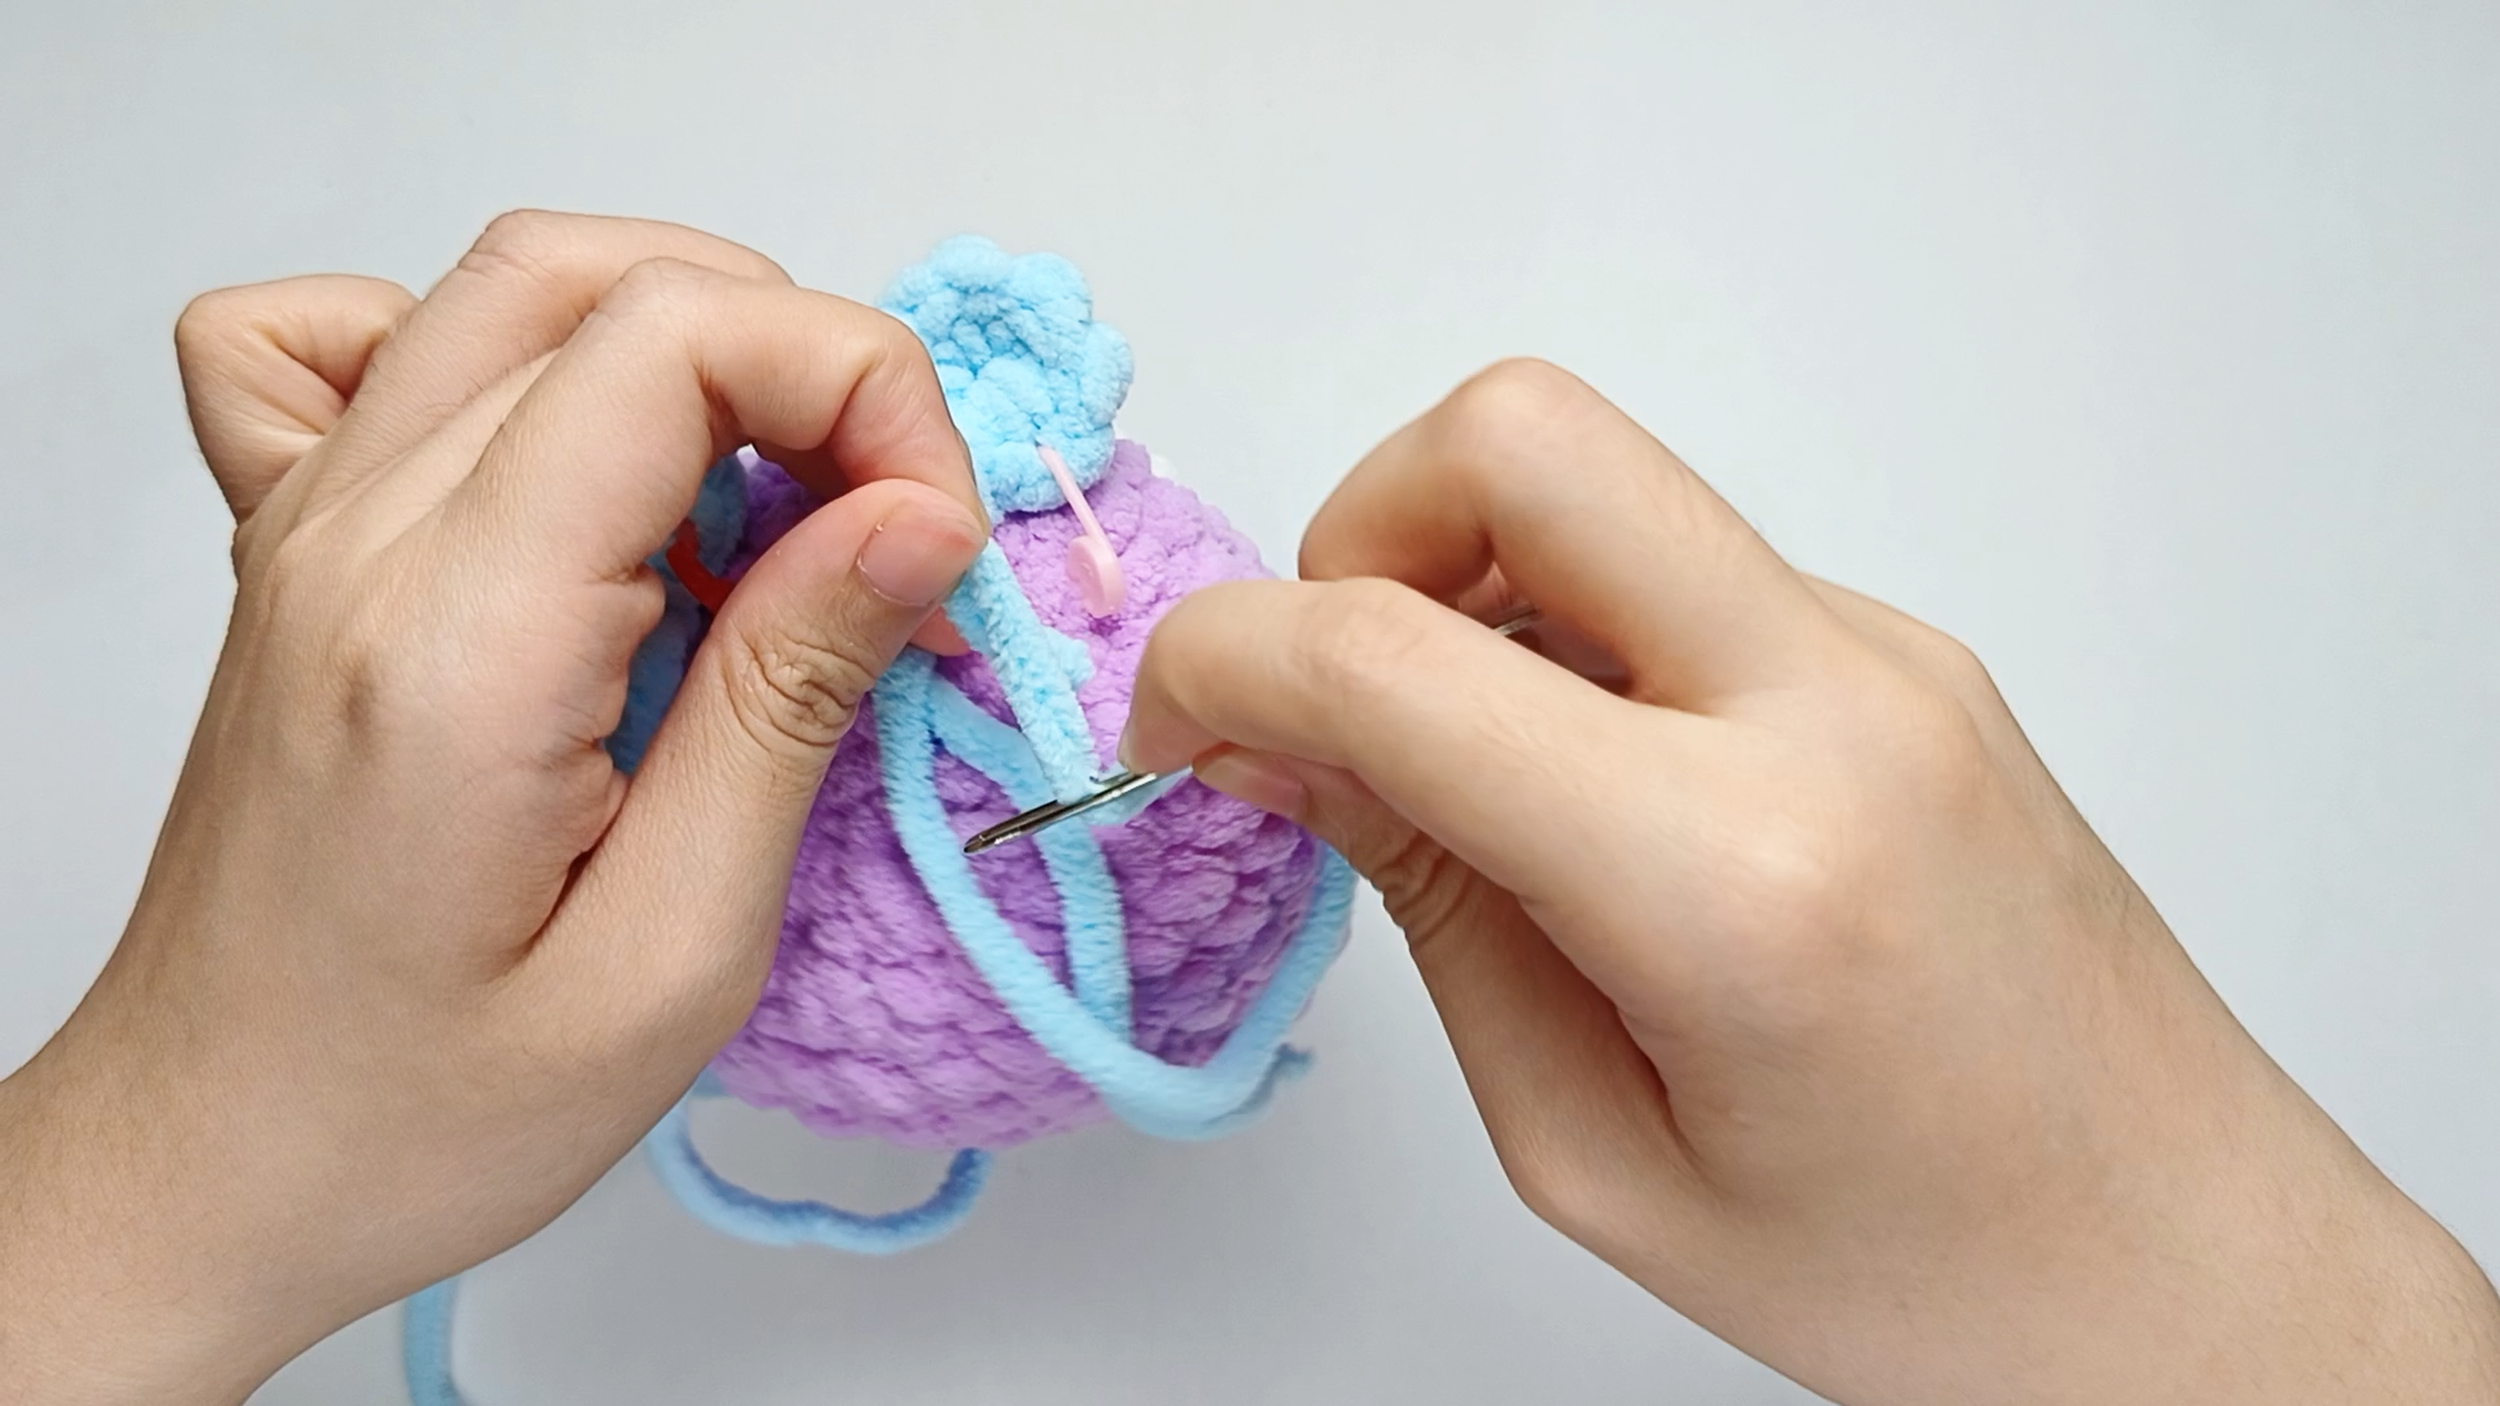
Thread the needle:
Thread the yarn tail from the Foot onto your yarn needle.
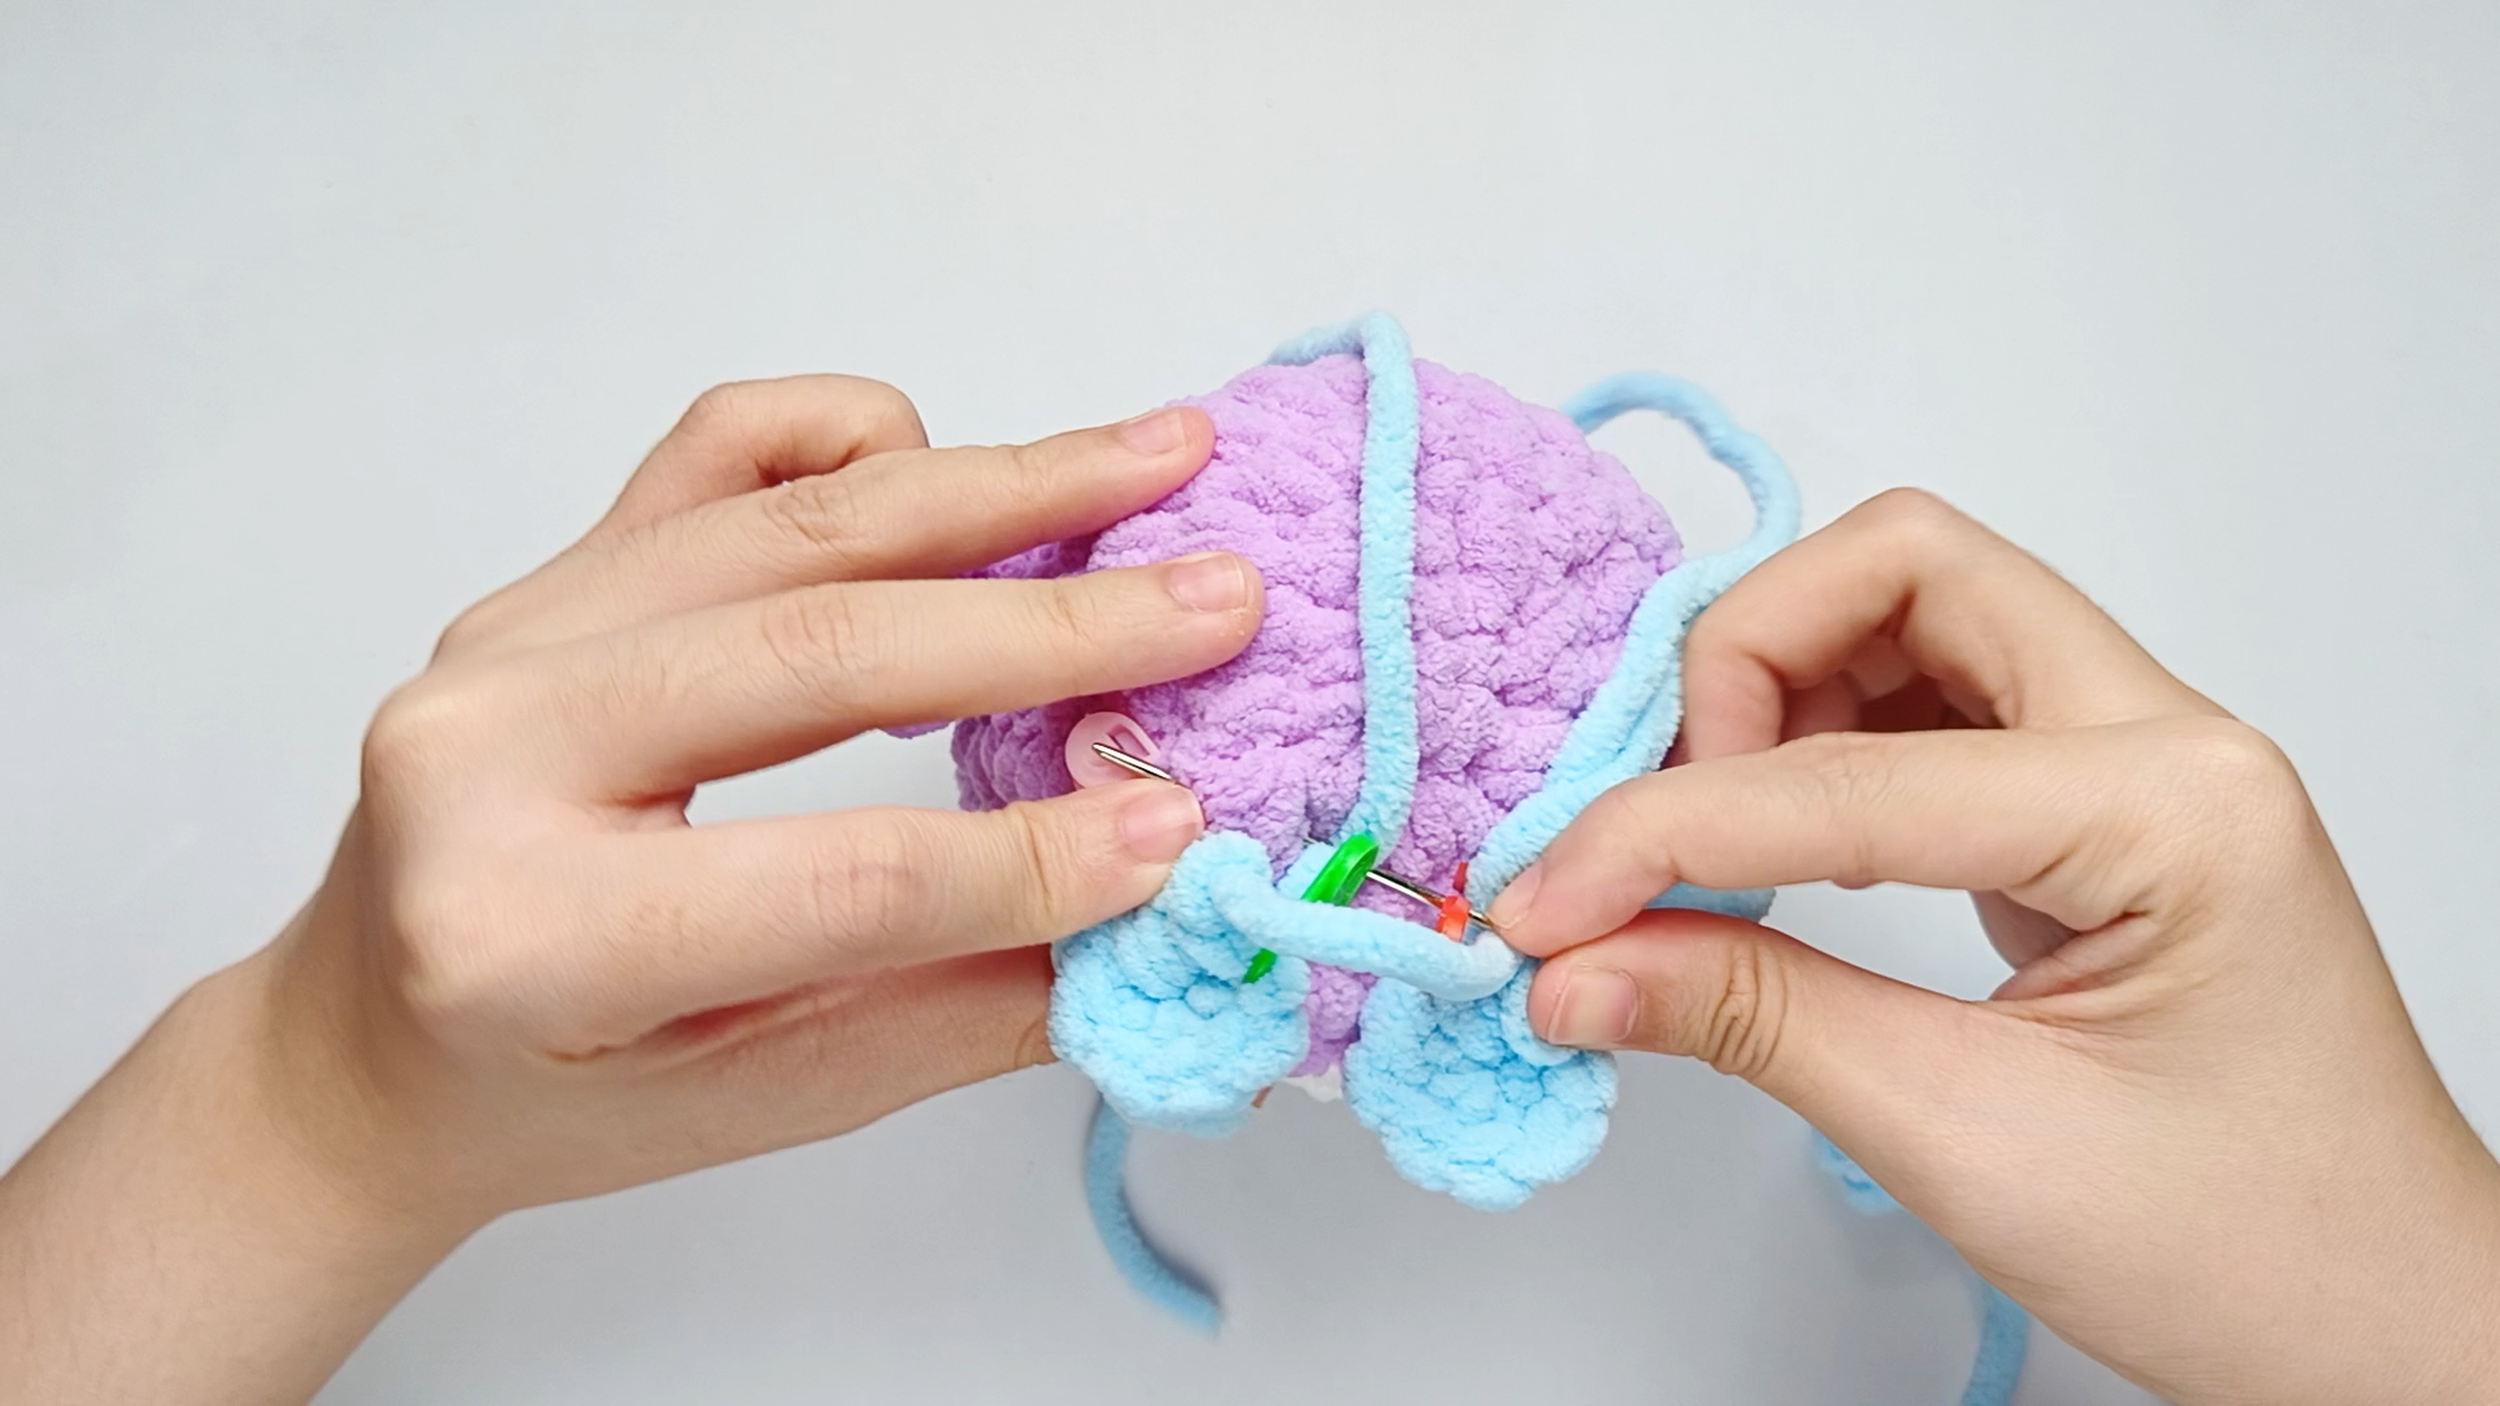
Into the Body:
Insert the needle into one stitch of the Body, lining it up with the next stitch on the piece. Pull the yarn all the way through.
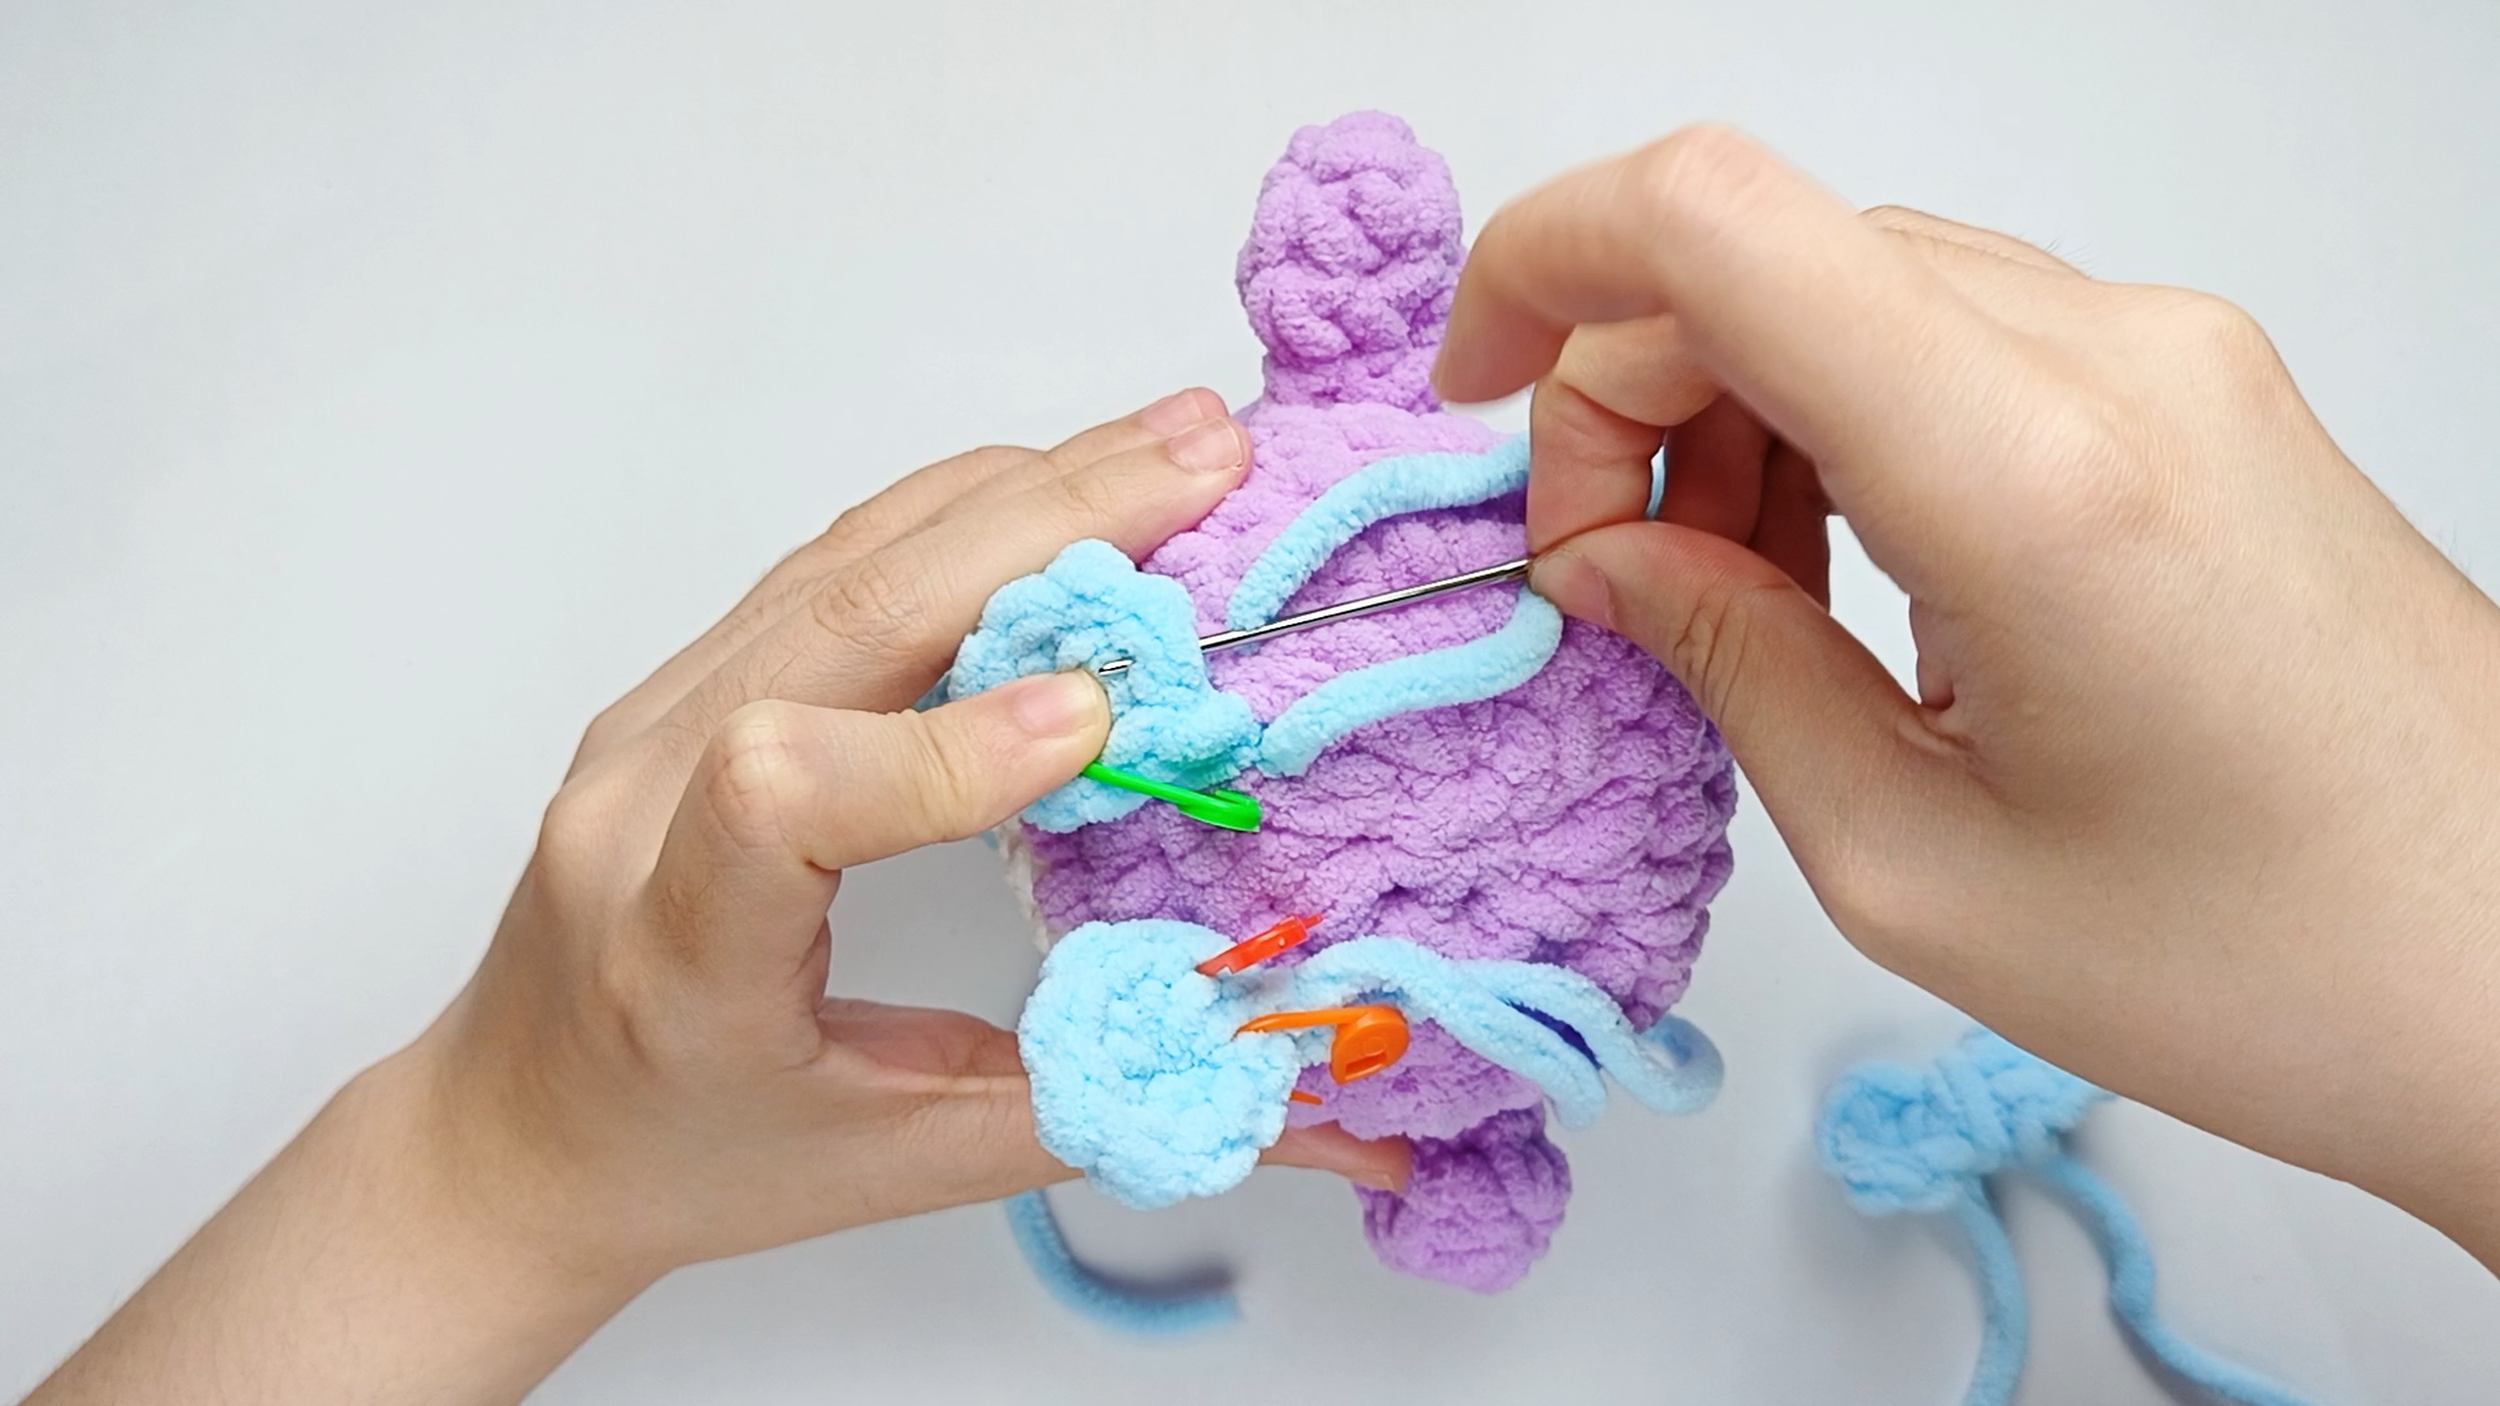
Up through the piece:
Bring the needle up through the next stitch on the Foot. Pull the yarn all the way through.
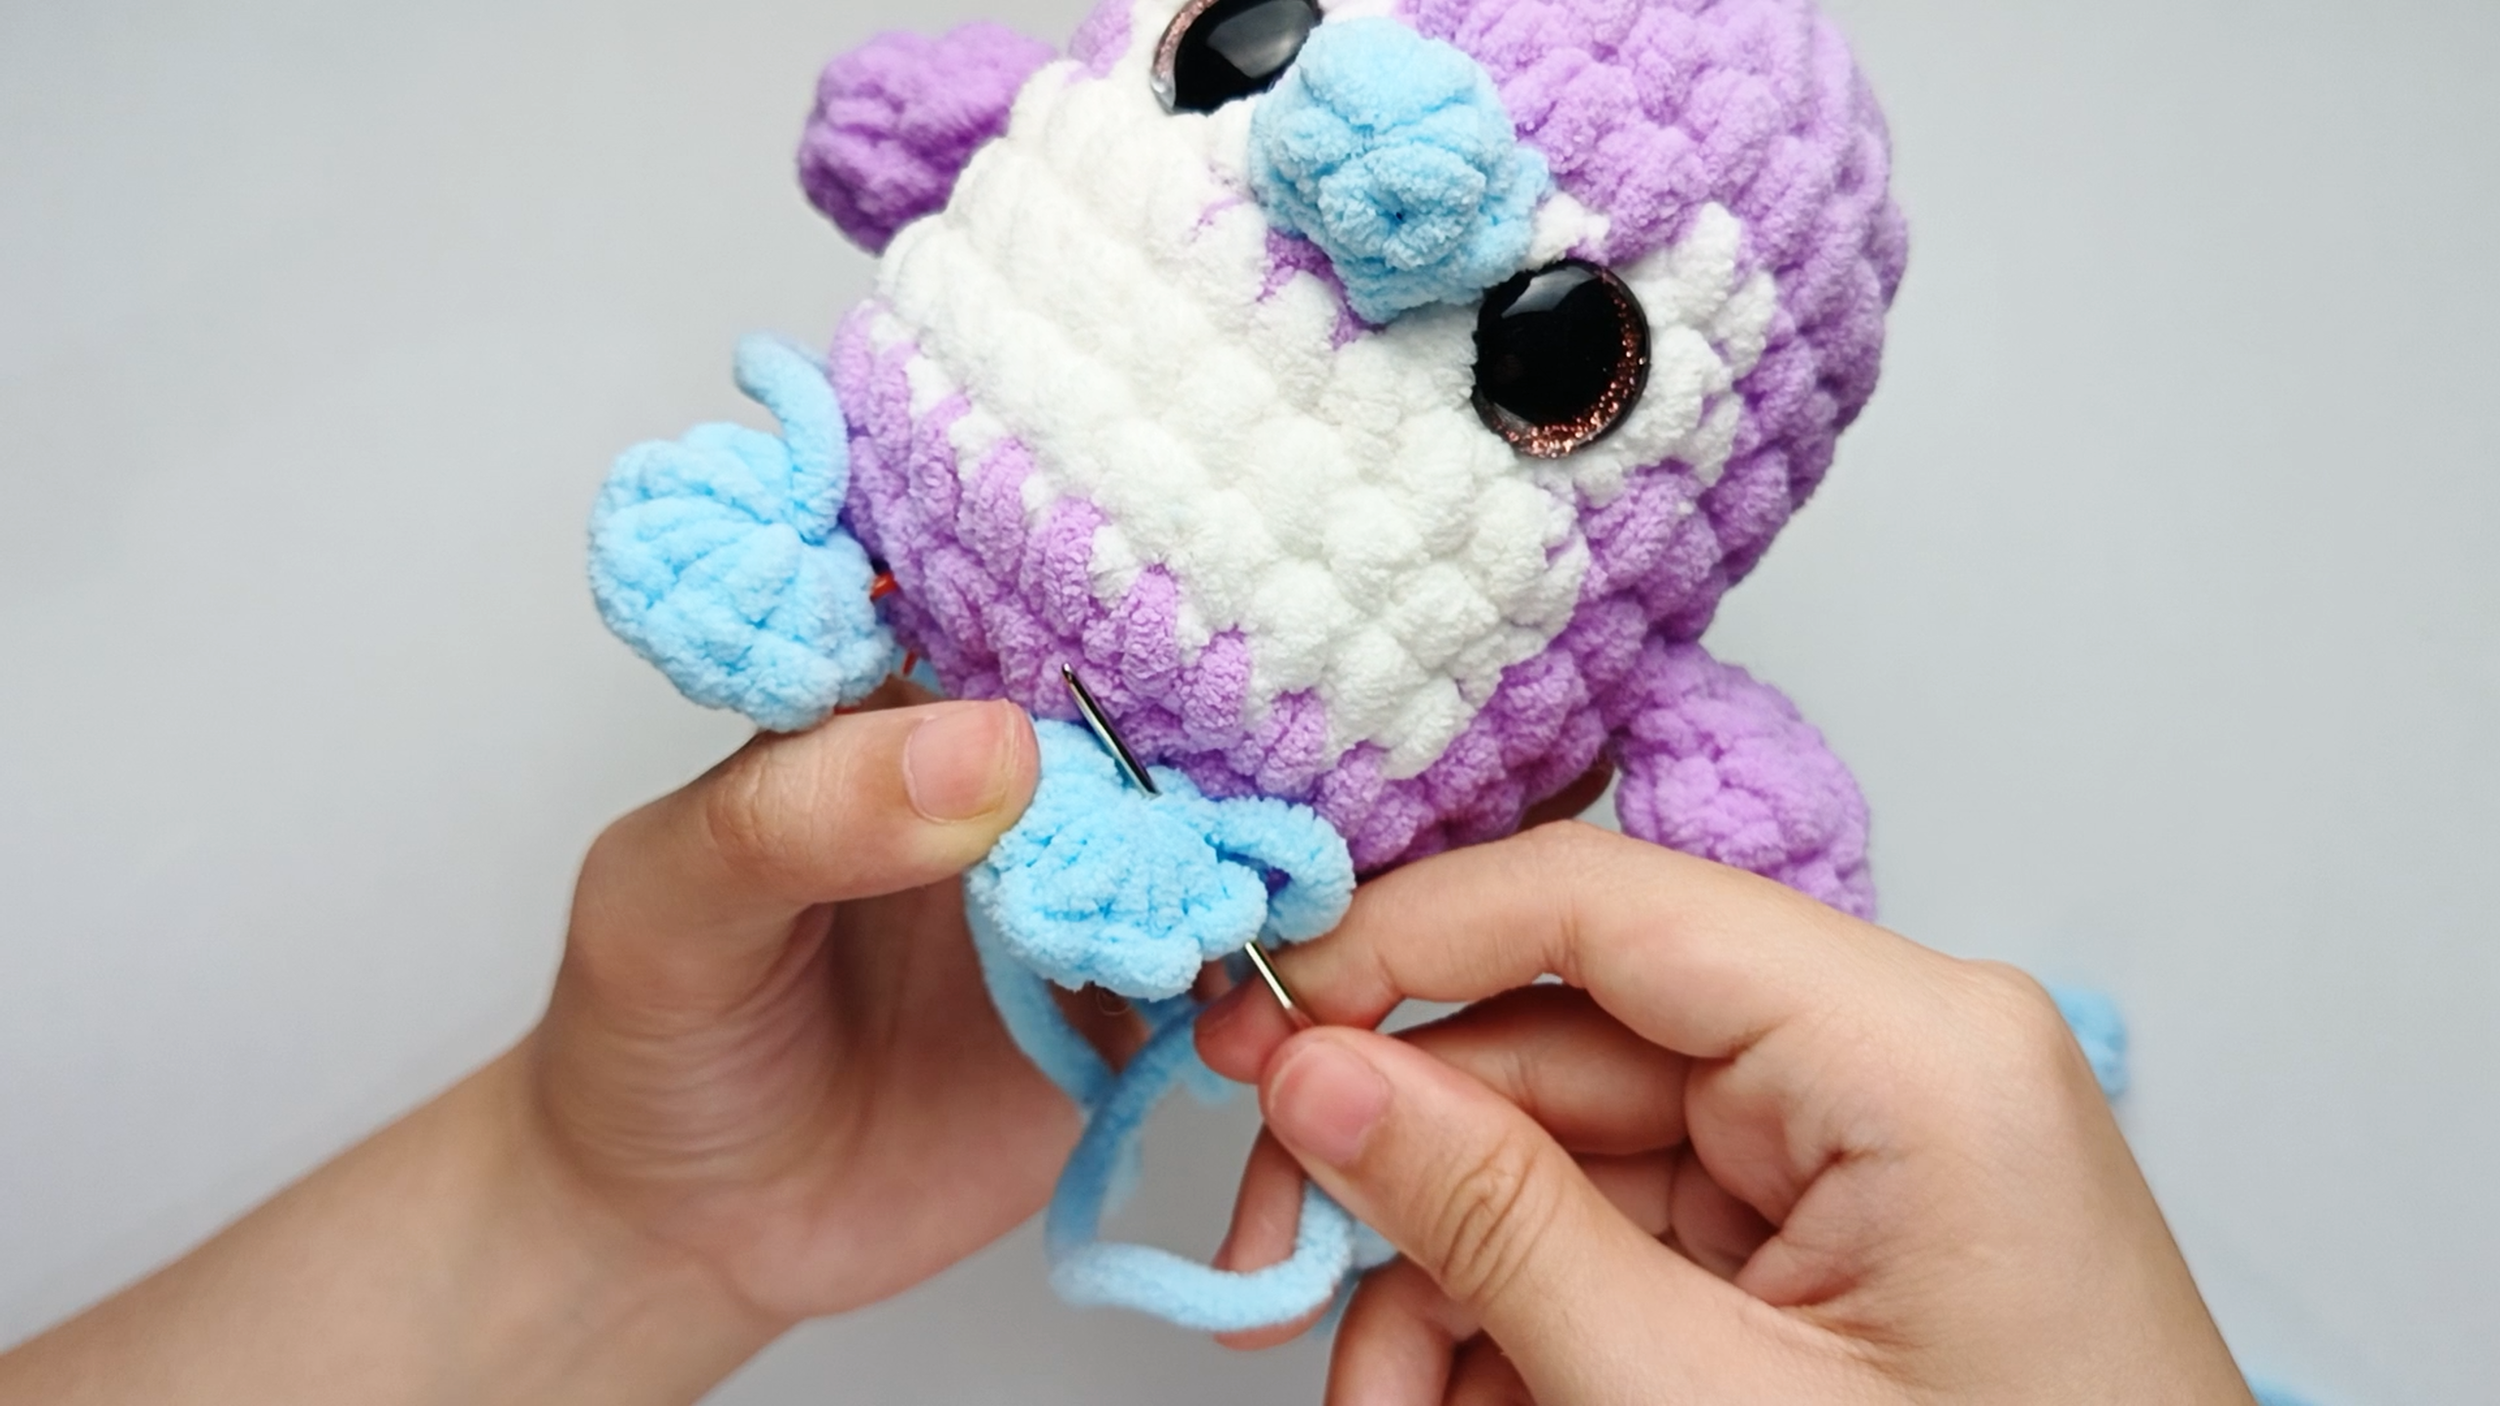
Tip: For the front side, we will sew the middle stitches of the Foot. It will make the Foot look like it's sticking out.
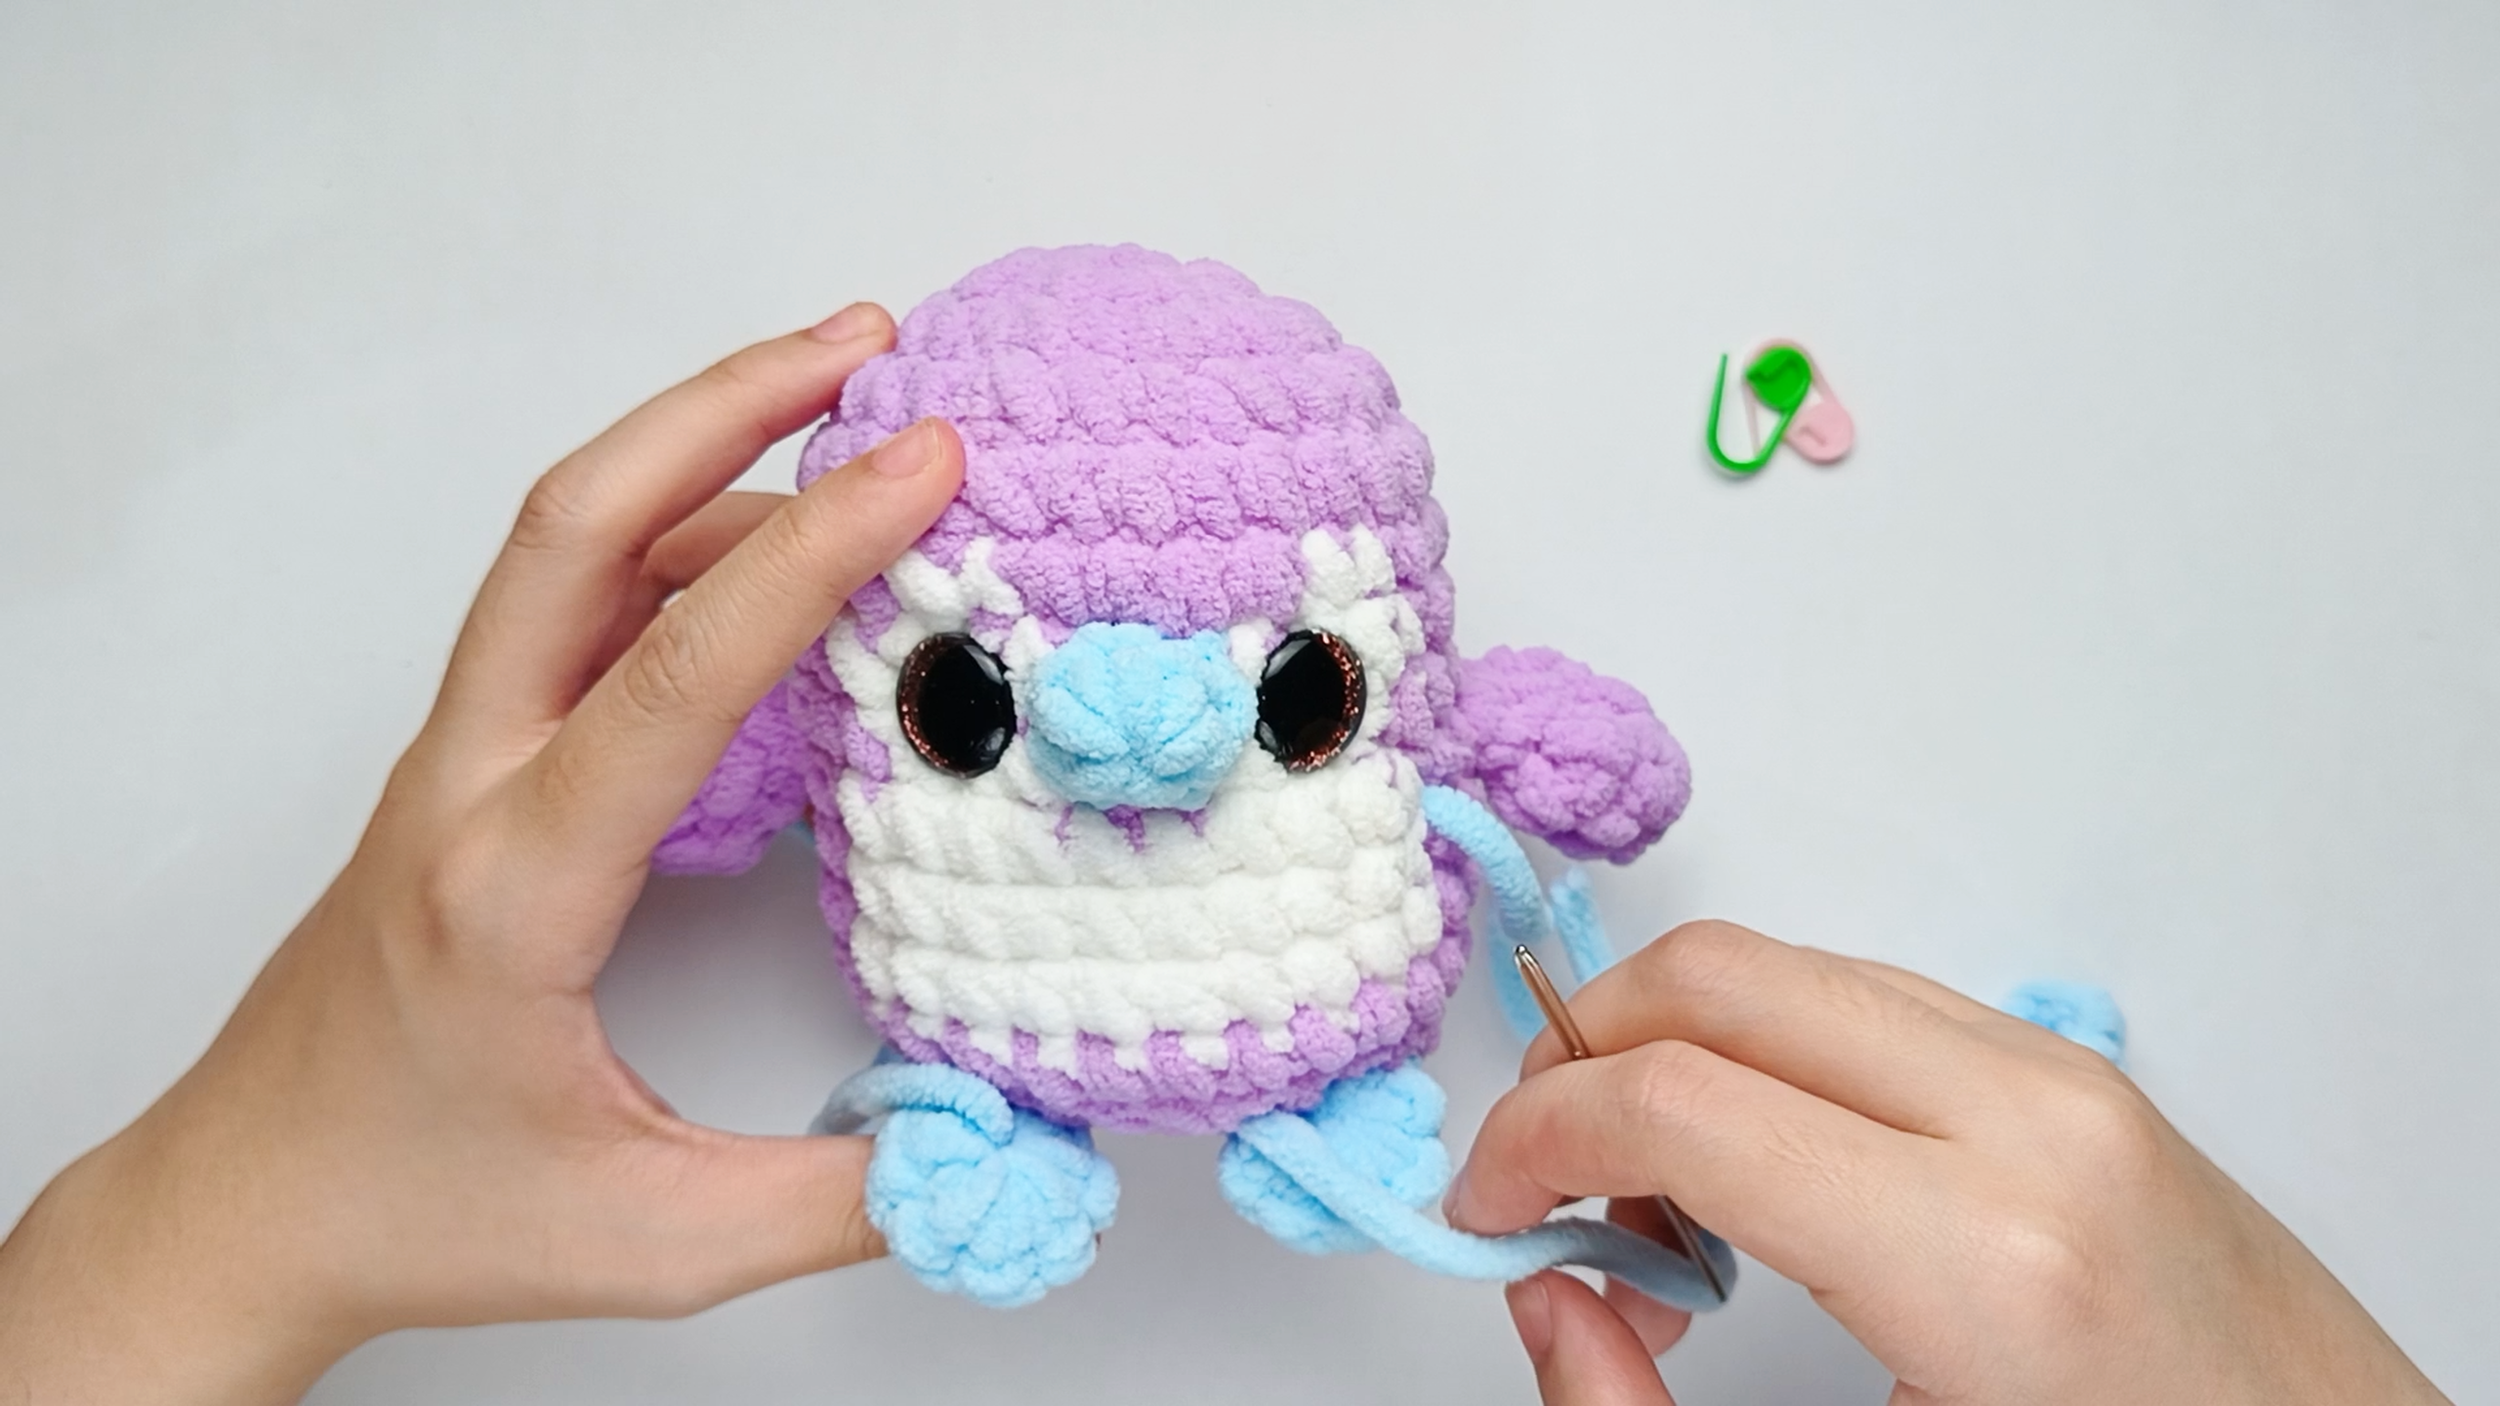
Work all the way around:
Keep sewing - insert the needle into one stitch of the Body, lining it up with the next stitch on the Foot, and pull the yarn through - until you reach the last stitch and the Foot is fully joined. Remove the stitch markers as you go.
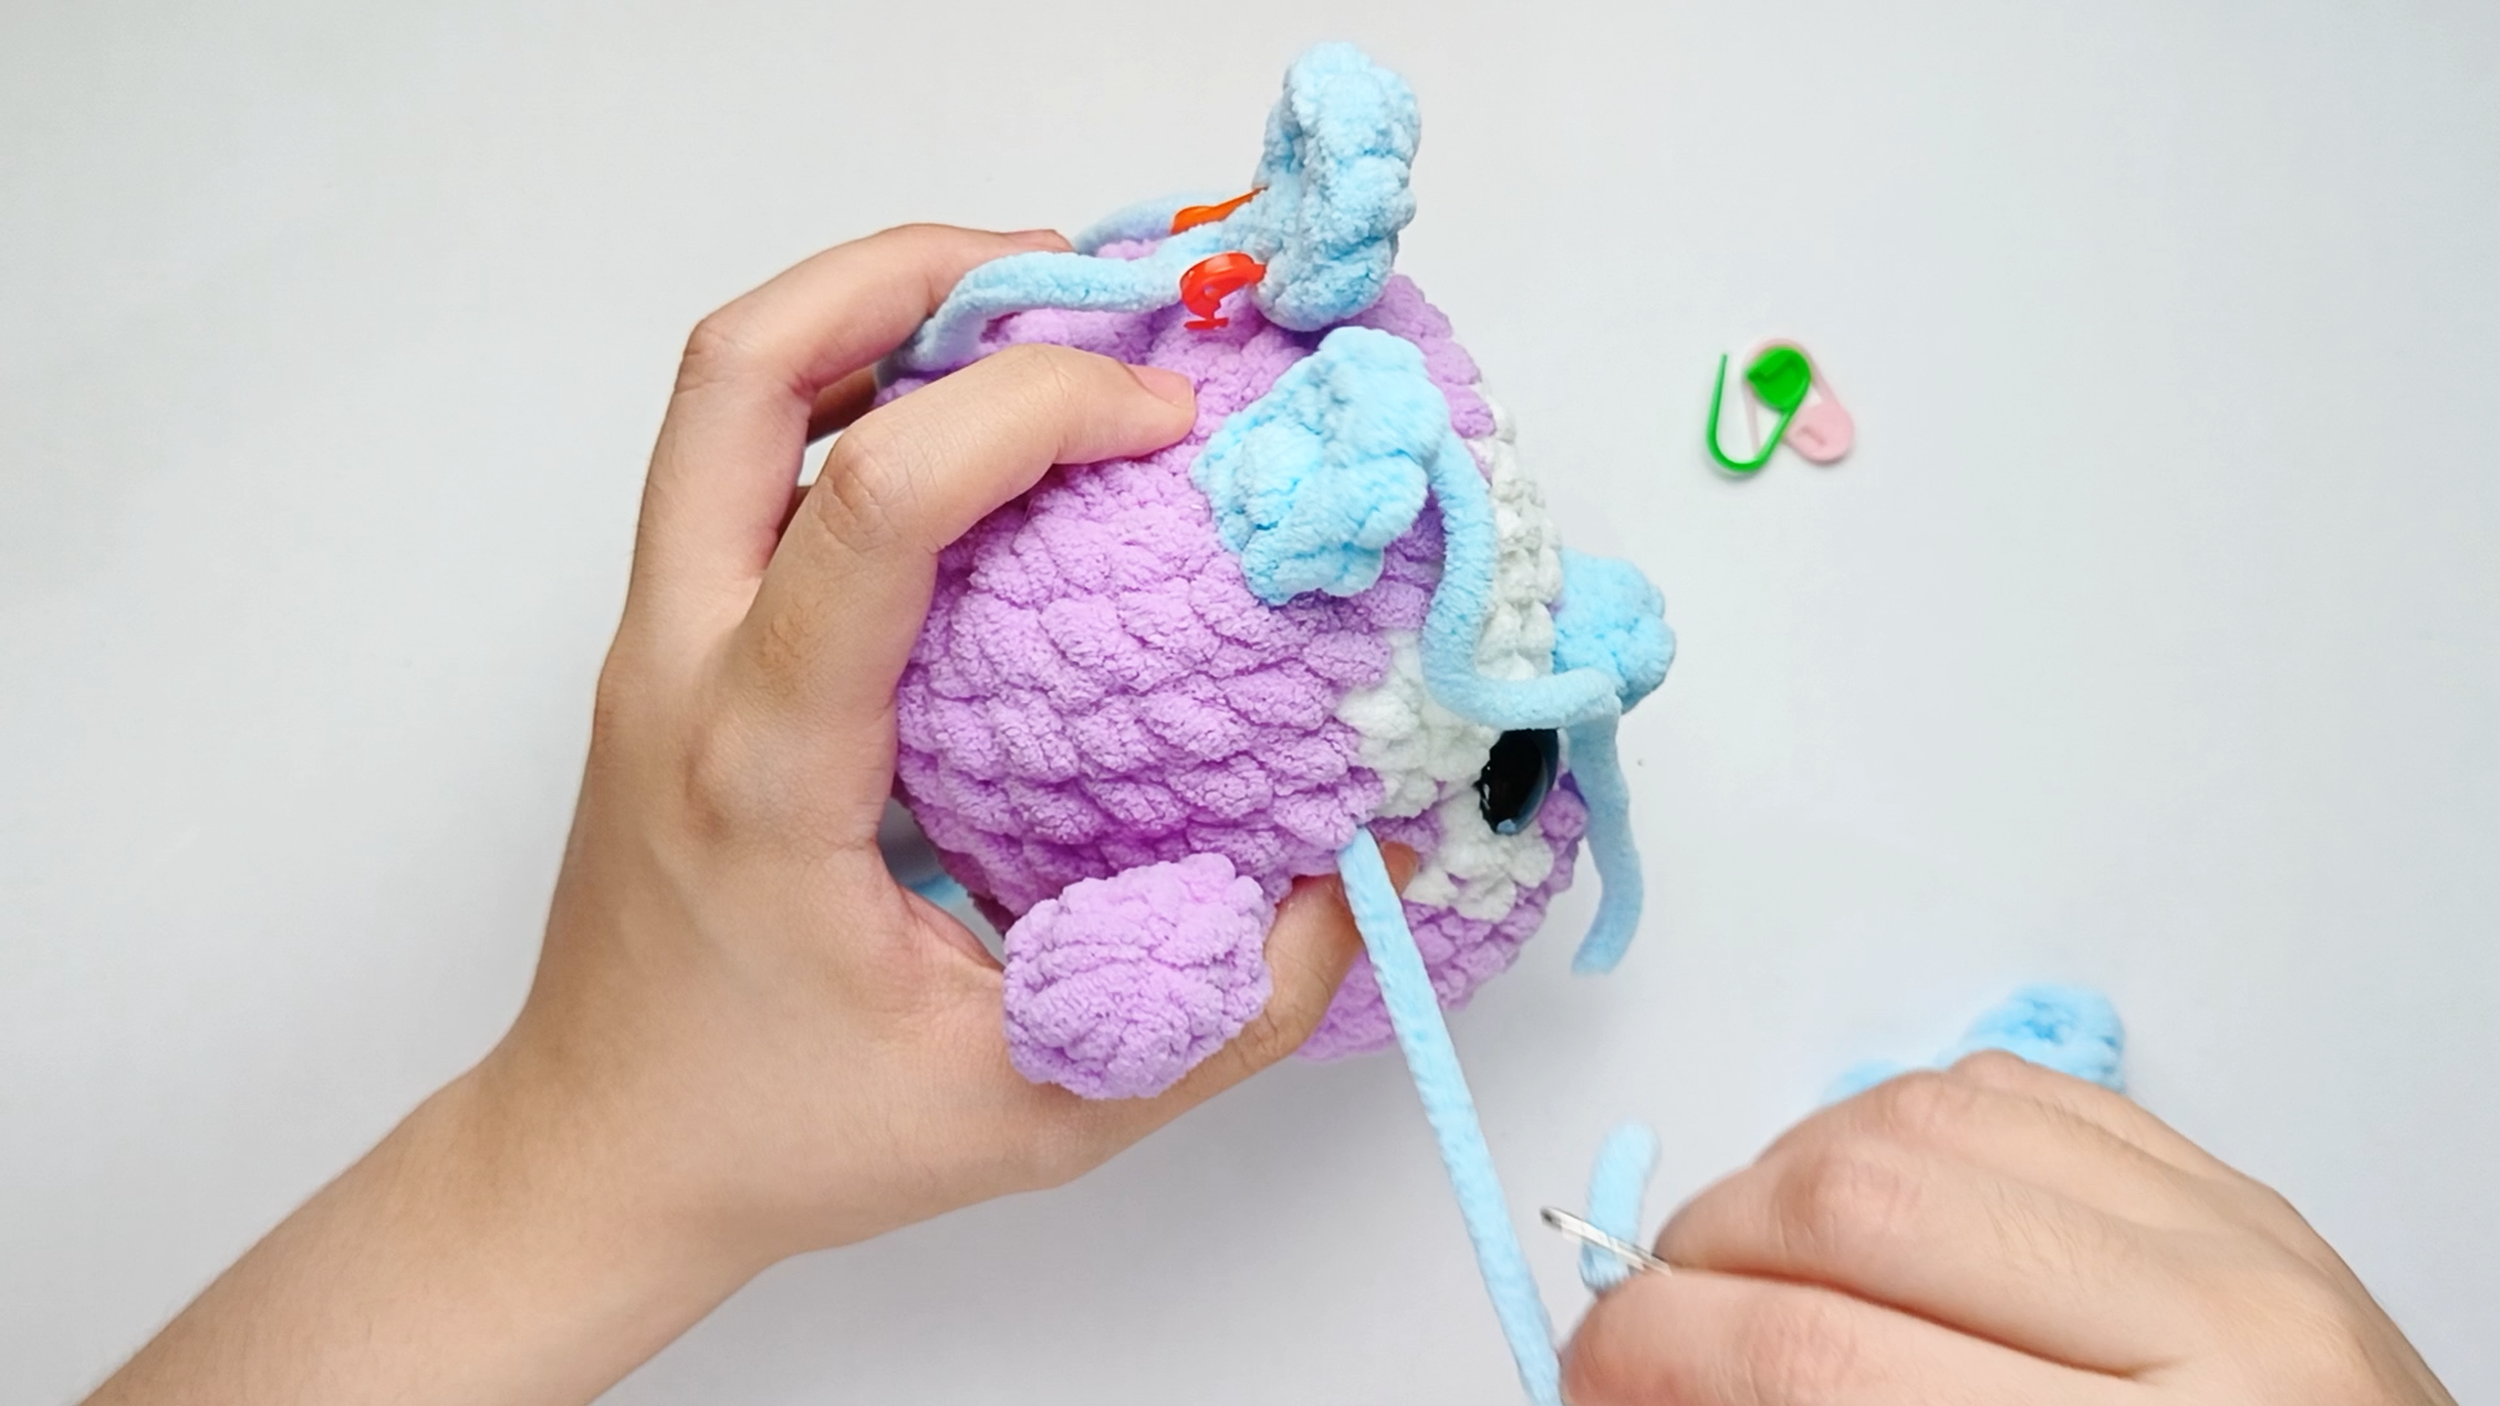
Secure and hide the tail:
To hide the yarn tail, take the needle down into the next stitch and run it through the Body, then pull the yarn through.
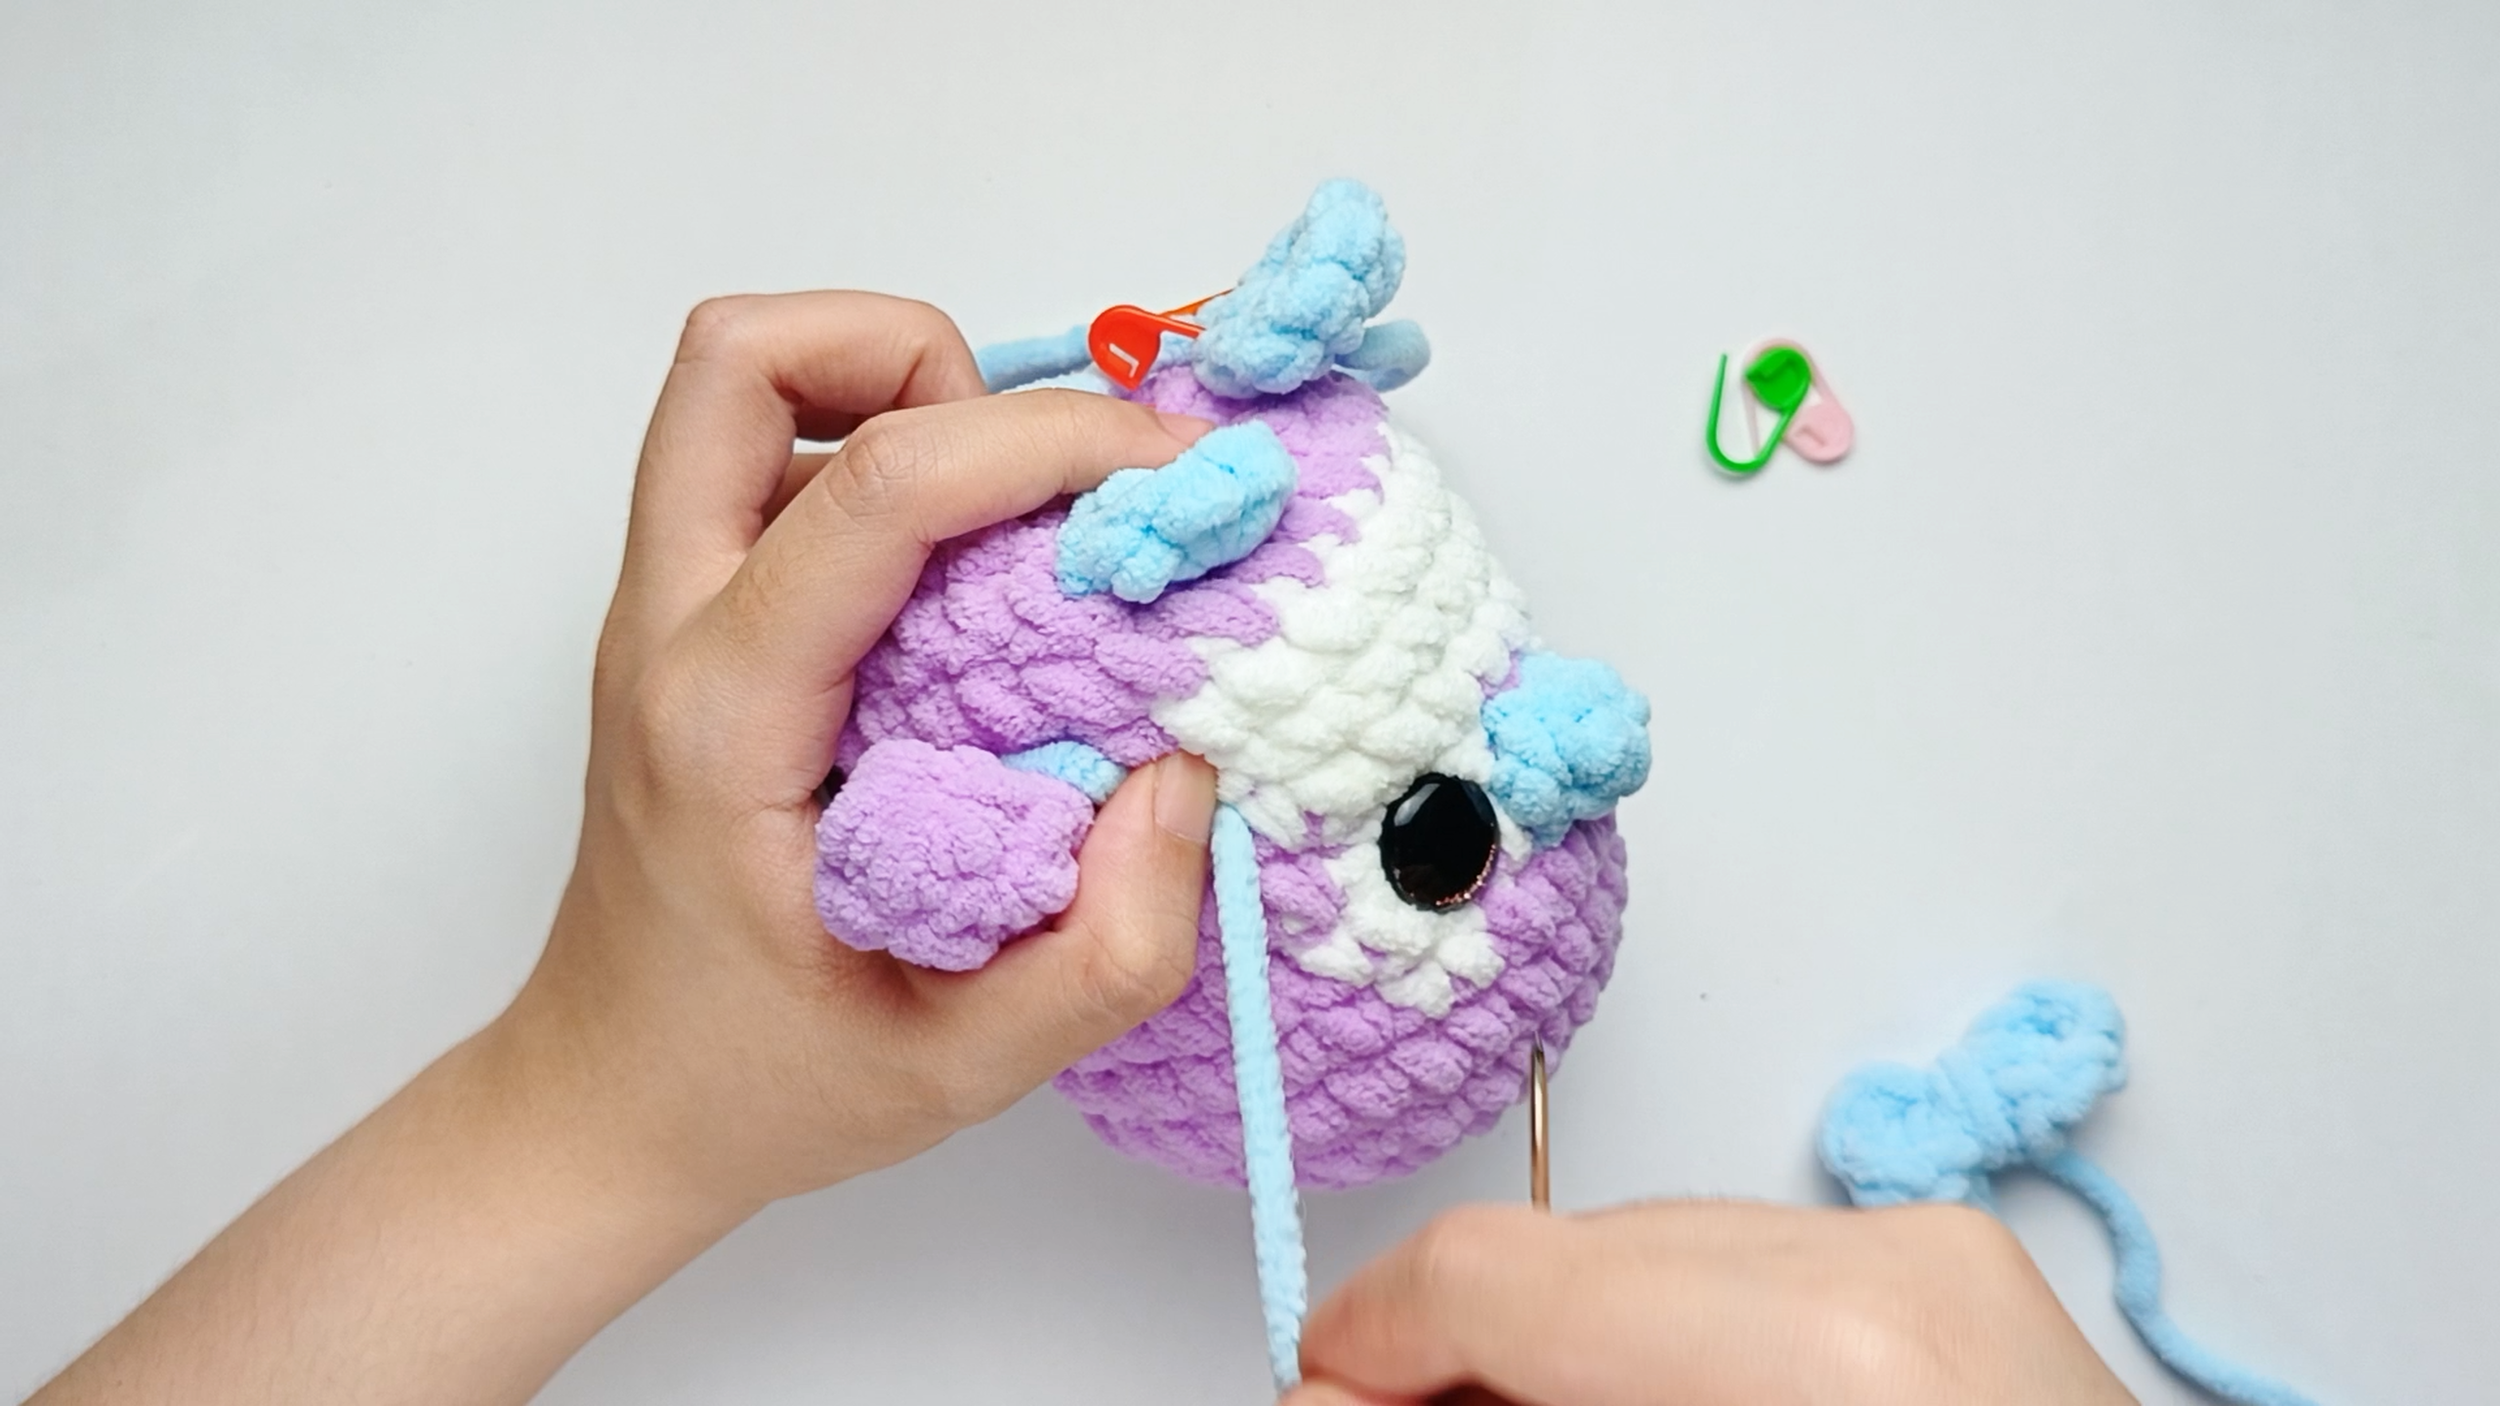
Hide the magic ring (MR) yarn tail:
Let’s hide the yarn tail from the magic ring (MR) inside the Body too. Thread the needle, take it down into the next stitch, run it through the Body, then pull the yarn through.
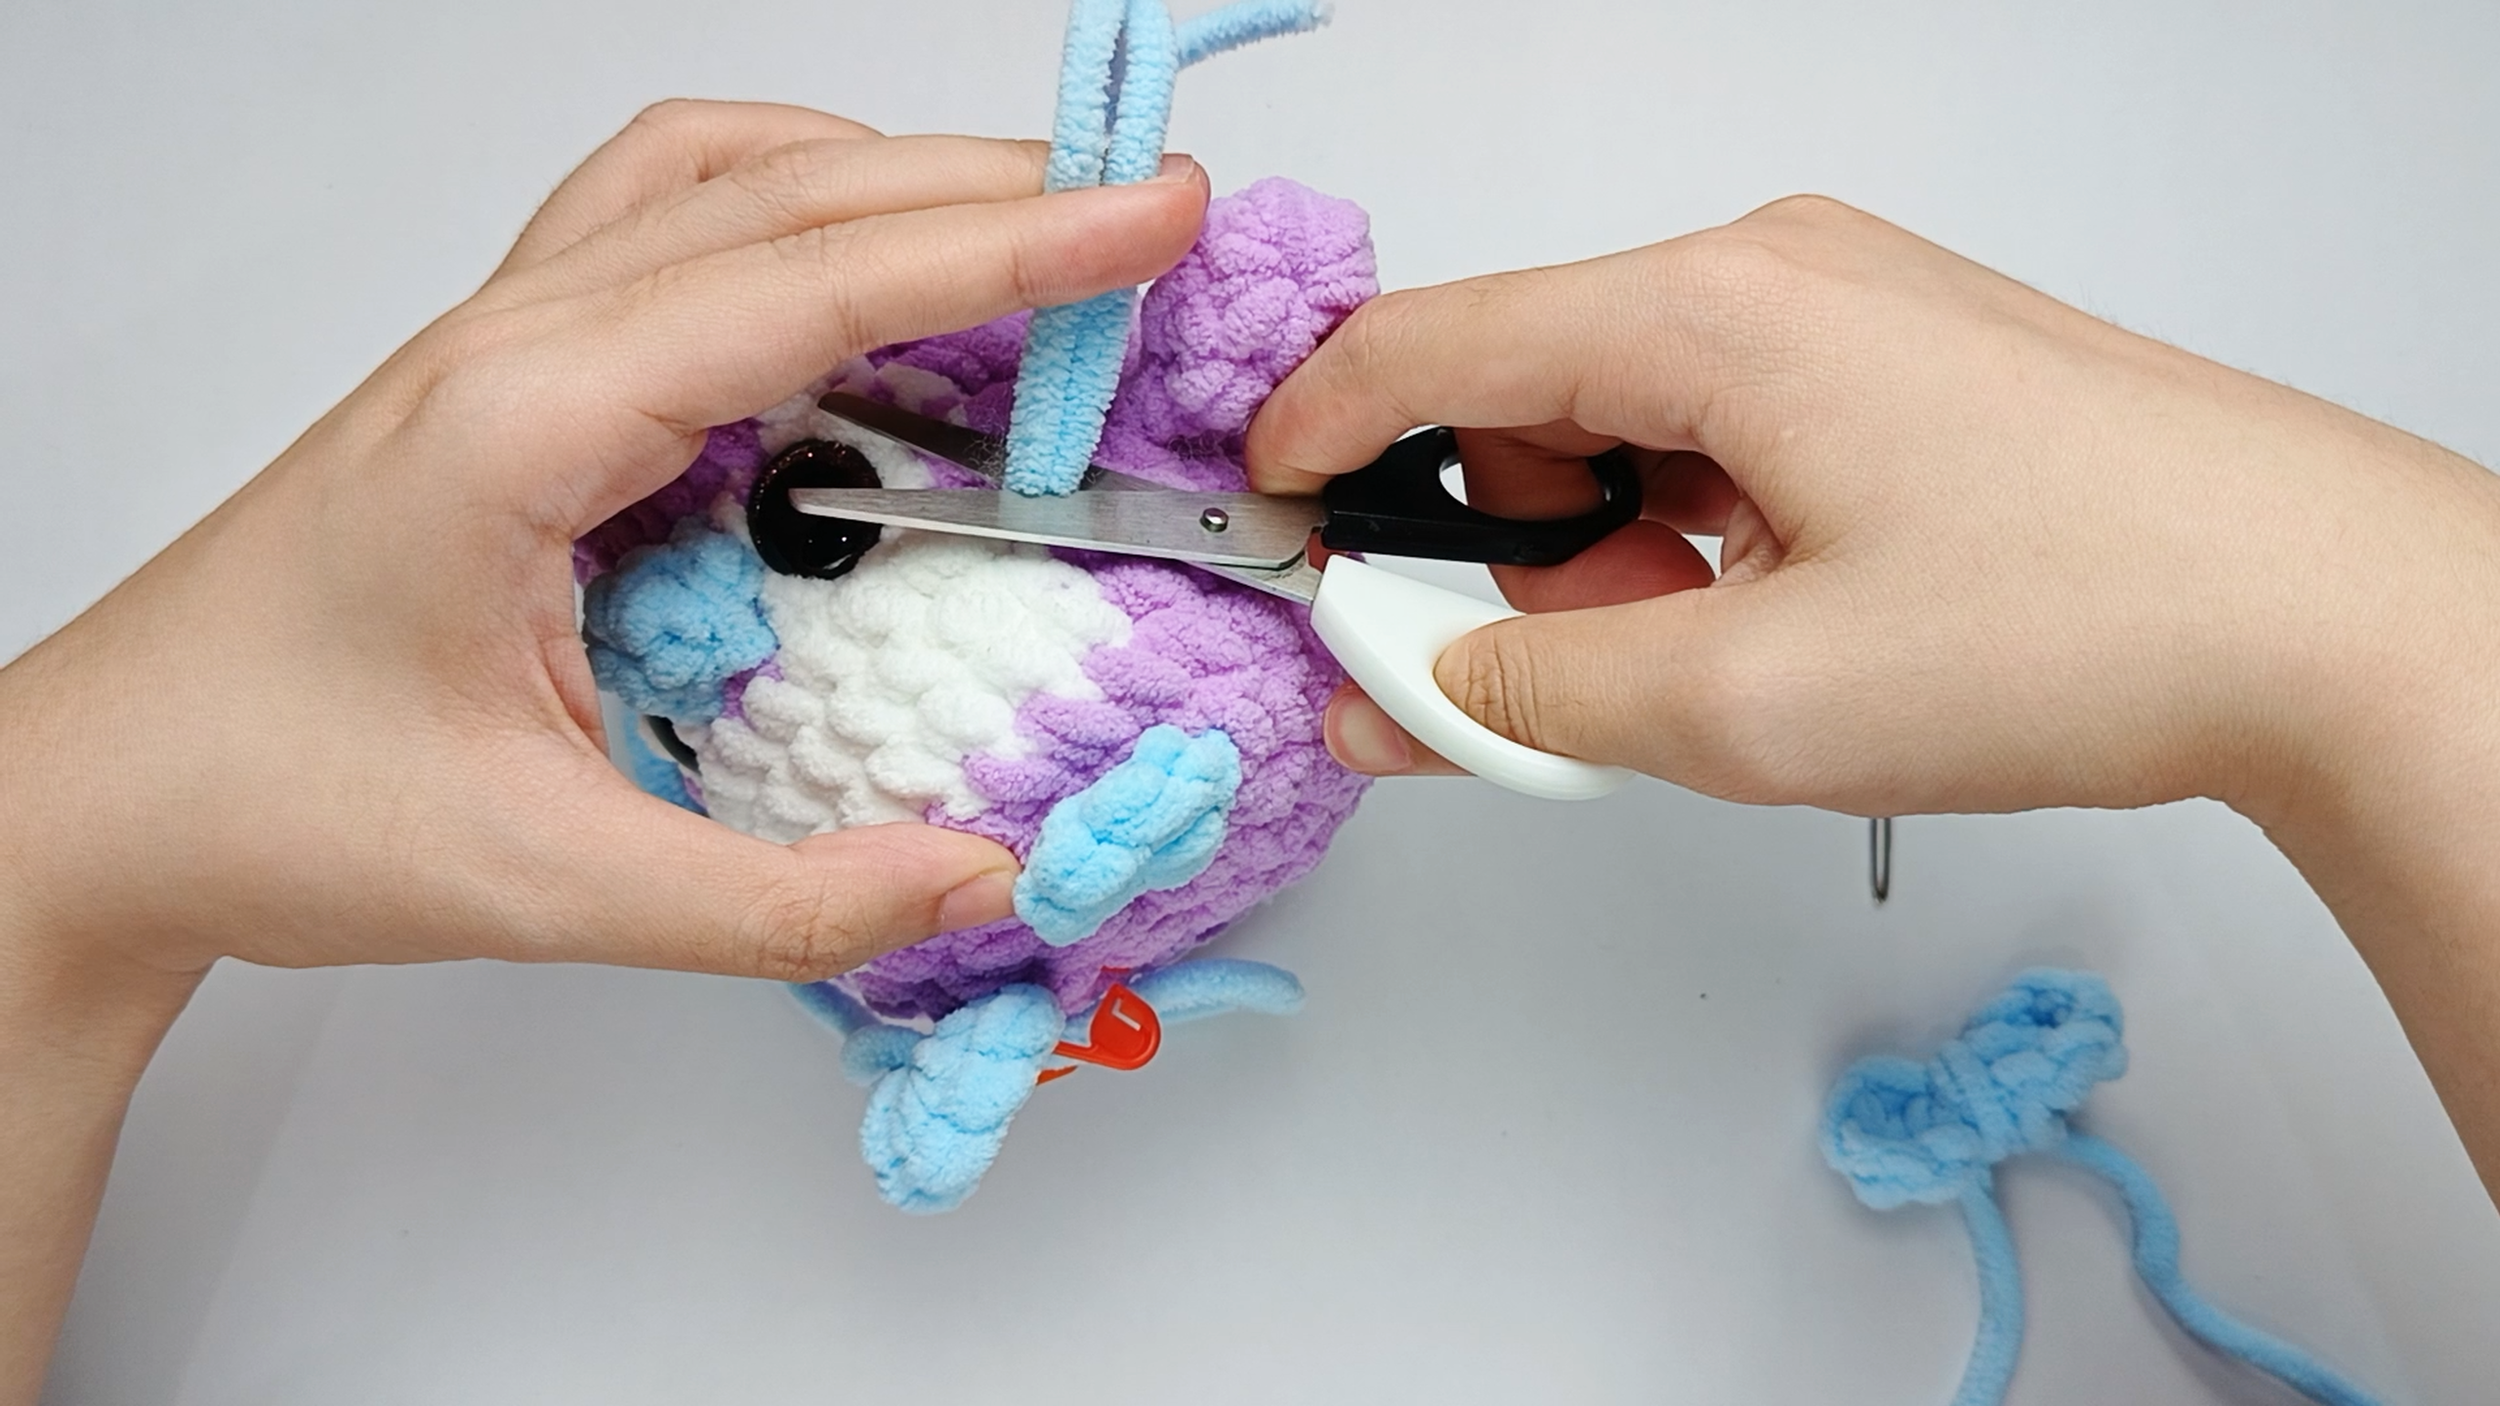
Trim the tails:
Trim the tails close to the surface and gently massage the area so the end disappears inside.
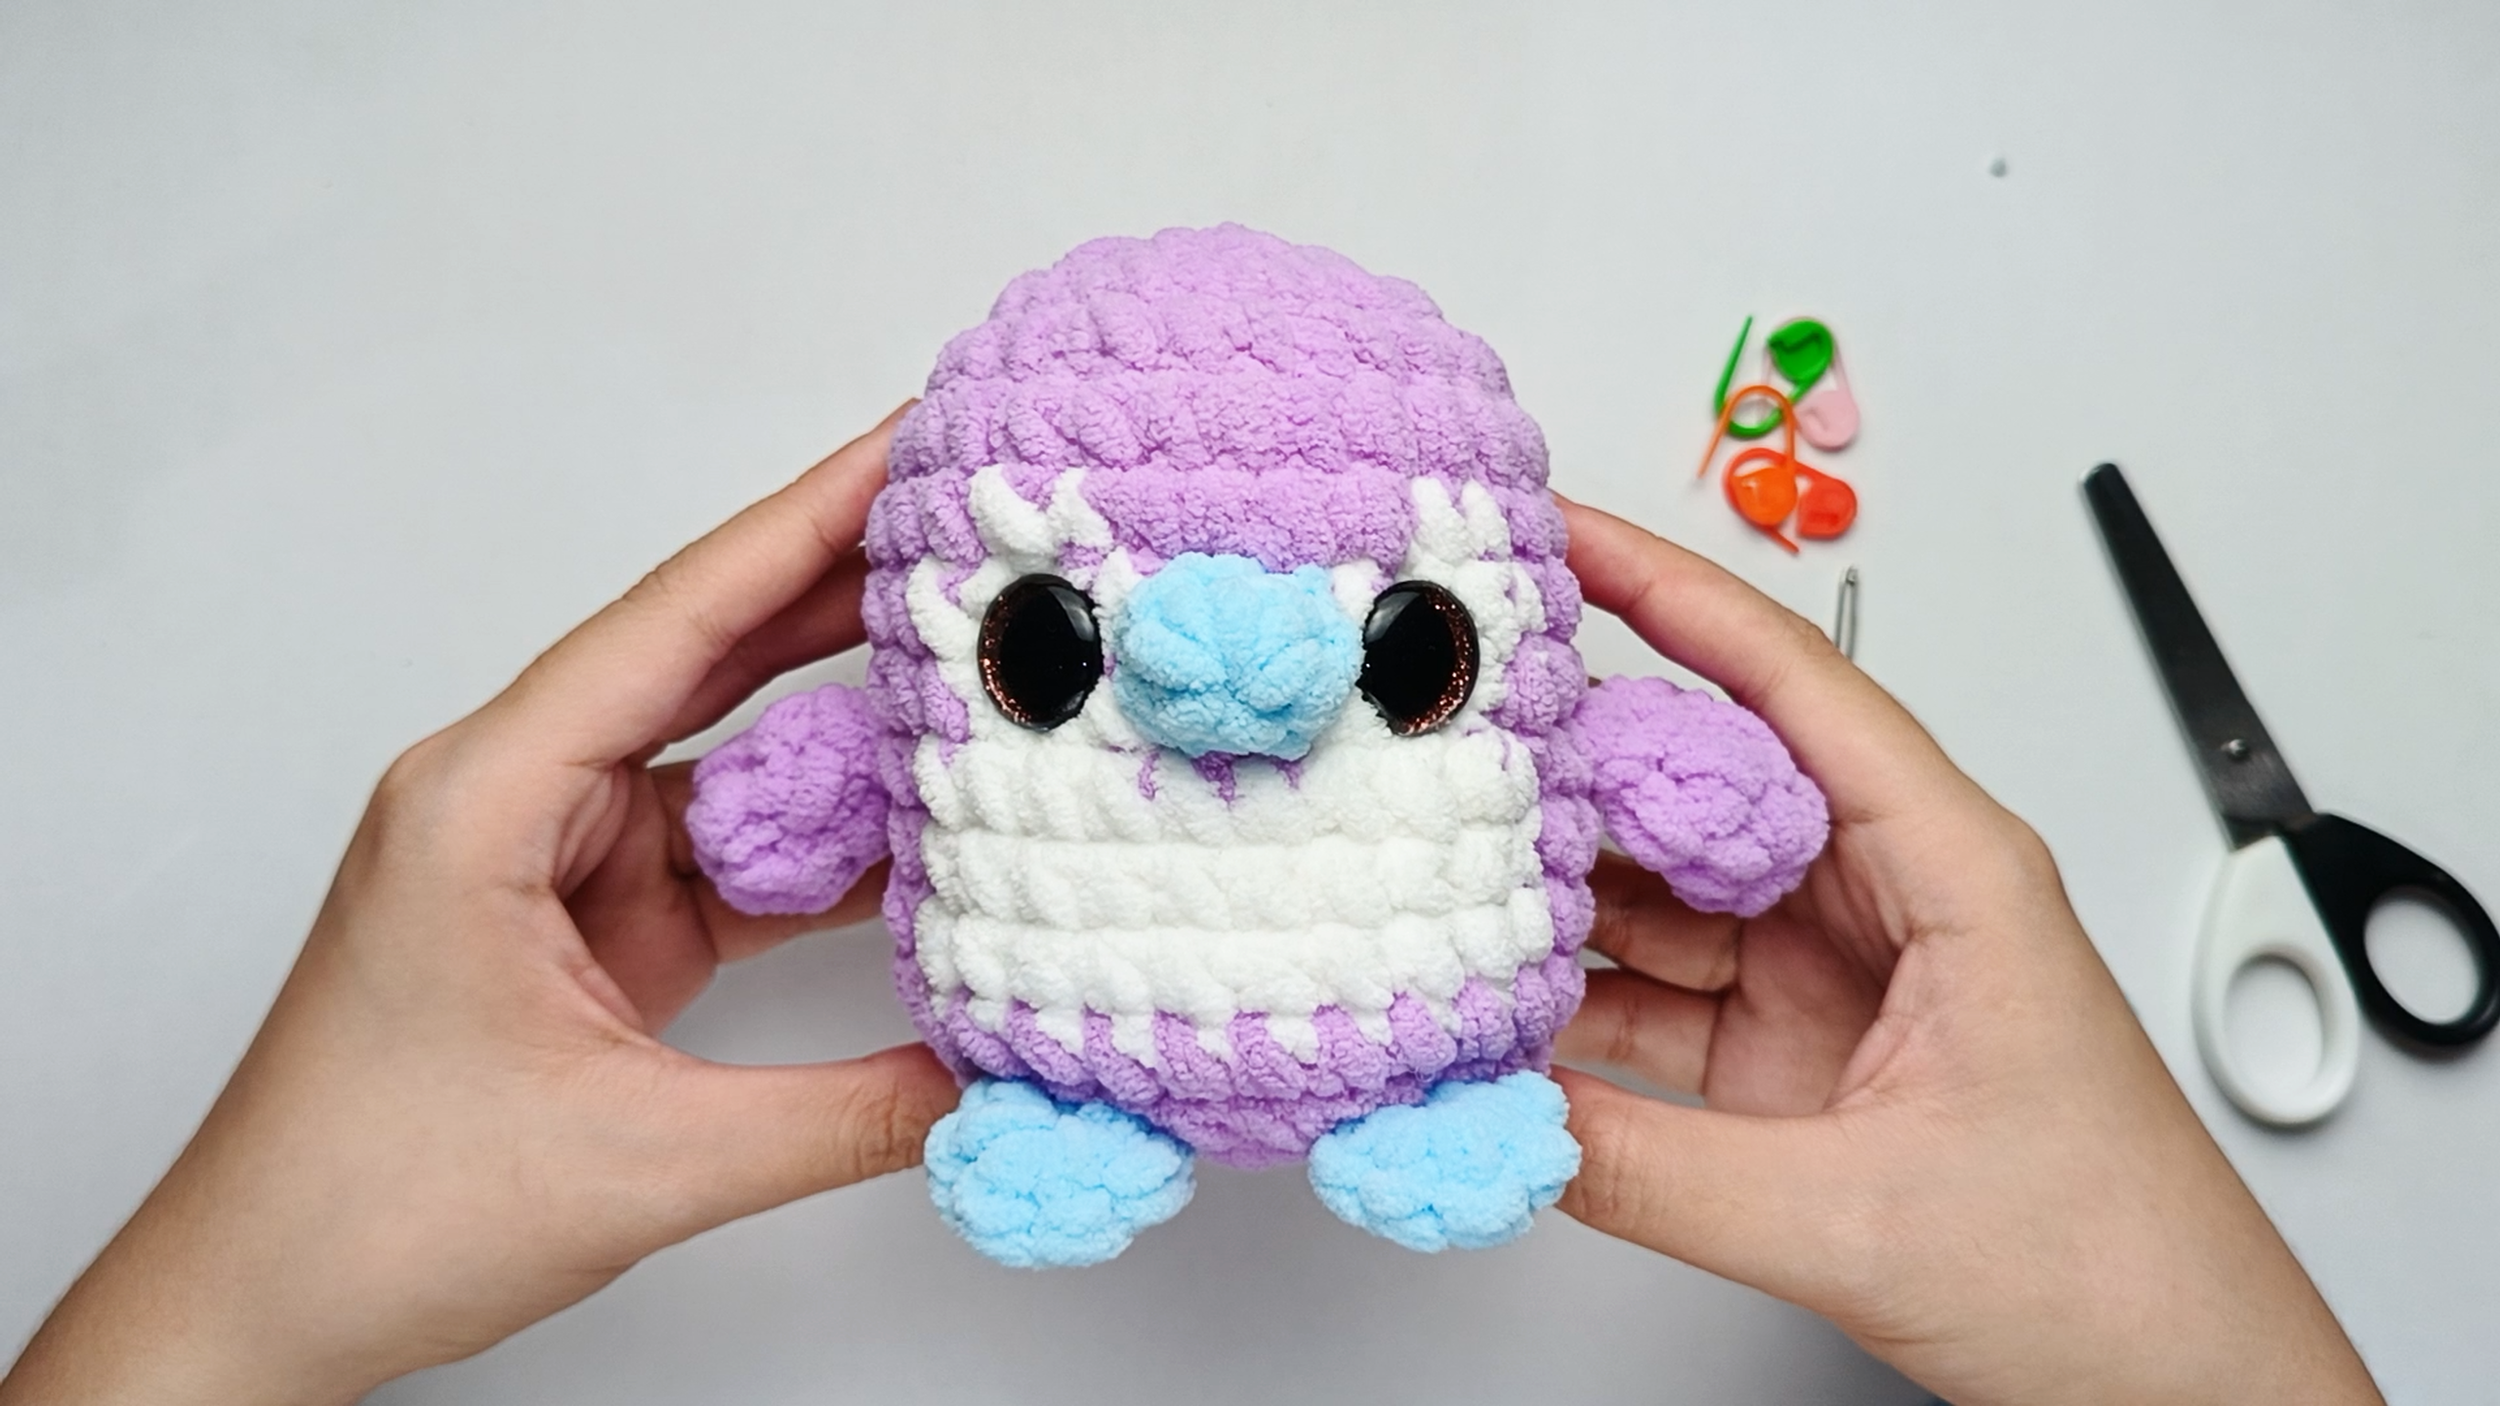
Attach the second Foot:
Repeat the same positioning-and-sewing process for the second Foot on the opposite side. The Feet are now fully attached.
Attaching the Bow
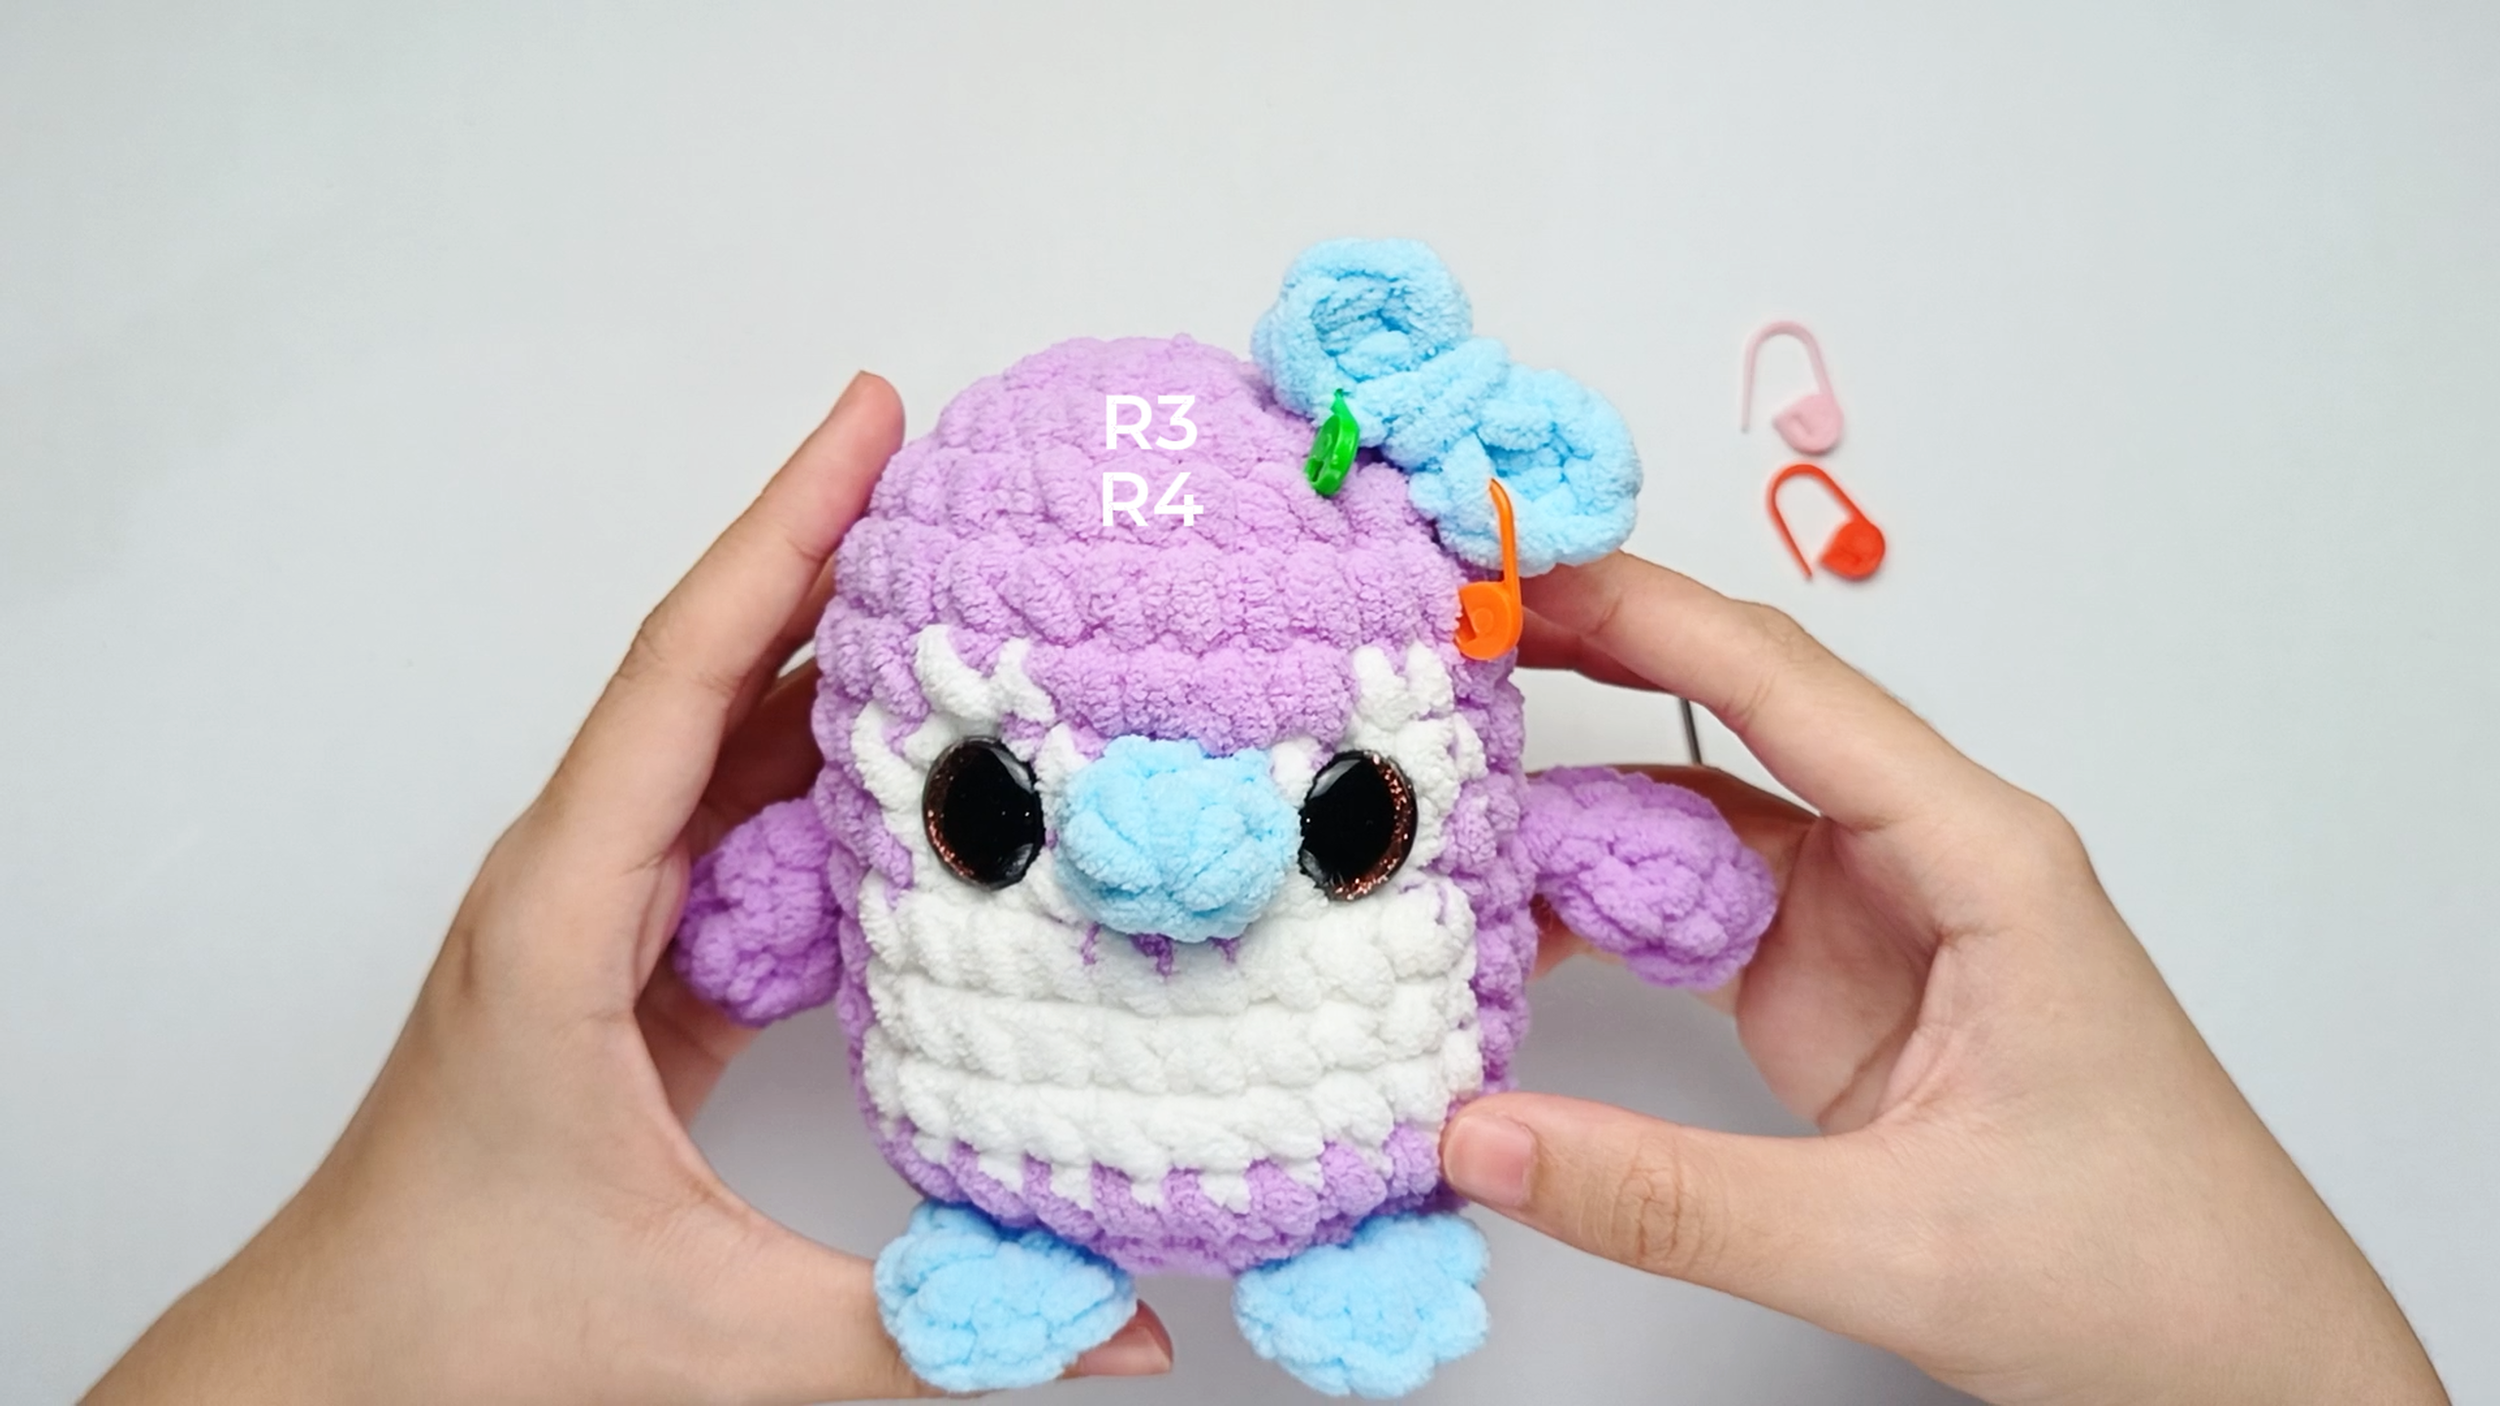
Position and secure the Bow:
Place the Bow between Round 3 and Round 4 of the Body, near the top of the Body, above the Eyes. Pin it with stitch markers first so you can check the position.
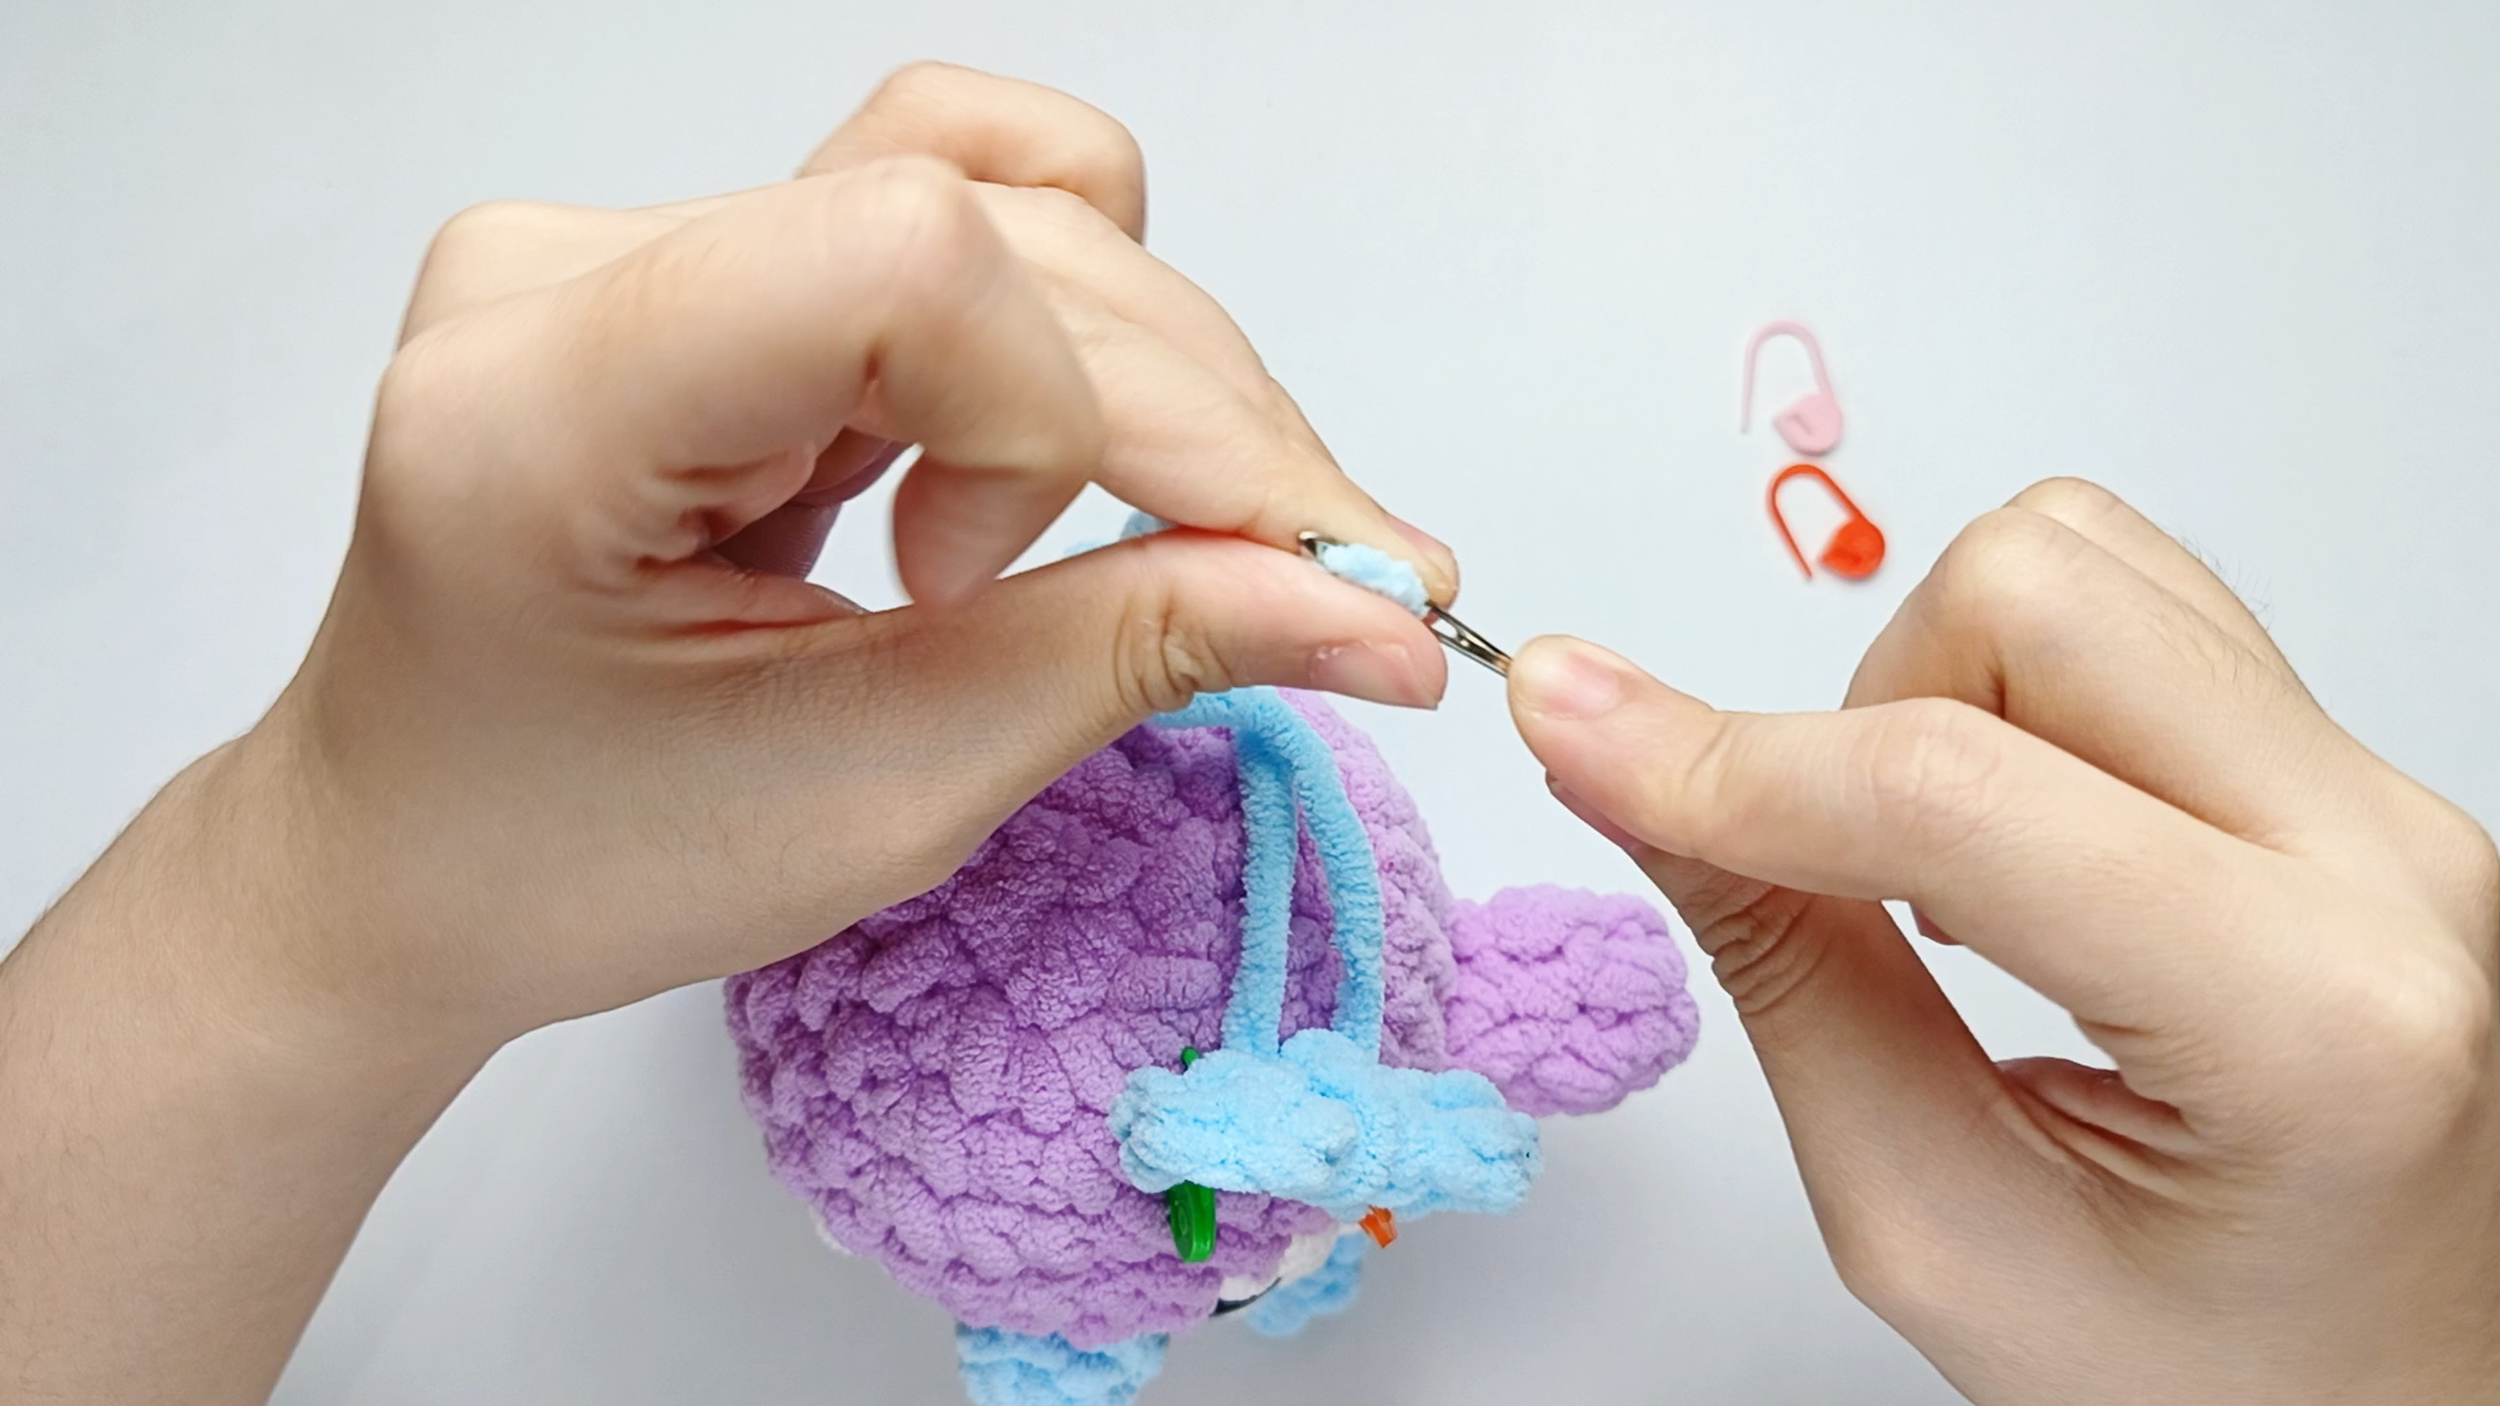
Thread the needle:
Thread the yarn tail from the Bow onto your yarn needle.
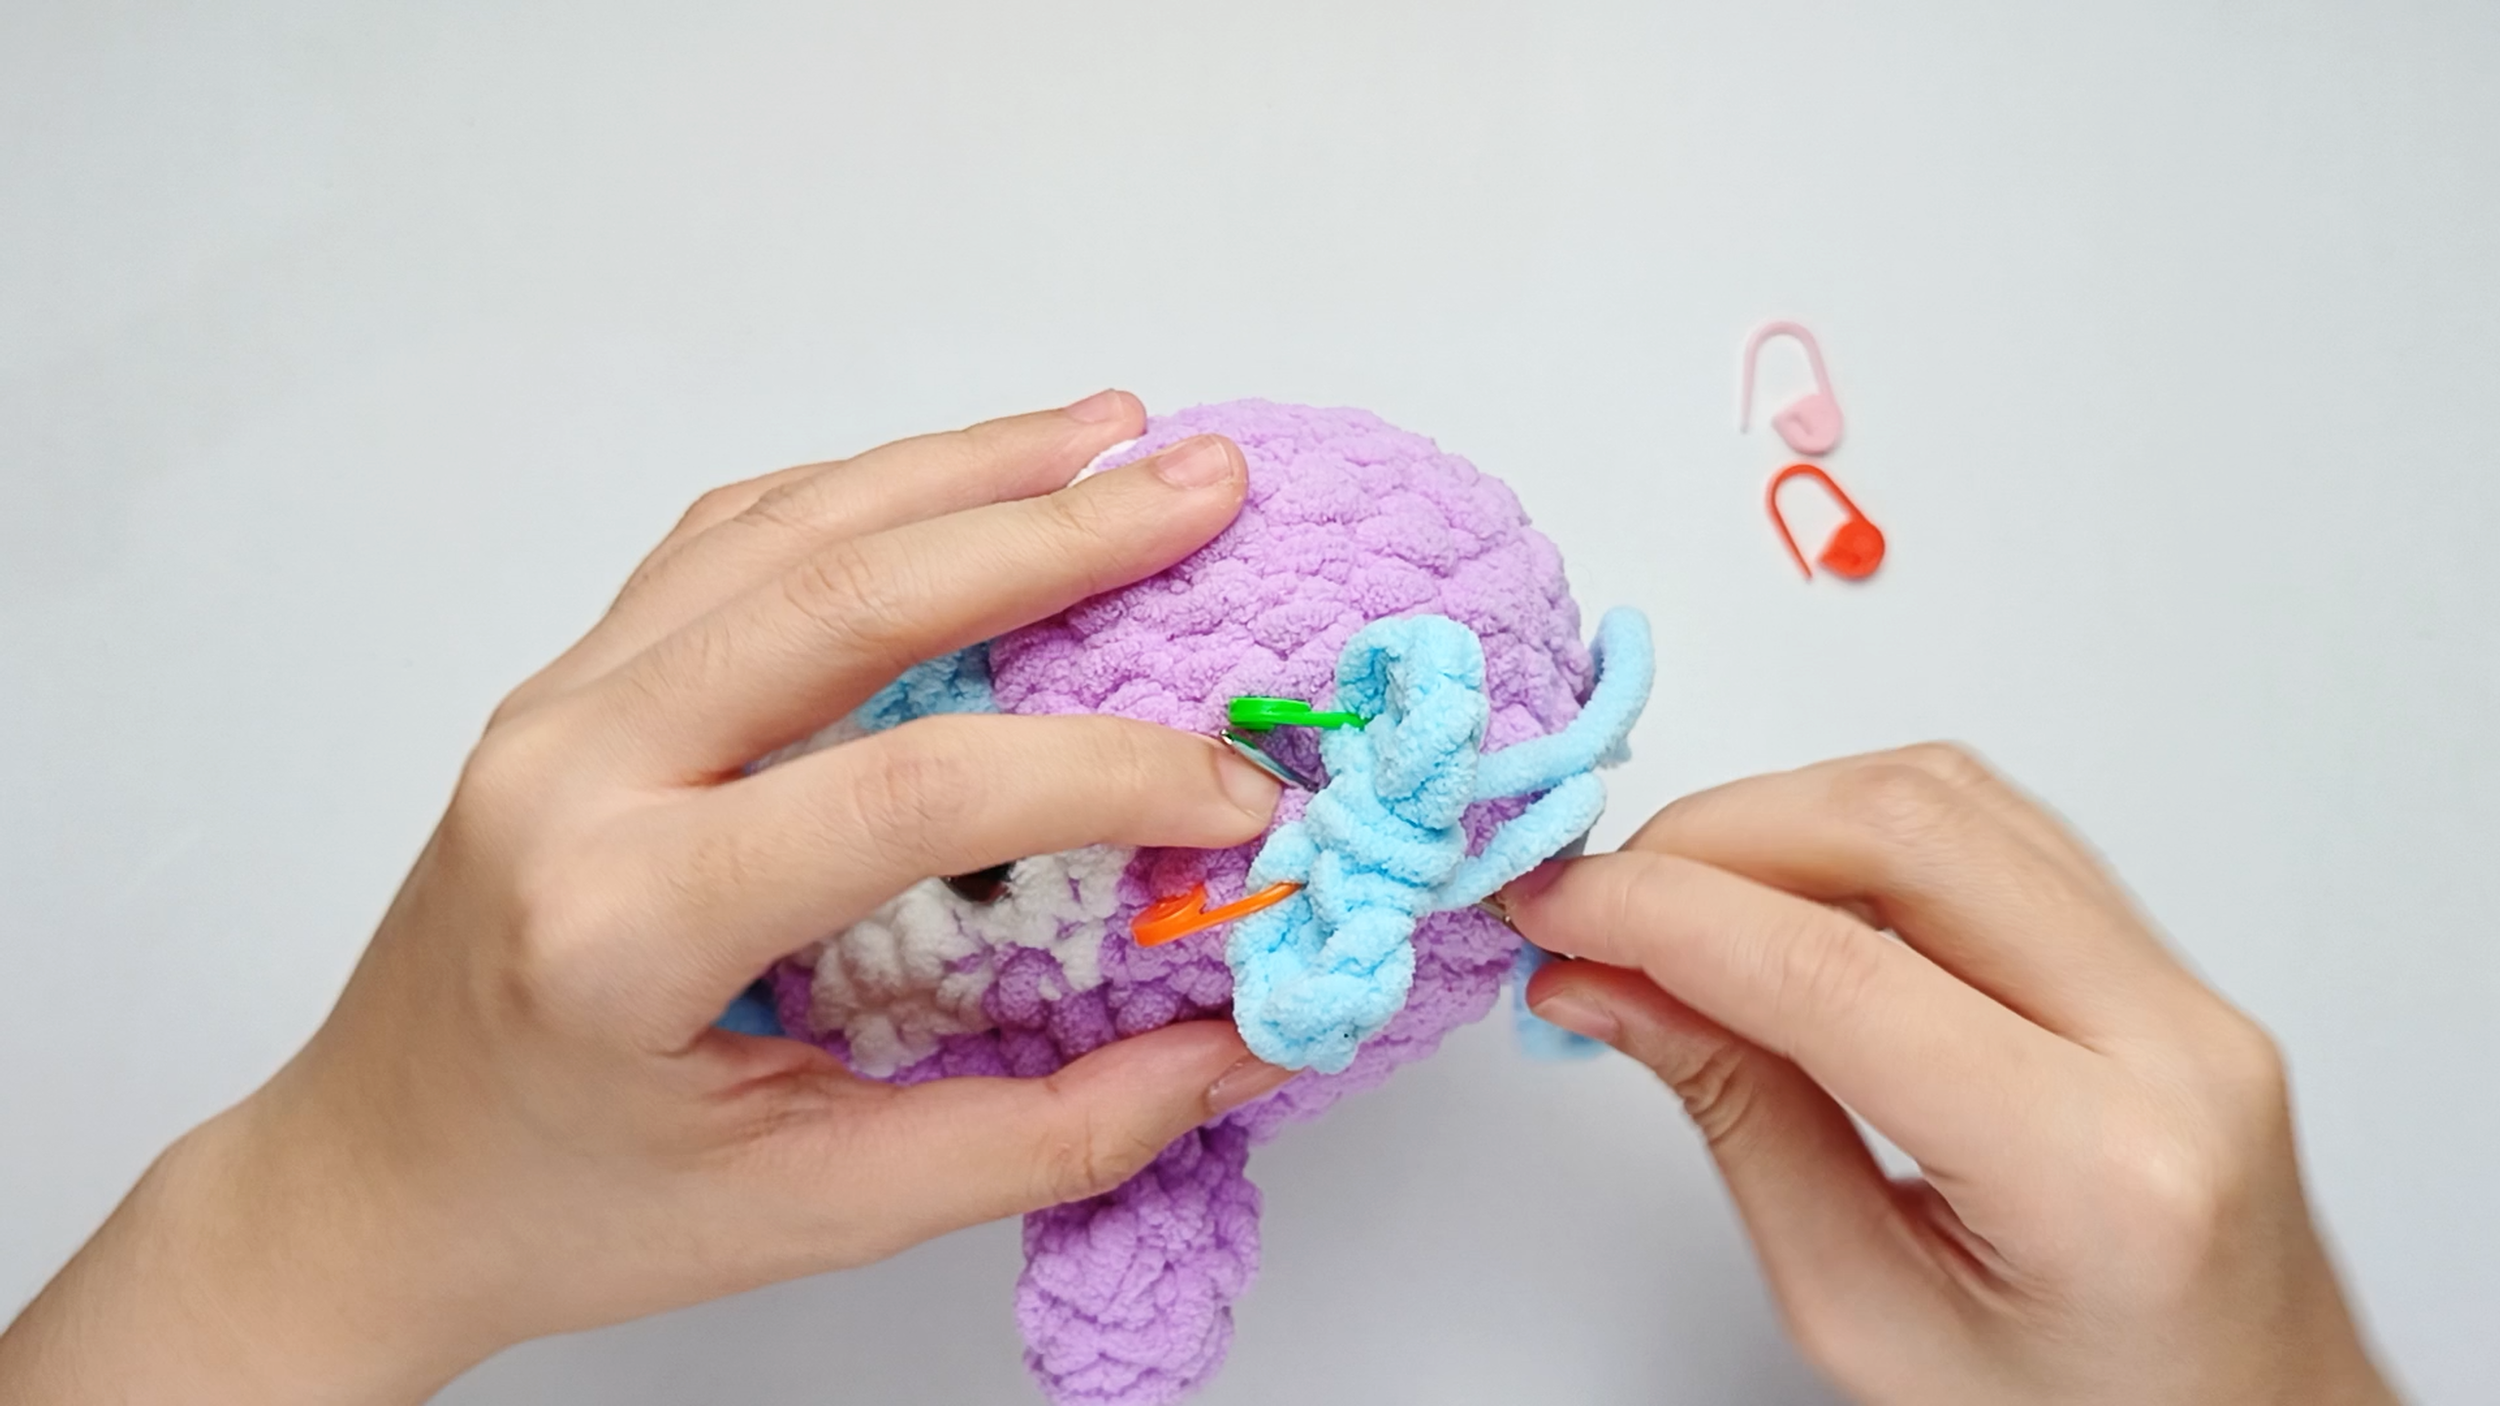
Into the Body:
Insert the needle into one stitch of the Body, lining it up with the next stitch on the piece. Pull the yarn all the way through.

Important: Only sew the center of the Bow onto the Body. Do not sew down the outer edges, so the Bow keeps its soft, puffy shape.
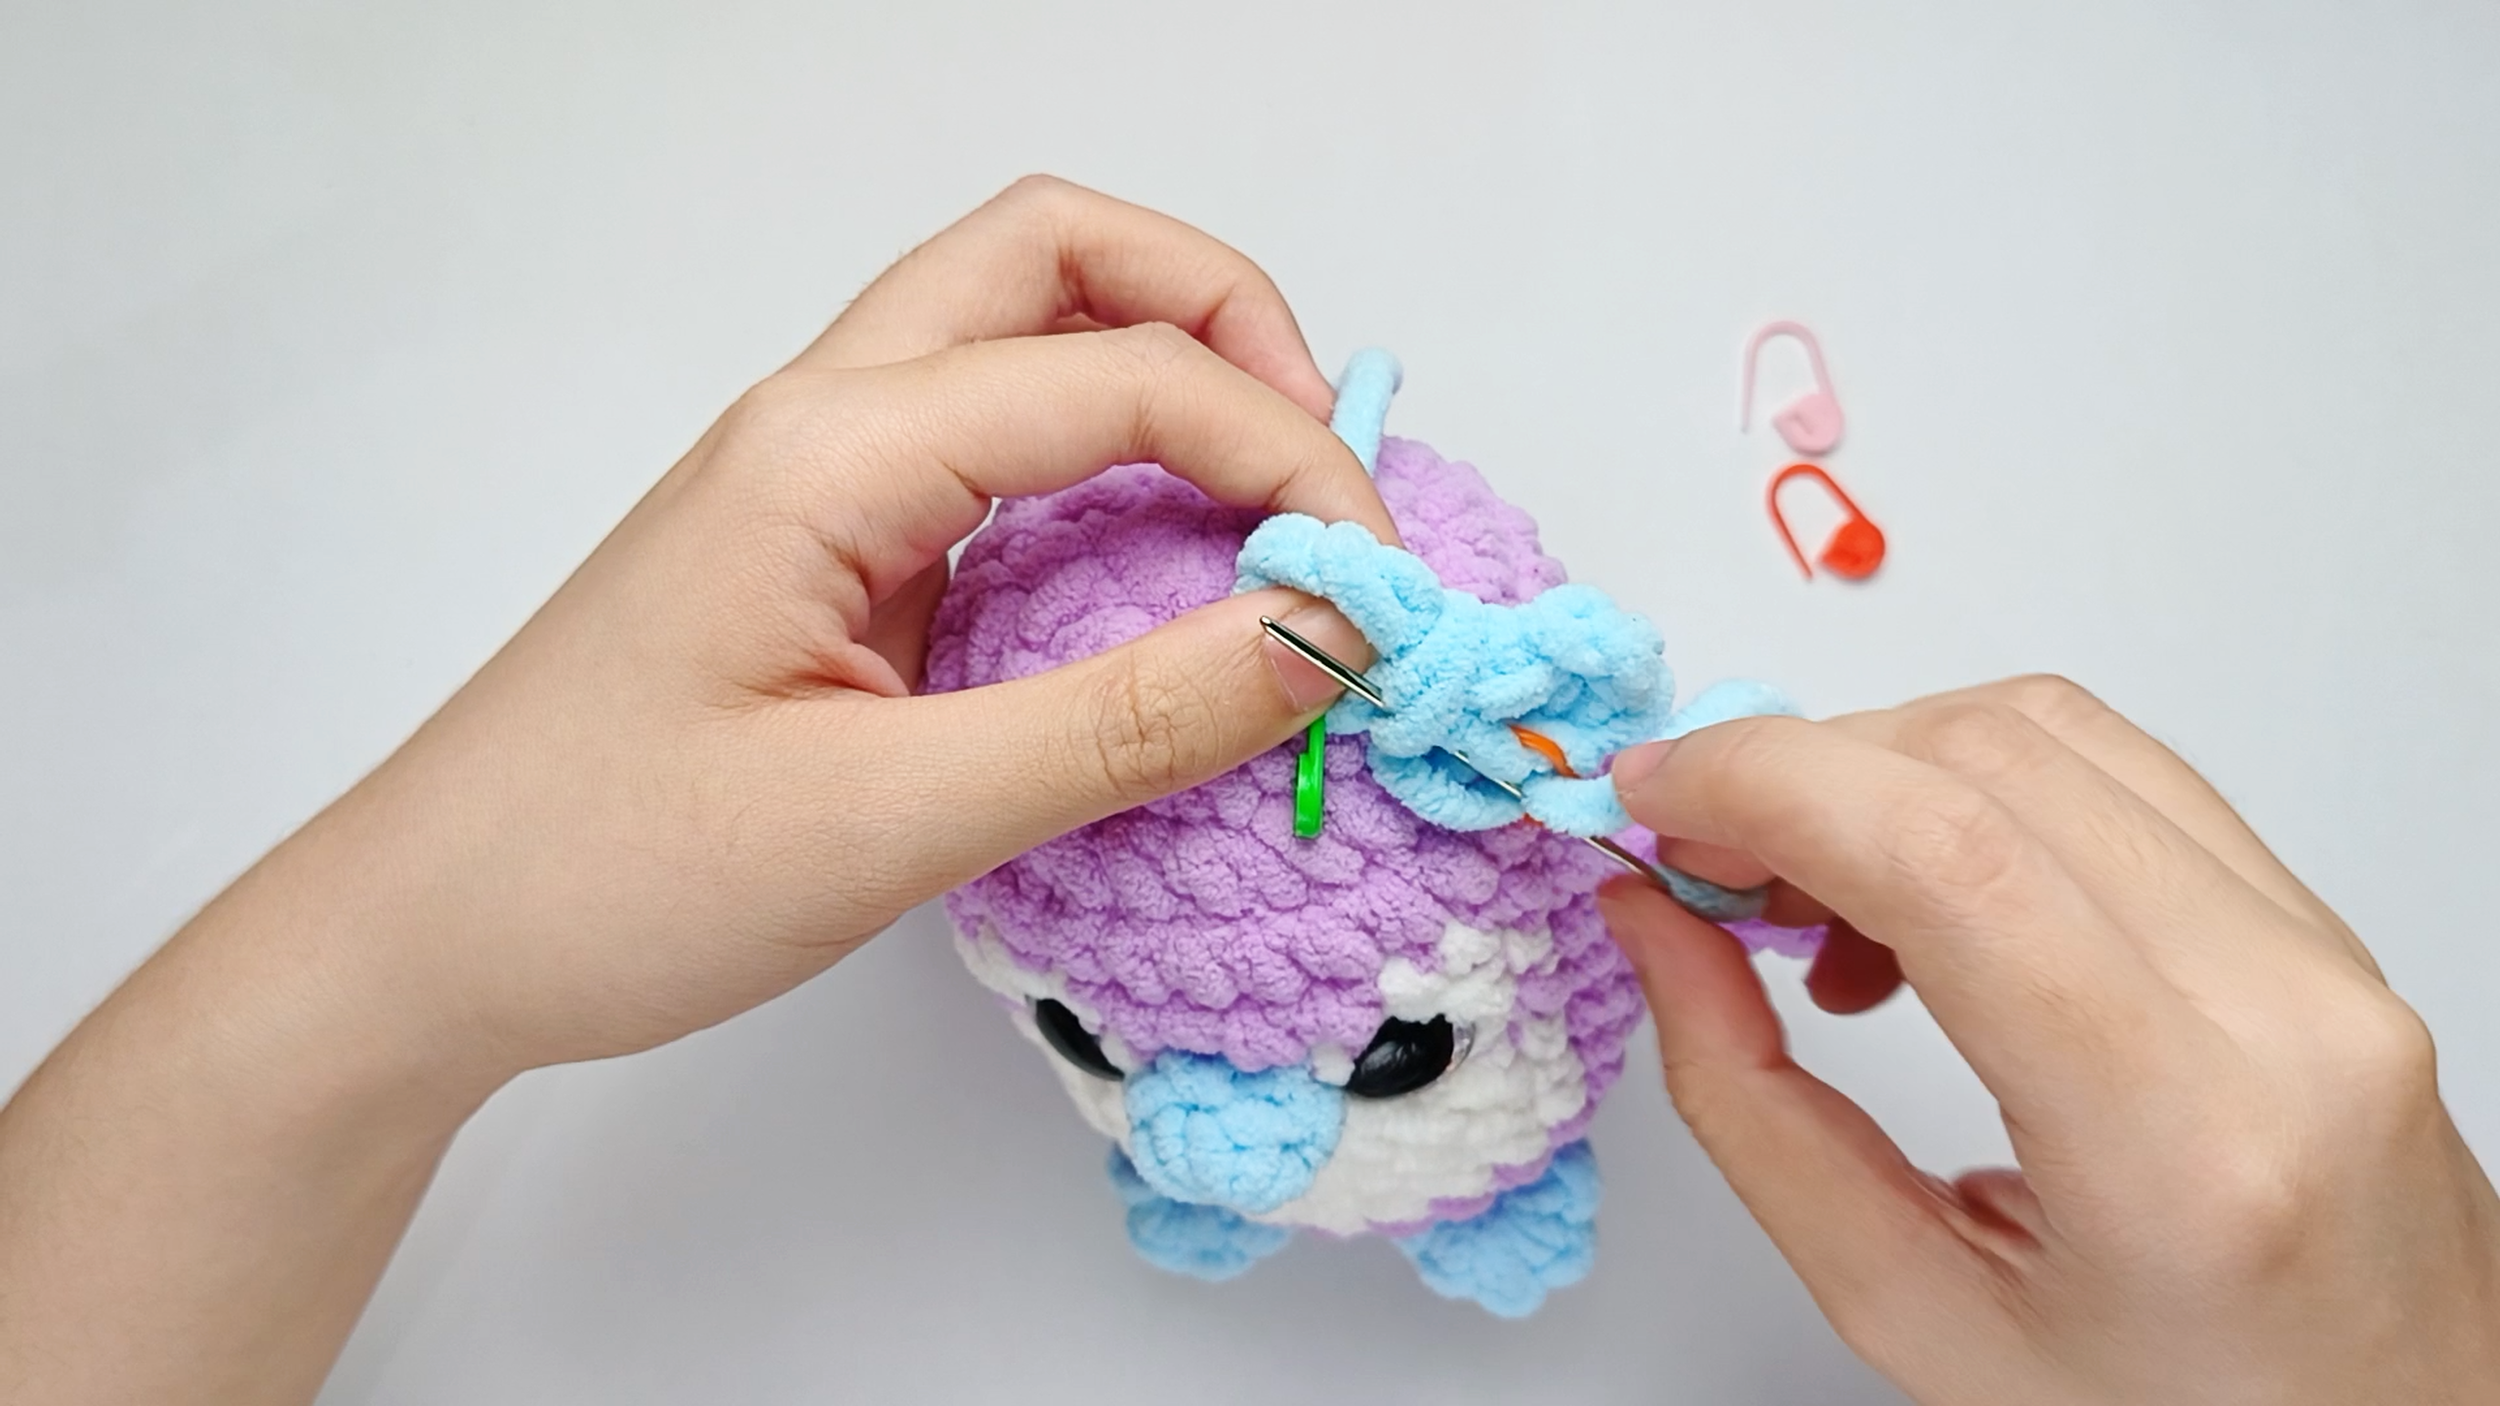
Up through the piece:
Bring the needle up through the center of the Bow. Pull the yarn all the way through.
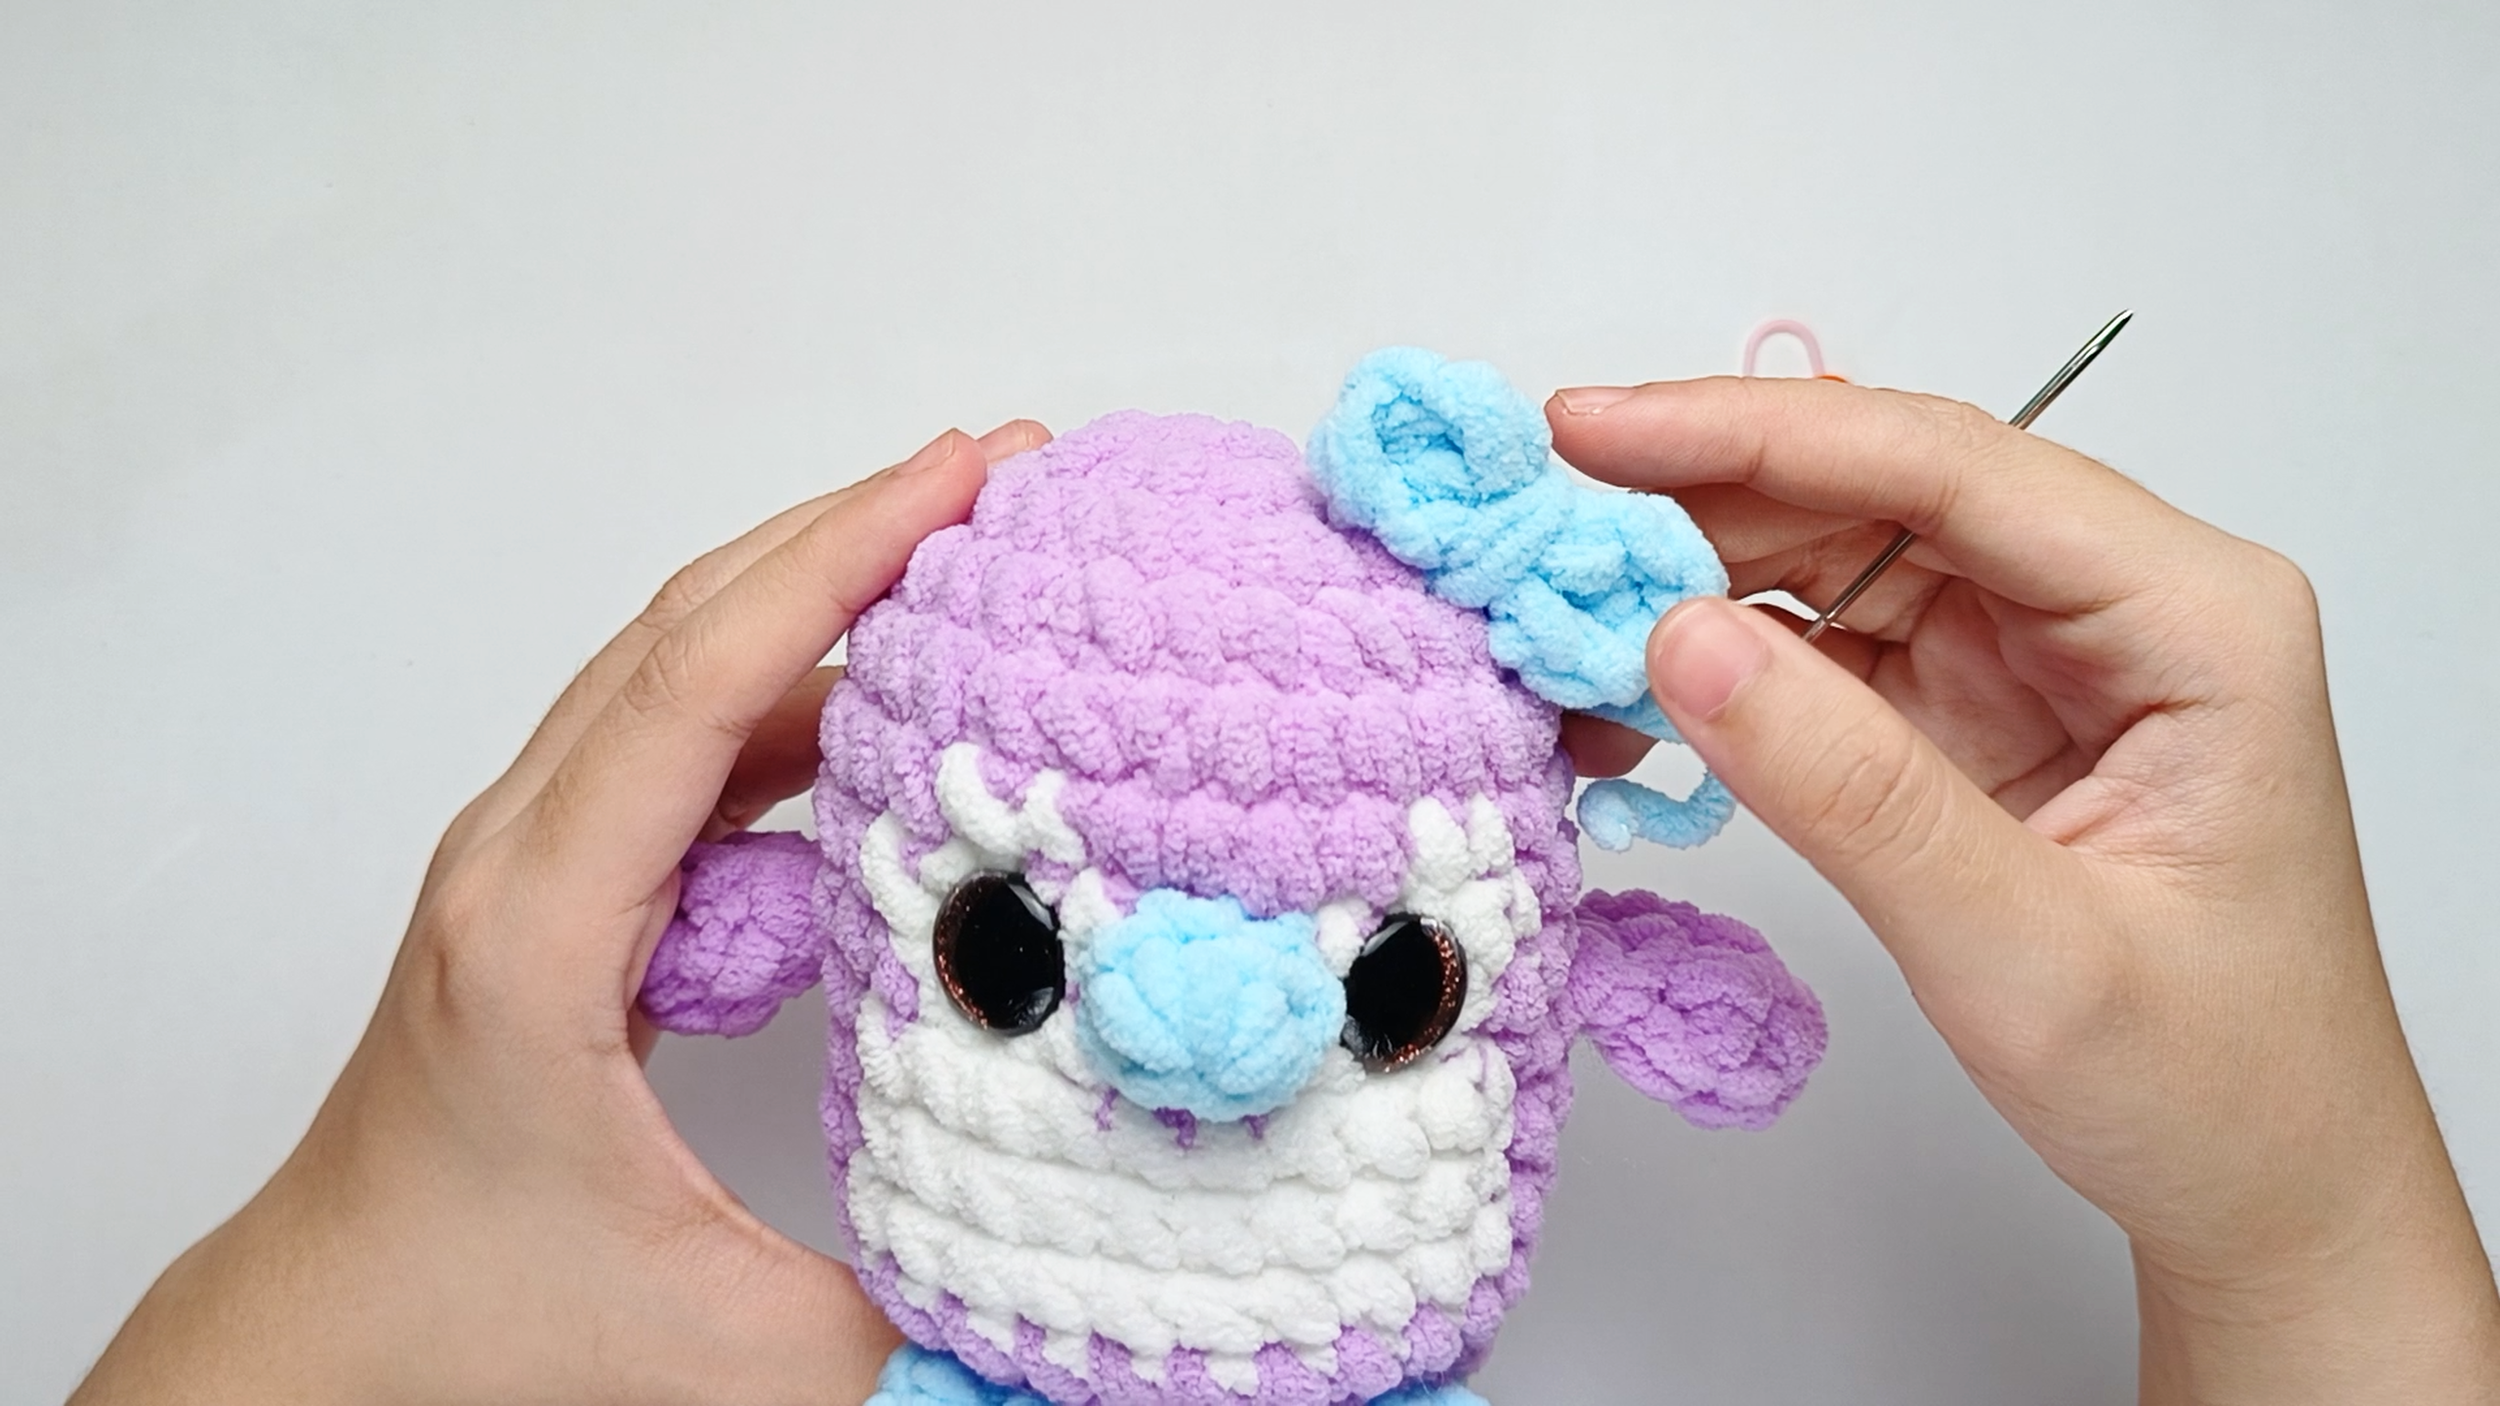
Work all the way around:
Keep repeating that same stitch - into one stitch of the Body, then back up through the center of the Bow - to secure the Bow with a few small stitches until it feels firmly attached. Remove the stitch markers as you go.
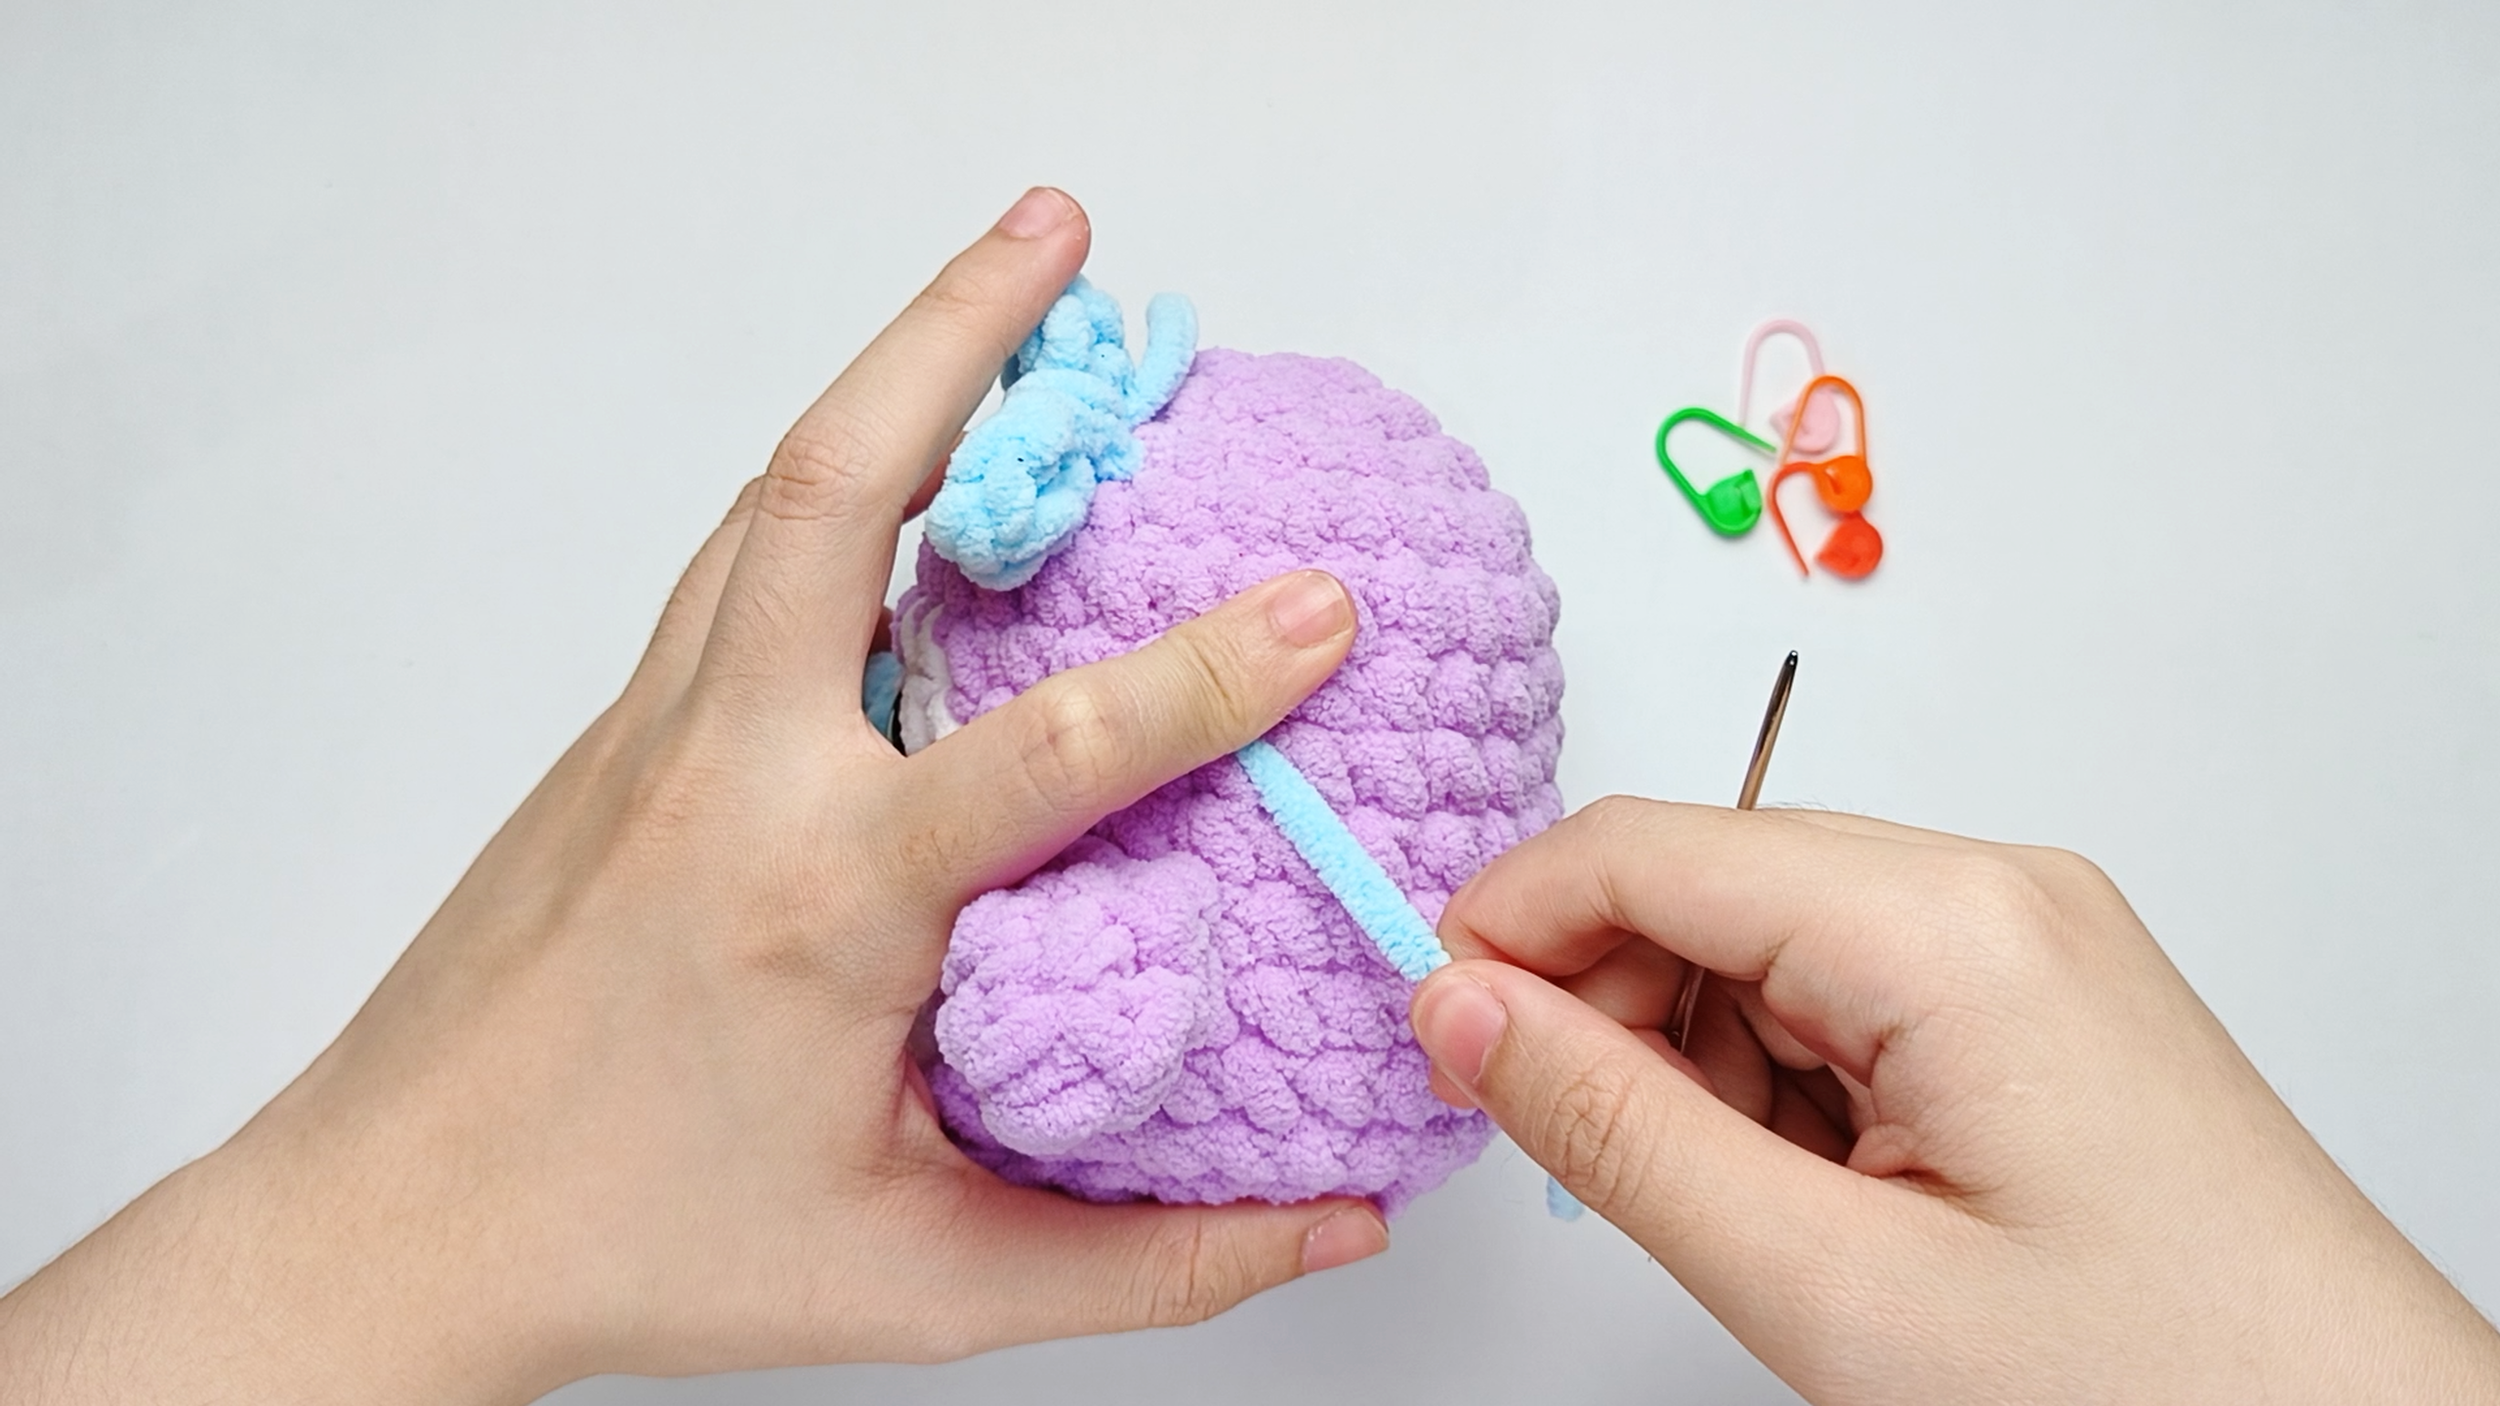
Secure and hide the tail:
To hide the yarn tail, take the needle down into the next stitch and run it through the Body, then pull the yarn through.
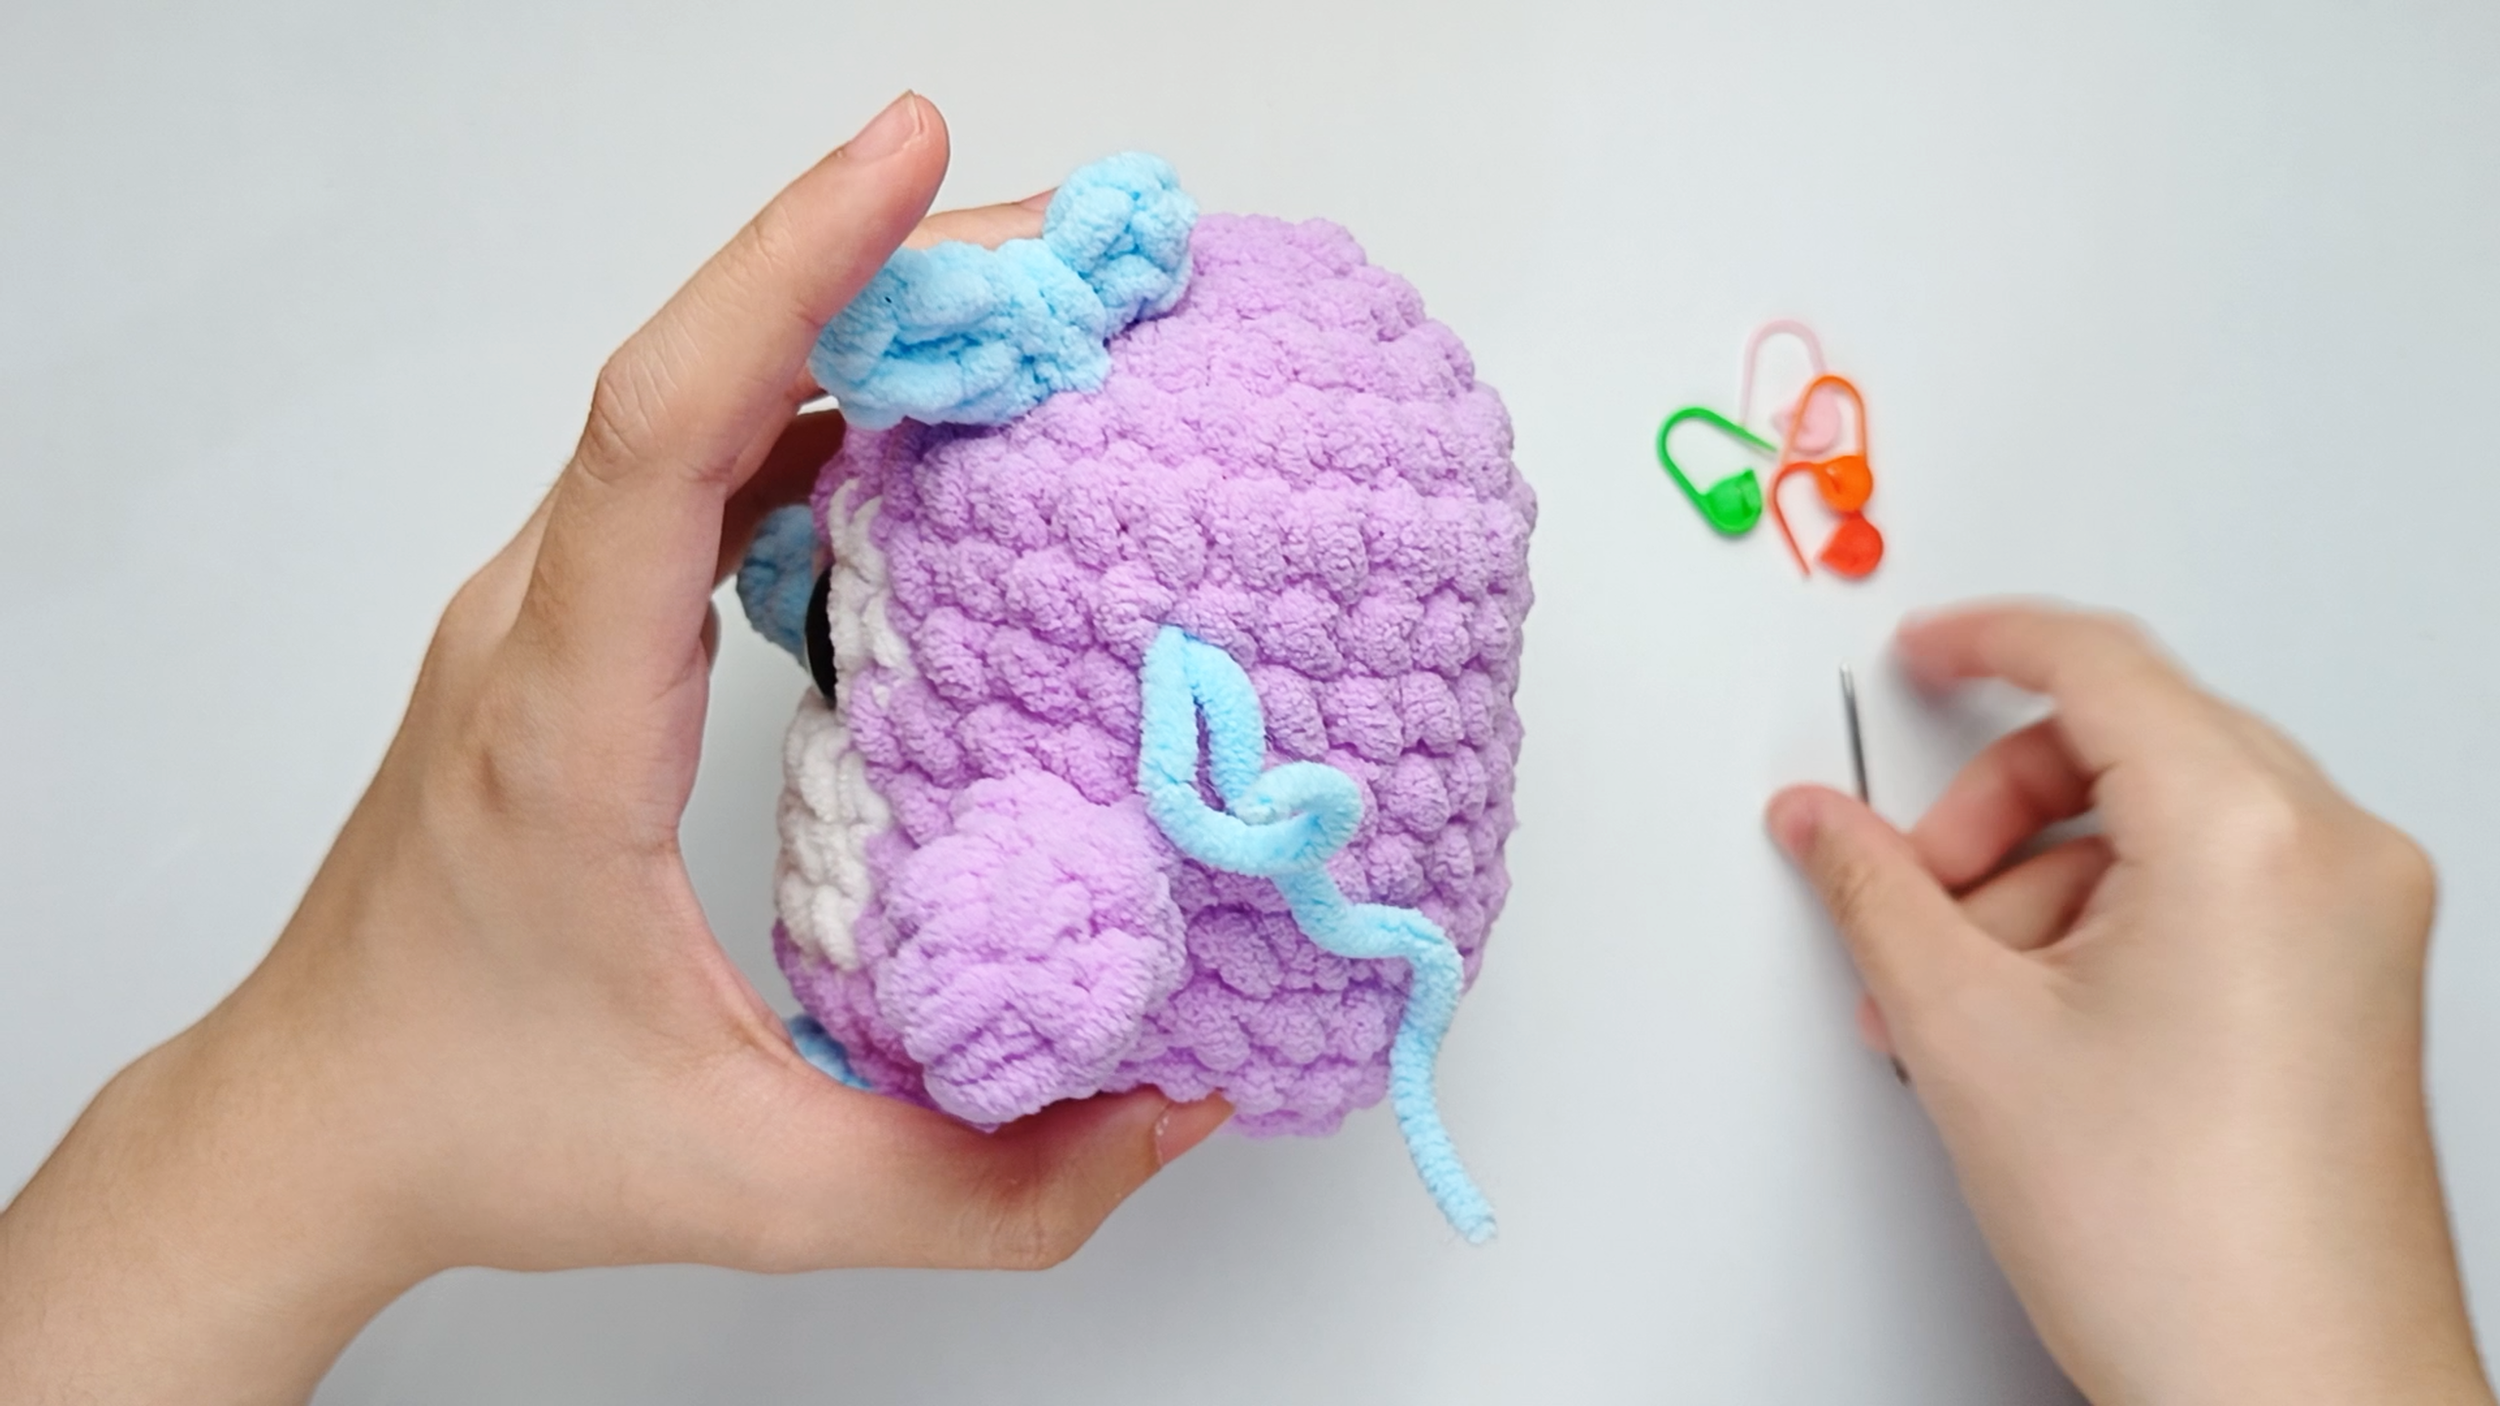
Hide the chain (ch) yarn tail:
Let’s hide the yarn tail from the chain (ch) inside the Body too. Thread the needle, take it down into the next stitch, run it through the Body, then pull the yarn through.
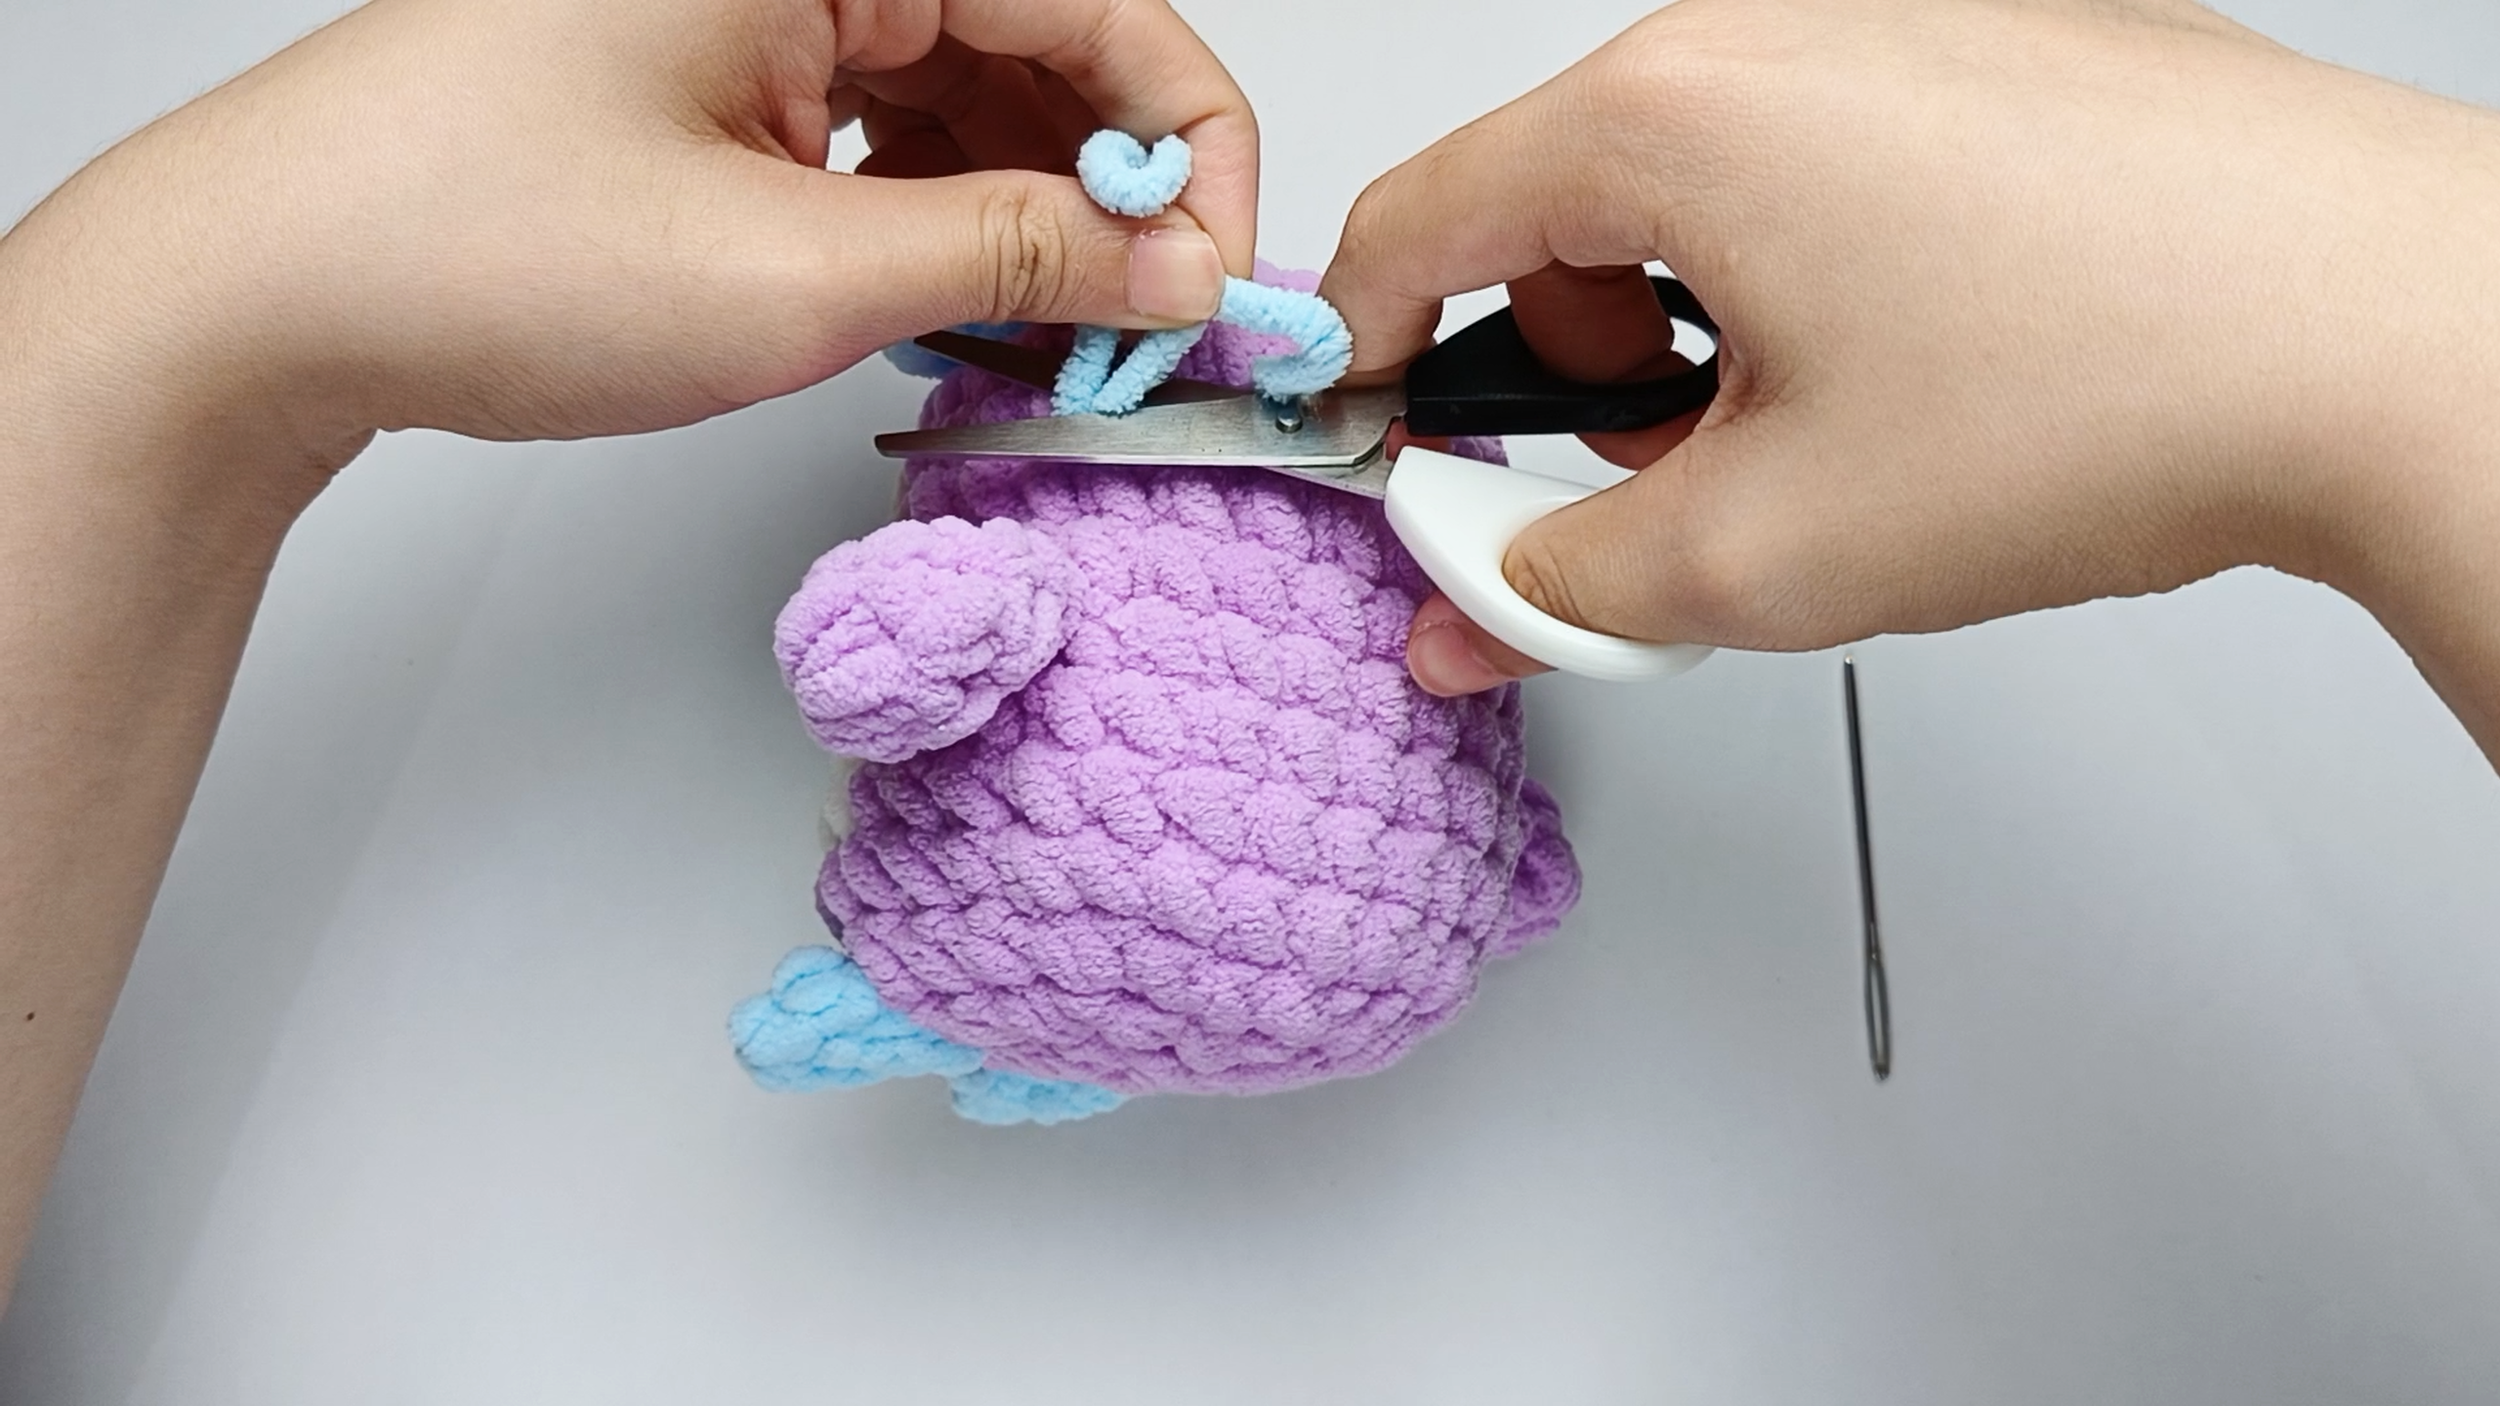
Trim the tails:
Trim the tails close to the surface and gently massage the area so the end disappears inside.
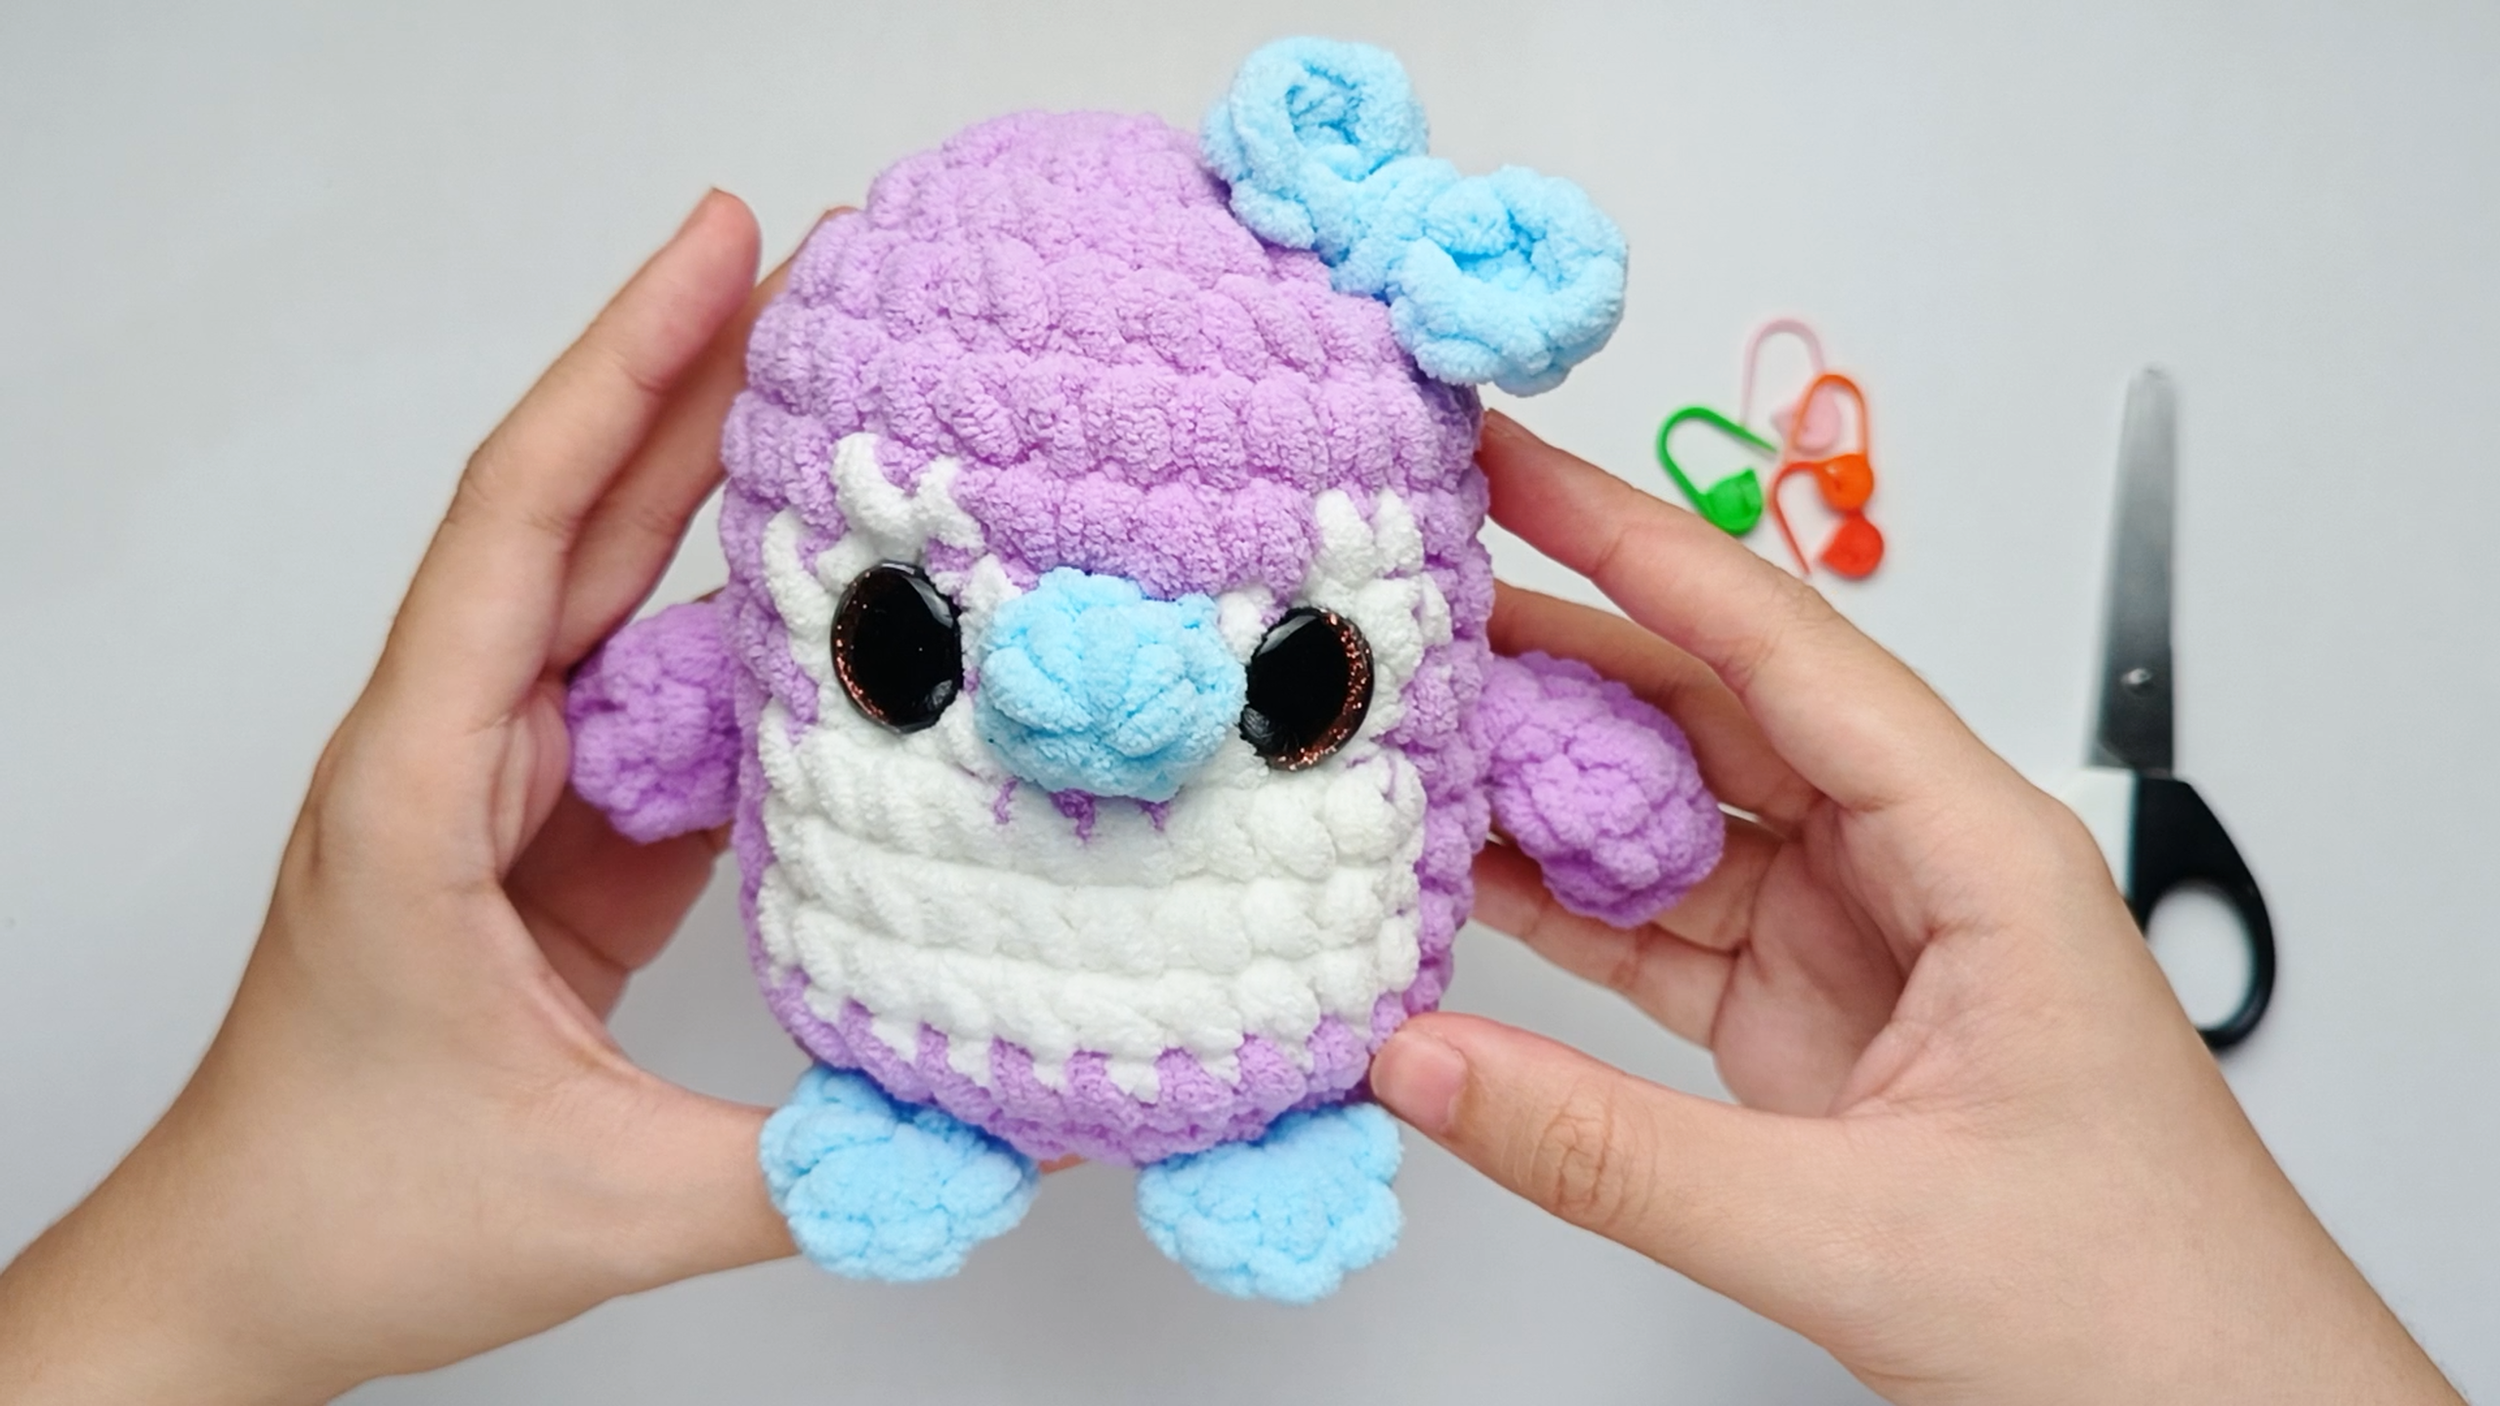
Attached Bow:
The Bow is now fully attached.

You've finished Pip the Penguin, and that is genuinely something to be proud of. Think about what you've just learned: the magic ring, working in the round, color changing, shaping with increases and decreases, and sewing pieces together. Five brand-new skills, one finished handmade penguin.
Show off your finished Pip! Tag @knothaven.store on Instagram, and we'd love a review on Amazon or a note at hello@knothavenstore.com.