
Pip’s Body
You'll crochet the Body in the round, starting at the top of Pip's Head and working down toward her Belly. Use purple yarn first, then change to white as instructed. You'll also add stuffing as you go.
Keep this direction in mind for later - it's how you'll know where Pip's Eyes, Nose and Bow go when you assemble her.

Unsure about a stitch? The video tutorial for it is linked right where you need it, just look for the play button or an underlined word.
Chapter 1:
Getting Started
Let's begin. in this Chapter, you'll make your first magic ring, crochet into it, and start using a stitch marker so you always know where each round begins.

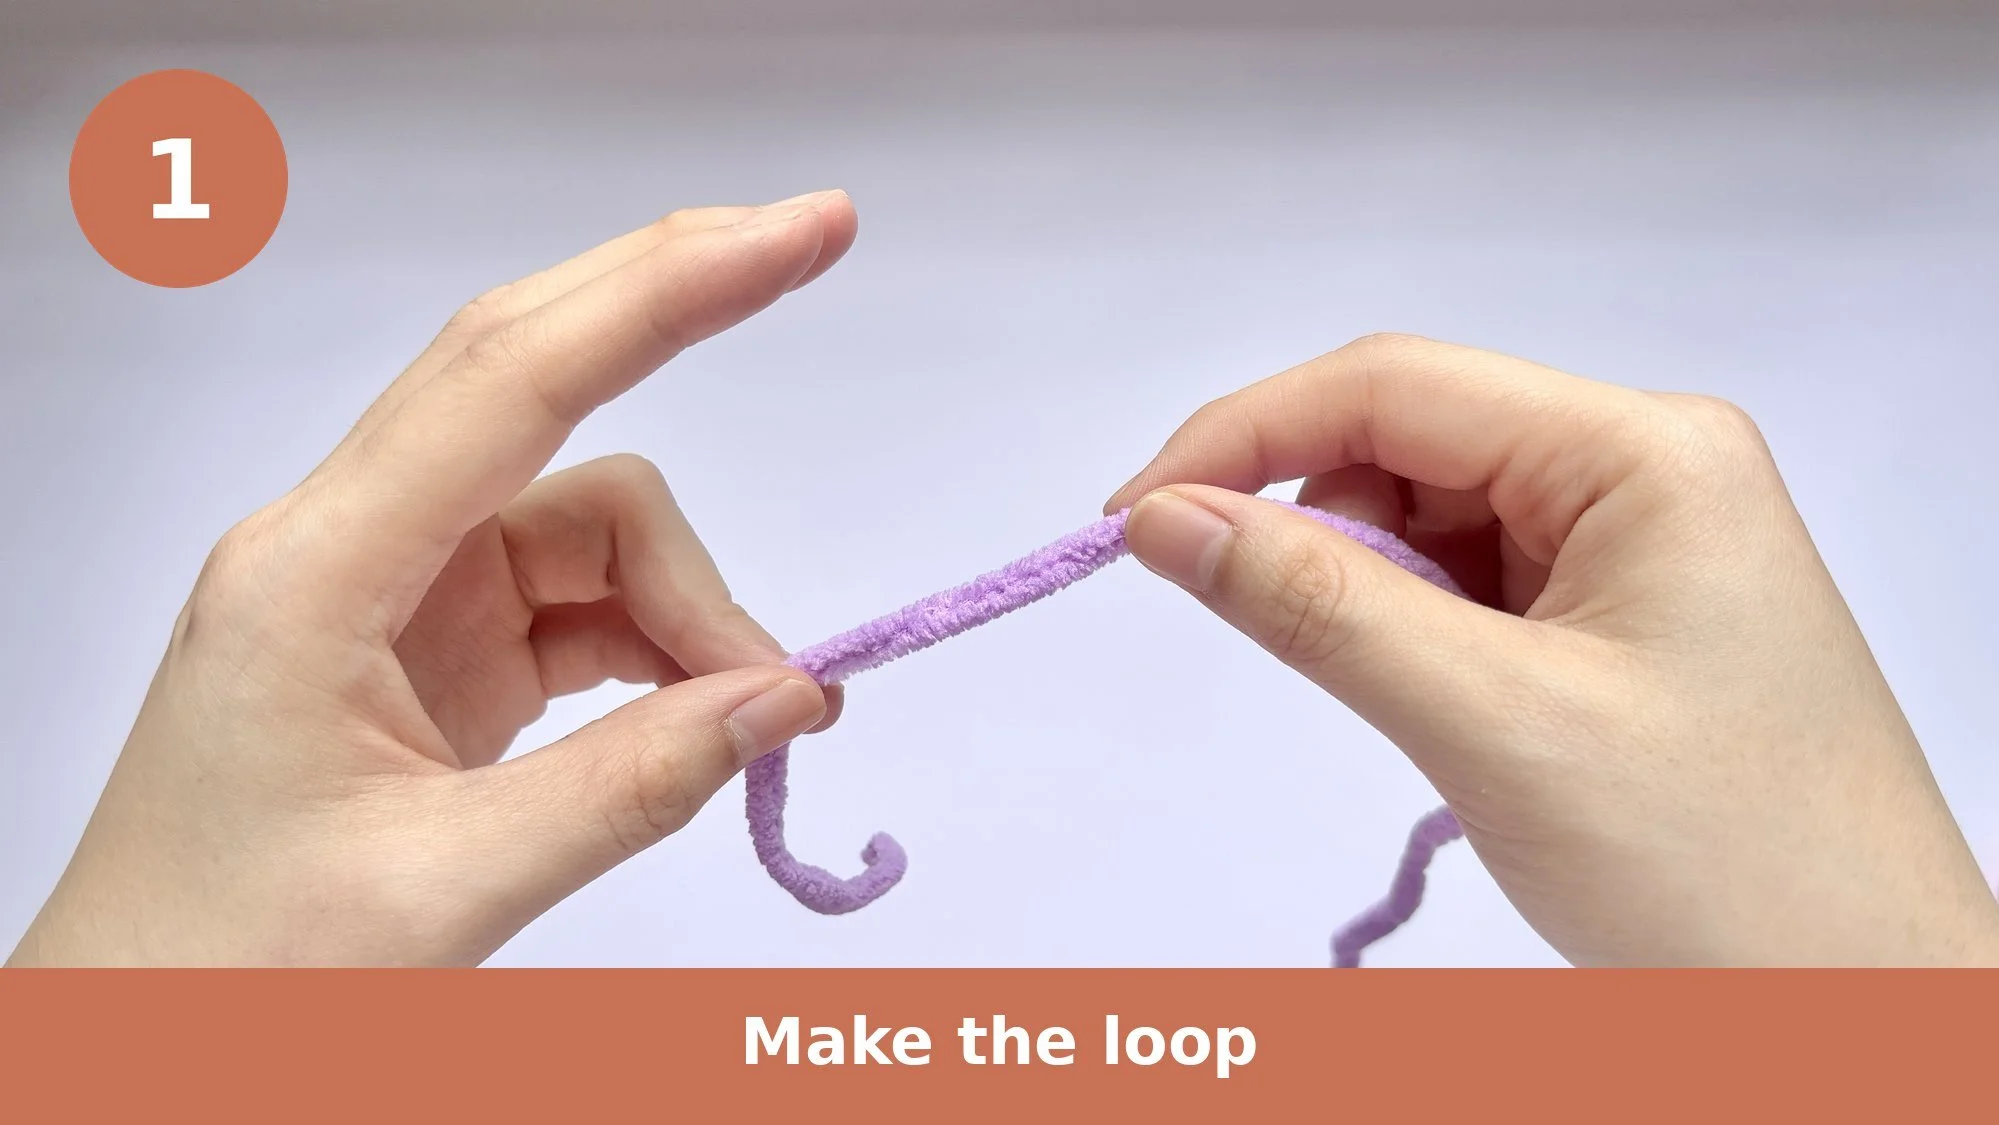
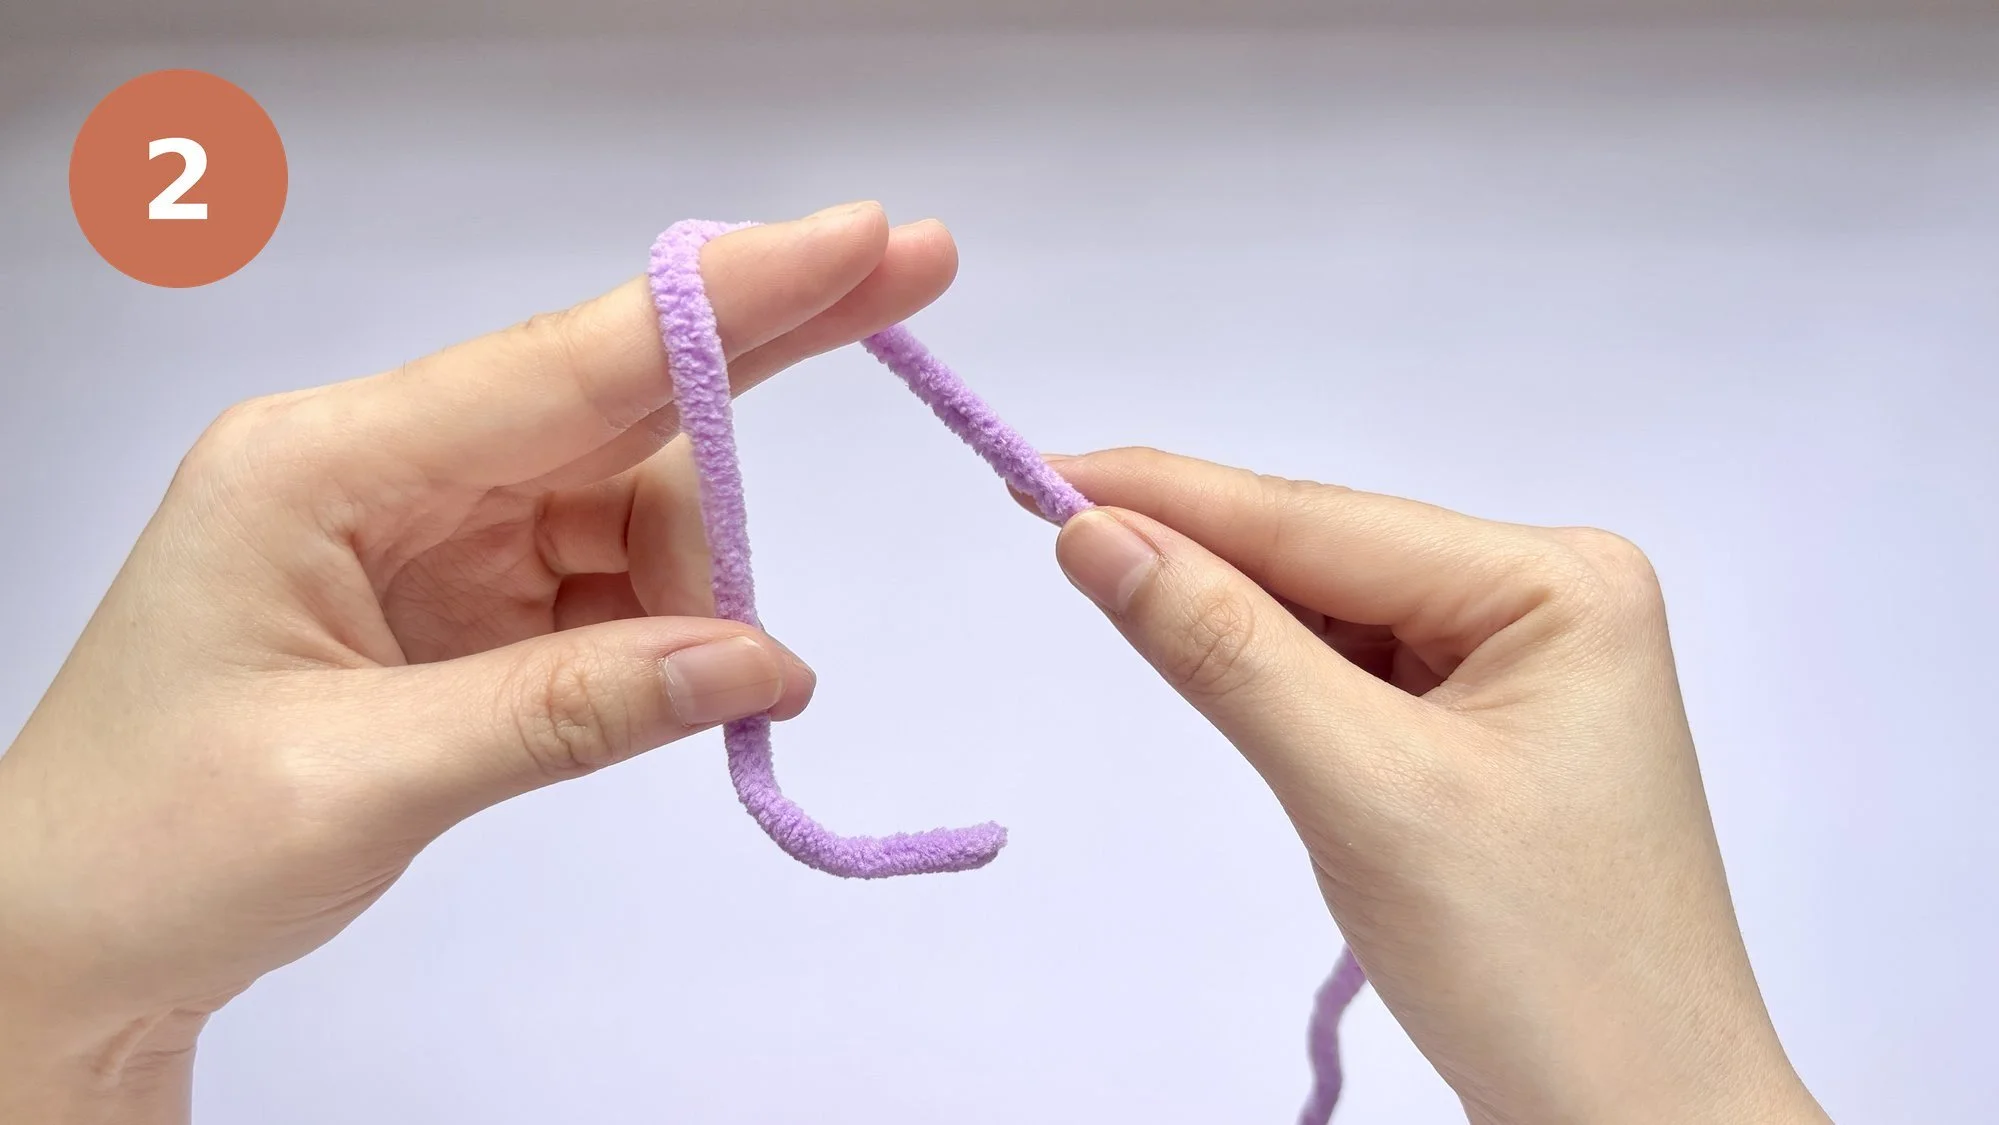
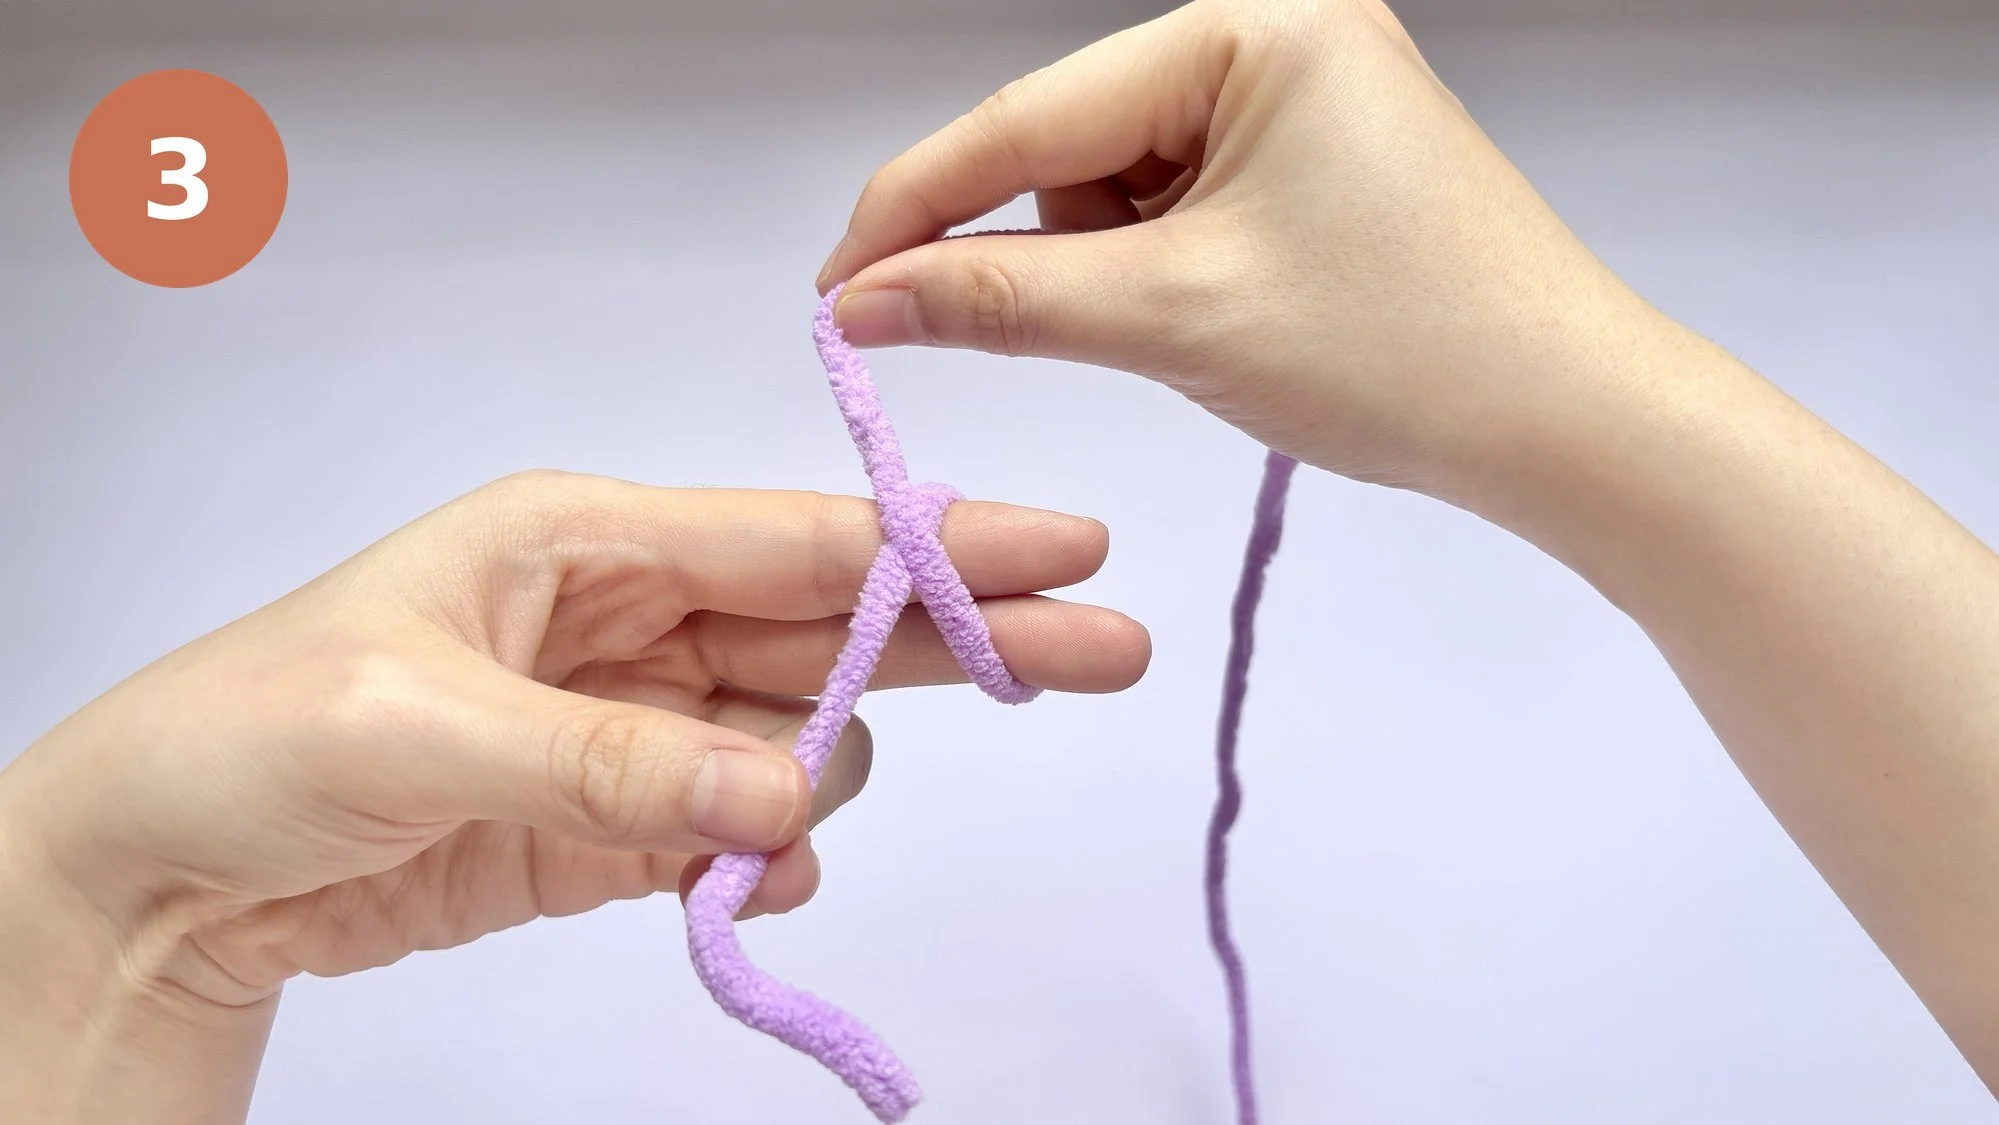
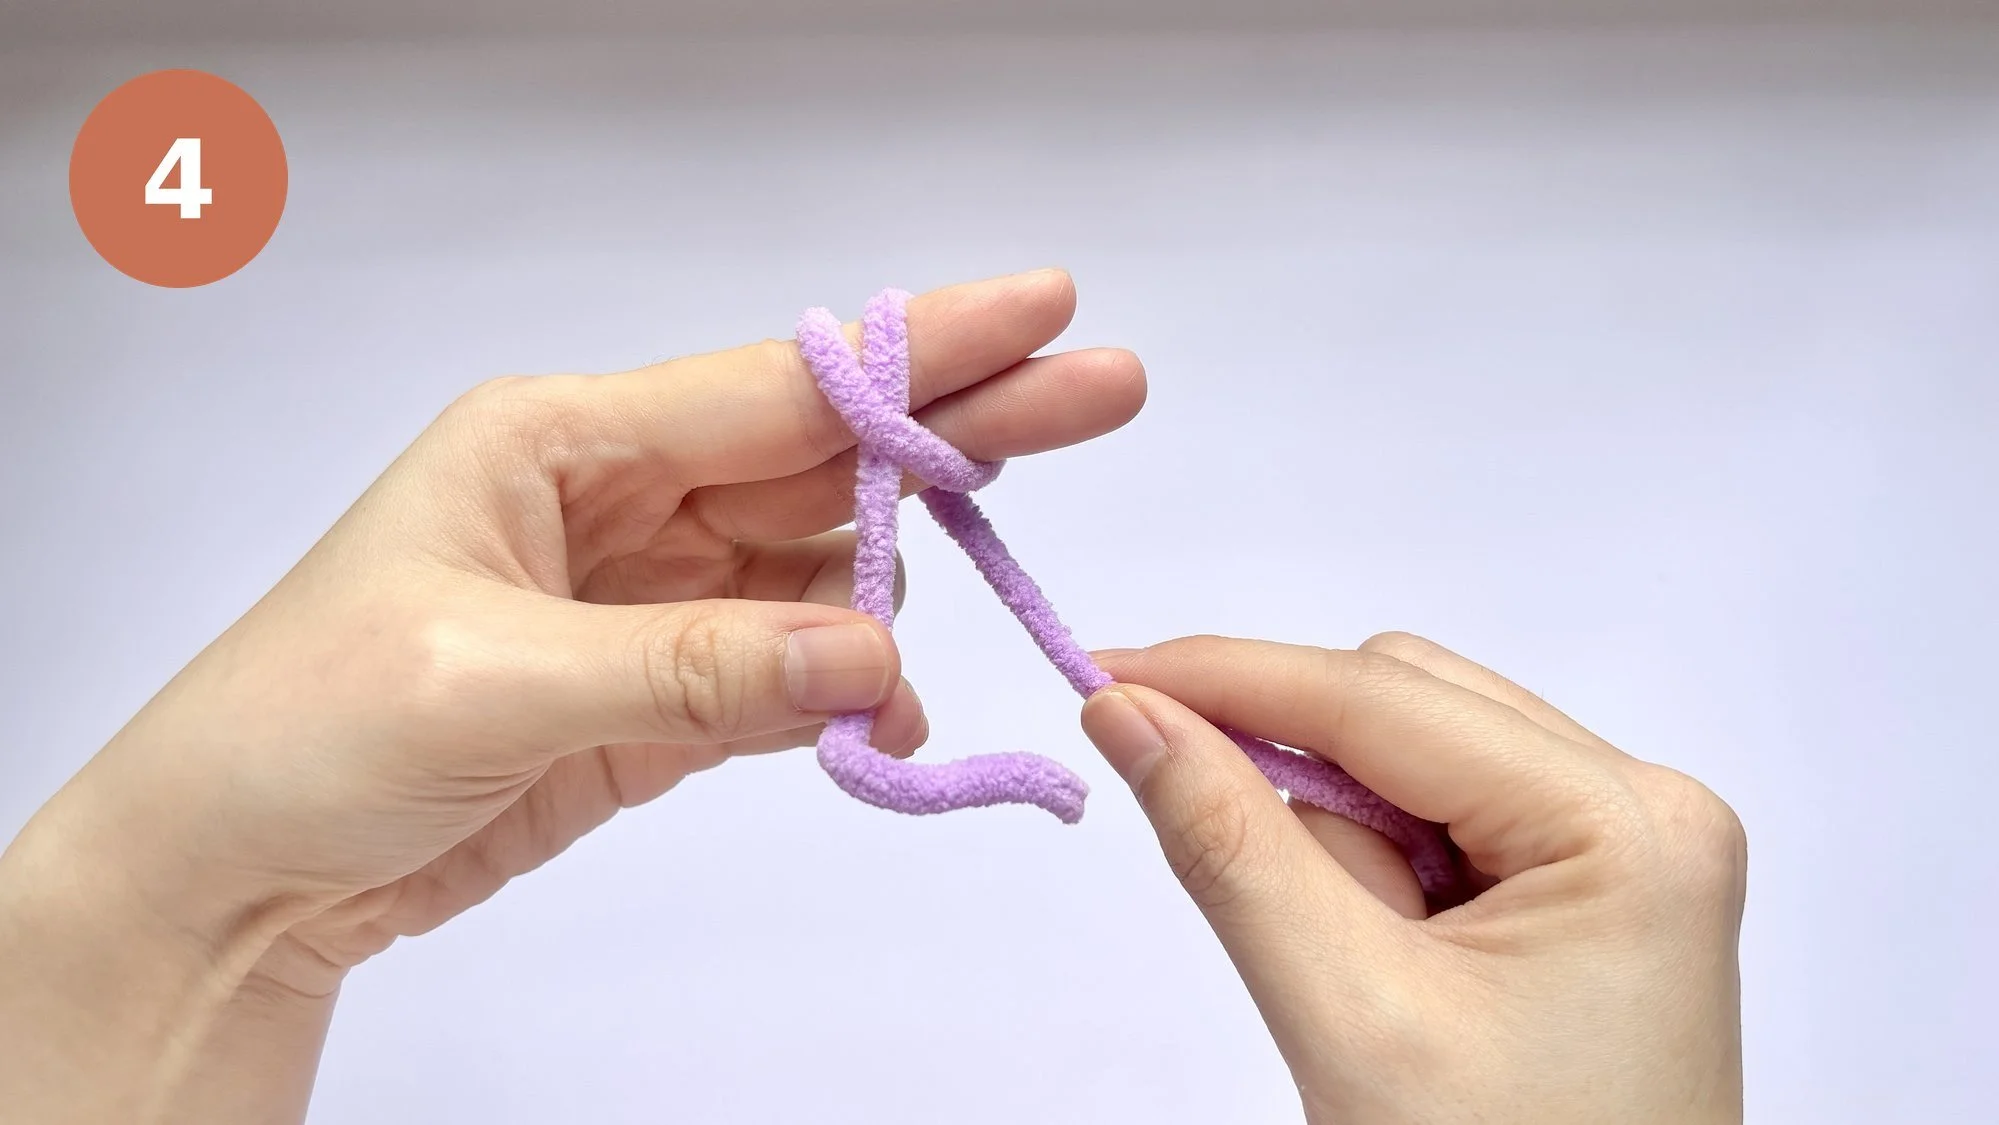
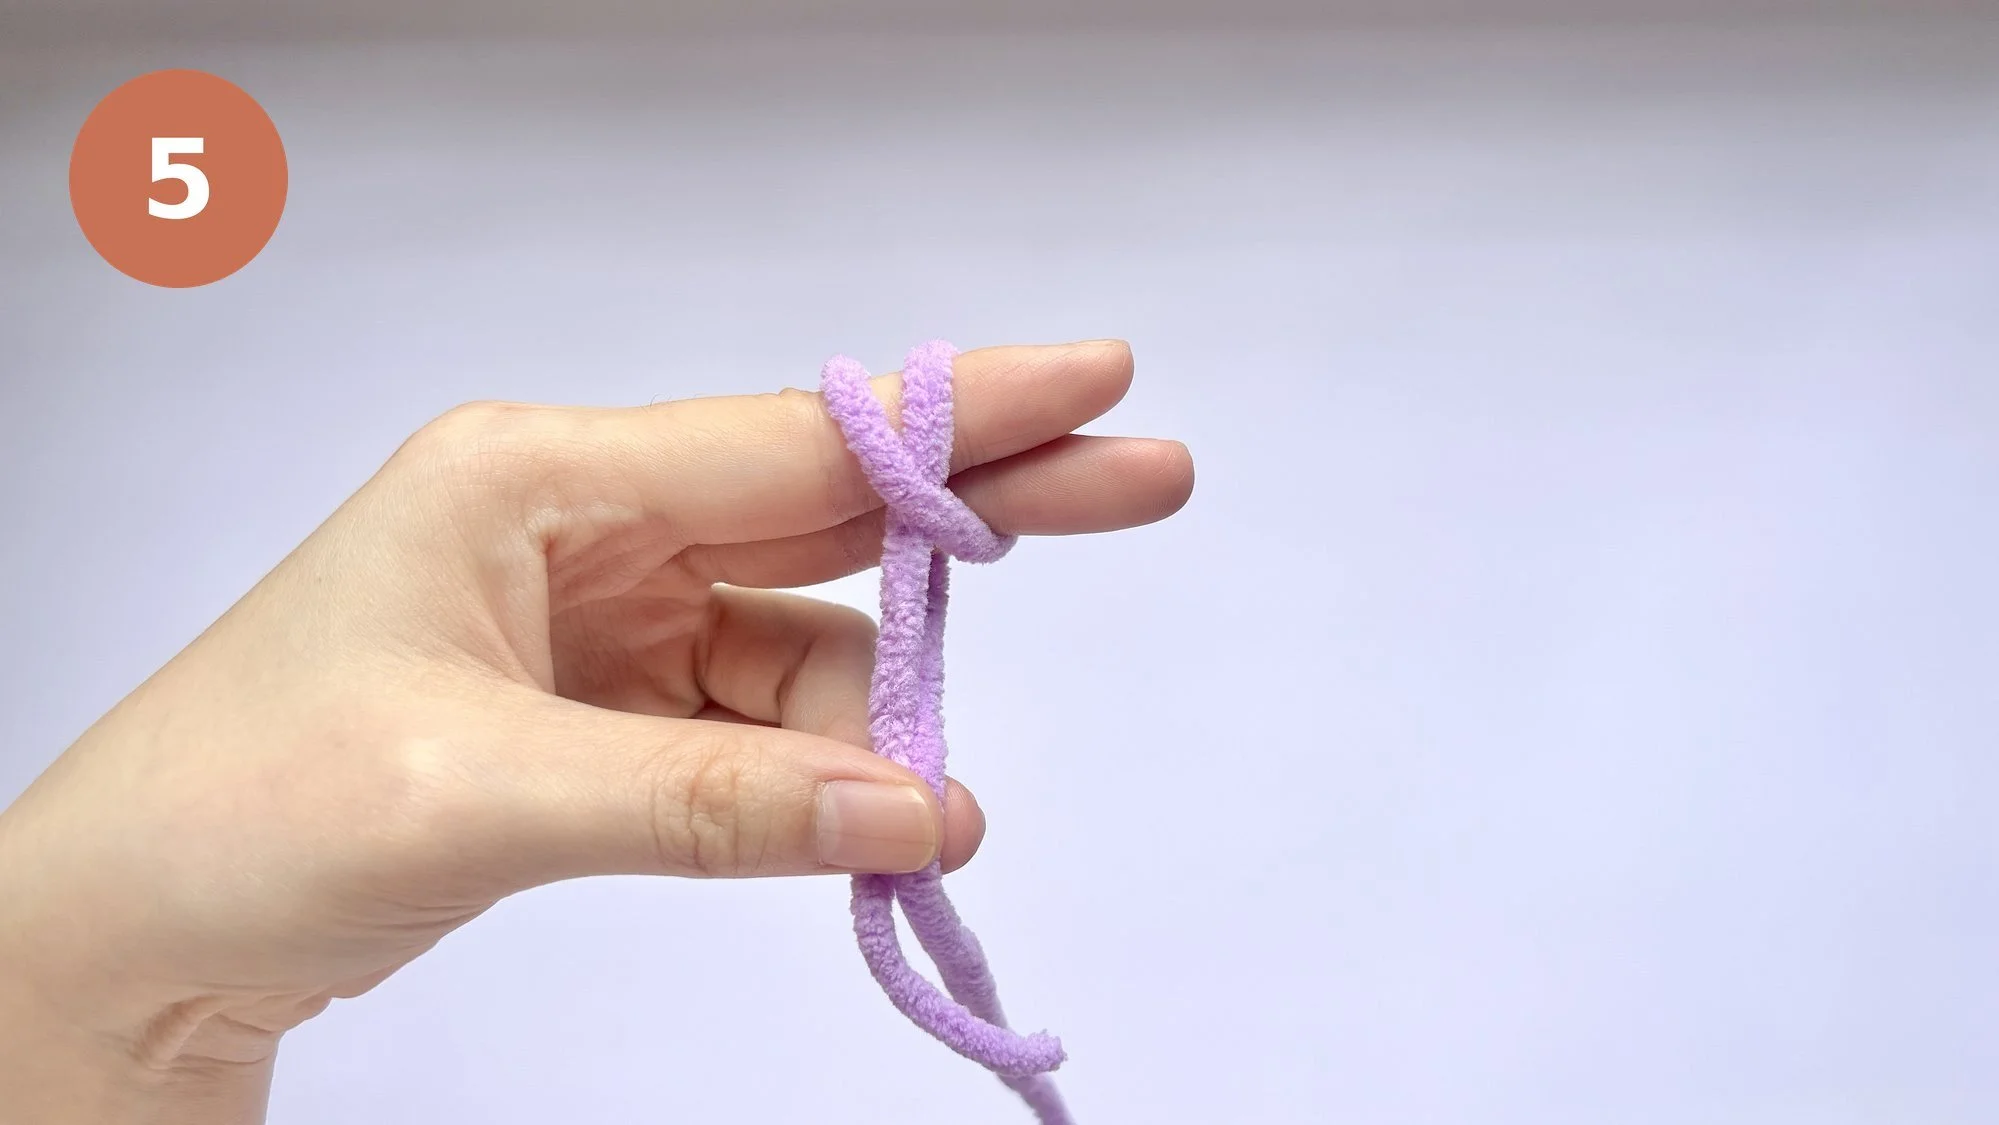
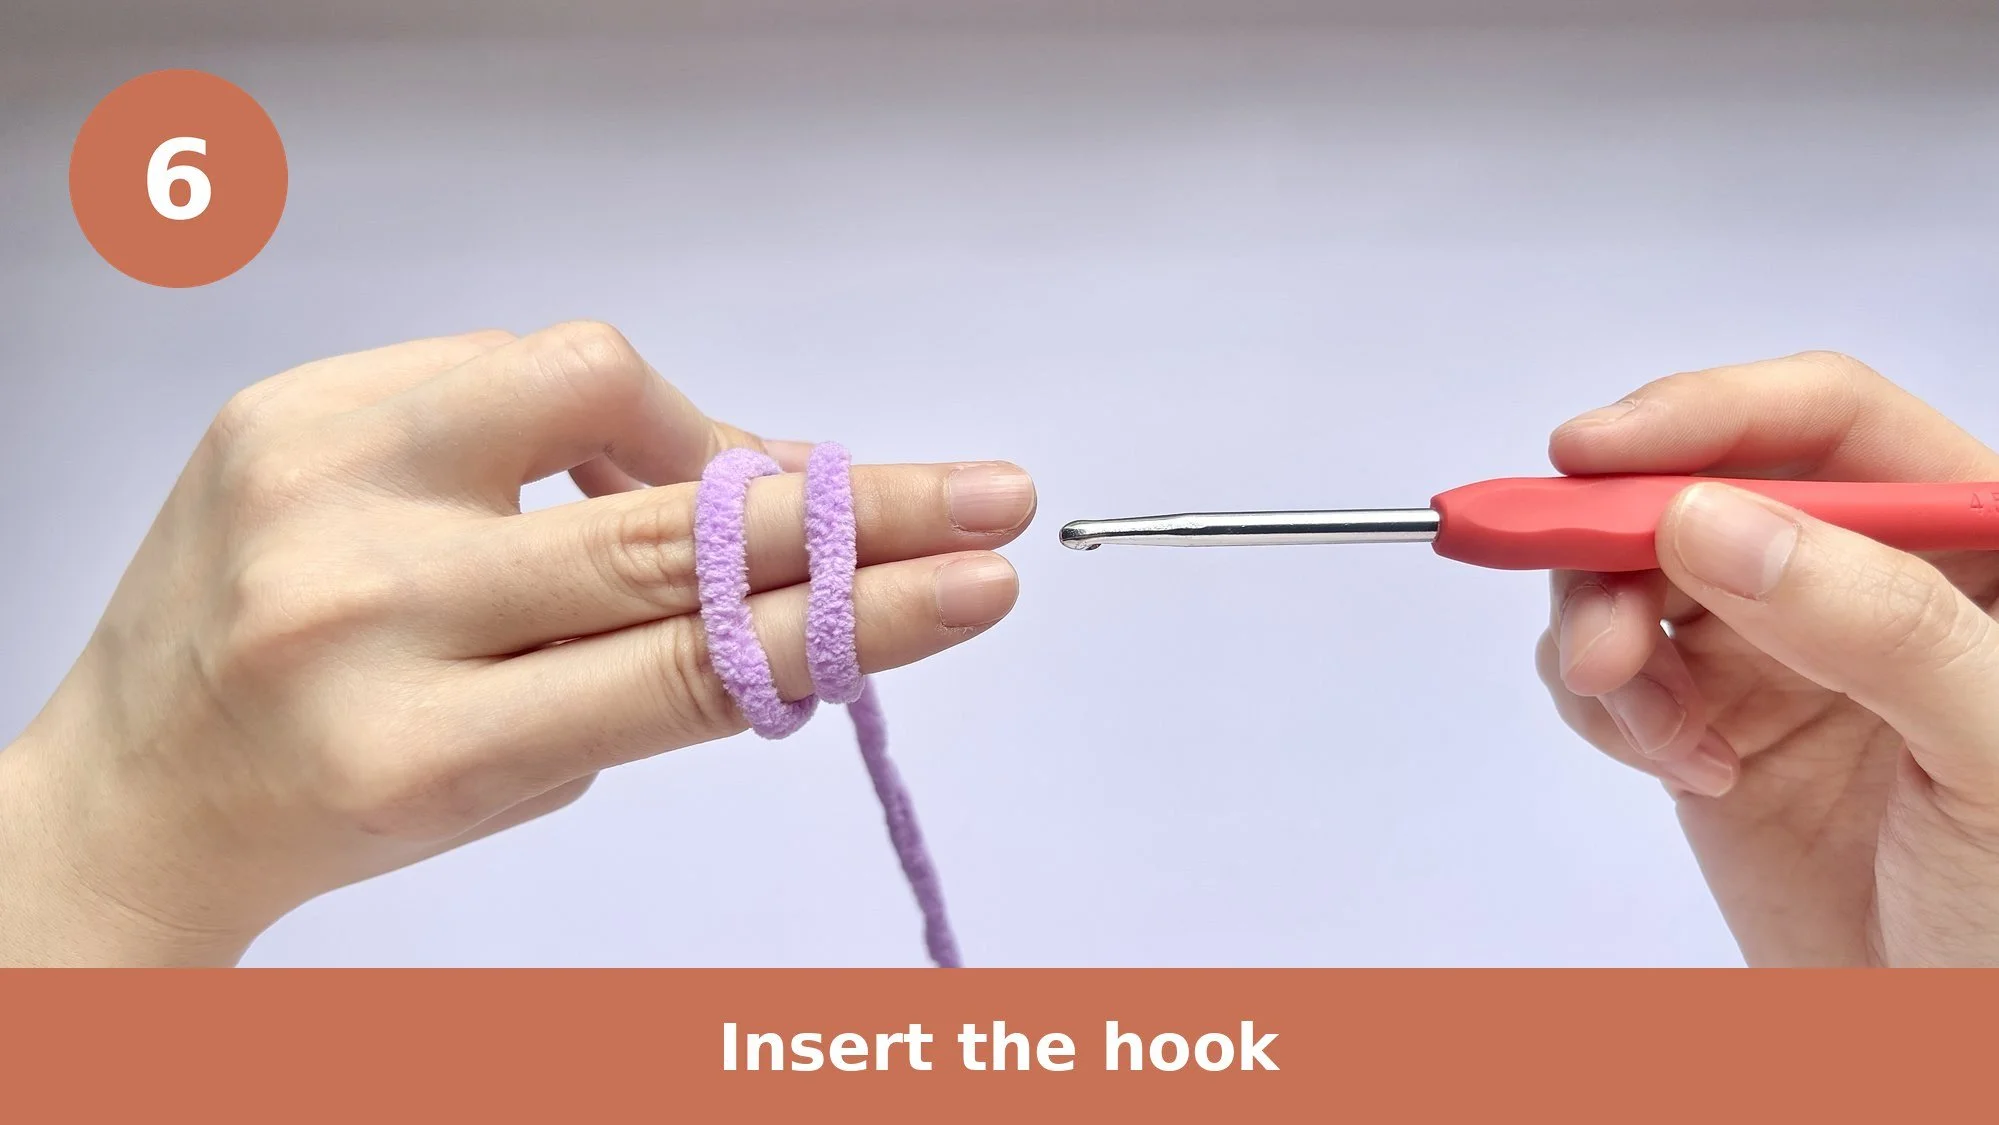
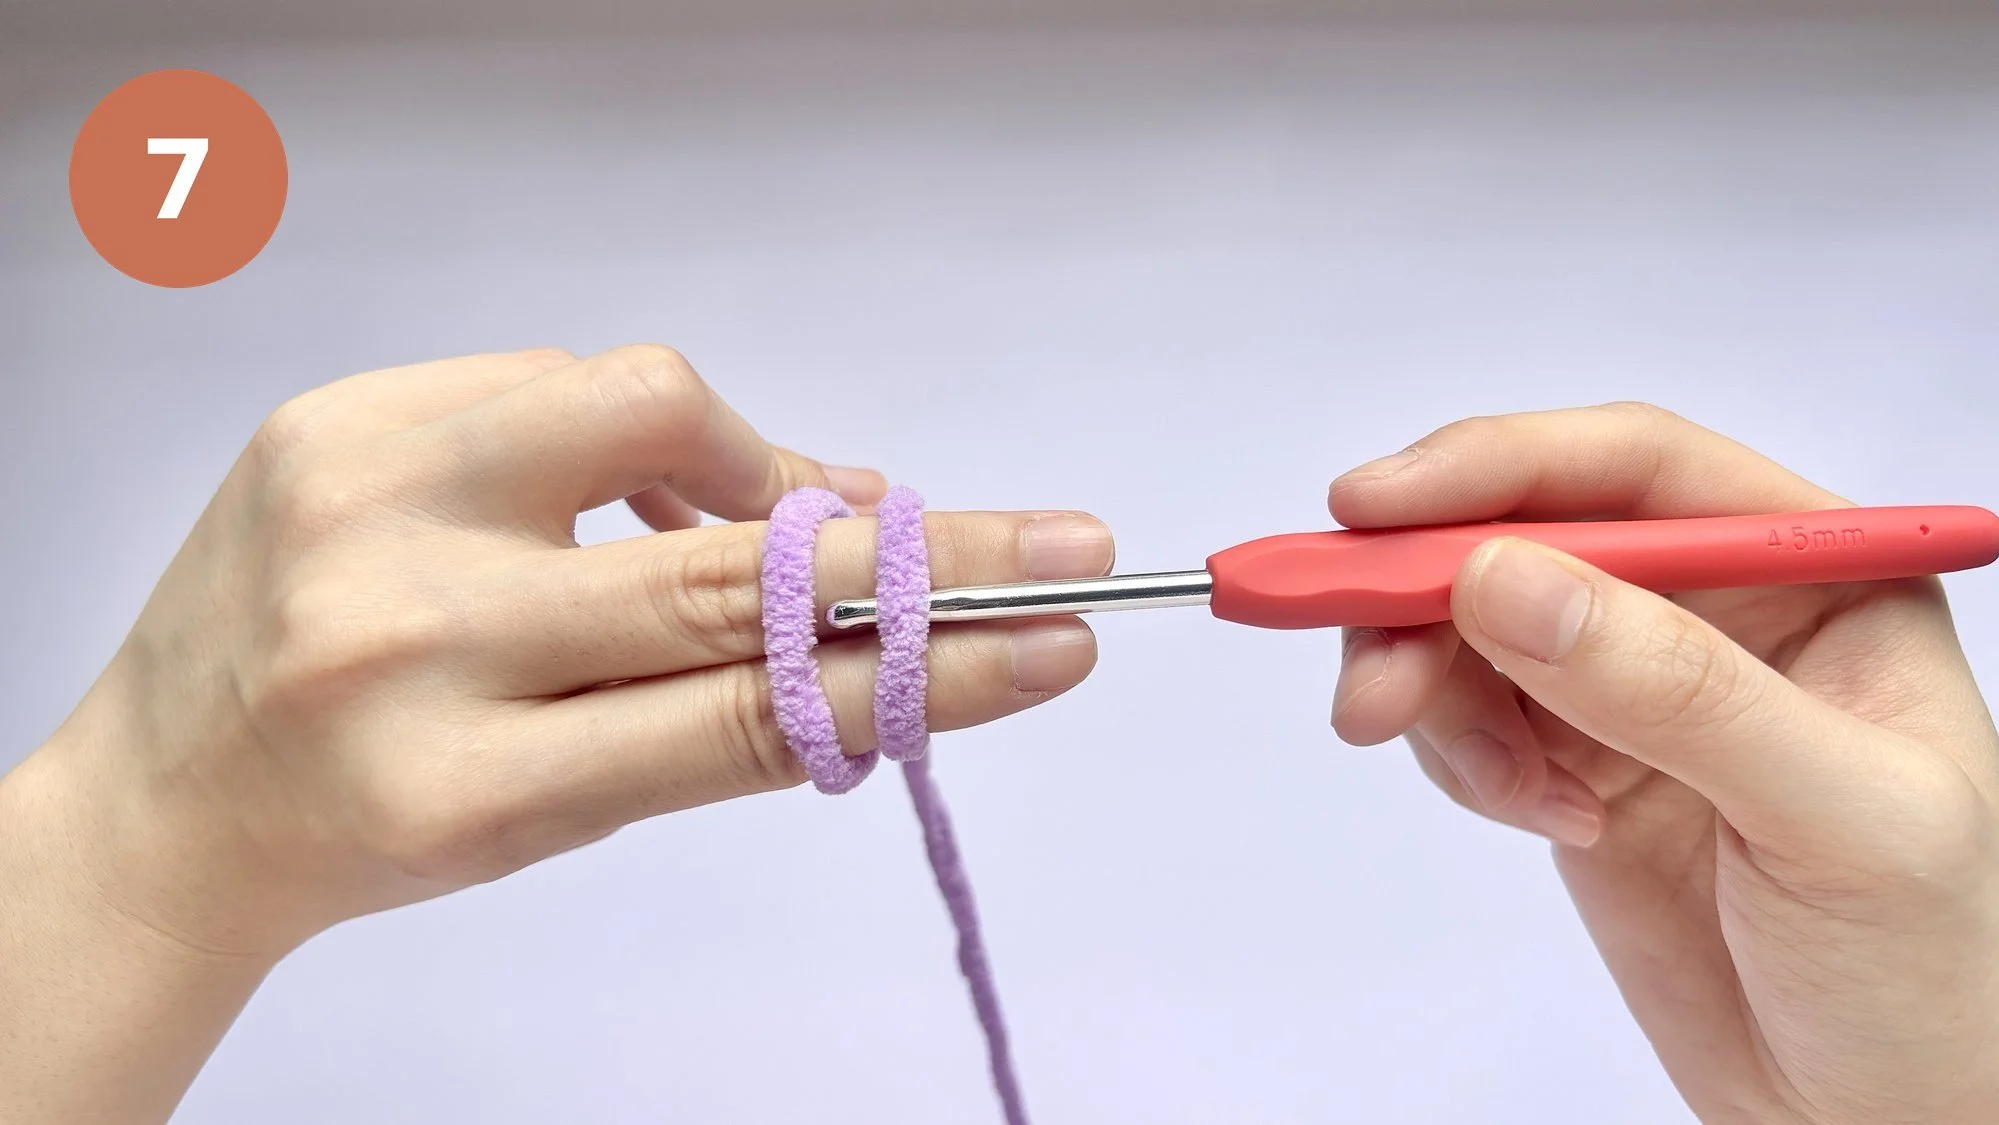
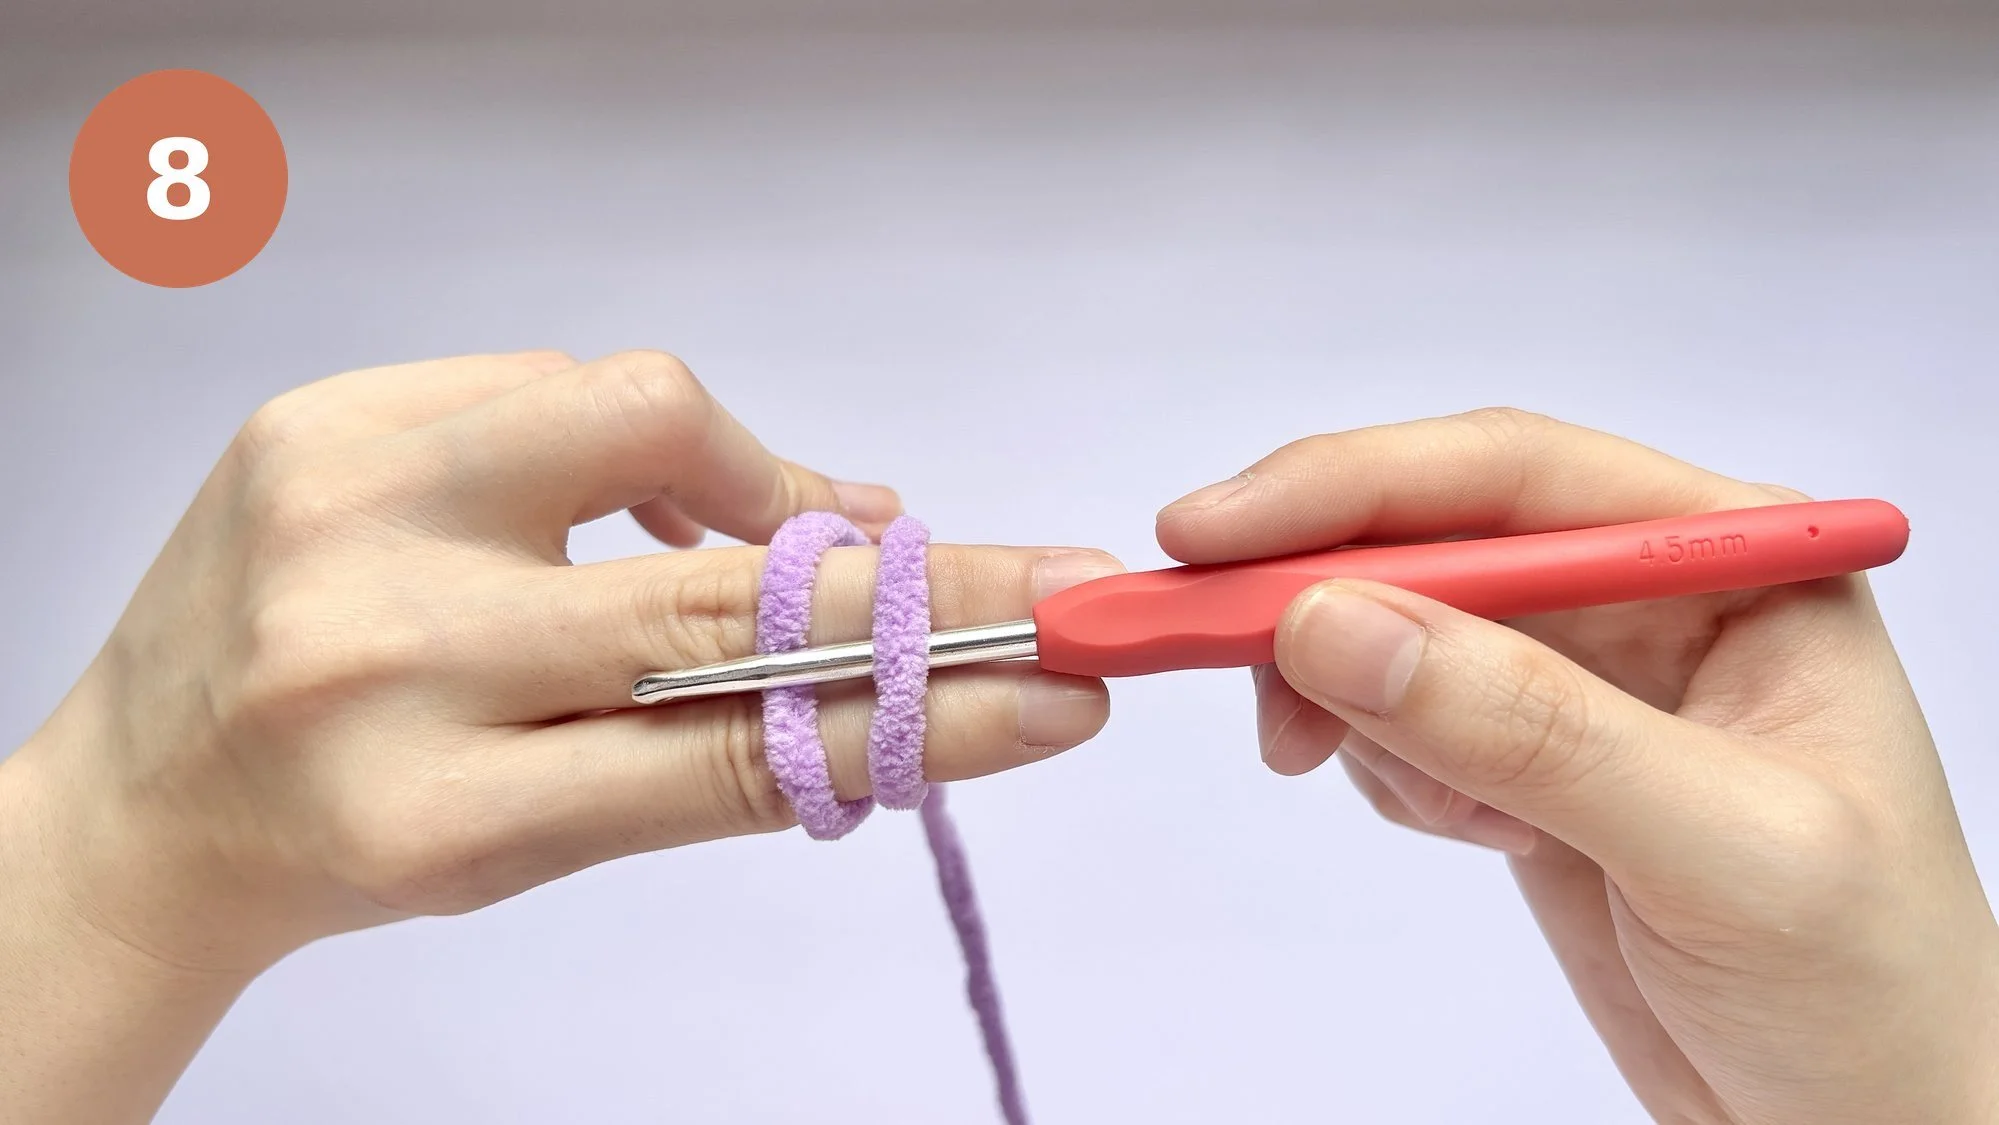
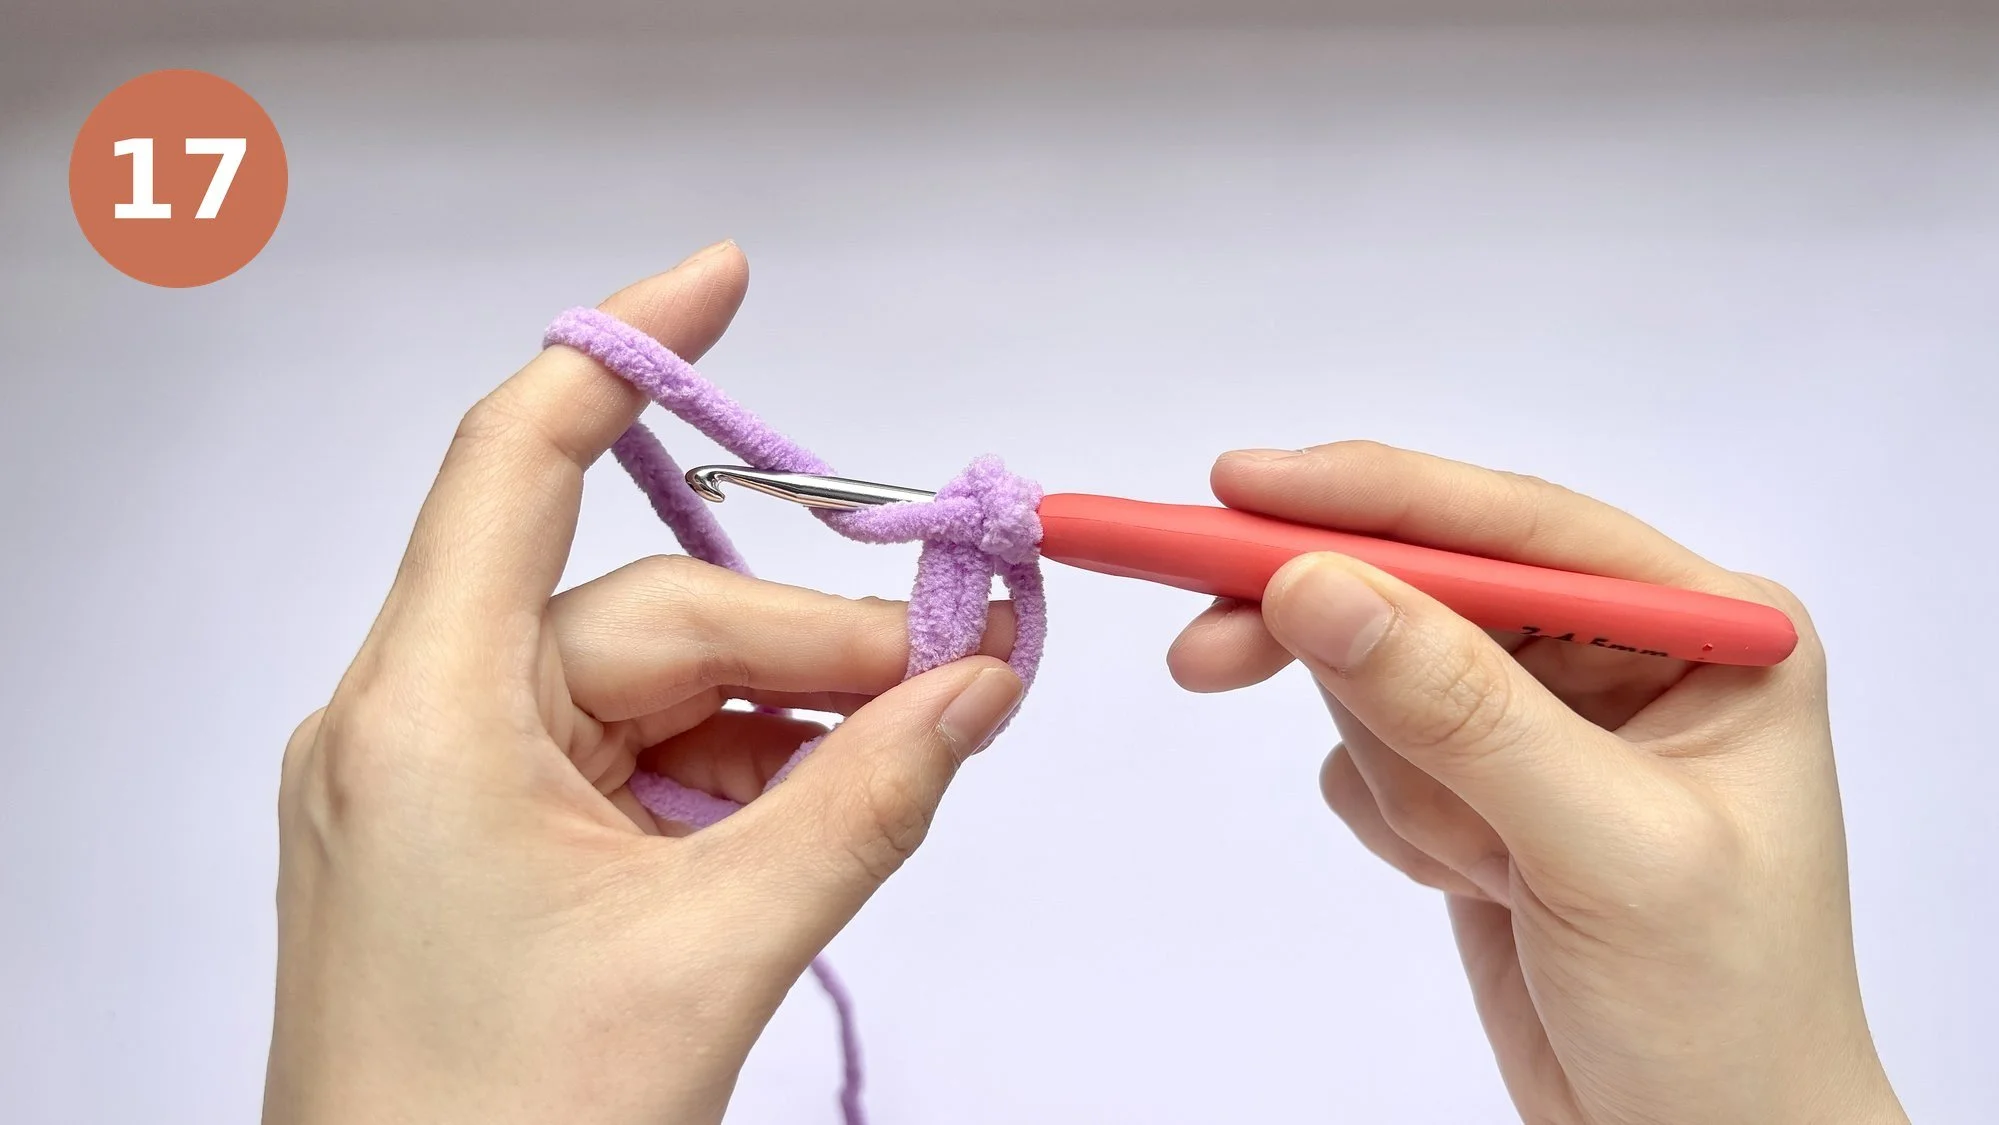
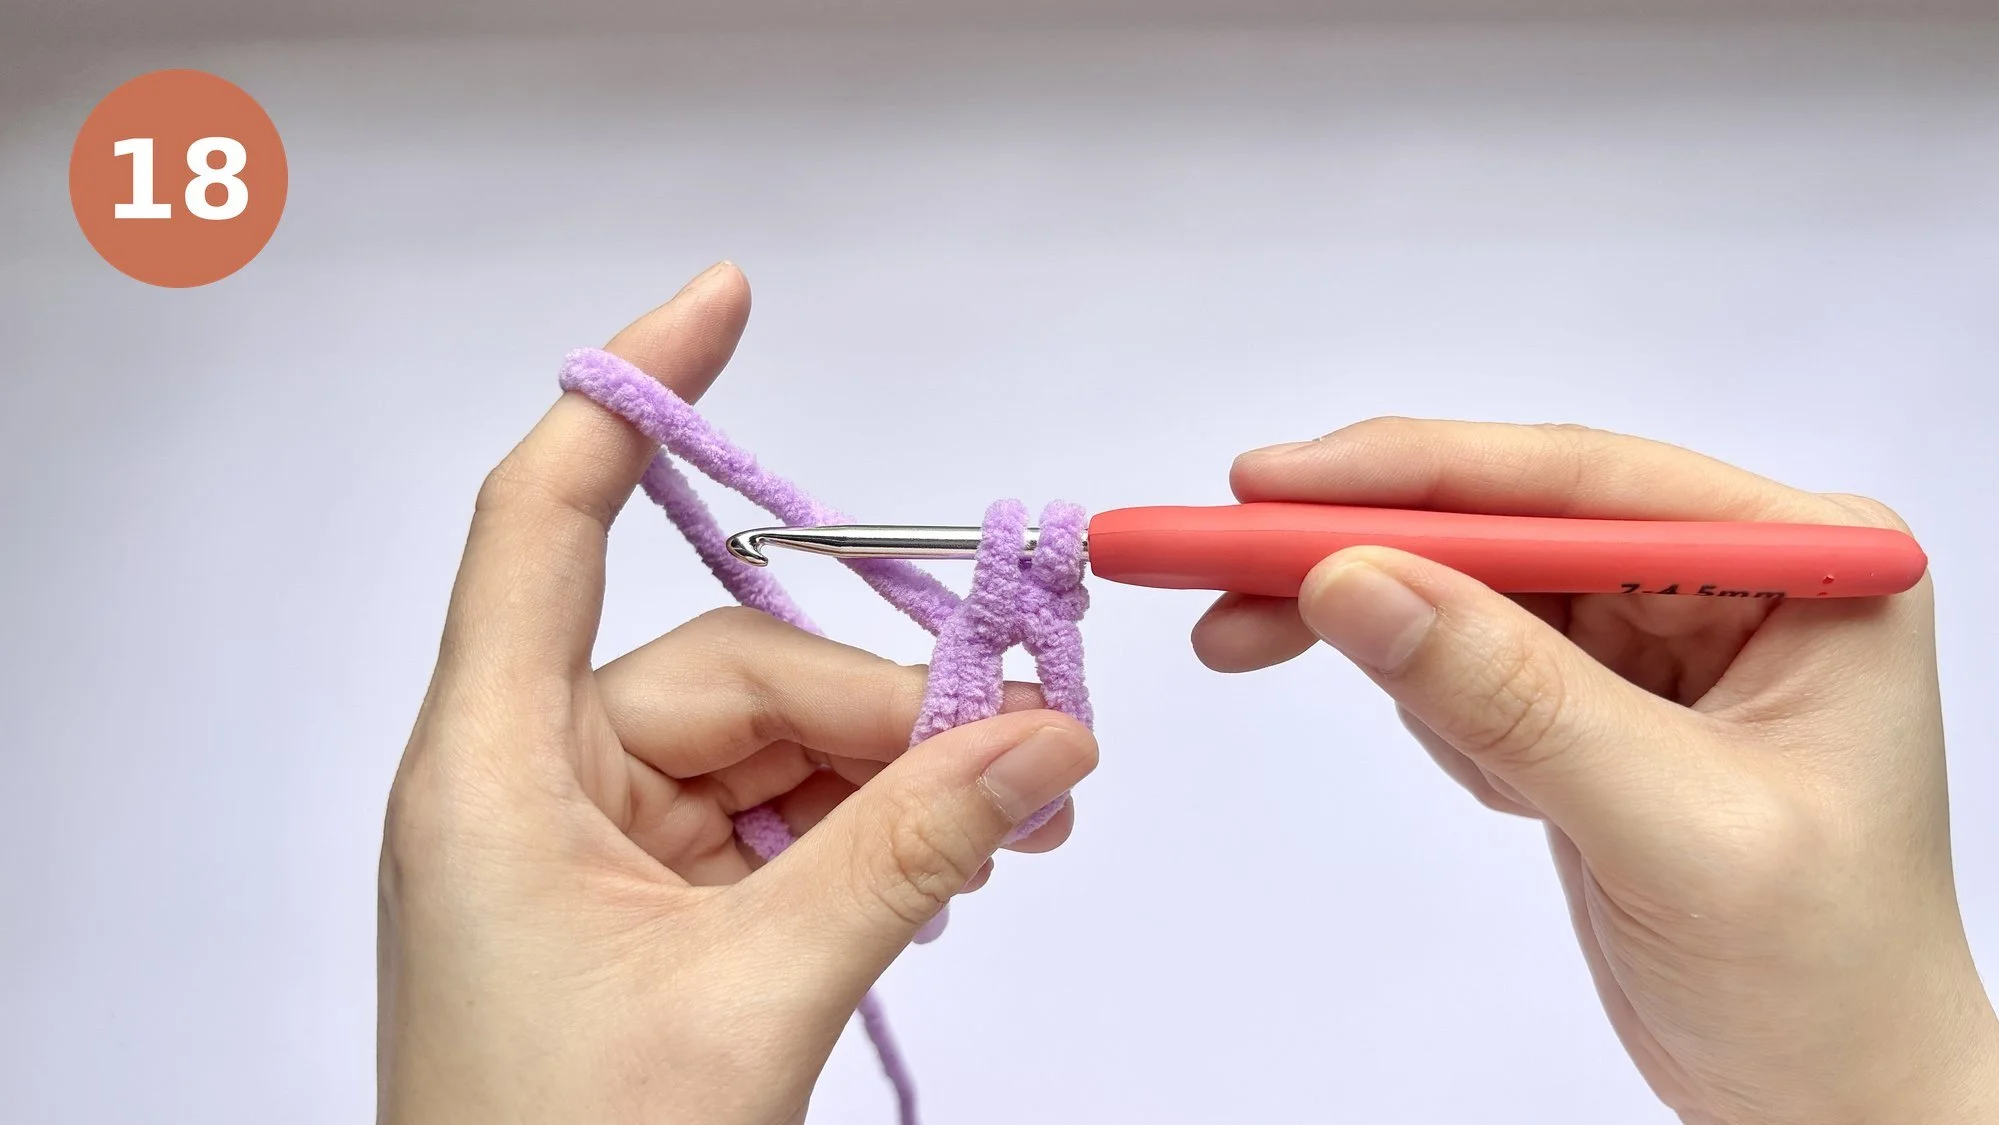
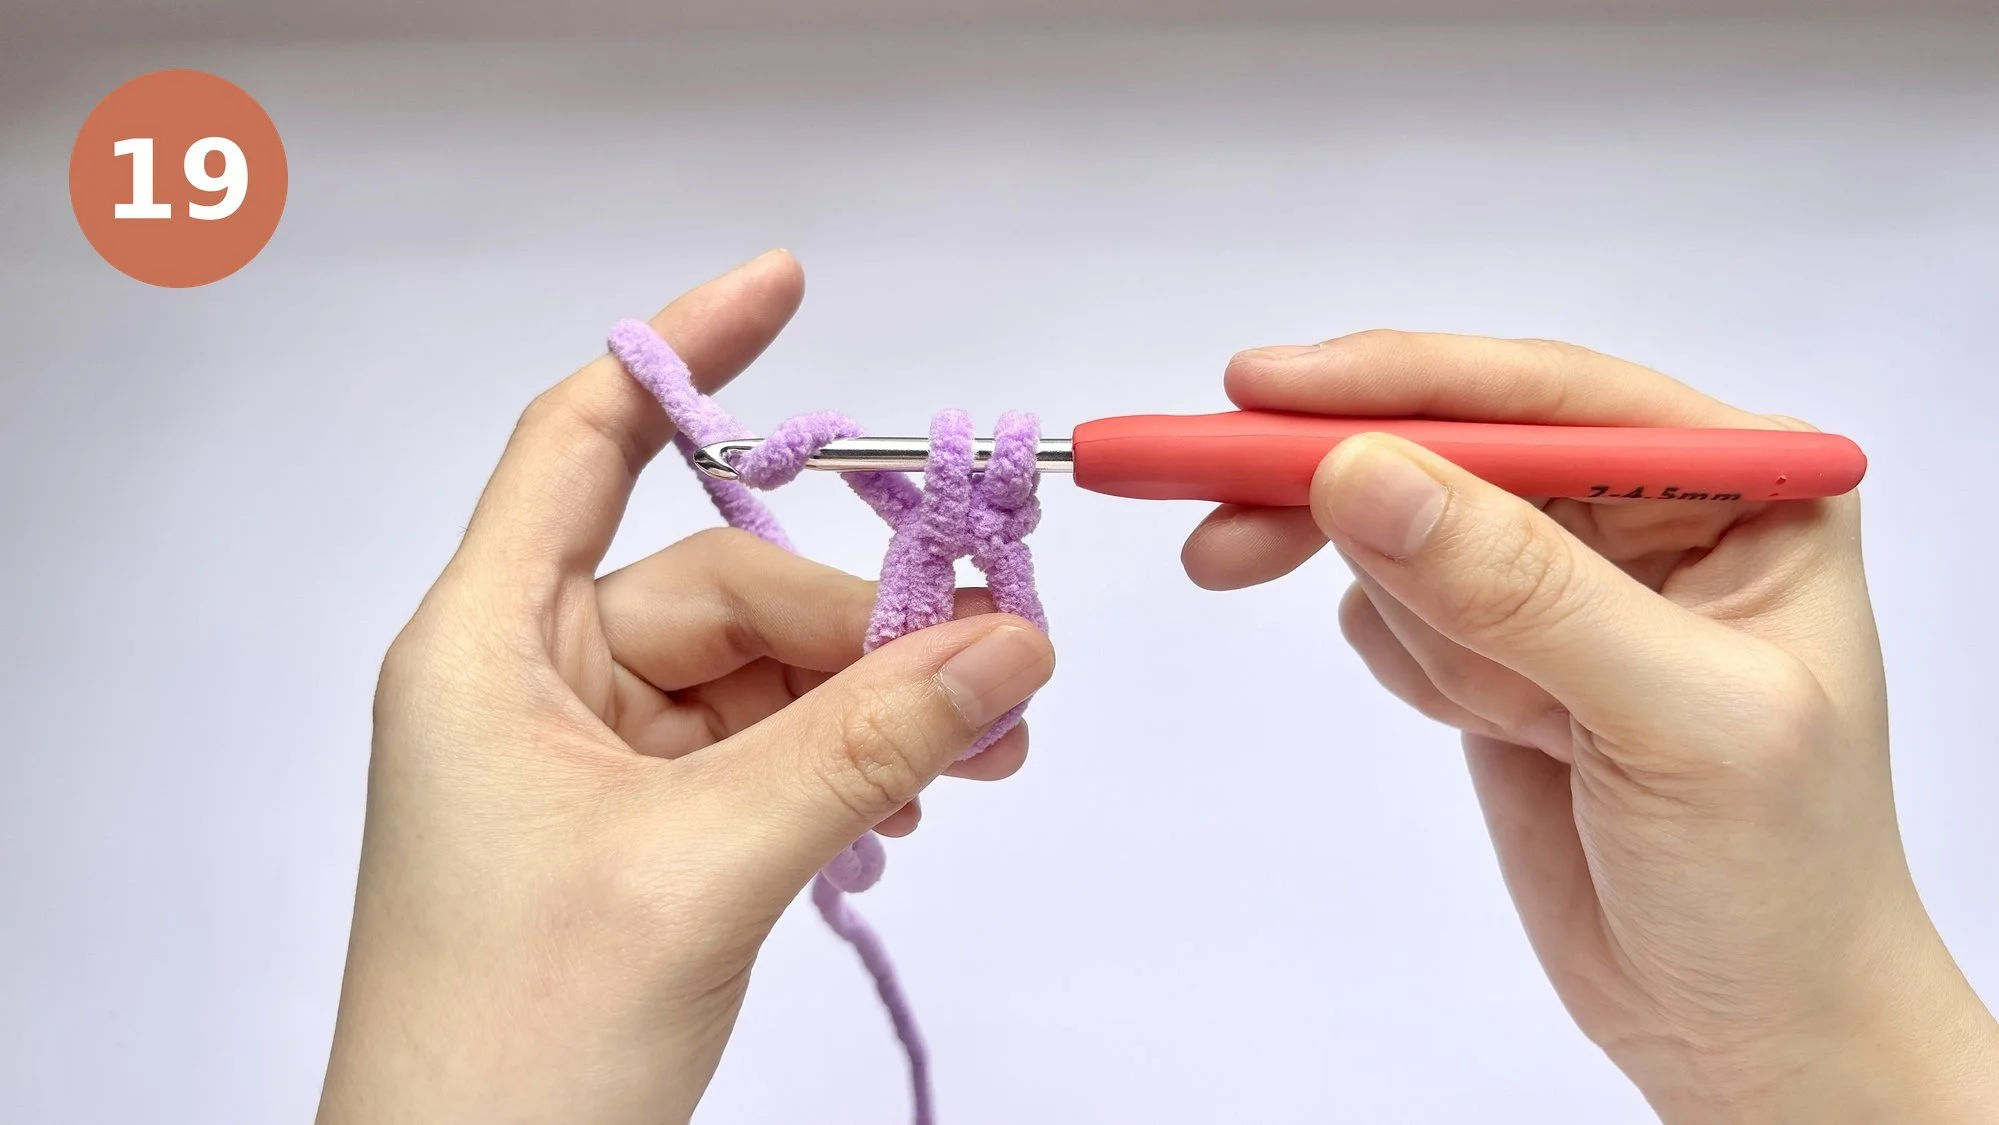
Watch: Your first magic ring can feel a little tricky, and that's completely normal! Watch the video below before you start.
Round
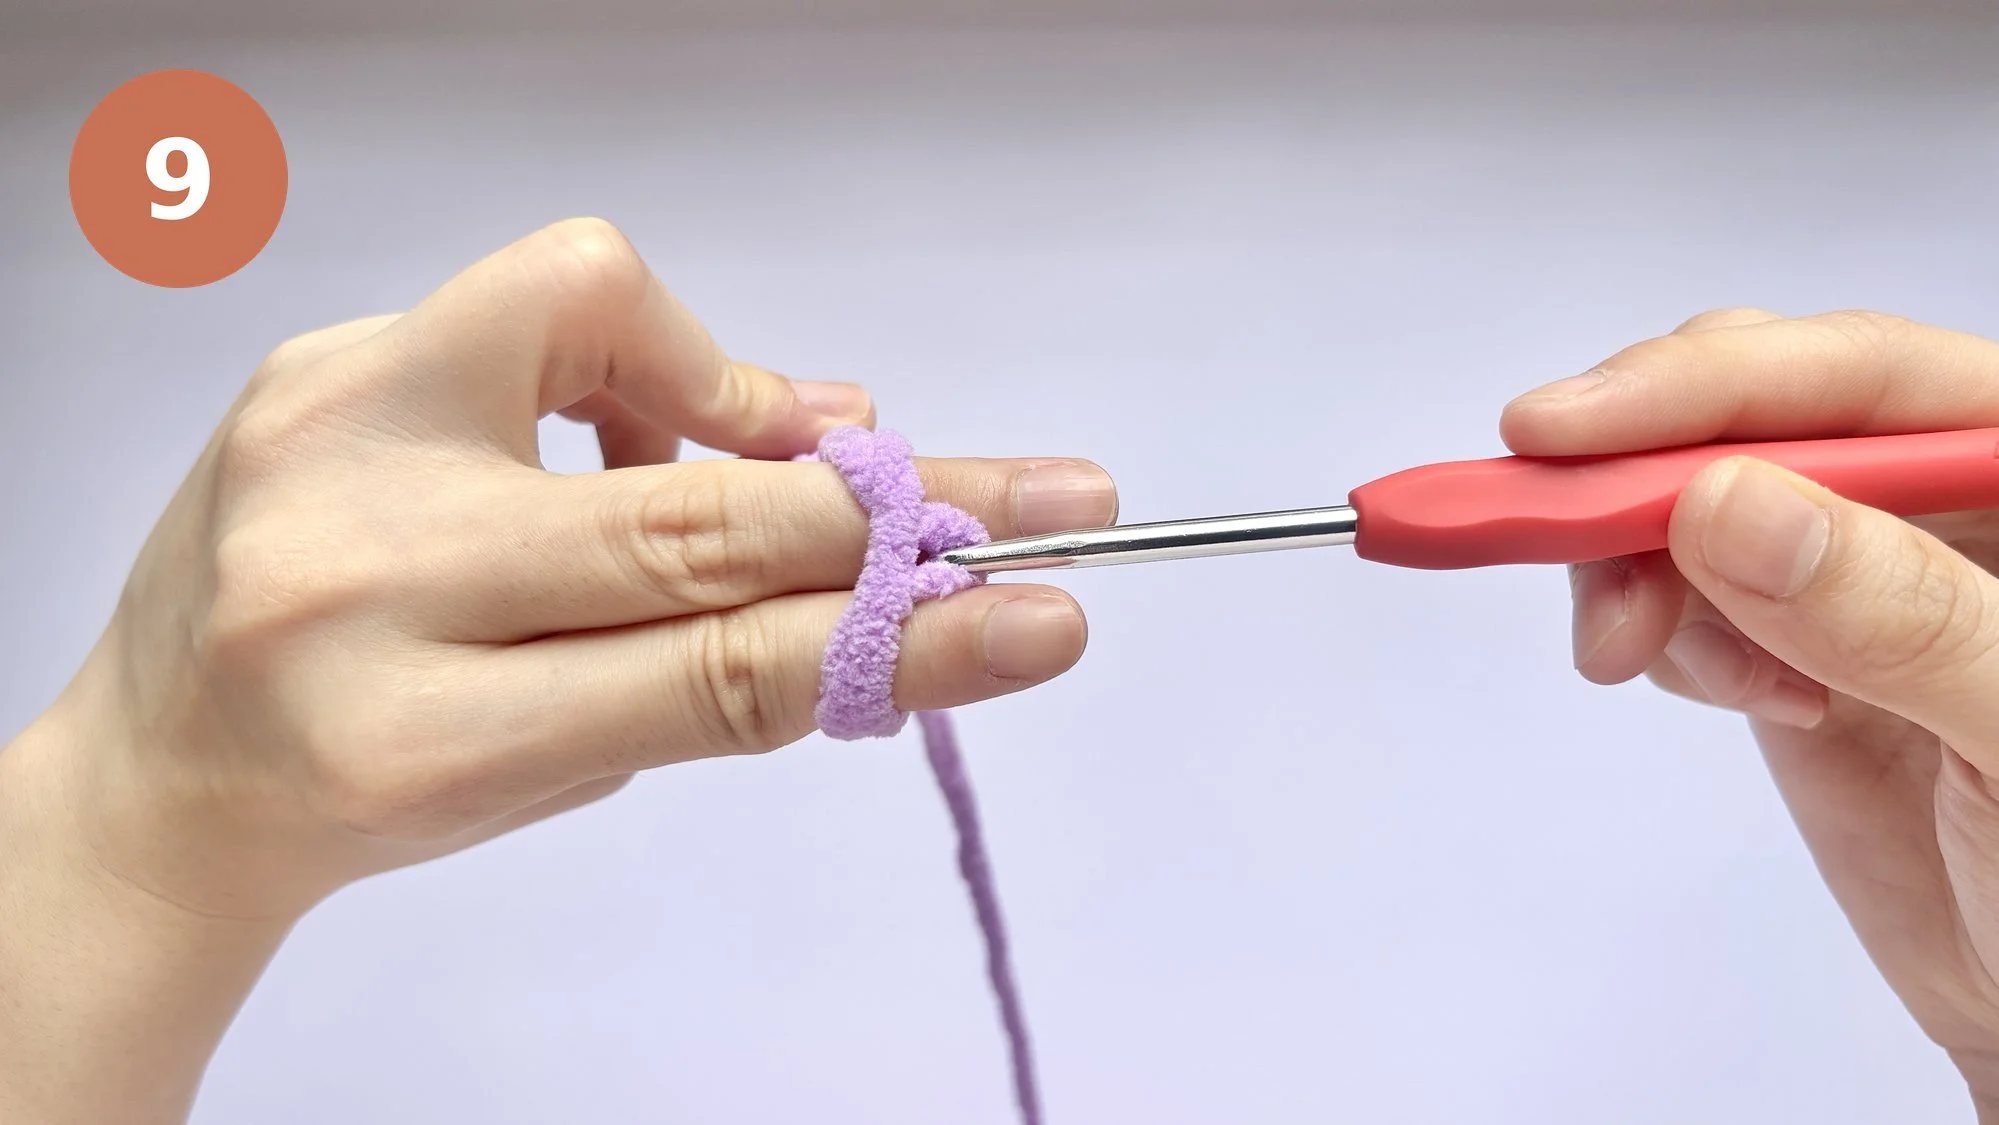
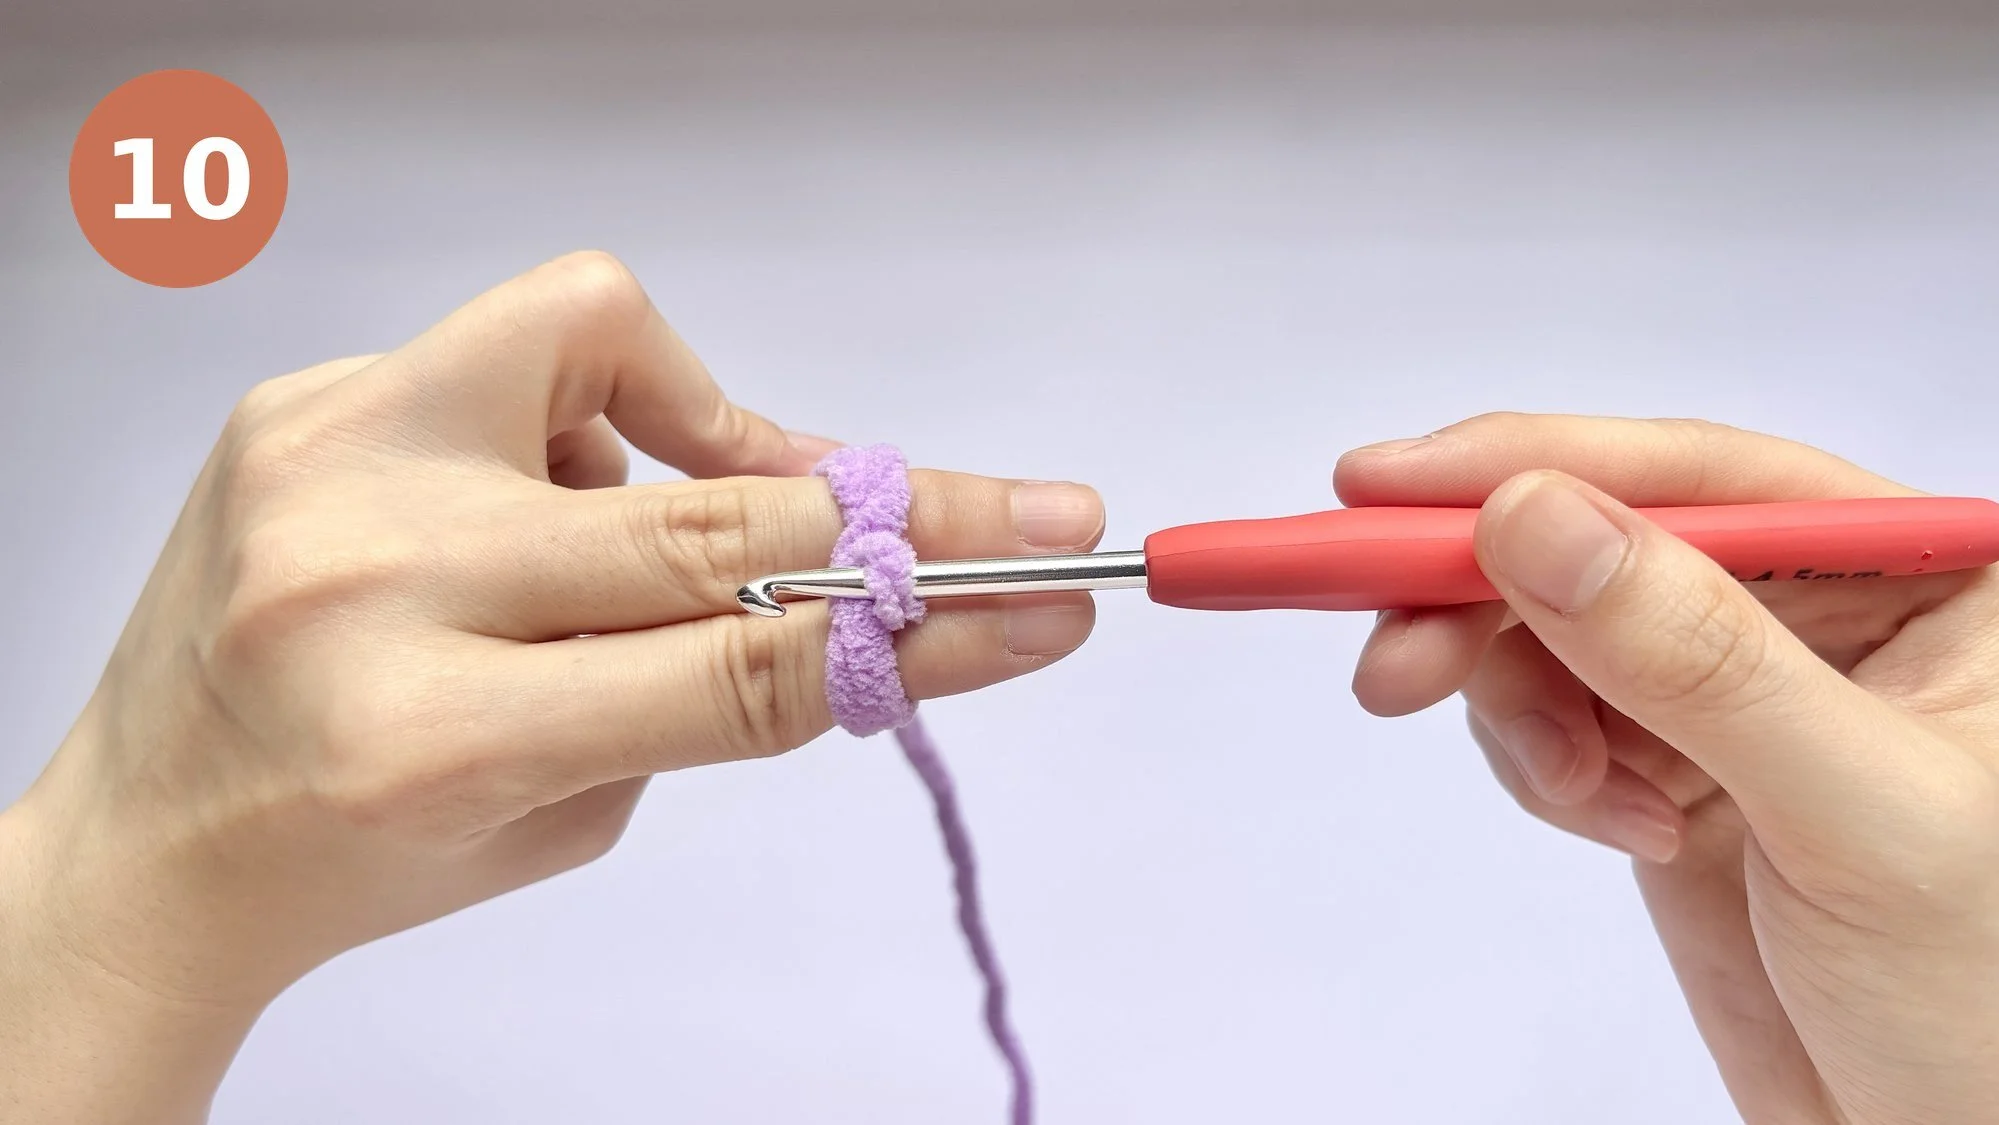
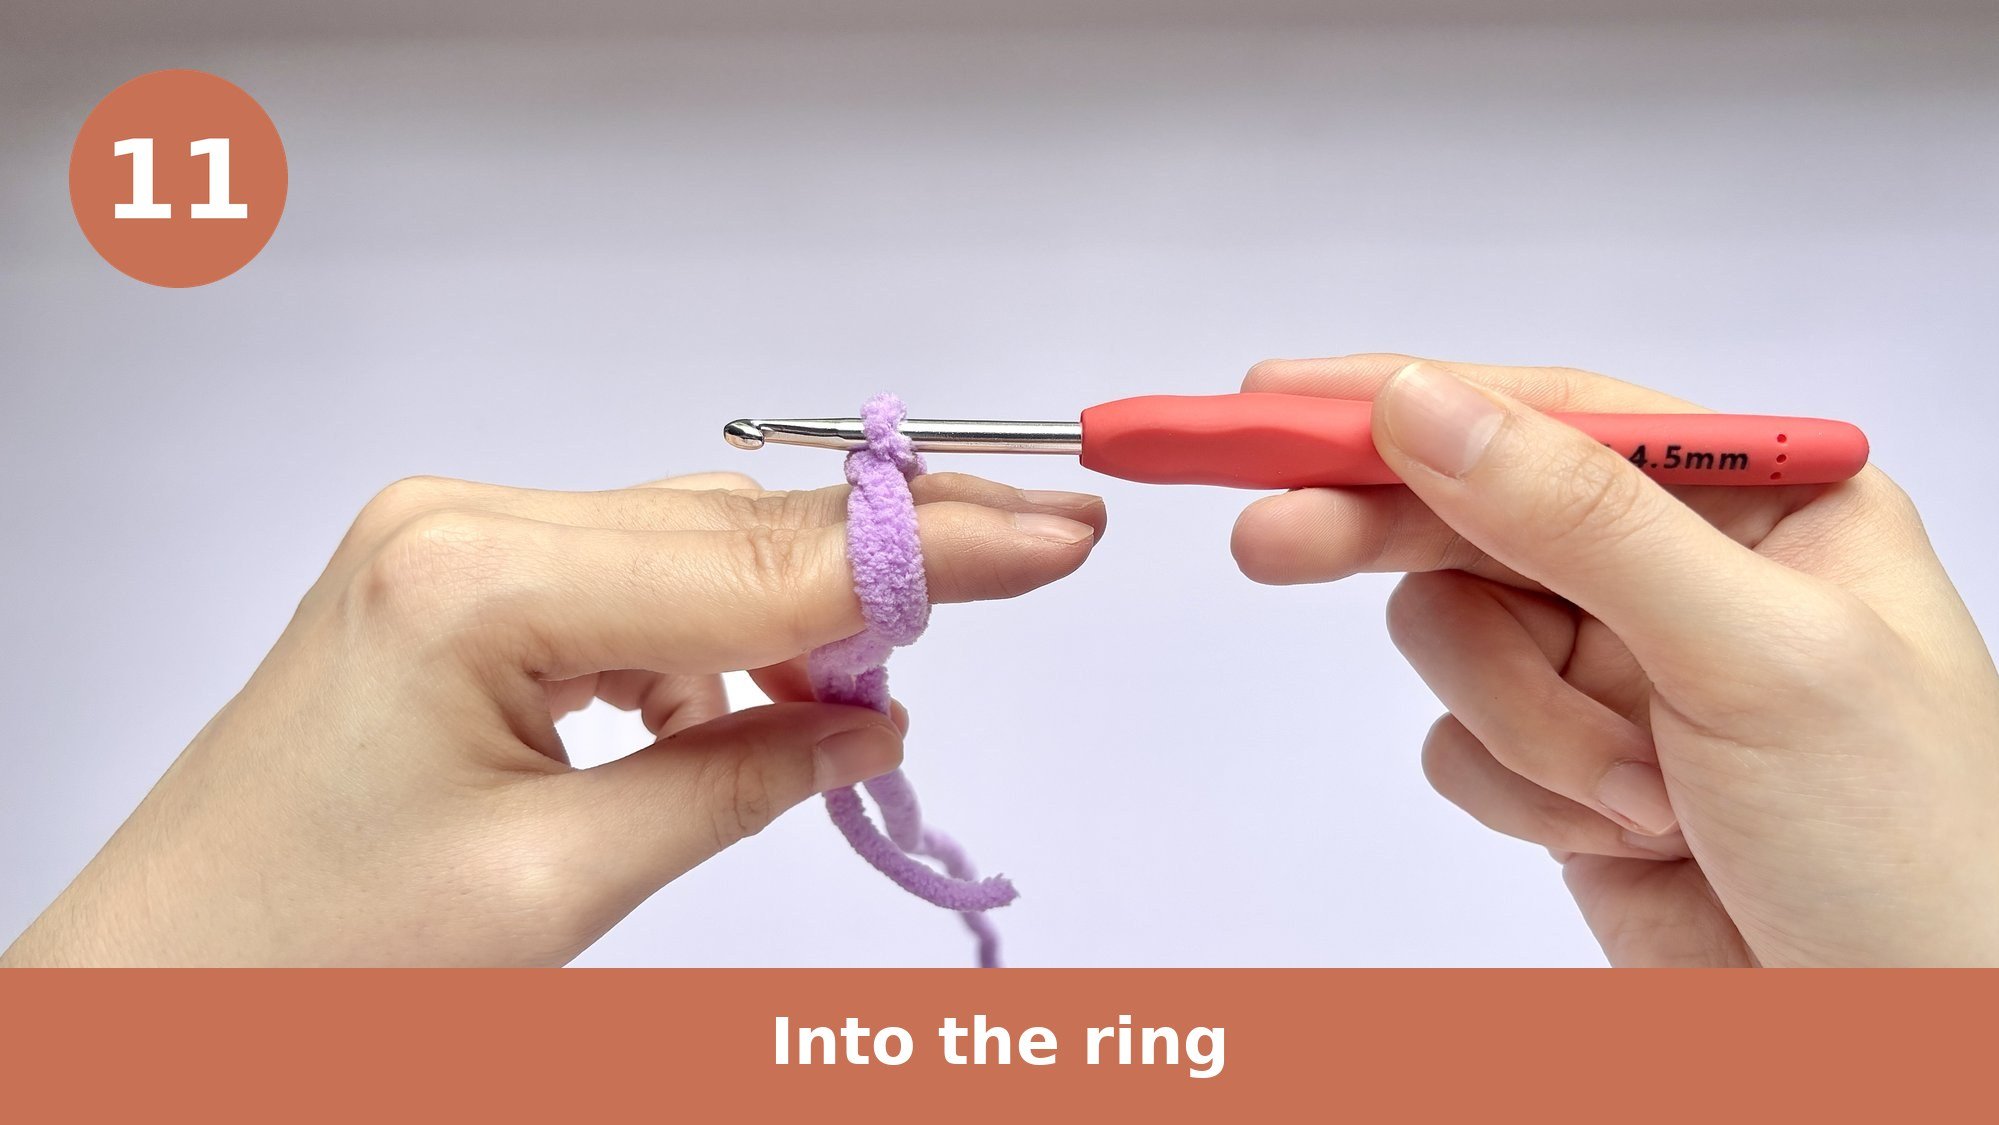
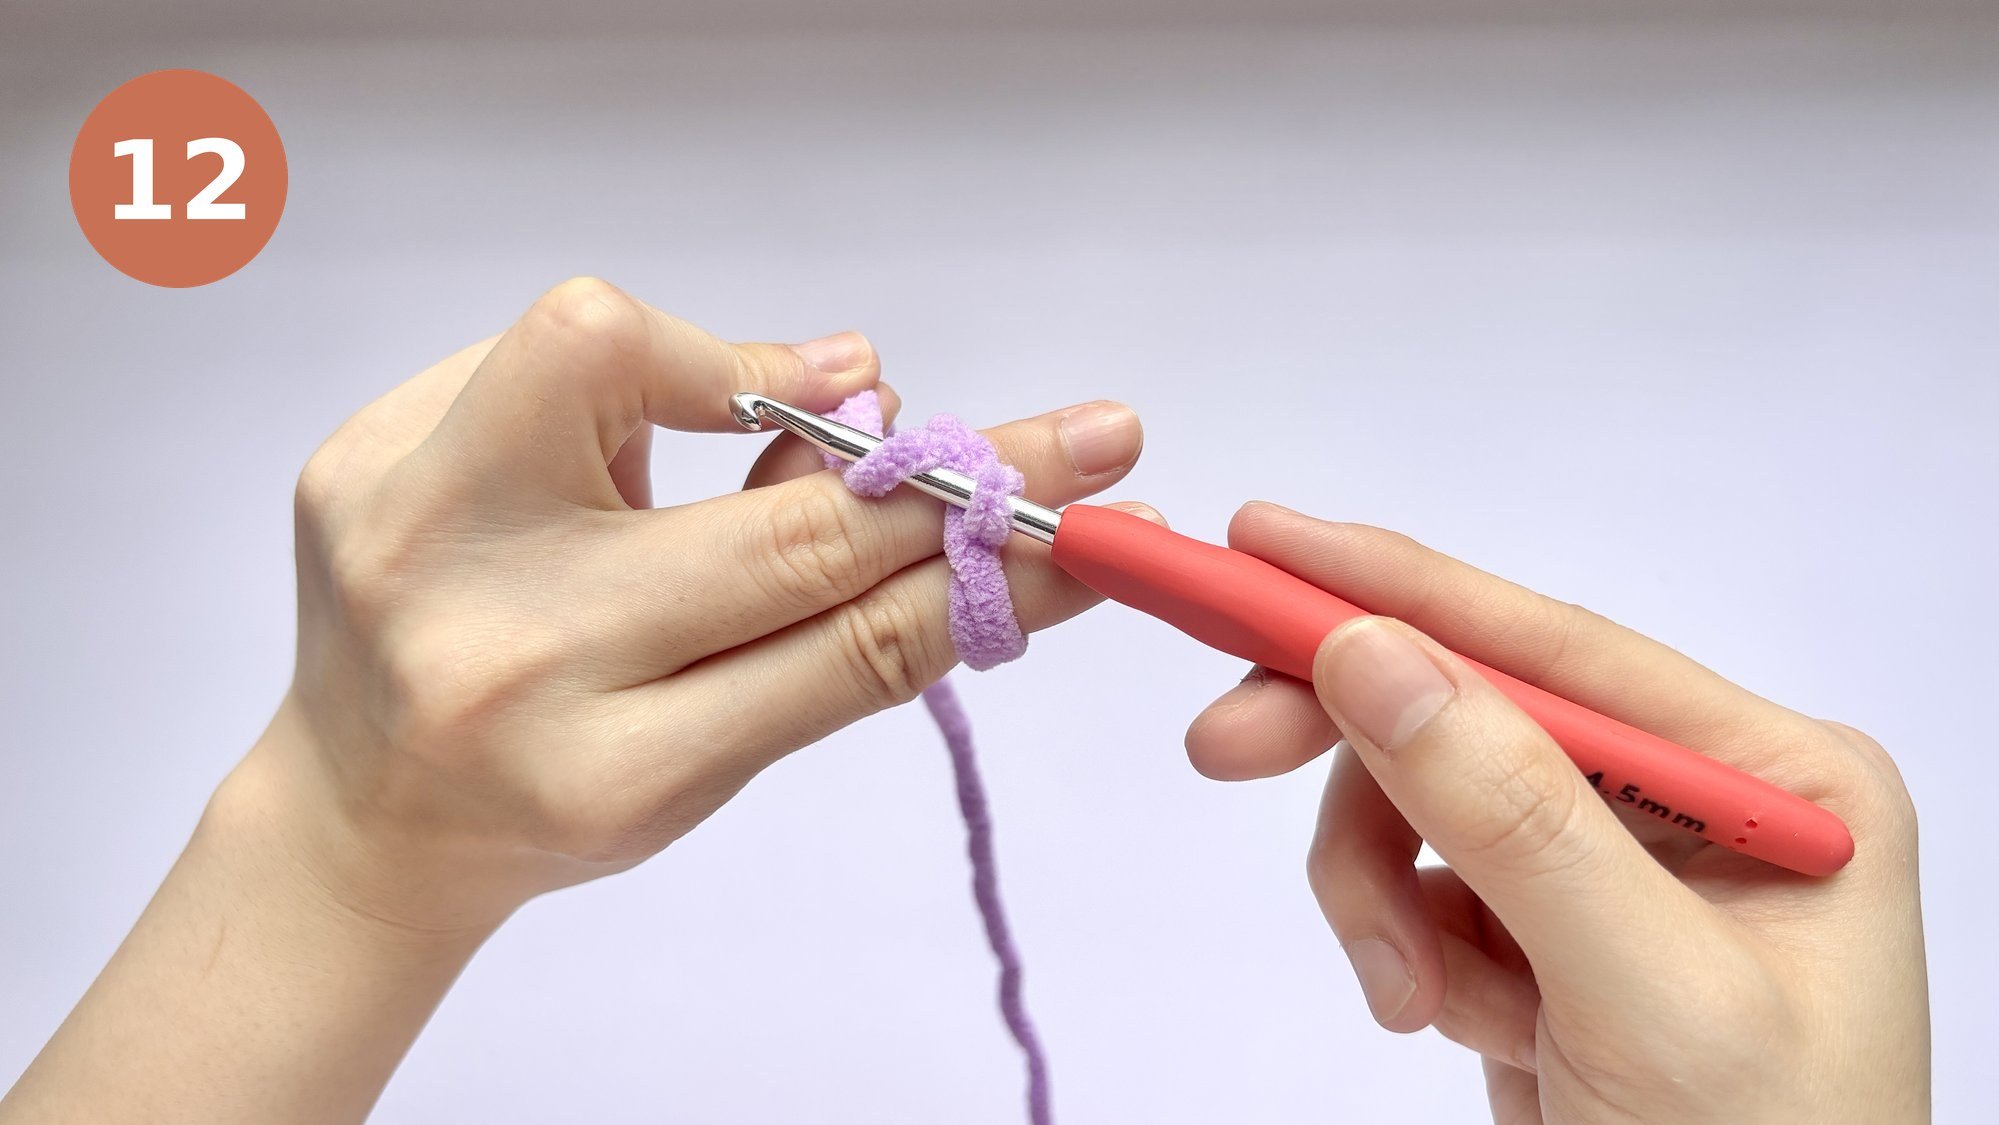
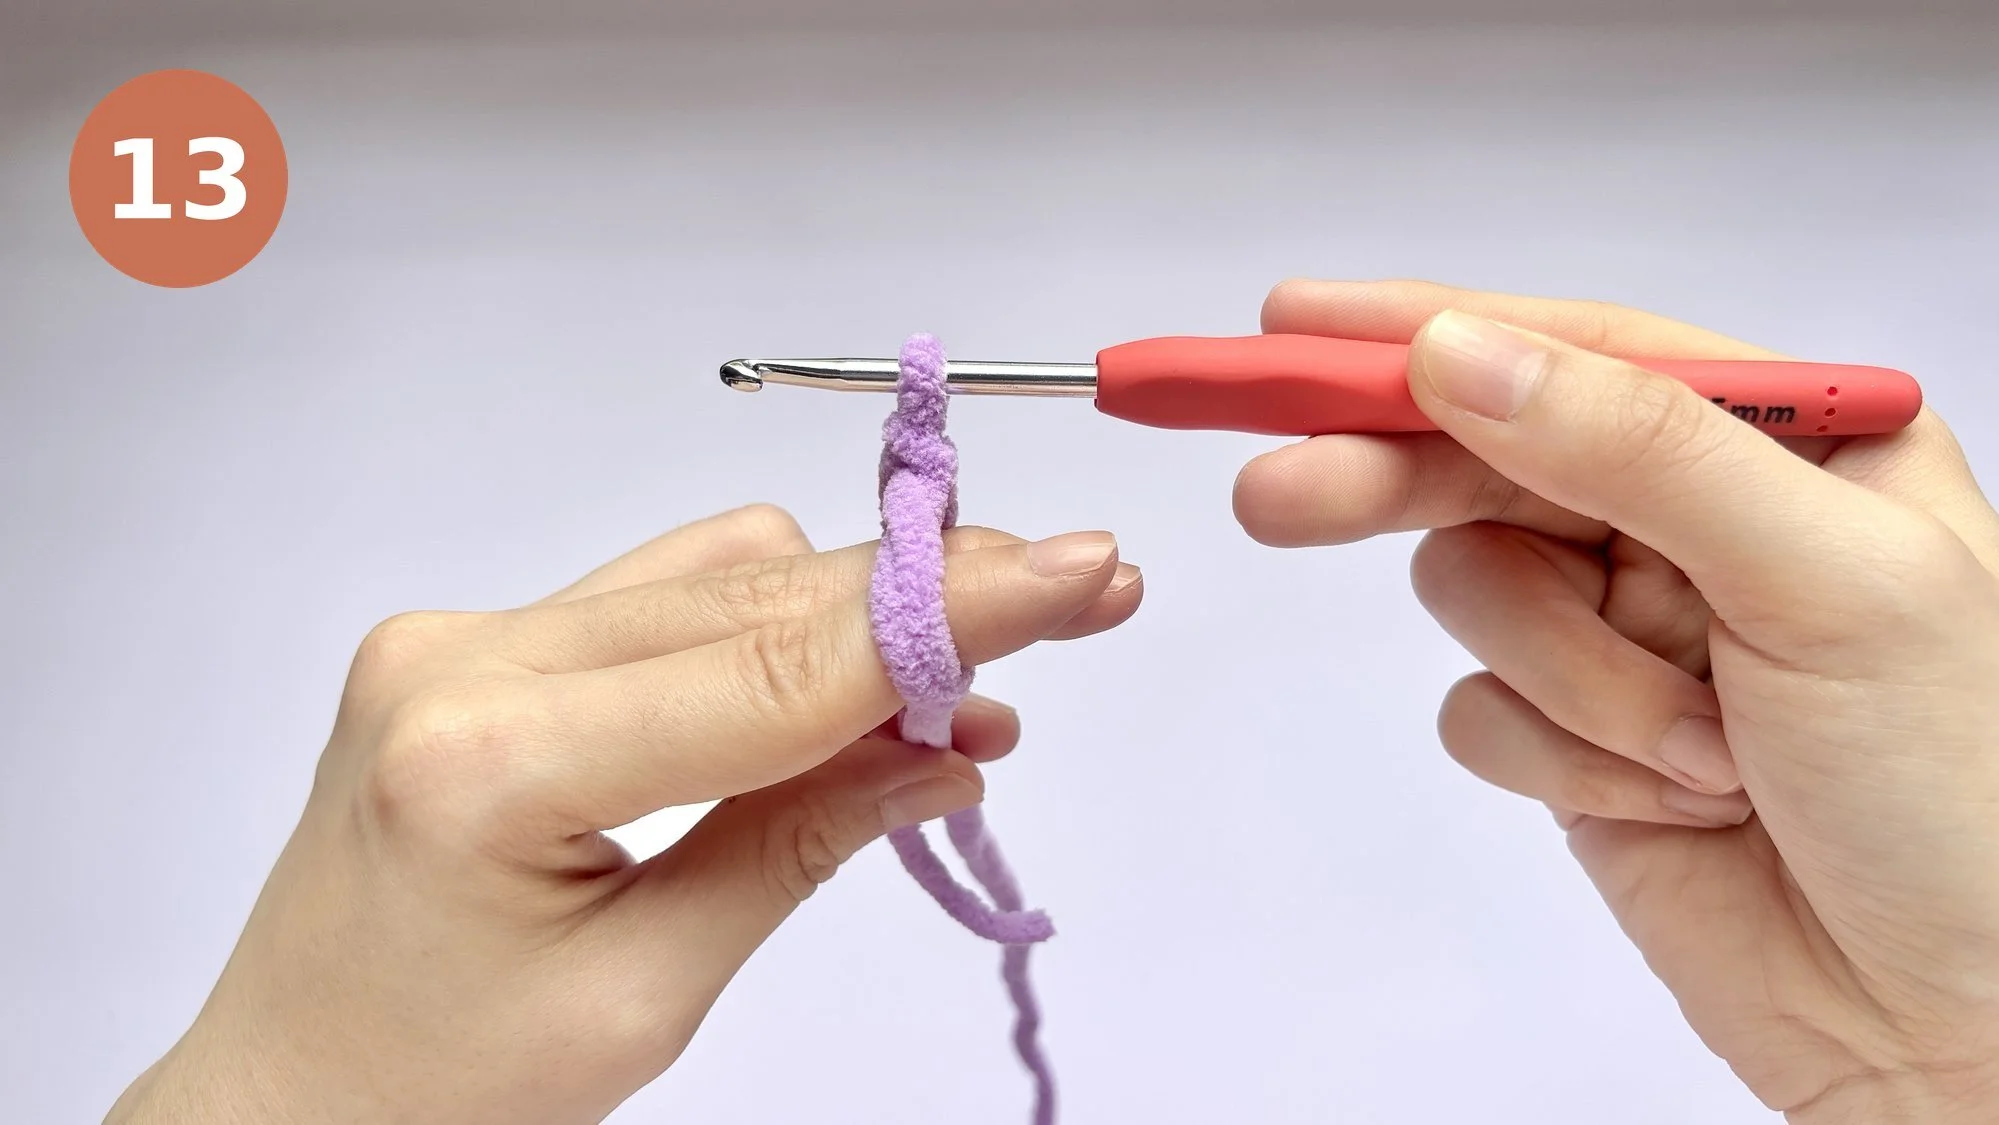
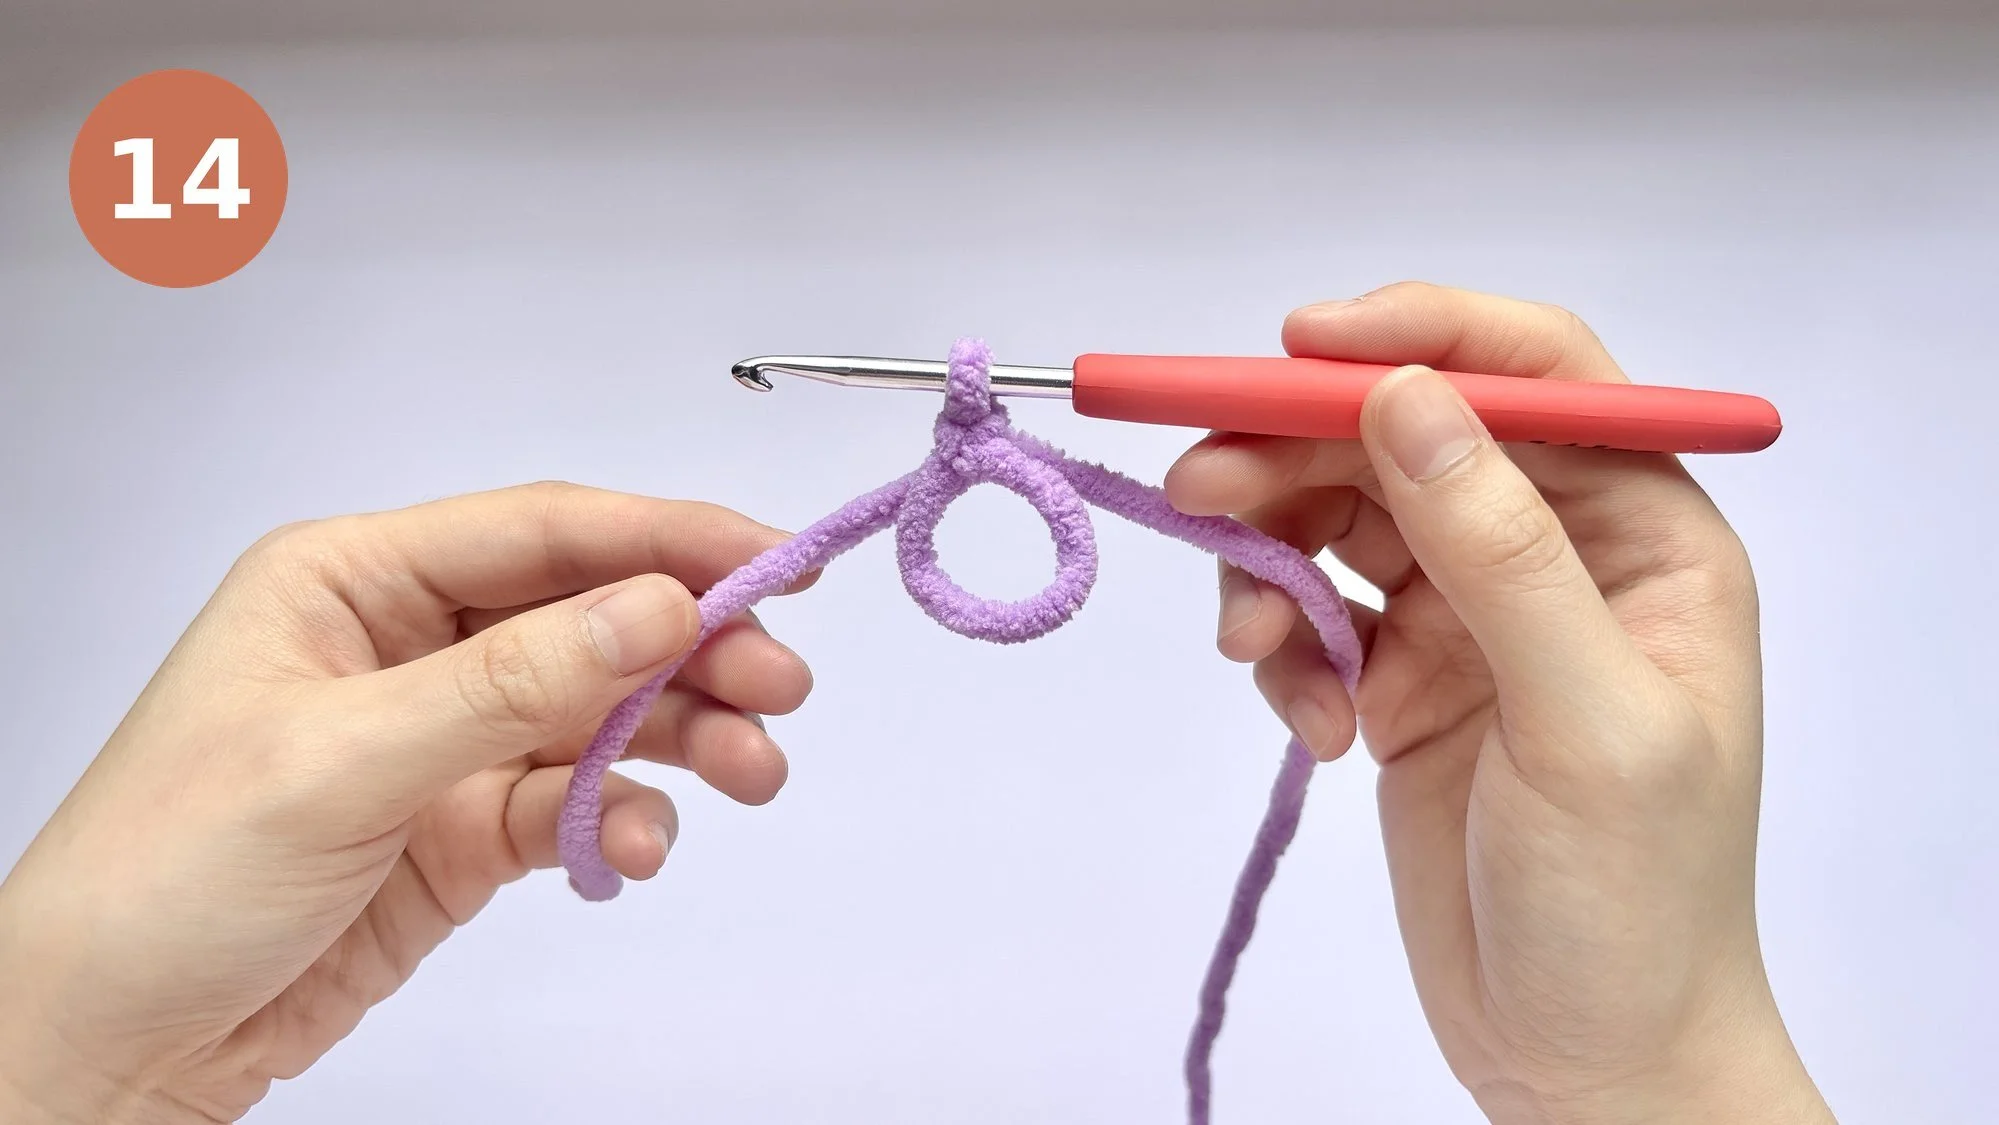
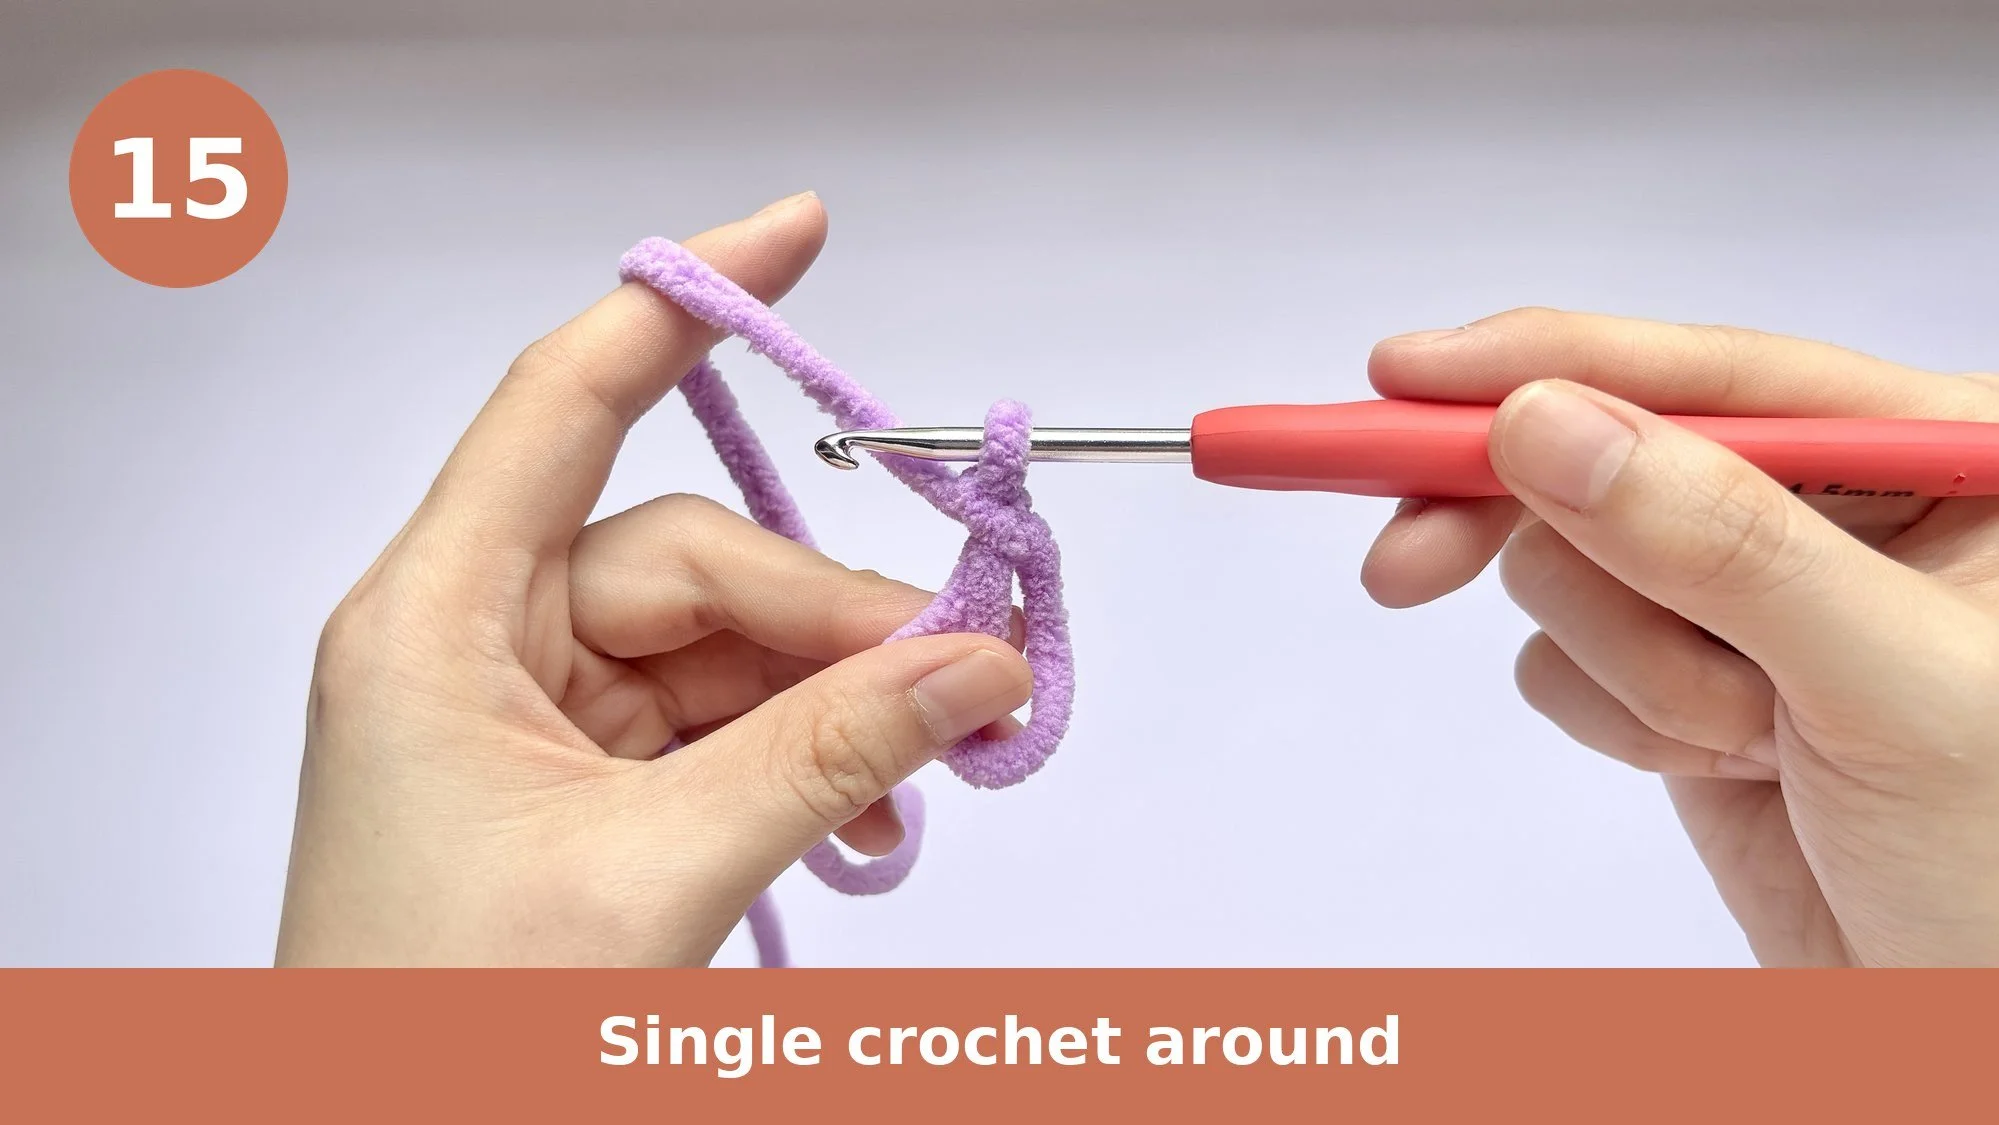
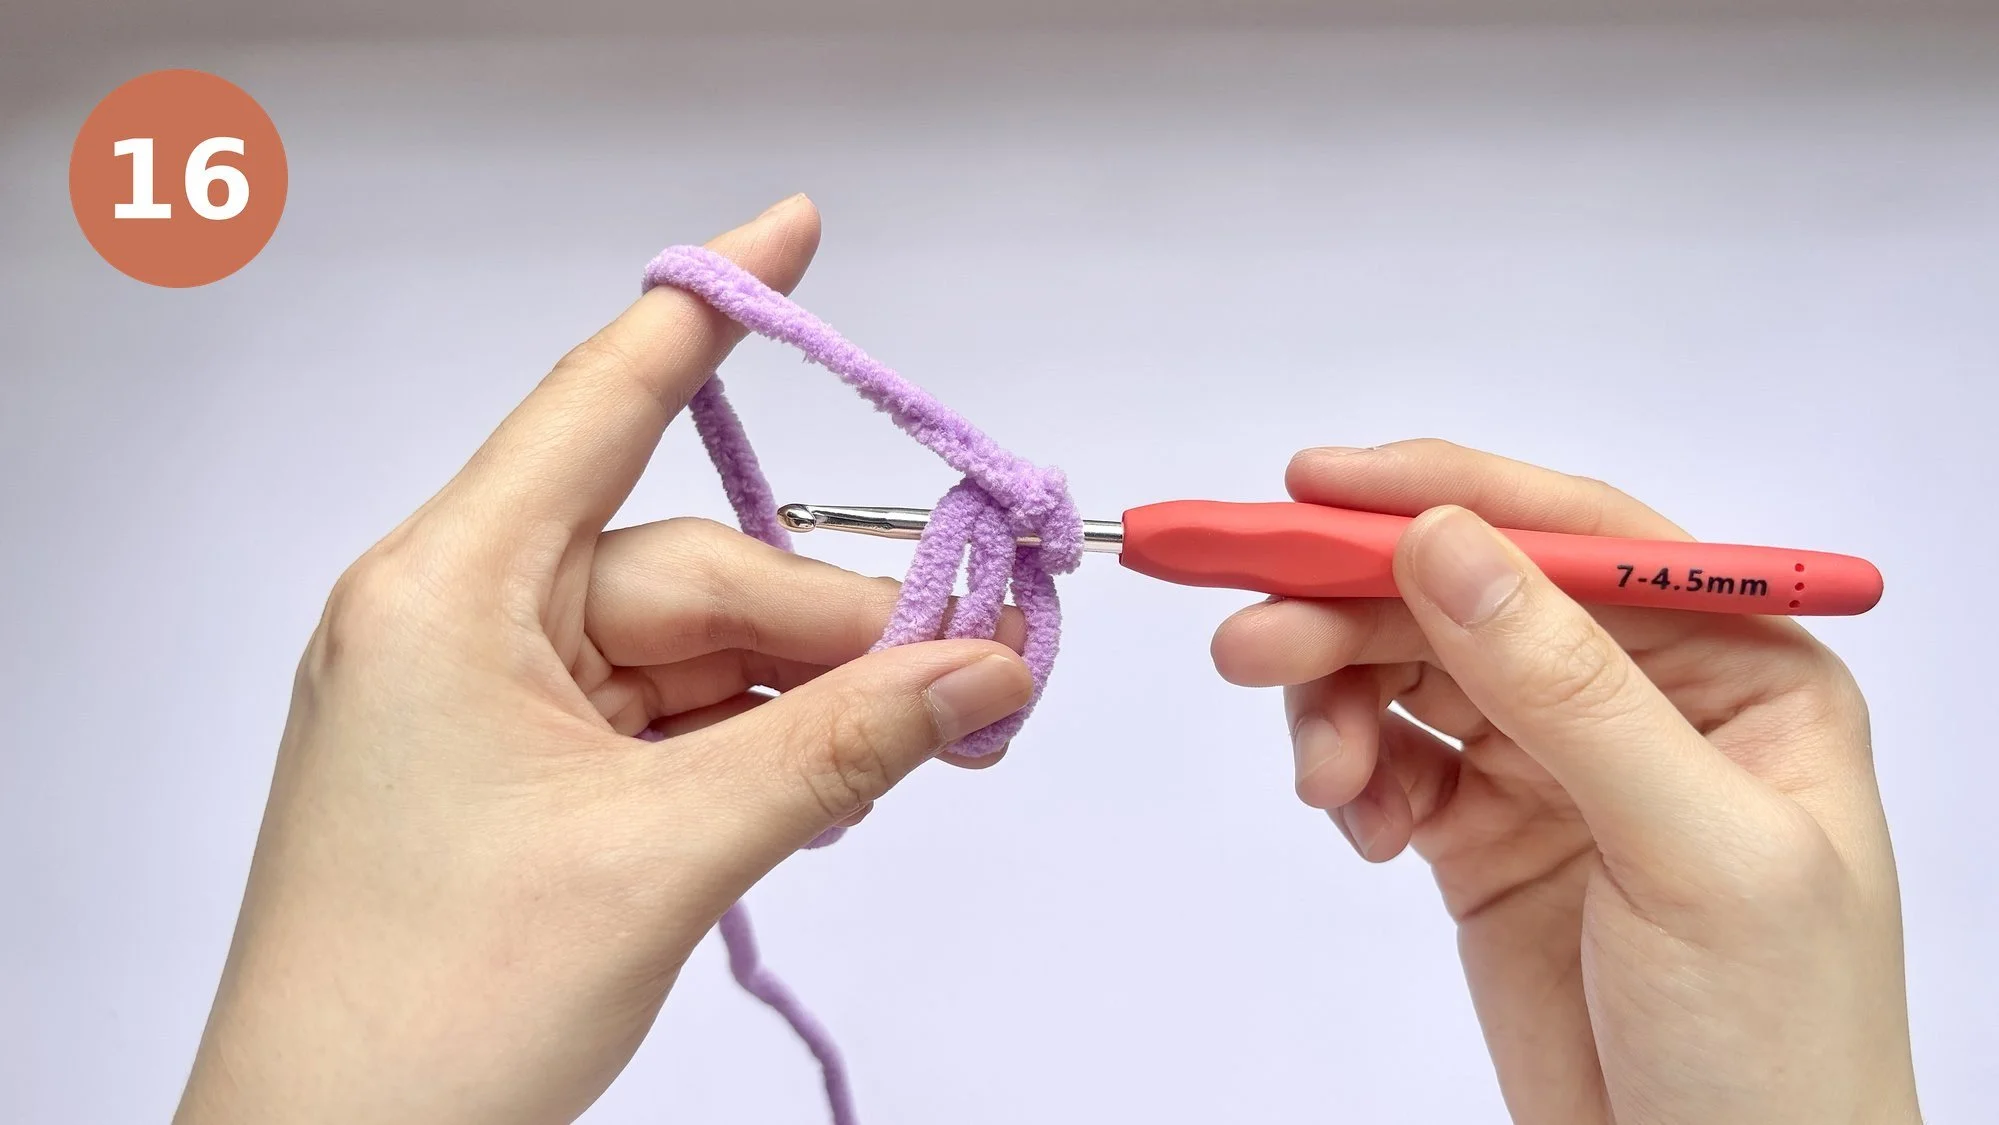
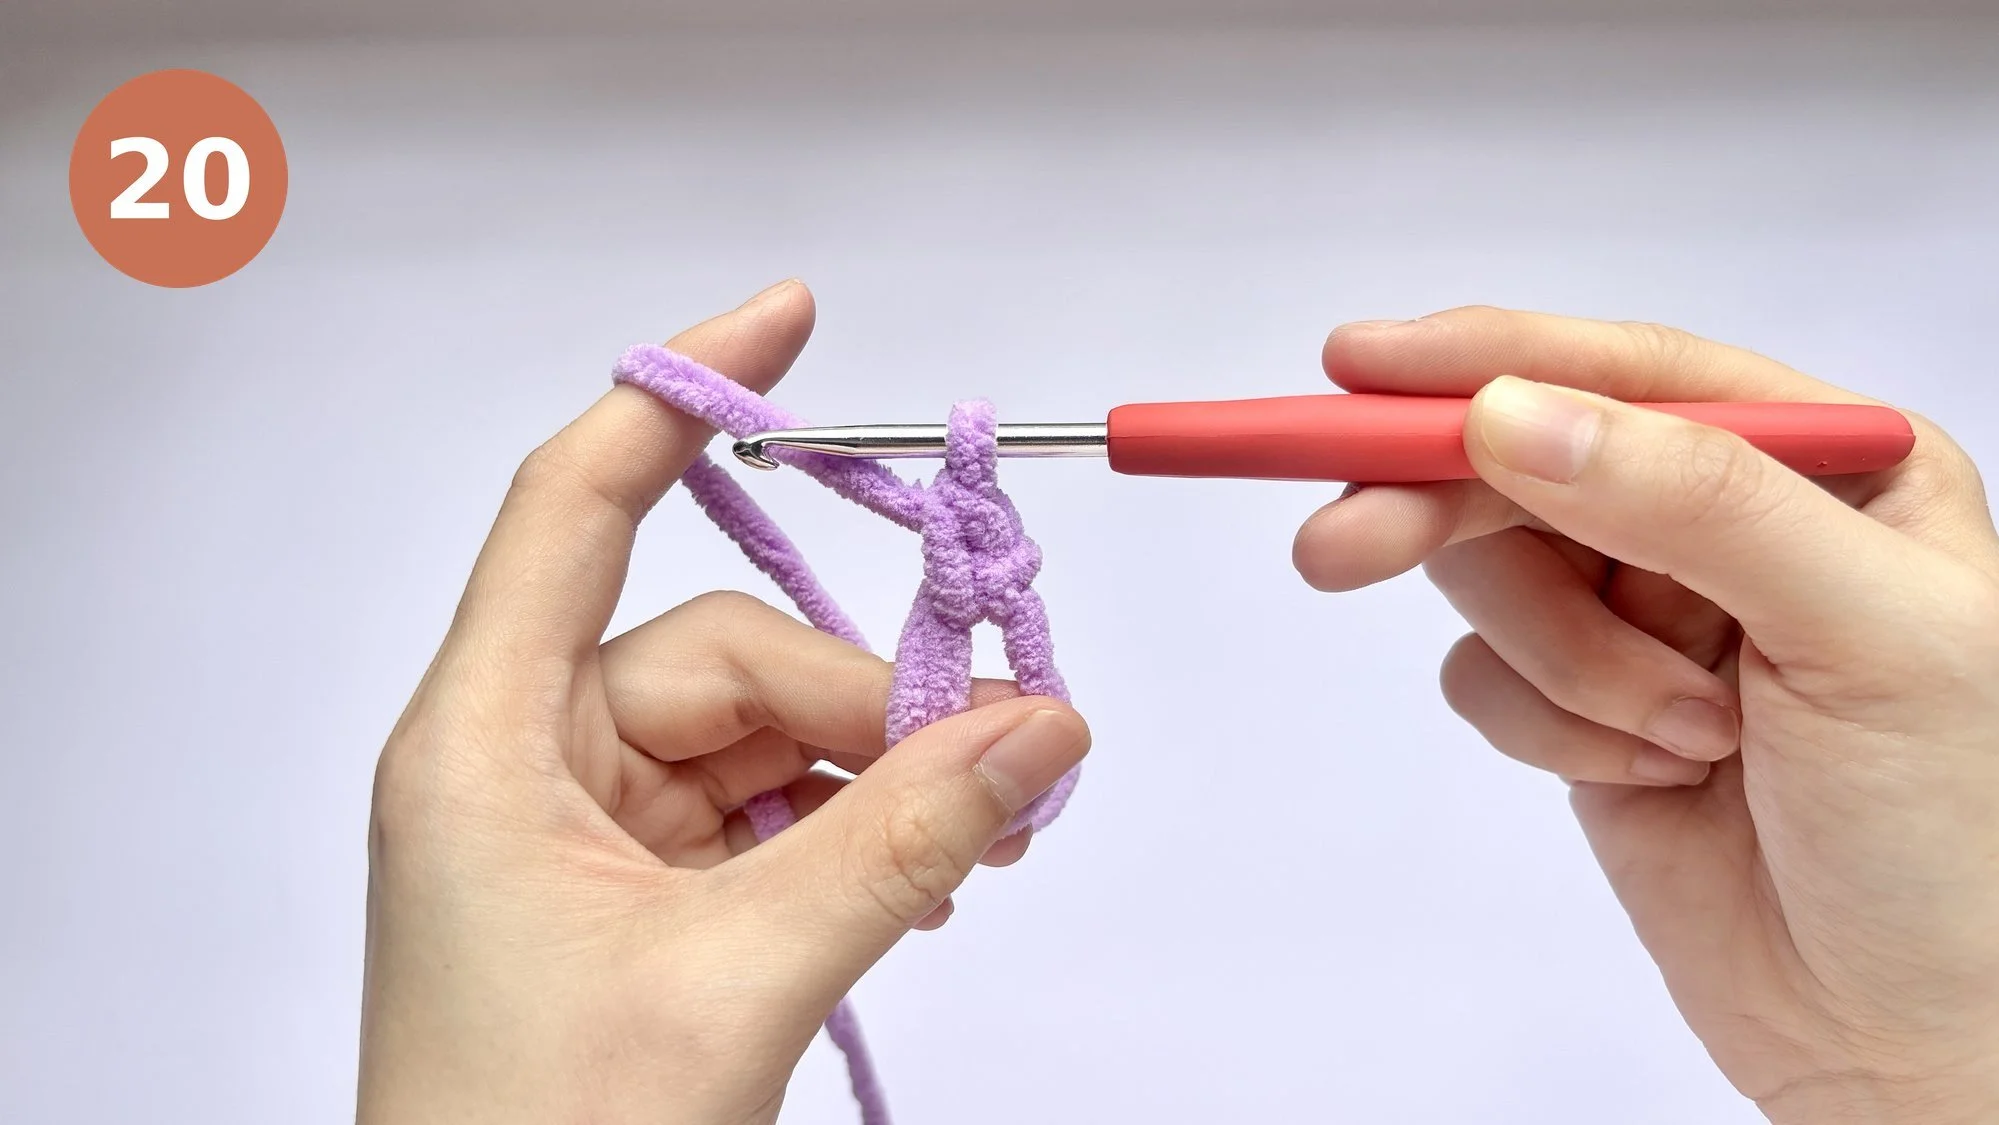
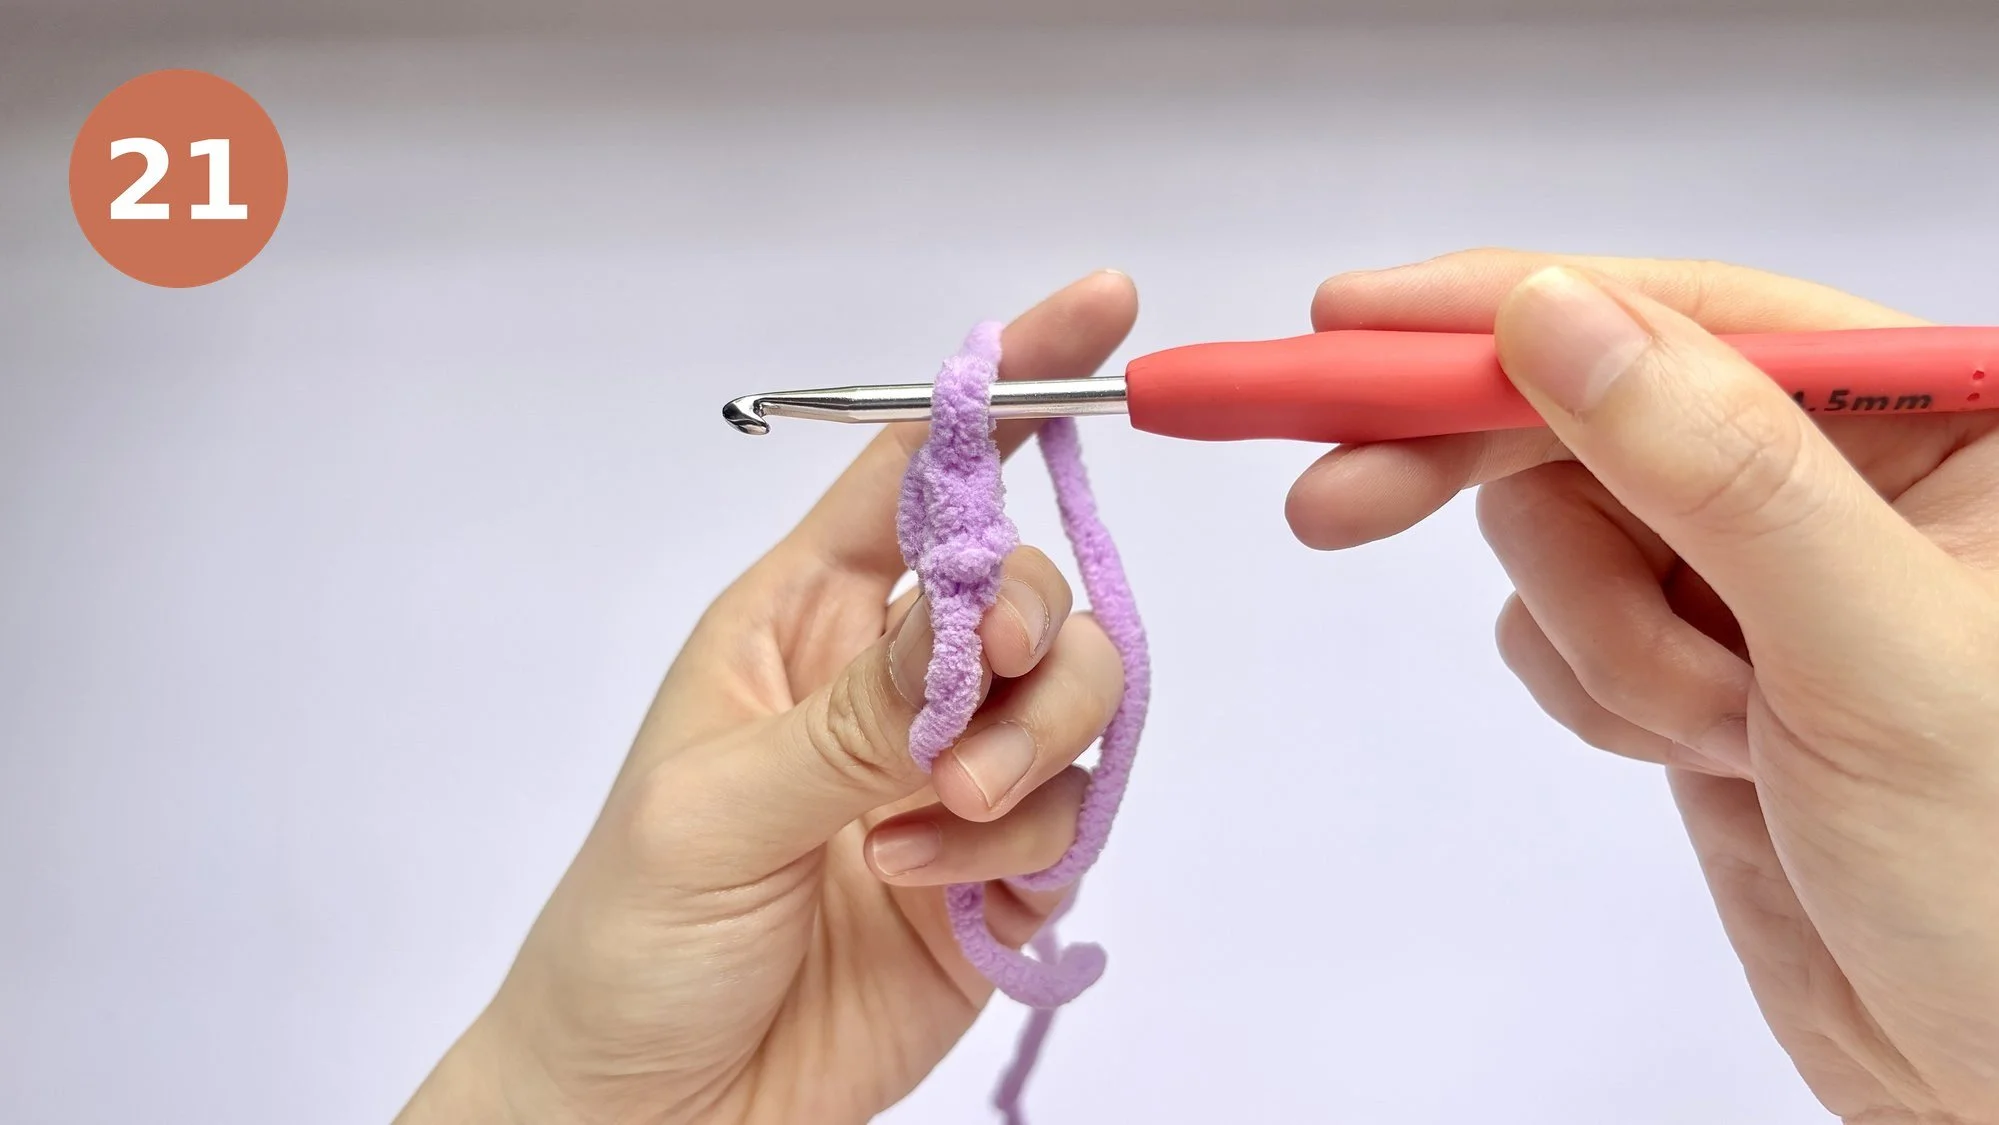
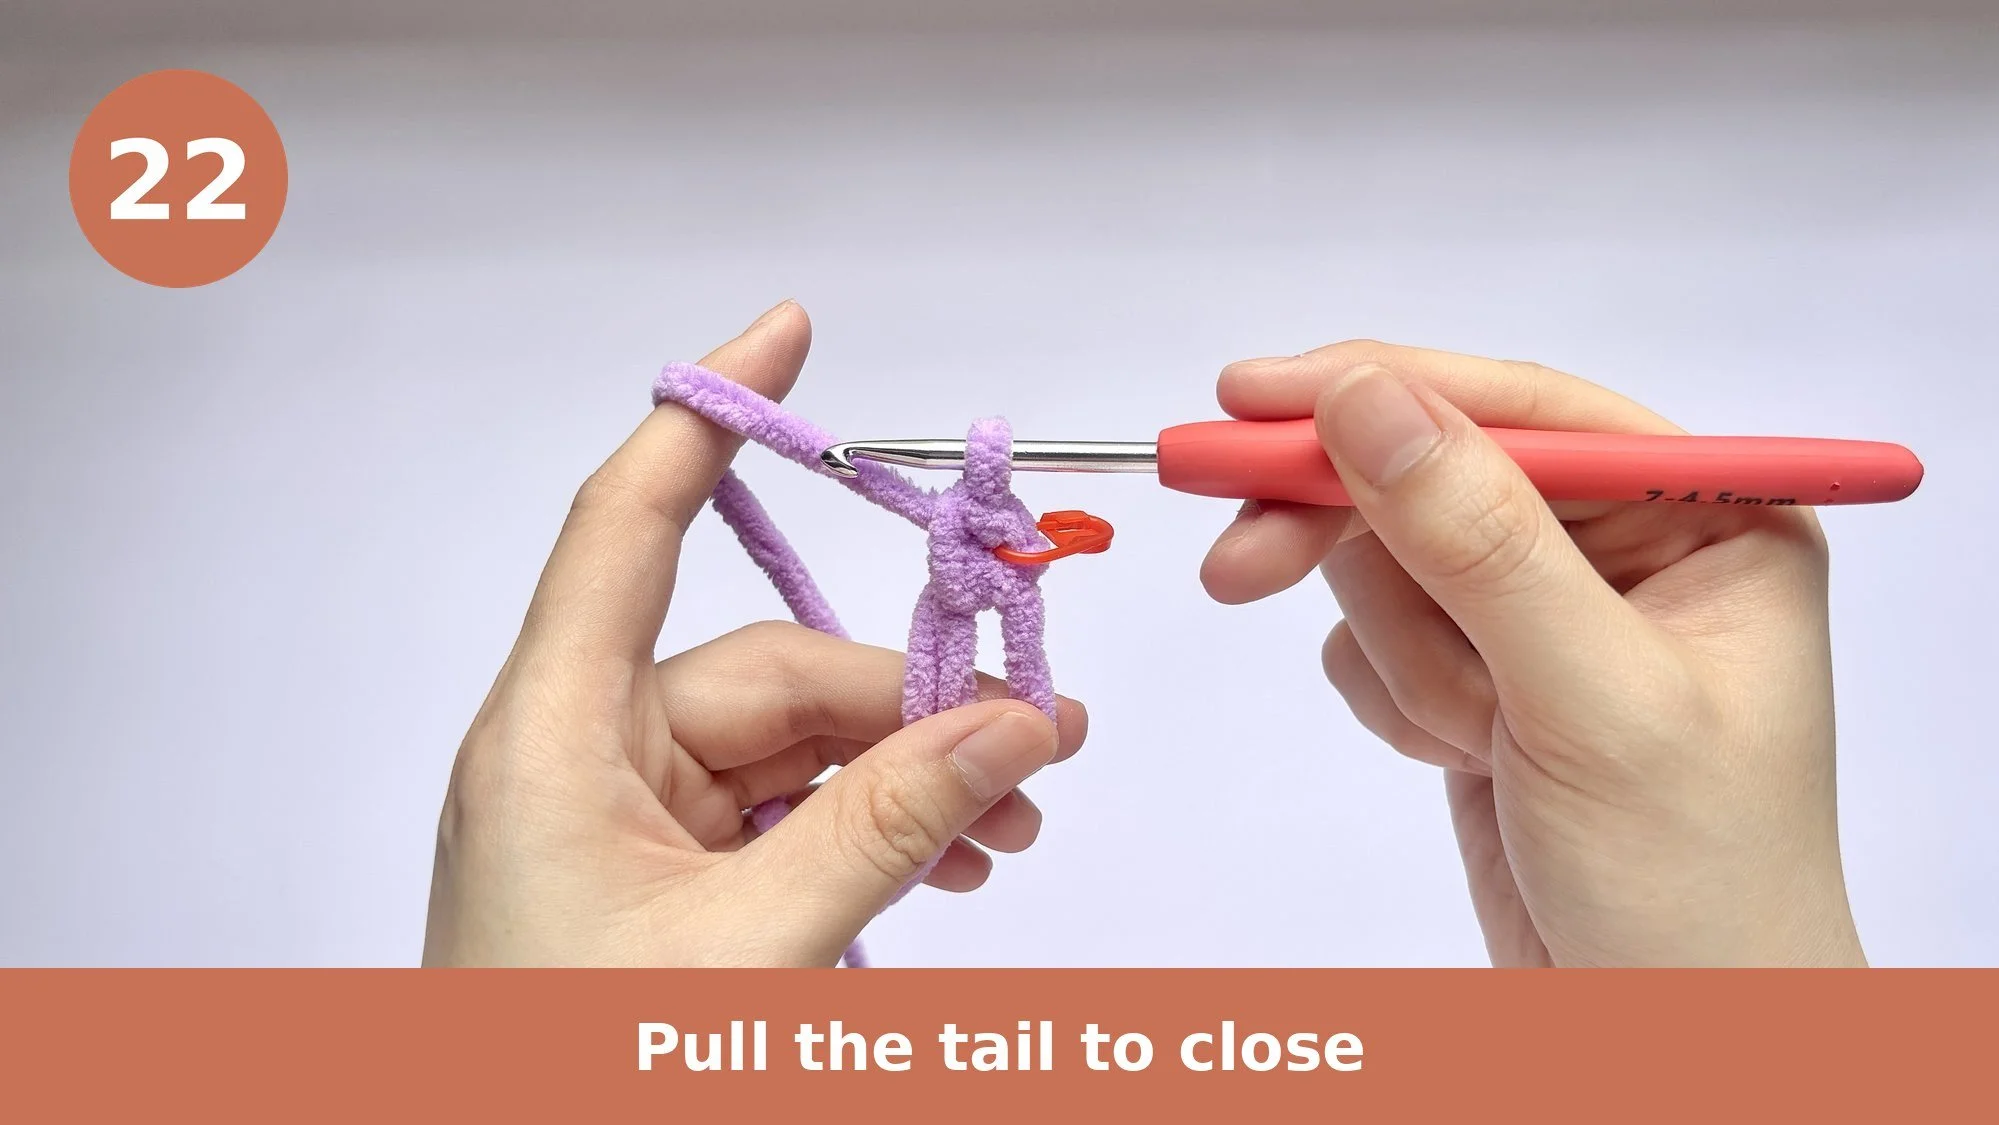
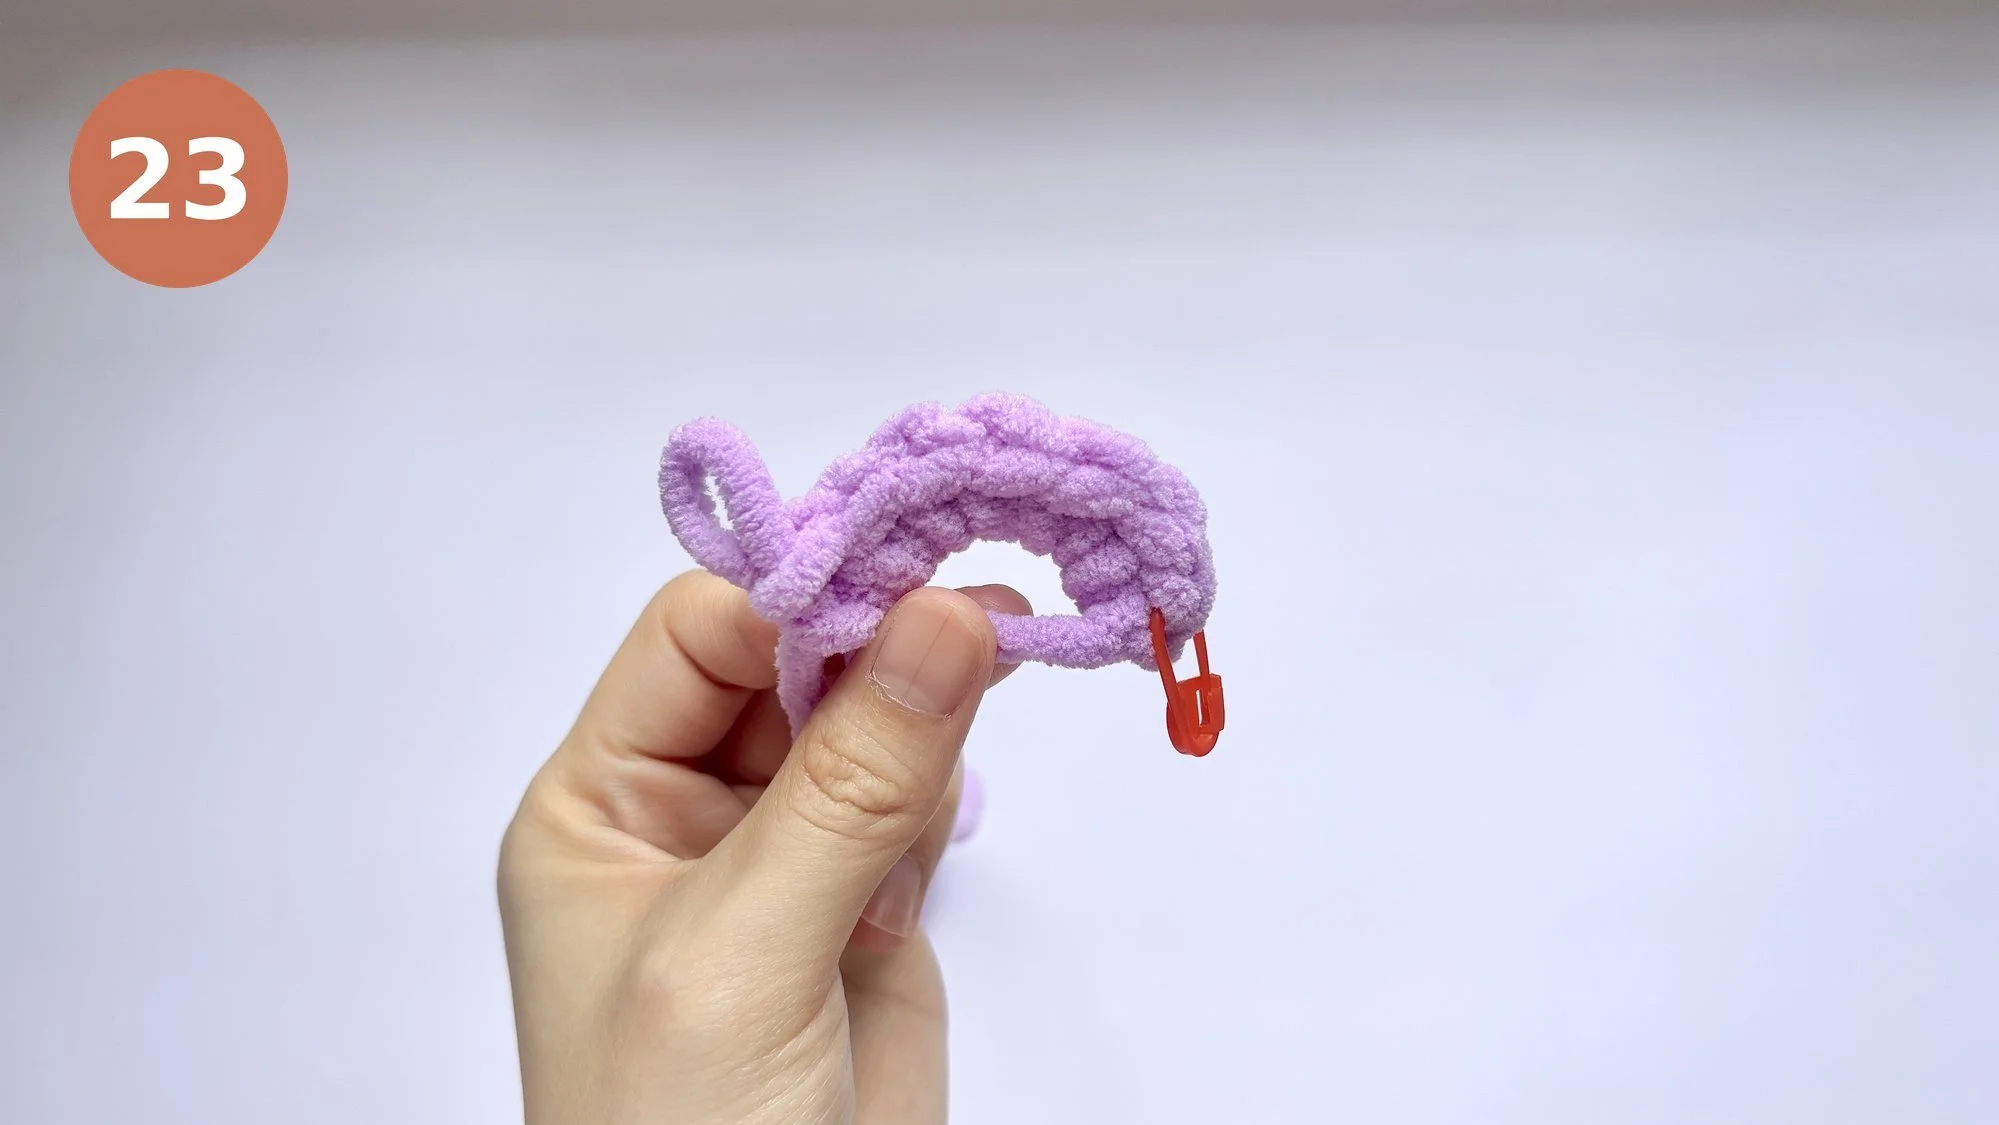
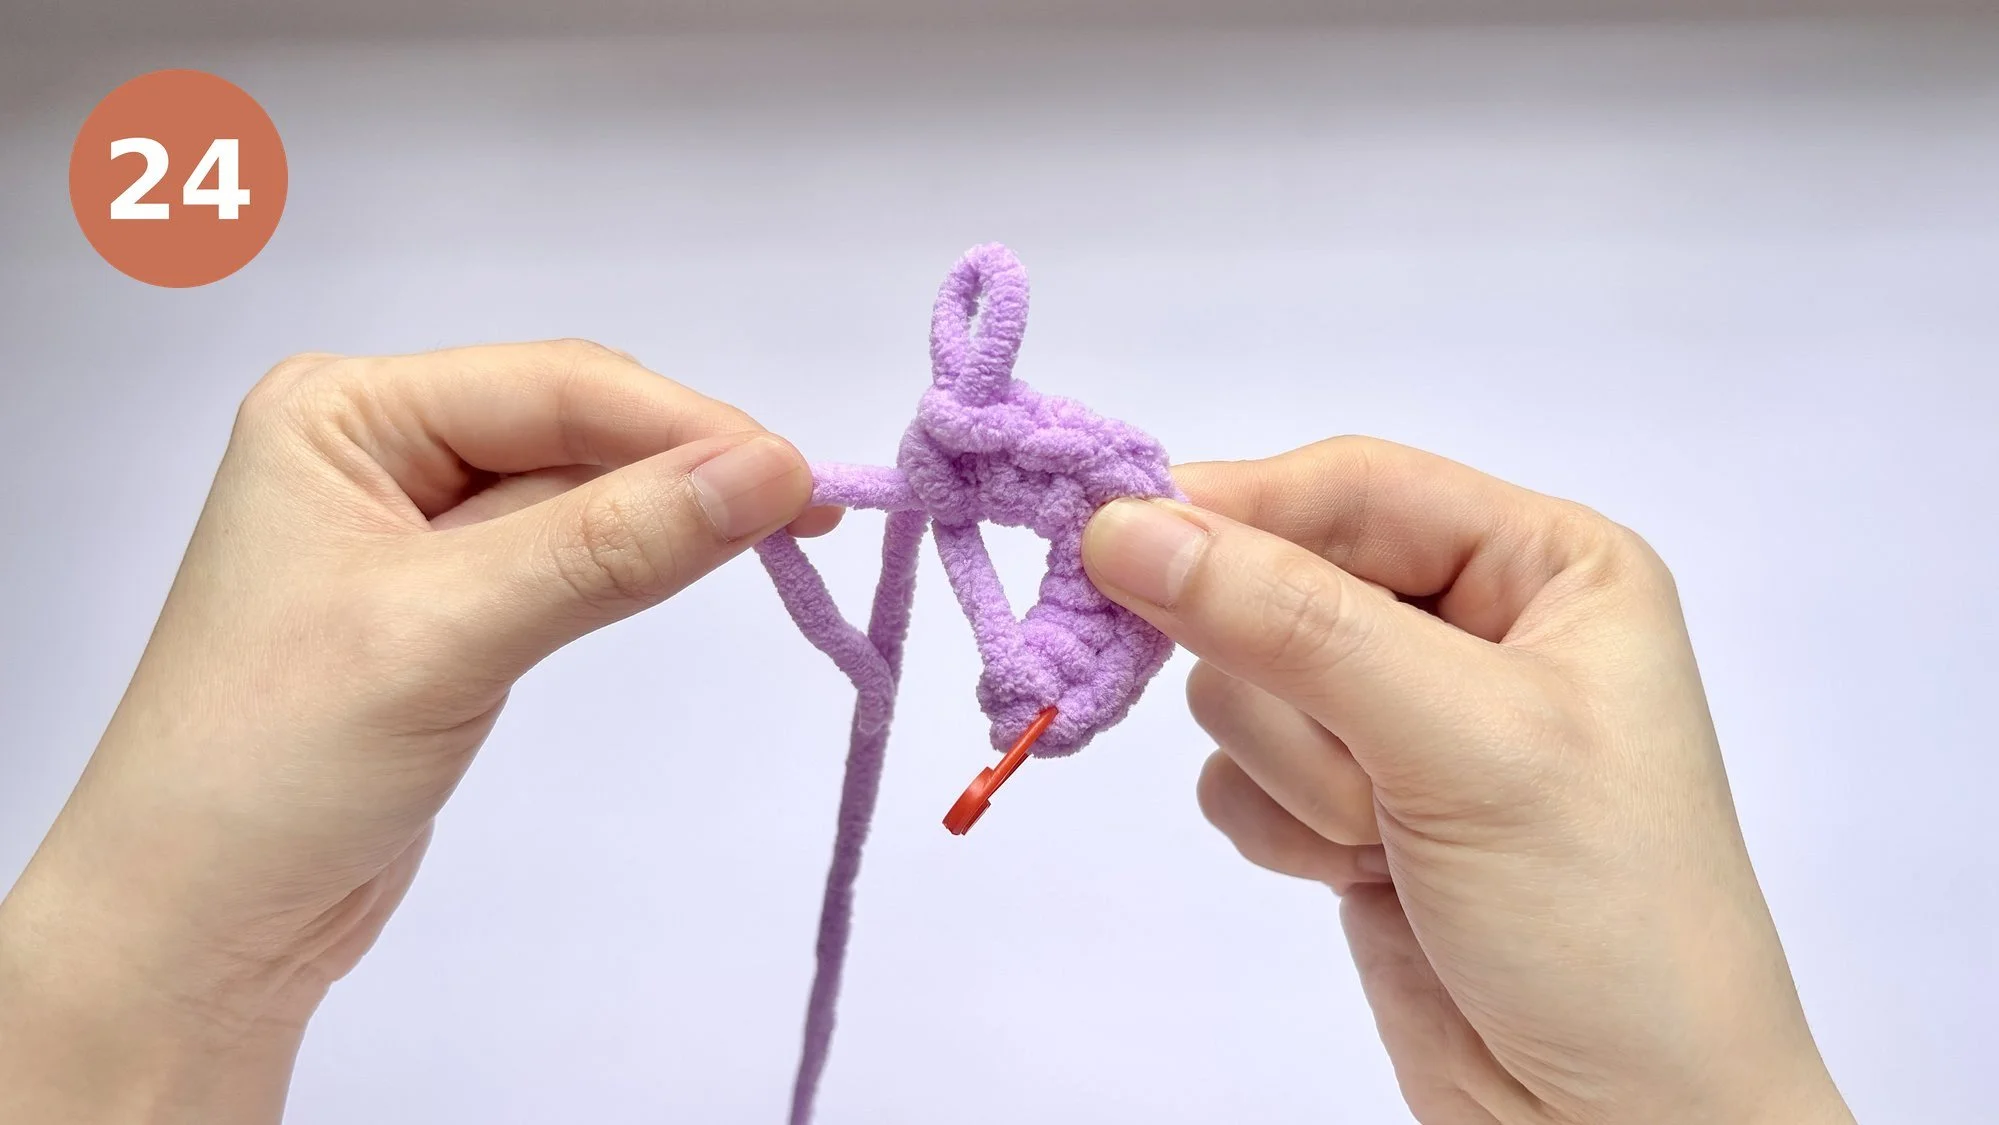
1Start by making a magic ring (MR) with the purple yarn. Then crochet 7 single crochet (sc) into the center of the ring. Gently pull the yarn tail to draw the ring tightly closed.
Total stitches: 7
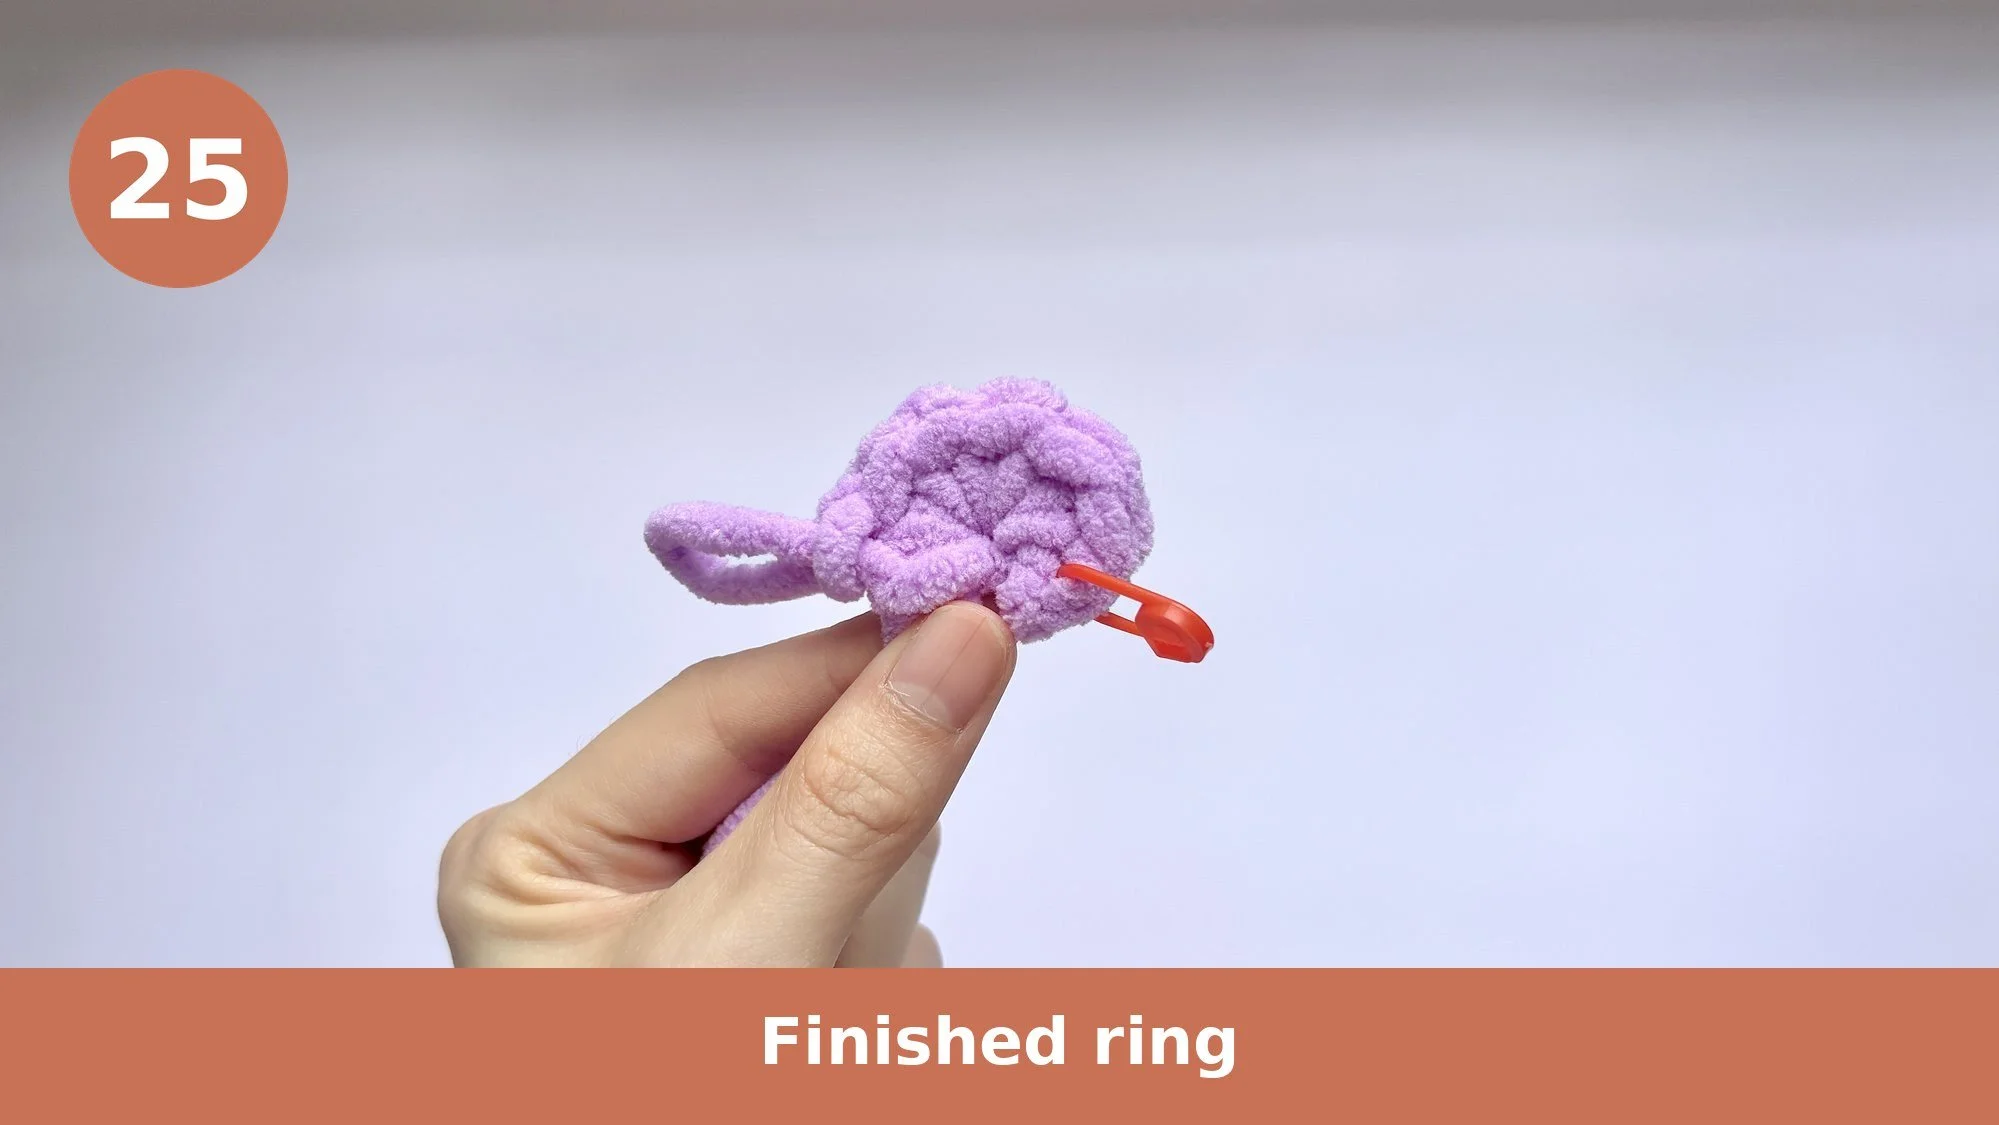
Round
2Time for your stitch marker. As you begin Round 2, place it in the first stitch, then move it up to the first stitch of every round so you always know where a new round starts.
Increase (inc) in every stitch by crocheting 2 single crochet (sc) into each stitch around.
Total stitches: 14

Tip: Your stitches may feel loose or uneven at first, and that's completely normal when learning crochet.
Round
3Chapter 2:
Building Shape
Crochet 1 single crochet (sc), then 1 increase (inc). Repeat this pattern 7 times.
Total stitches: 21
Round
4Crochet 1 single crochet (sc) in the next 2 stitches, then 1 increase (inc) in the following stitch. Repeat this pattern 7 times.
Total stitches: 28
Round
5Crochet 1 single crochet (sc) in each stitch around.
Total stitches: 28
Chapter 3:
Your First Color Change
Over the next few rounds you'll introduce white yarn to shape Pip's Tummy. Follow the color sequence carefully in each round.
Watch: Your first color change might feel a little tricky, and that's completely normal. If you need extra help, watch the color change video below.
Change color on the last step of a stitch.
When you reach the final "yarn over and pull through" of the last stitch in the old color, make that pull-through with the new color. The new color then appears cleanly on the very next stitch. This is the secret to a neat color change.
Carry the resting color, don't cut it.
When you switch, let the color you've just finished with rest on the inside of the Body and carry it loosely up behind the Tummy as you go, catching it every 2 to 3 stitches so the strands stay short and hidden. You'll only cut the white yarn once, after Round 11.
A little color peeking through is normal.
A slightly bumpy join, or a hint of purple behind the white, will disappear once Pip is stuffed. Keep going!
How the Color Change Works (read this first):
Let's do the very first purple-to-white change (from Round 6) together:
Using purple, single crochet (sc) the first 10 stitches of the round.
On that 10th stitch, stop just before the final step, so you have 2 loops on your hook.
Pick up the white yarn. Yarn over with white and pull through both loops to finish the stitch. Your hook now holds white, and the change is made.
Let the purple yarn drop to the inside of the Body. You'll carry it up behind the next few stitches, so don't cut it.
Using white, single crochet (sc) the next 2 stitches.
To change back to purple, use the same trick: work the last white stitch until 2 loops remain, then finish it with purple.
That's it, you've changed color! Carry on with the color sequence below, using the same method at each change.
Your First Color Change - Step by Step:
Round
6Crochet 1 single crochet (sc) in each stitch around with the following color changes:
Purple: 10
White: 2
Purple: 4
White: 2
Purple: 10
Total stitches: 28
Round
7
Tip: When changing colors, pull both yarn tails after your first few stitches to keep the color change neat and secure.
Continue following the color sequence. The white sections are growing wider this round.
Crochet 1 single crochet (sc) in each stitch around with the following color changes:
Purple: 9
White: 4
Purple: 2
White: 4
Purple: 9
Total stitches: 28

Note: Pip's Tummy should now appear in the front center of the Body. Don't worry if your color changes don't look perfect, they'll become less noticeable as Pip takes shape.
Round
8Crochet 1 single crochet (sc) in each stitch around with the following color changes:
Purple: 10
White: 3
Purple: 2
White: 3
Purple: 10
Total stitches: 28
Rounds
9-11These three rounds are worked identically. In each round, follow this color sequence:
Purple: 9
White: 10
Purple: 9
Total stitches: 28

Important: After Round 11, you've now finished using the white yarn for the Body. Cut the white yarn, leaving about a 3- inch yarn tail. Leave the yarn tail loose inside the Body.
Round
12With the purple yarn, crochet 1 single crochet (sc) in each stitch all the way around.
Total stitches: 28
Chapter 4:
Safety Eyes and Stuffing
Important: Safety eyes are not suitable for toys given to babies or children under 3, as they can be a choking hazard.
Now it's time to attach Pip's Eyes. They sit high on the white Tummy, at the level where Round 7 meets Round 8. Read all the steps below before you begin, because once the backing clicks on, the eyes are permanent.
Attach the Eyes
Find the level:
Locate the wide solid white band on Pip's front (Rounds 9-11). The Eyes sit one round above it, where Round 7 meets Round 8. (Round 1 is at the very top of Pip's Head, so you can also count down from there.)
Mark before you commit:
Place a stitch marker where each Eye will go, so you can still move them. Set them level with each other and about 5-6 stitches apart, one Eye on each of the two white patches at the front, so they sit evenly on the white.
Check from the front:
Step back and check from the front. The Eyes should sit level with each other and even on the white. Adjust the stitch markers until you are completely happy.
Push through and lock in:
When you're happy, push each Eye's stem through from the front where its marker sits, then press a locking back onto it from inside until it snaps. Firm enough to lock, not so hard it dents Pip's shape.
Watch: Need extra help attaching the safety eyes or counting rounds? Watch the video below.
Now it's time to start adding the stuffing to Pip's Body. Add small amounts of stuffing at a time and gently shape the Body as you go. Add enough stuffing for the Body to feel firm, soft, and rounded.
Add the stuffing
Tip: It's best to build up a smooth, even shape if you add a little stuffing at a time instead of all at once. You can always add more later if Pip feels too squishy!
Chapter 5:
Finishing the Body
Round
13We are now going to start closing Pip's Body.
Crochet 2 single crochet (sc), then 1 decrease (dec). Repeat all the way around (7 times total).
Total stitches: 21
Tip: Decreases can feel a little tight or awkward at first, and that's completely normal. They help shape Pip's Body by making it gradually smaller. A small gap or bump where you decrease is normal too, and it will disappear once Pip is stuffed.
Round
14Crochet 1 single crochet (sc), then 1 decrease (dec). Repeat all the way around (7 times total).
Total stitches: 14
Add more stuffing now before the opening gets too small. Fill until the Body feels firm and evenly shaped, but not so full that the stitches are stretched.
Add more stuffing here.
Round
15Crochet 1 decrease (dec) in each stitch around.
Total stitches: 7
Finishing off the Body
Fasten off (FO):
Cut the yarn, leaving about a 6-inch tail.
Thread your needle:
Thread the yarn tail onto the yarn needle in your kit.
Close the opening:
Insert the needle through the front loops of the remaining 7 stitches, one stitch at a time, all the way around.
Pull to close:
Gently pull the yarn tail to close the remaining opening.
Secure the end:
Once it's closed, weave the yarn tail through a few nearby stitches to secure it. Trim the yarn close to the surface, and the yarn tail will slip inside and disappear.
Tip: Pull the yarn tail slowly so the opening closes neatly. If it still looks open, weave through the stitches one more time before trimming.