
Step 4 of 10:
Safety Eyes and Stuffing

Important: Safety eyes are not suitable for toys given to babies or children under 3 - they can be a choking hazard. They are also permanent once the locking back is clicked on, so read all the steps below and make sure you're completely happy with placement before securing them.
Now it's time to attach Pip's Eyes. They sit high on the white Tummy, at the level where Round 7 meets Round 8. Read all the steps below before you begin, because once the backing clicks on, the Eyes are permanent.

Watch: Prefer to follow along? The video below shows how to attach Pip's Safety Eyes and add the stuffing, from start to finish.
Attach the Eyes
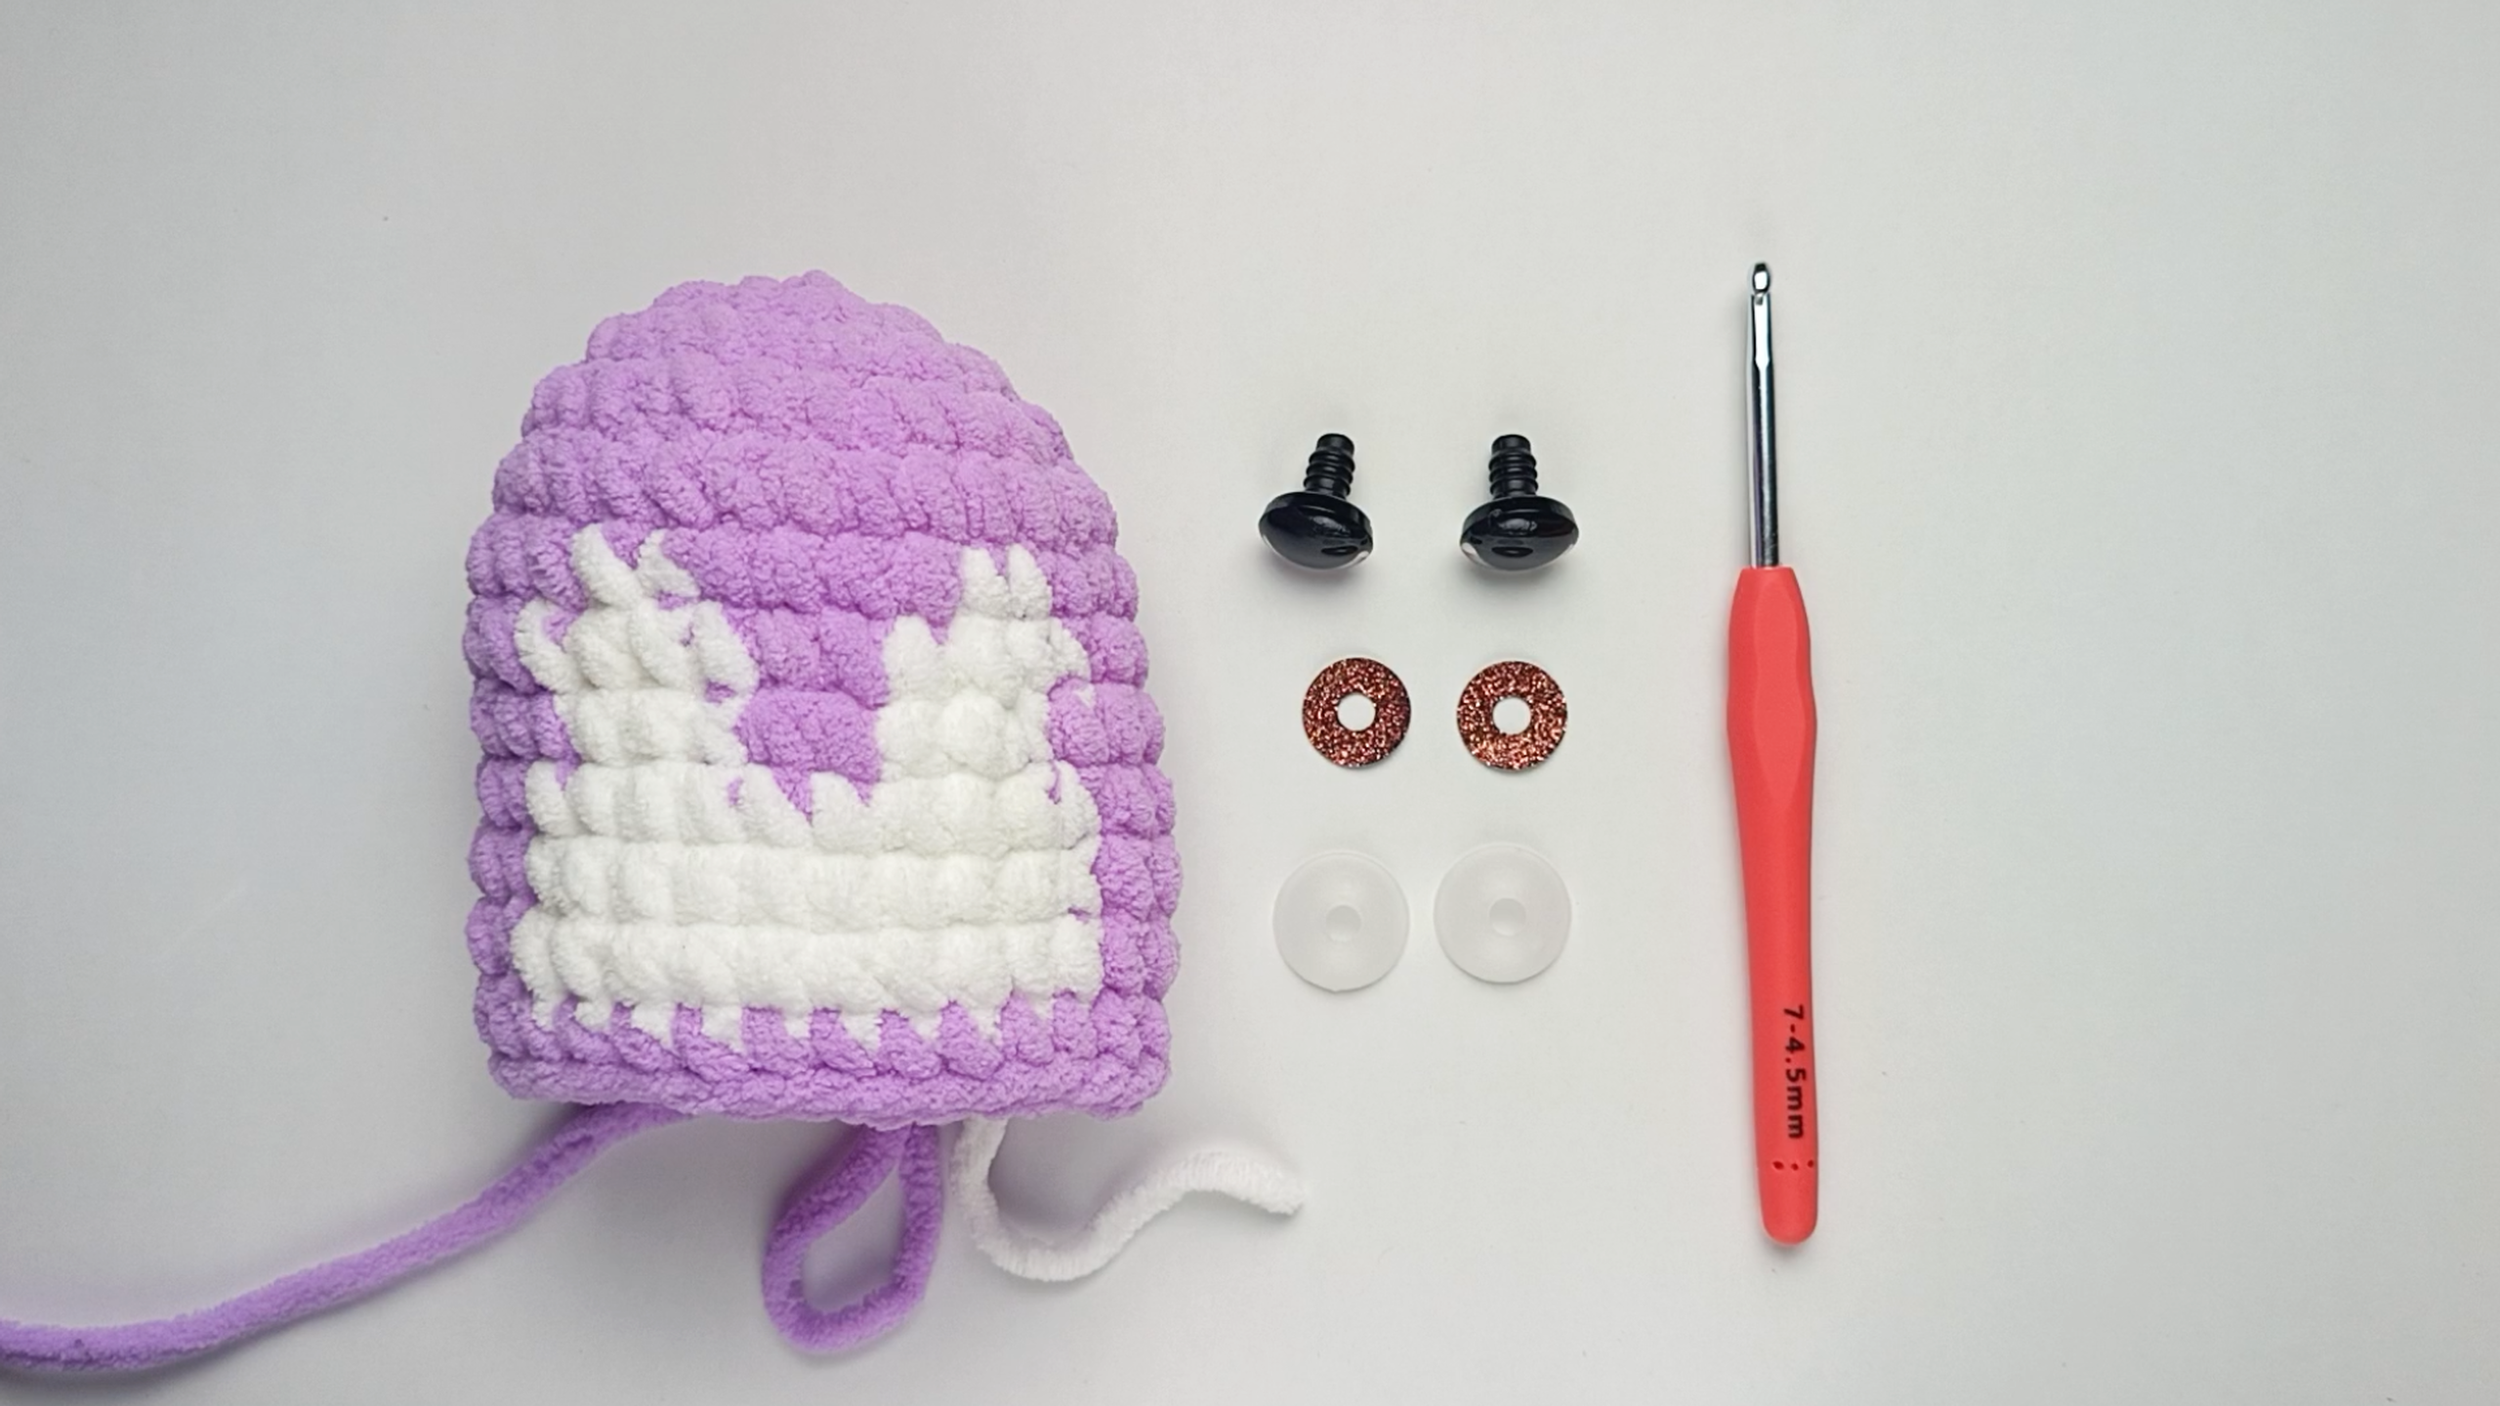
The three parts:
Each safety eye has three parts: the eye, with a stem on the back, the colored fabric disc that sits behind it, and the backing washer that locks onto it.
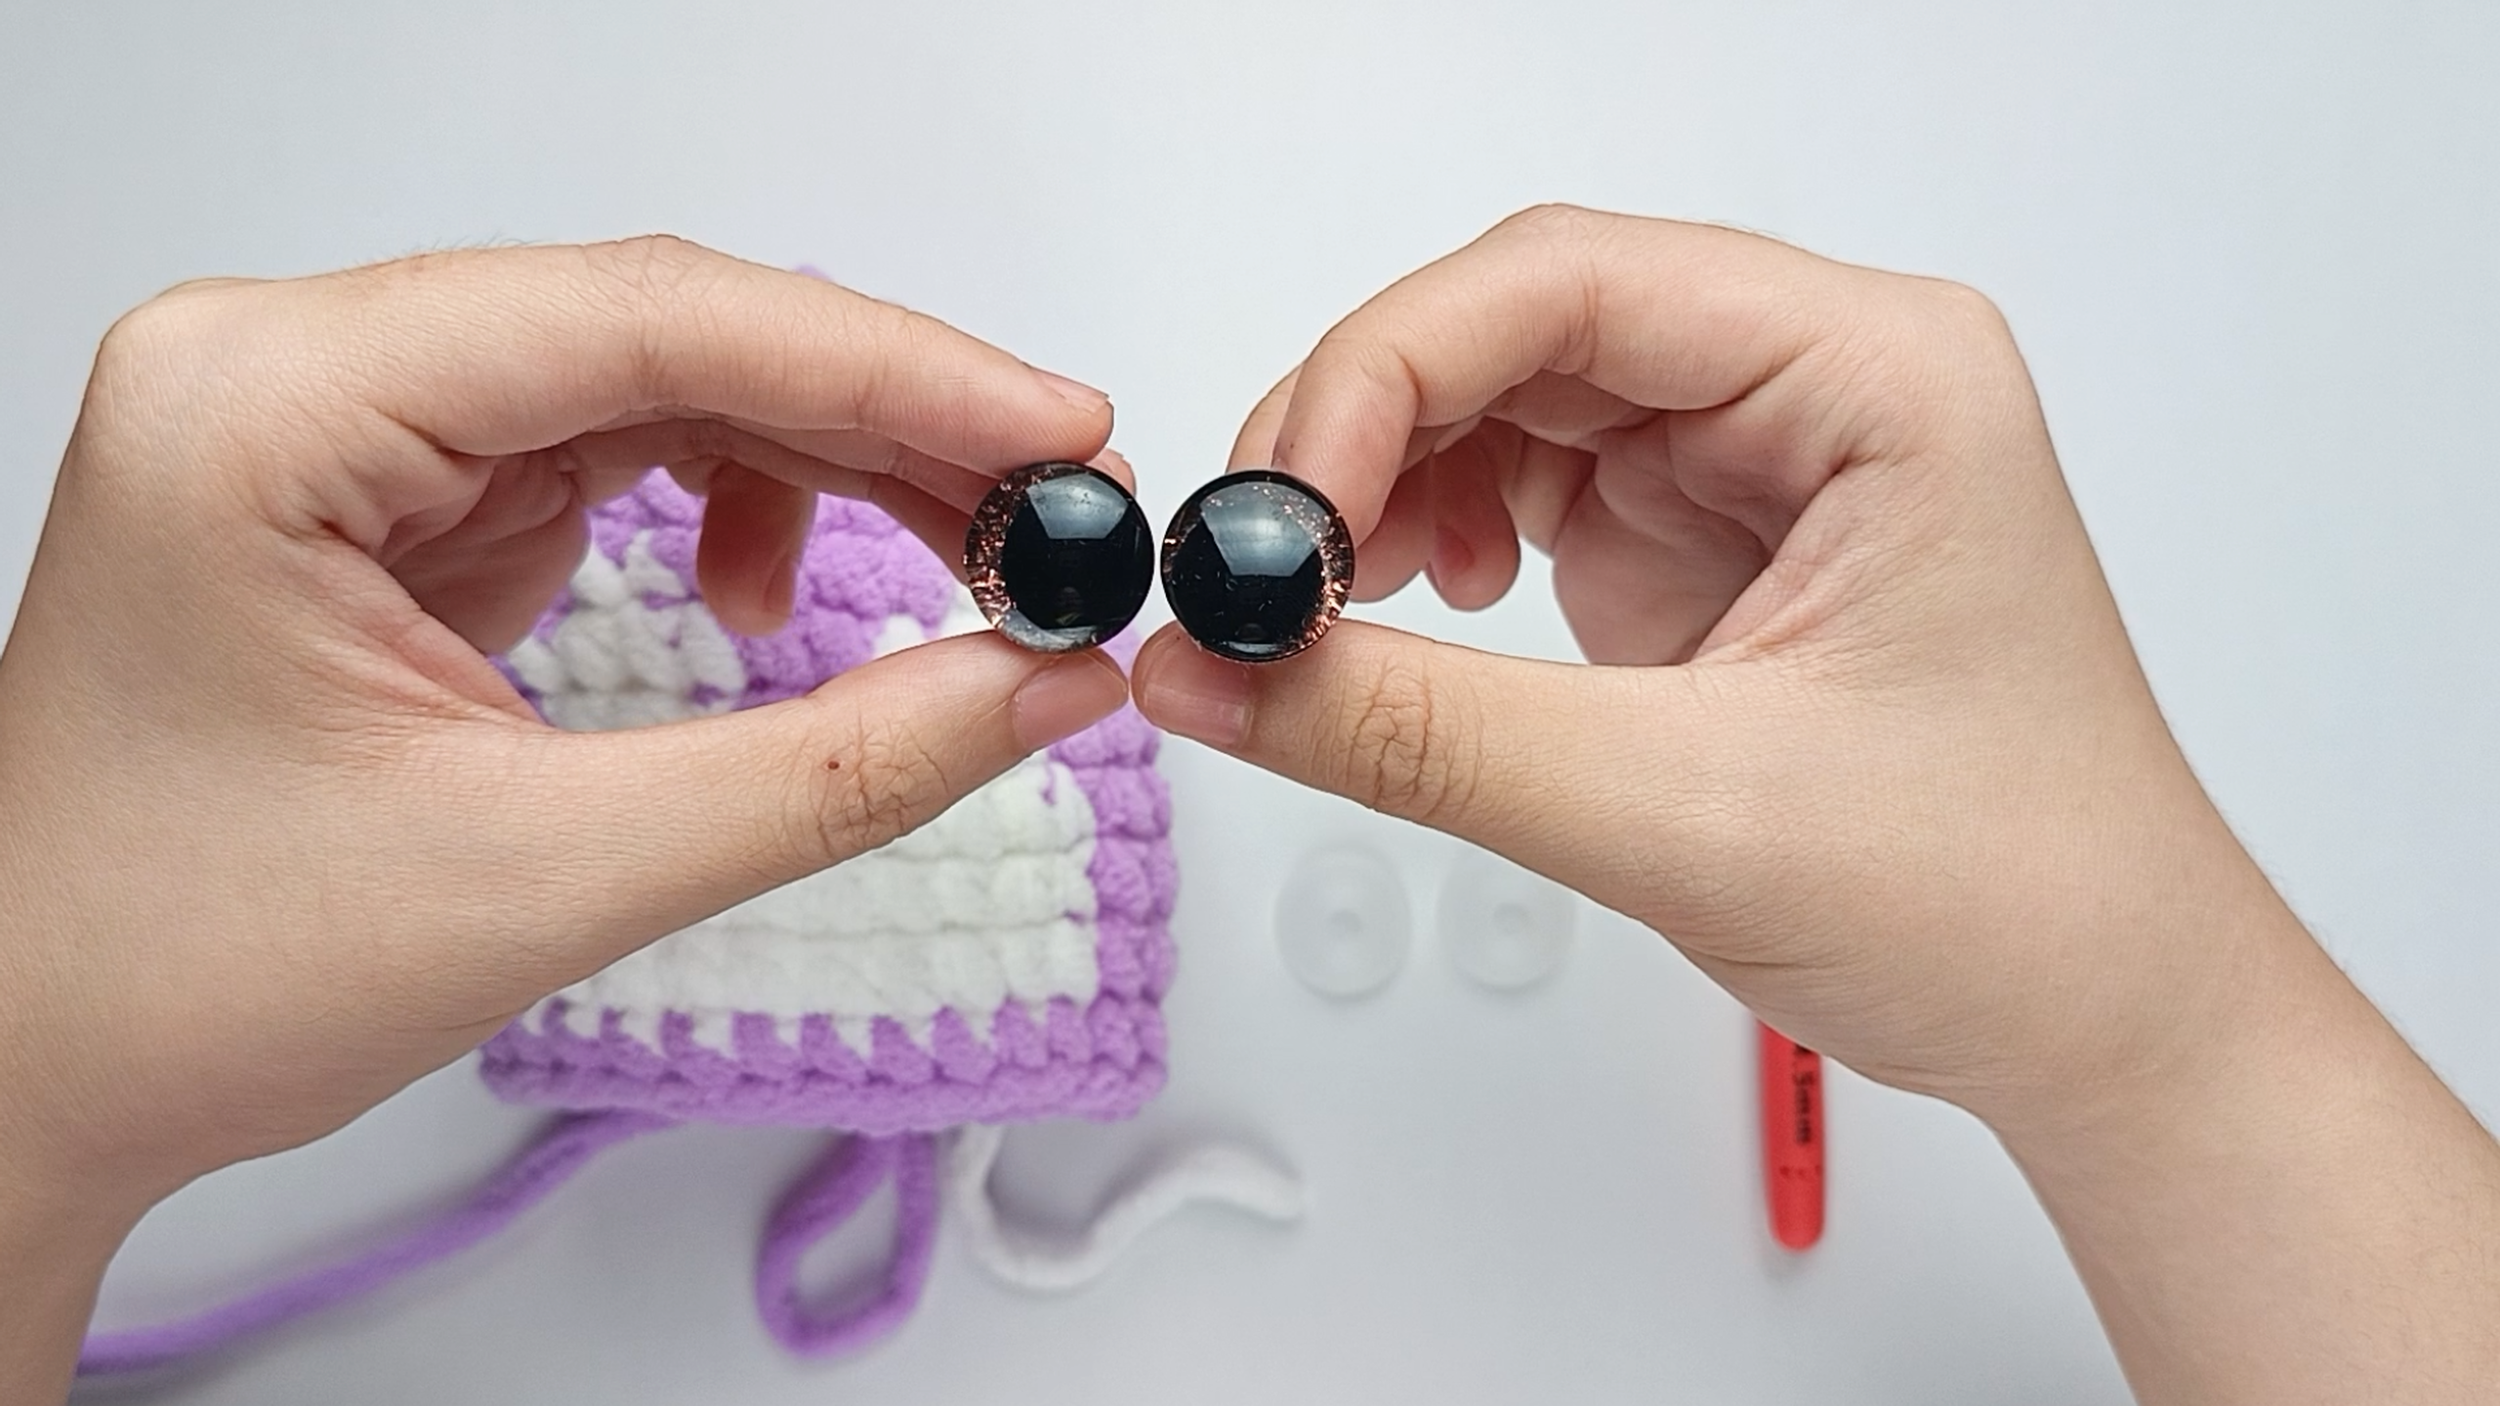
Insert the colored fabric:
Insert the colored fabric disc to the Eye first. The fabric will add colors to the Eyes.
FIND THE LEVEL
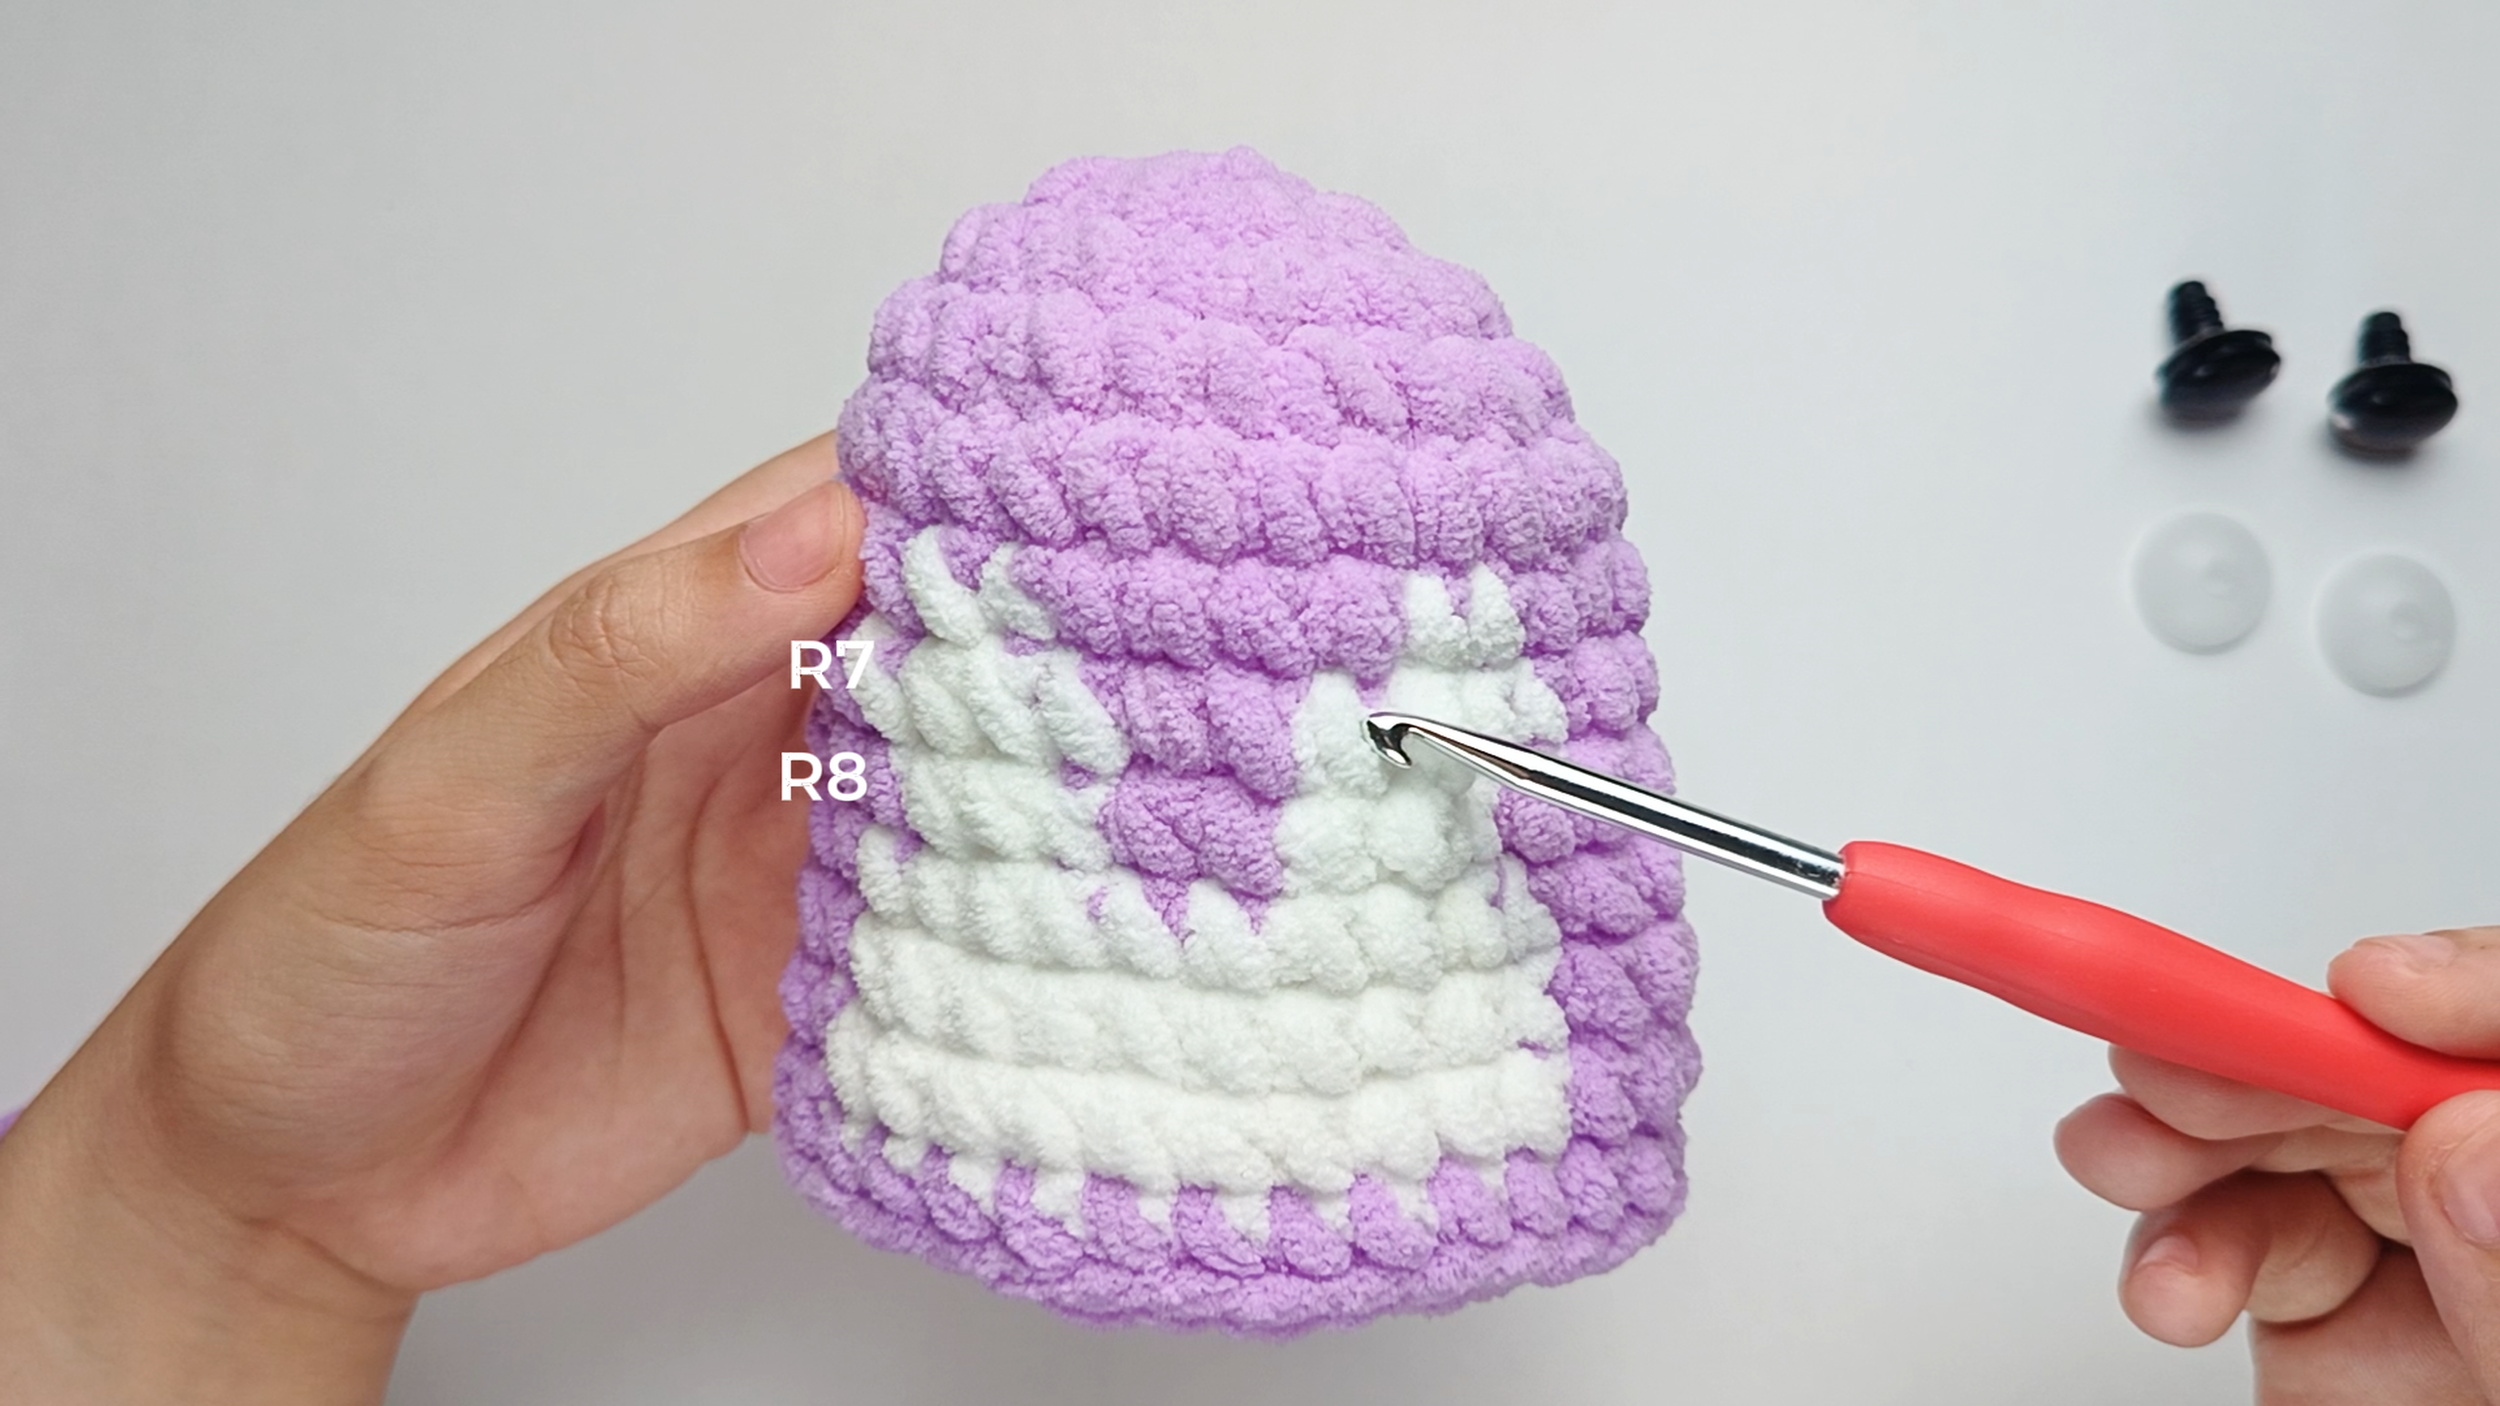
Locate the position:
Locate the wide solid white band on Pip's front (Rounds 9 - 11). We will place the Eyes one round above it, where Round 7 meets Round 8.
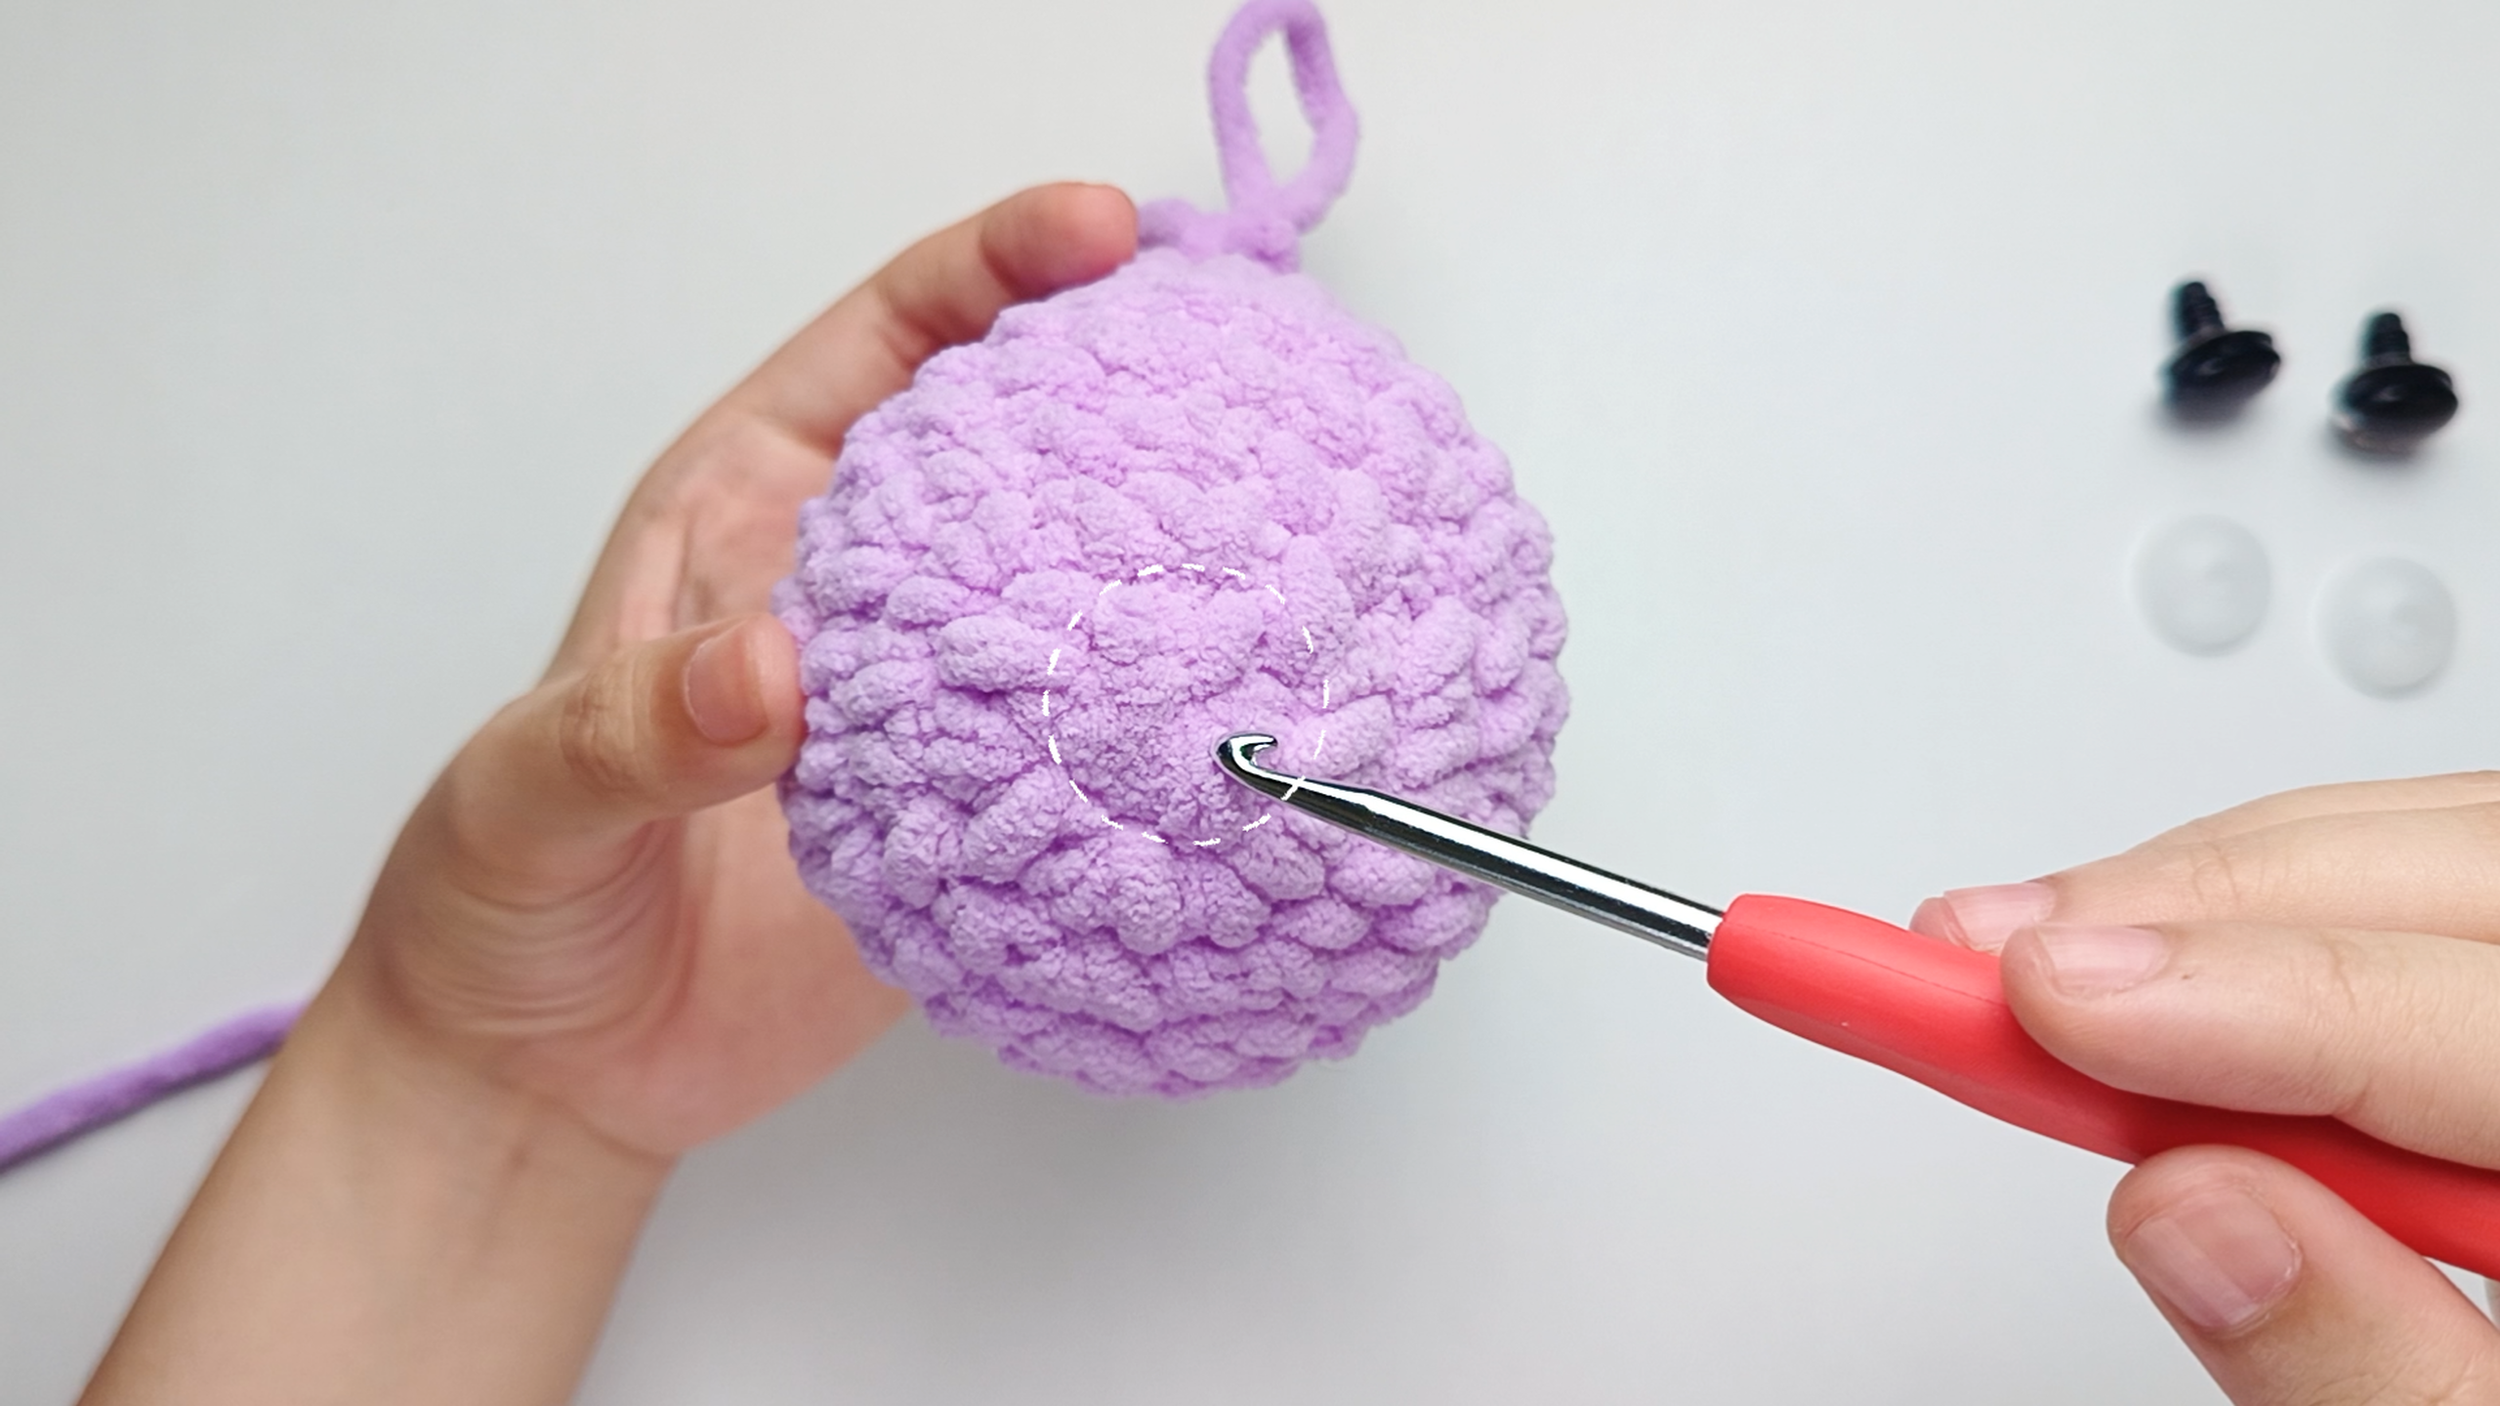
Find the center:
Alternatively, you can also locate the position by counting from the first round. Look at the center of your piece. This is where your work began, and it's always Round 1.
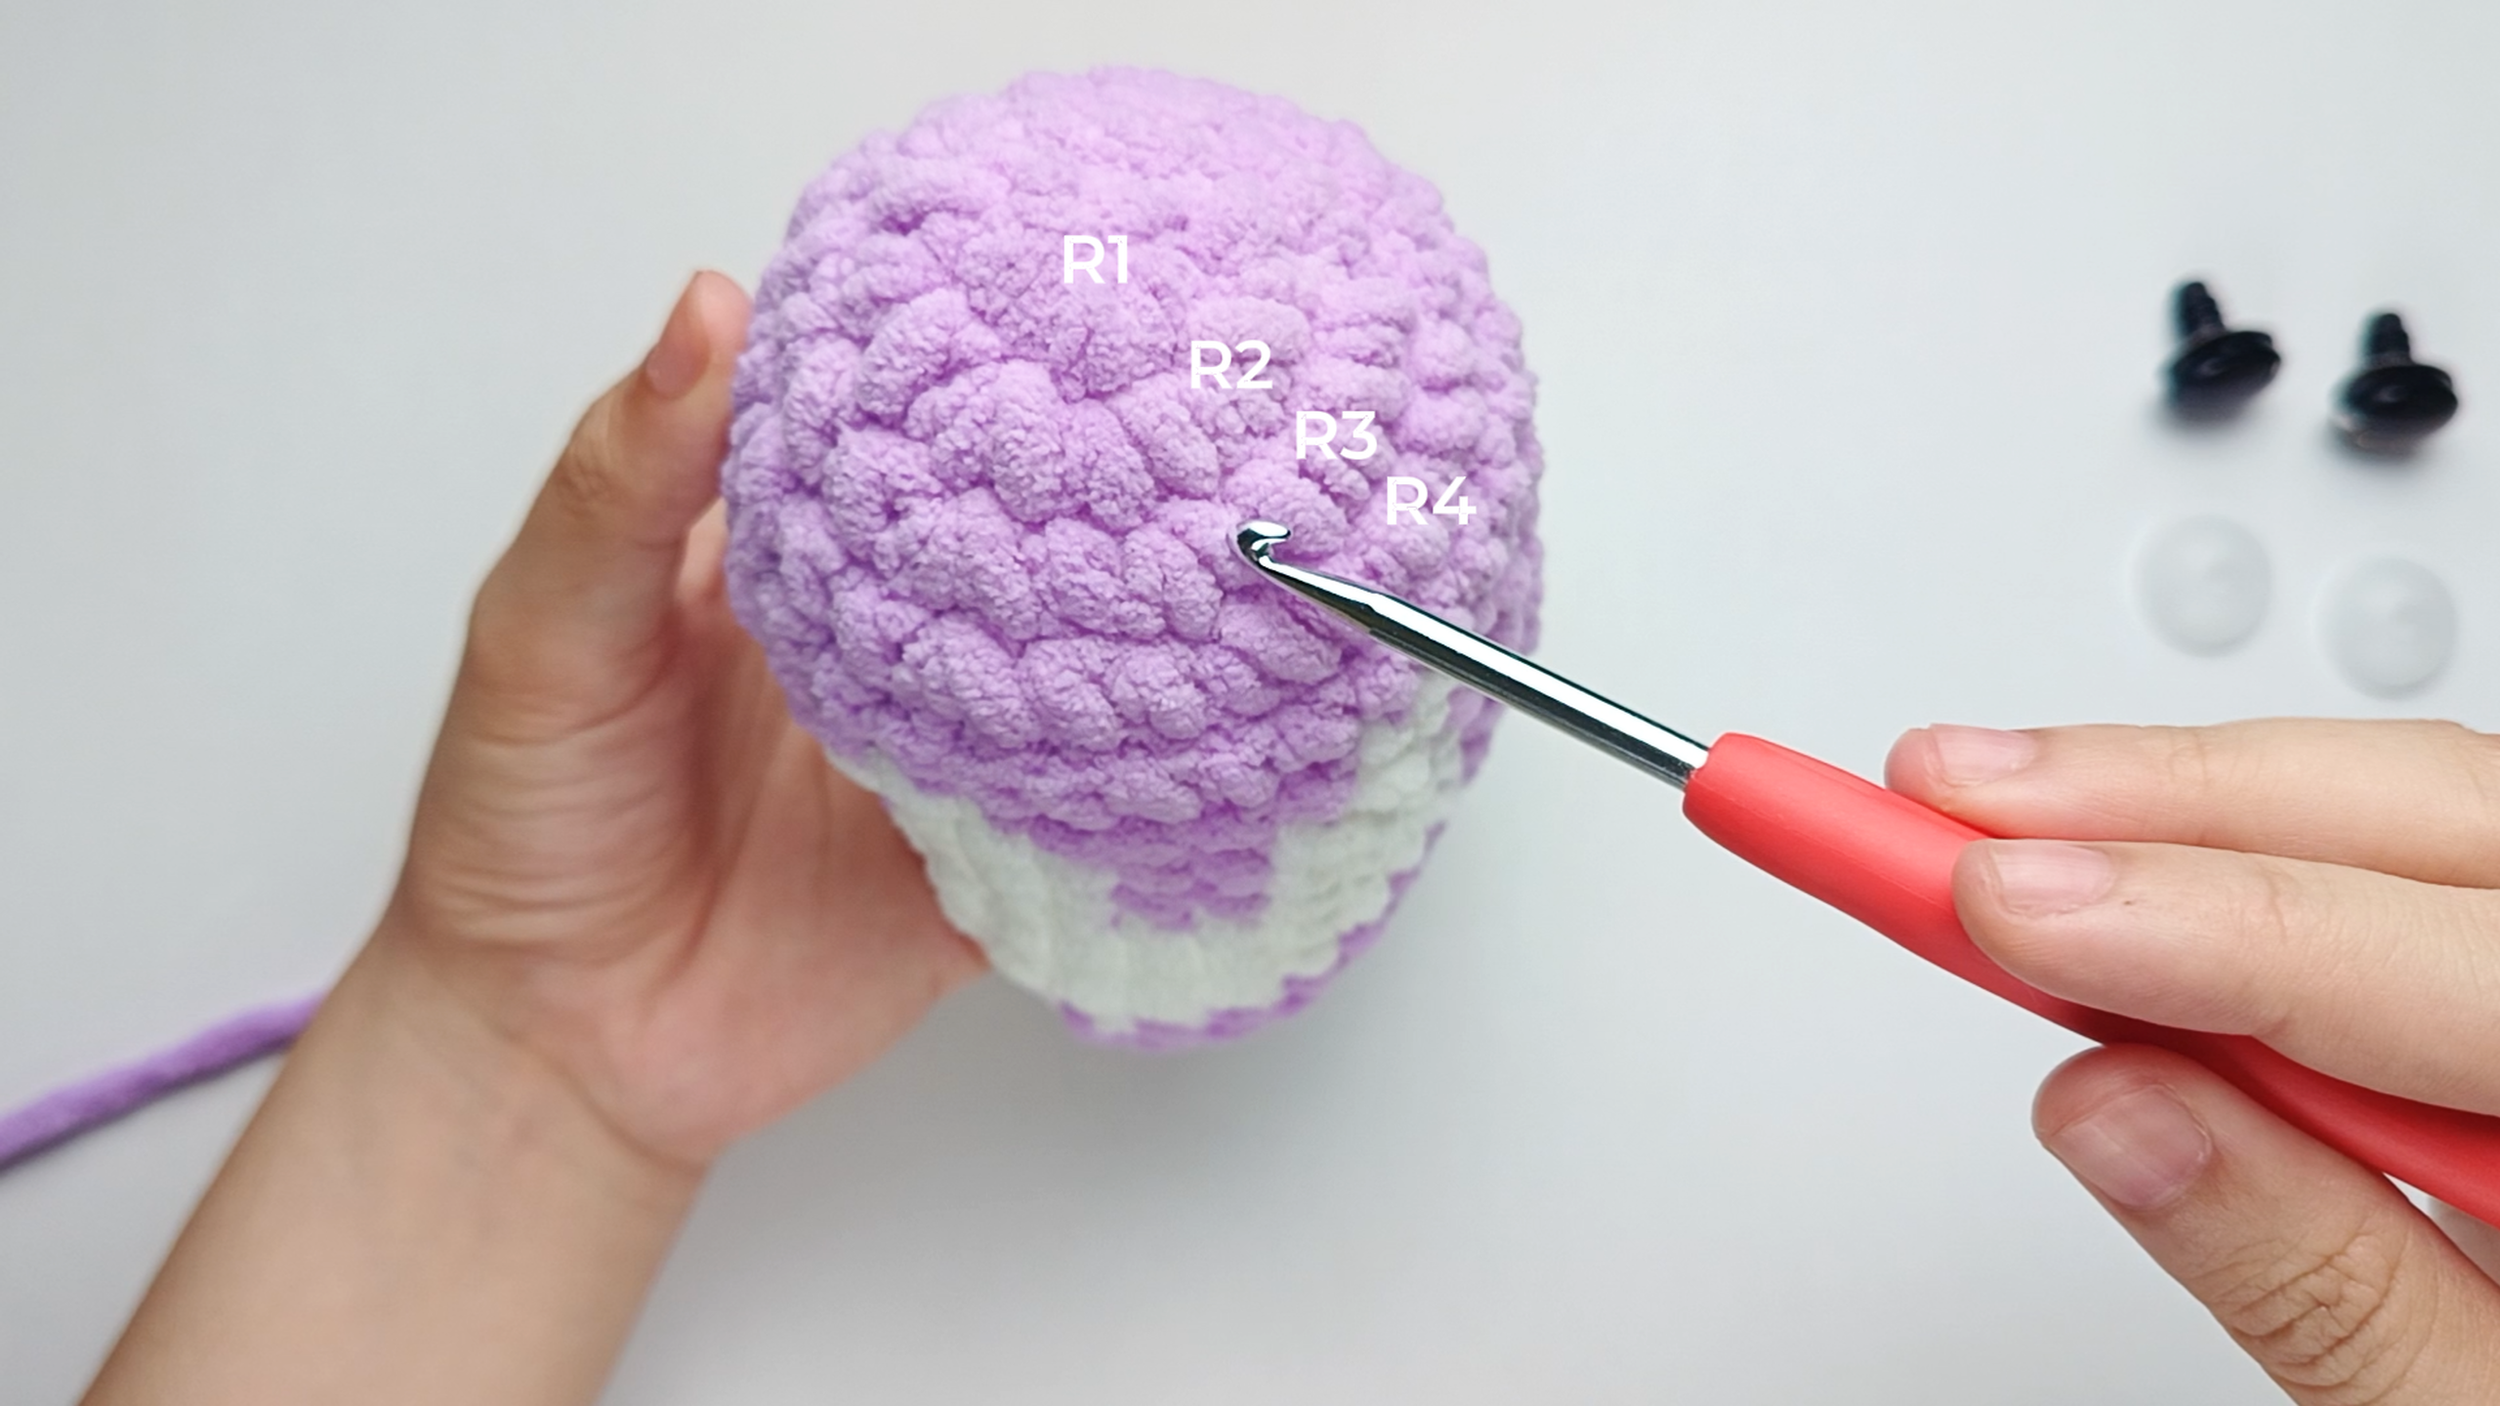
Count outward:
From the center, count the rounds as they move outward. Each round forms its own line, even as they spiral. Count each line one by one - Round 1, Round 2, Round 3, and so on until you find Round 7 and Round 8.
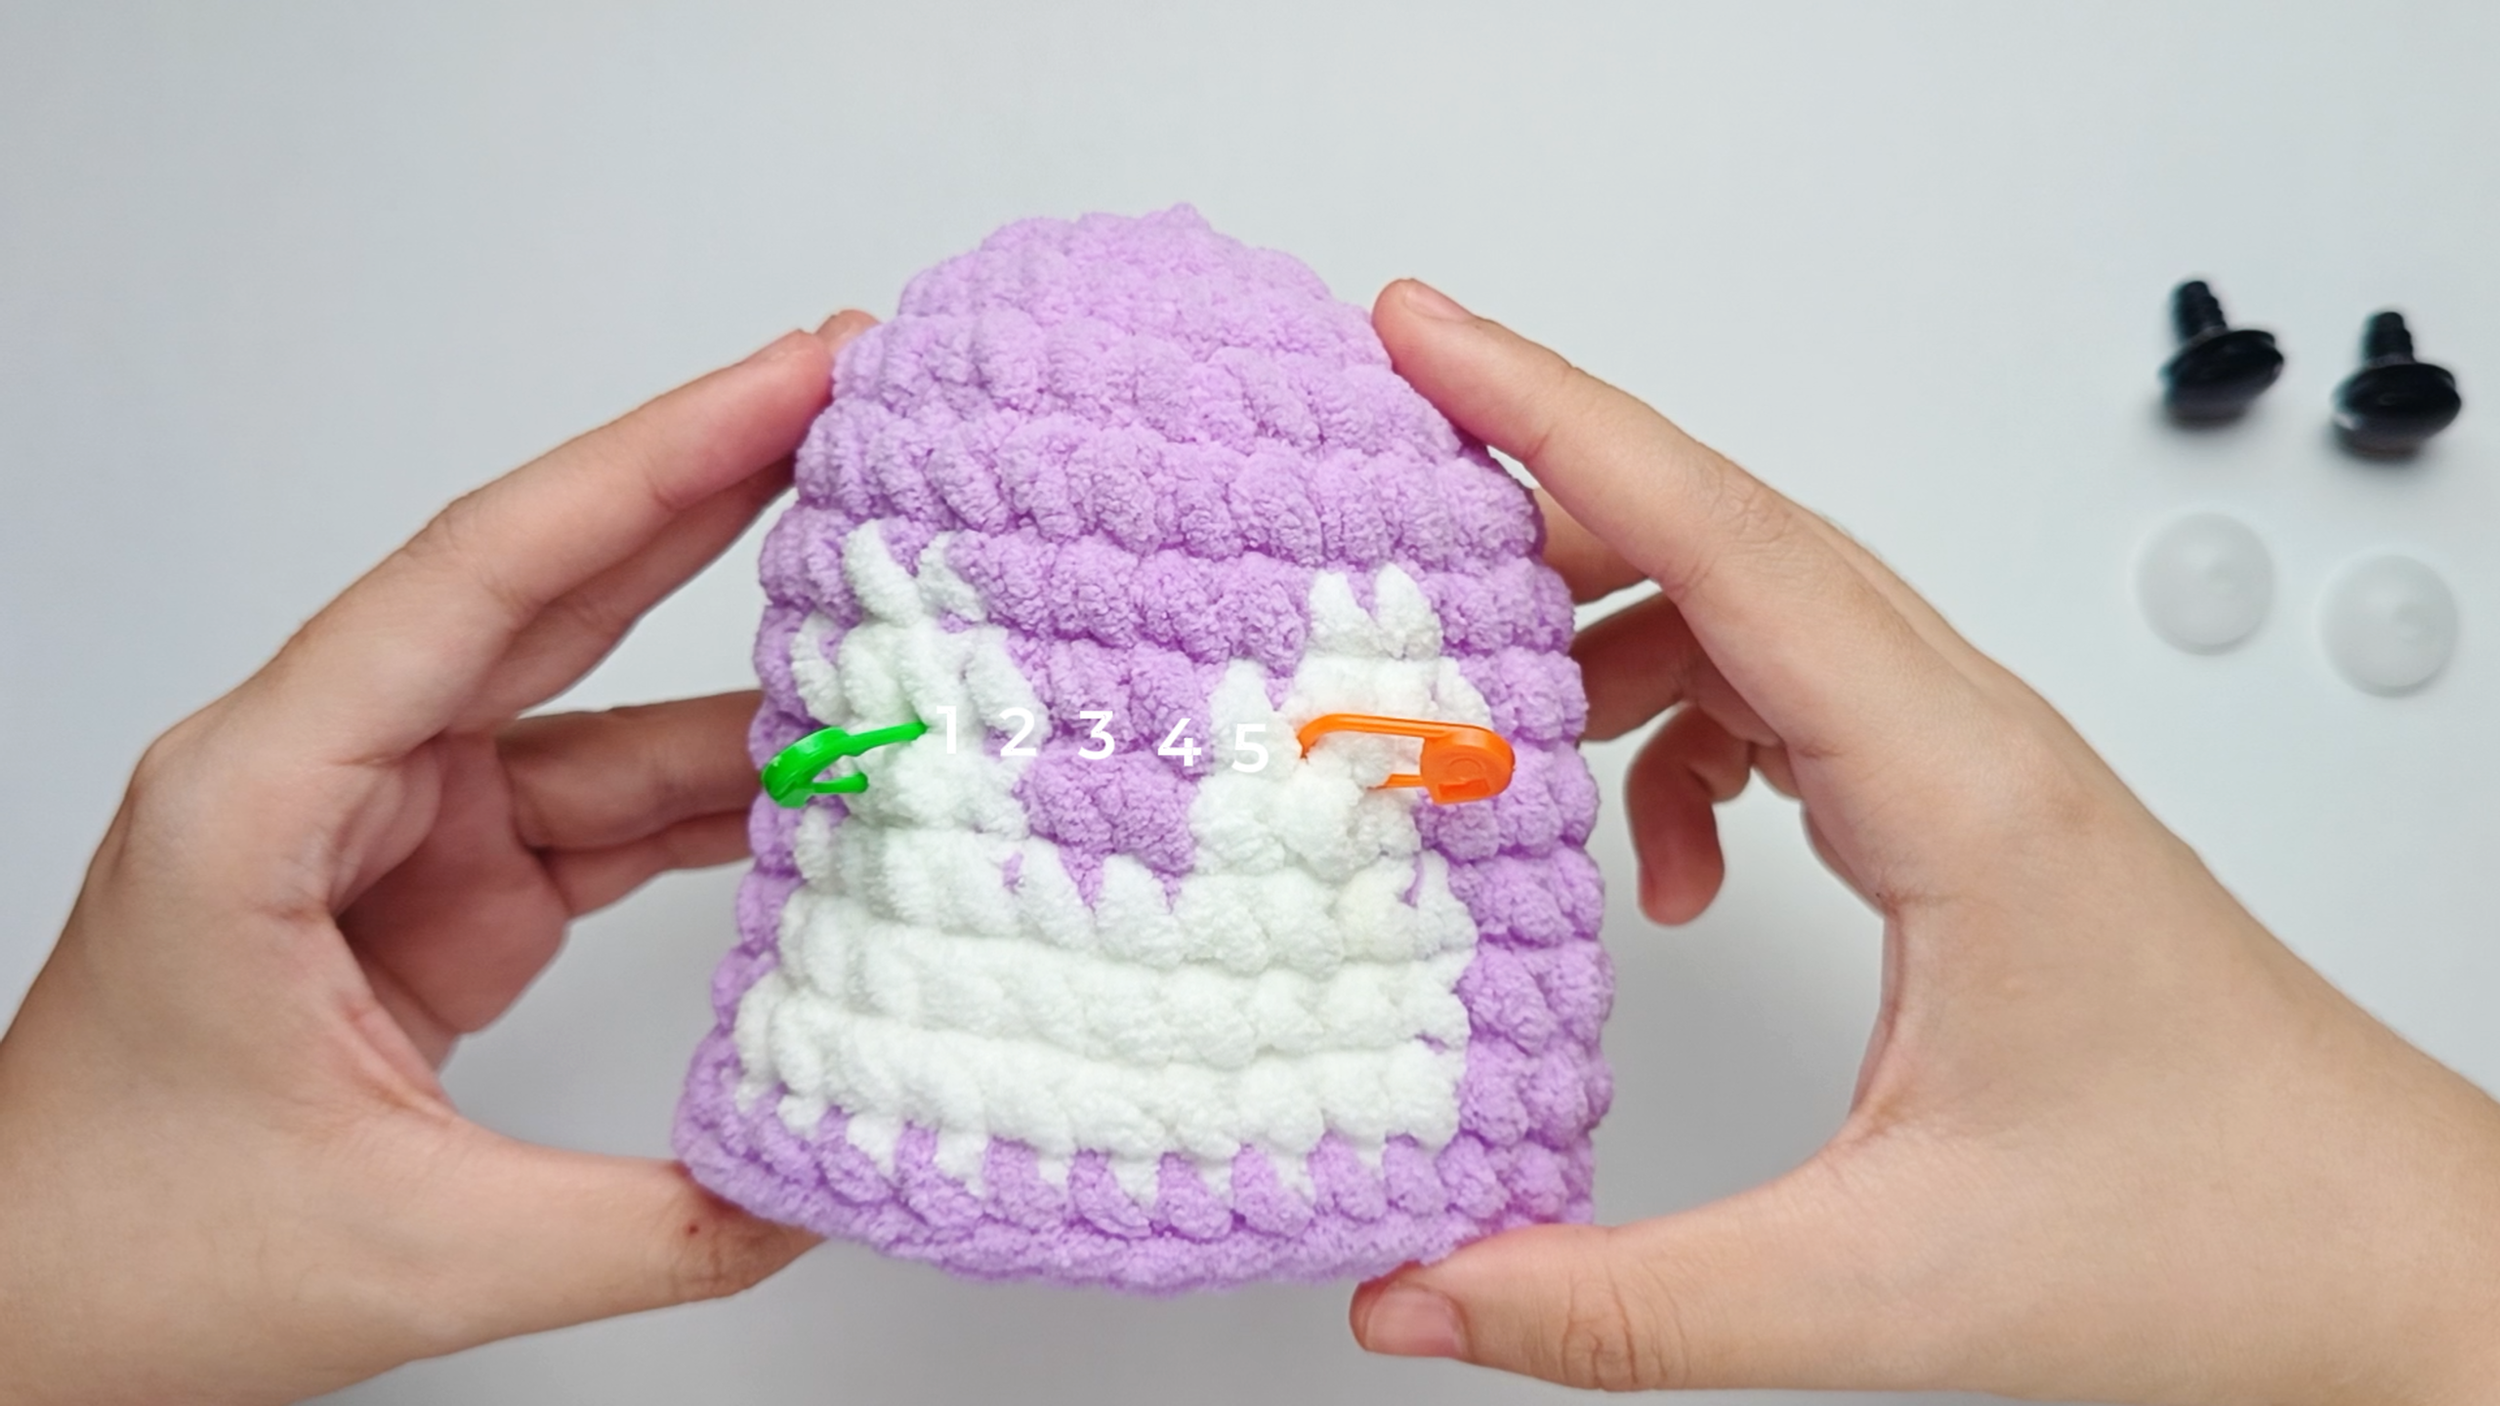
Mark before you commit:
Place a stitch marker where each Eye will go, so you can still move them. Set them level with each other and about 5-6 stitches apart - one Eye on each of the two white patches at the front - so they sit evenly on the white.

Tip: Step back and check from the front. The Eyes should sit level with each other and even on the white. Adjust the stitch markers until you are completely happy.
PUSH THROUGH AND LOCK IN
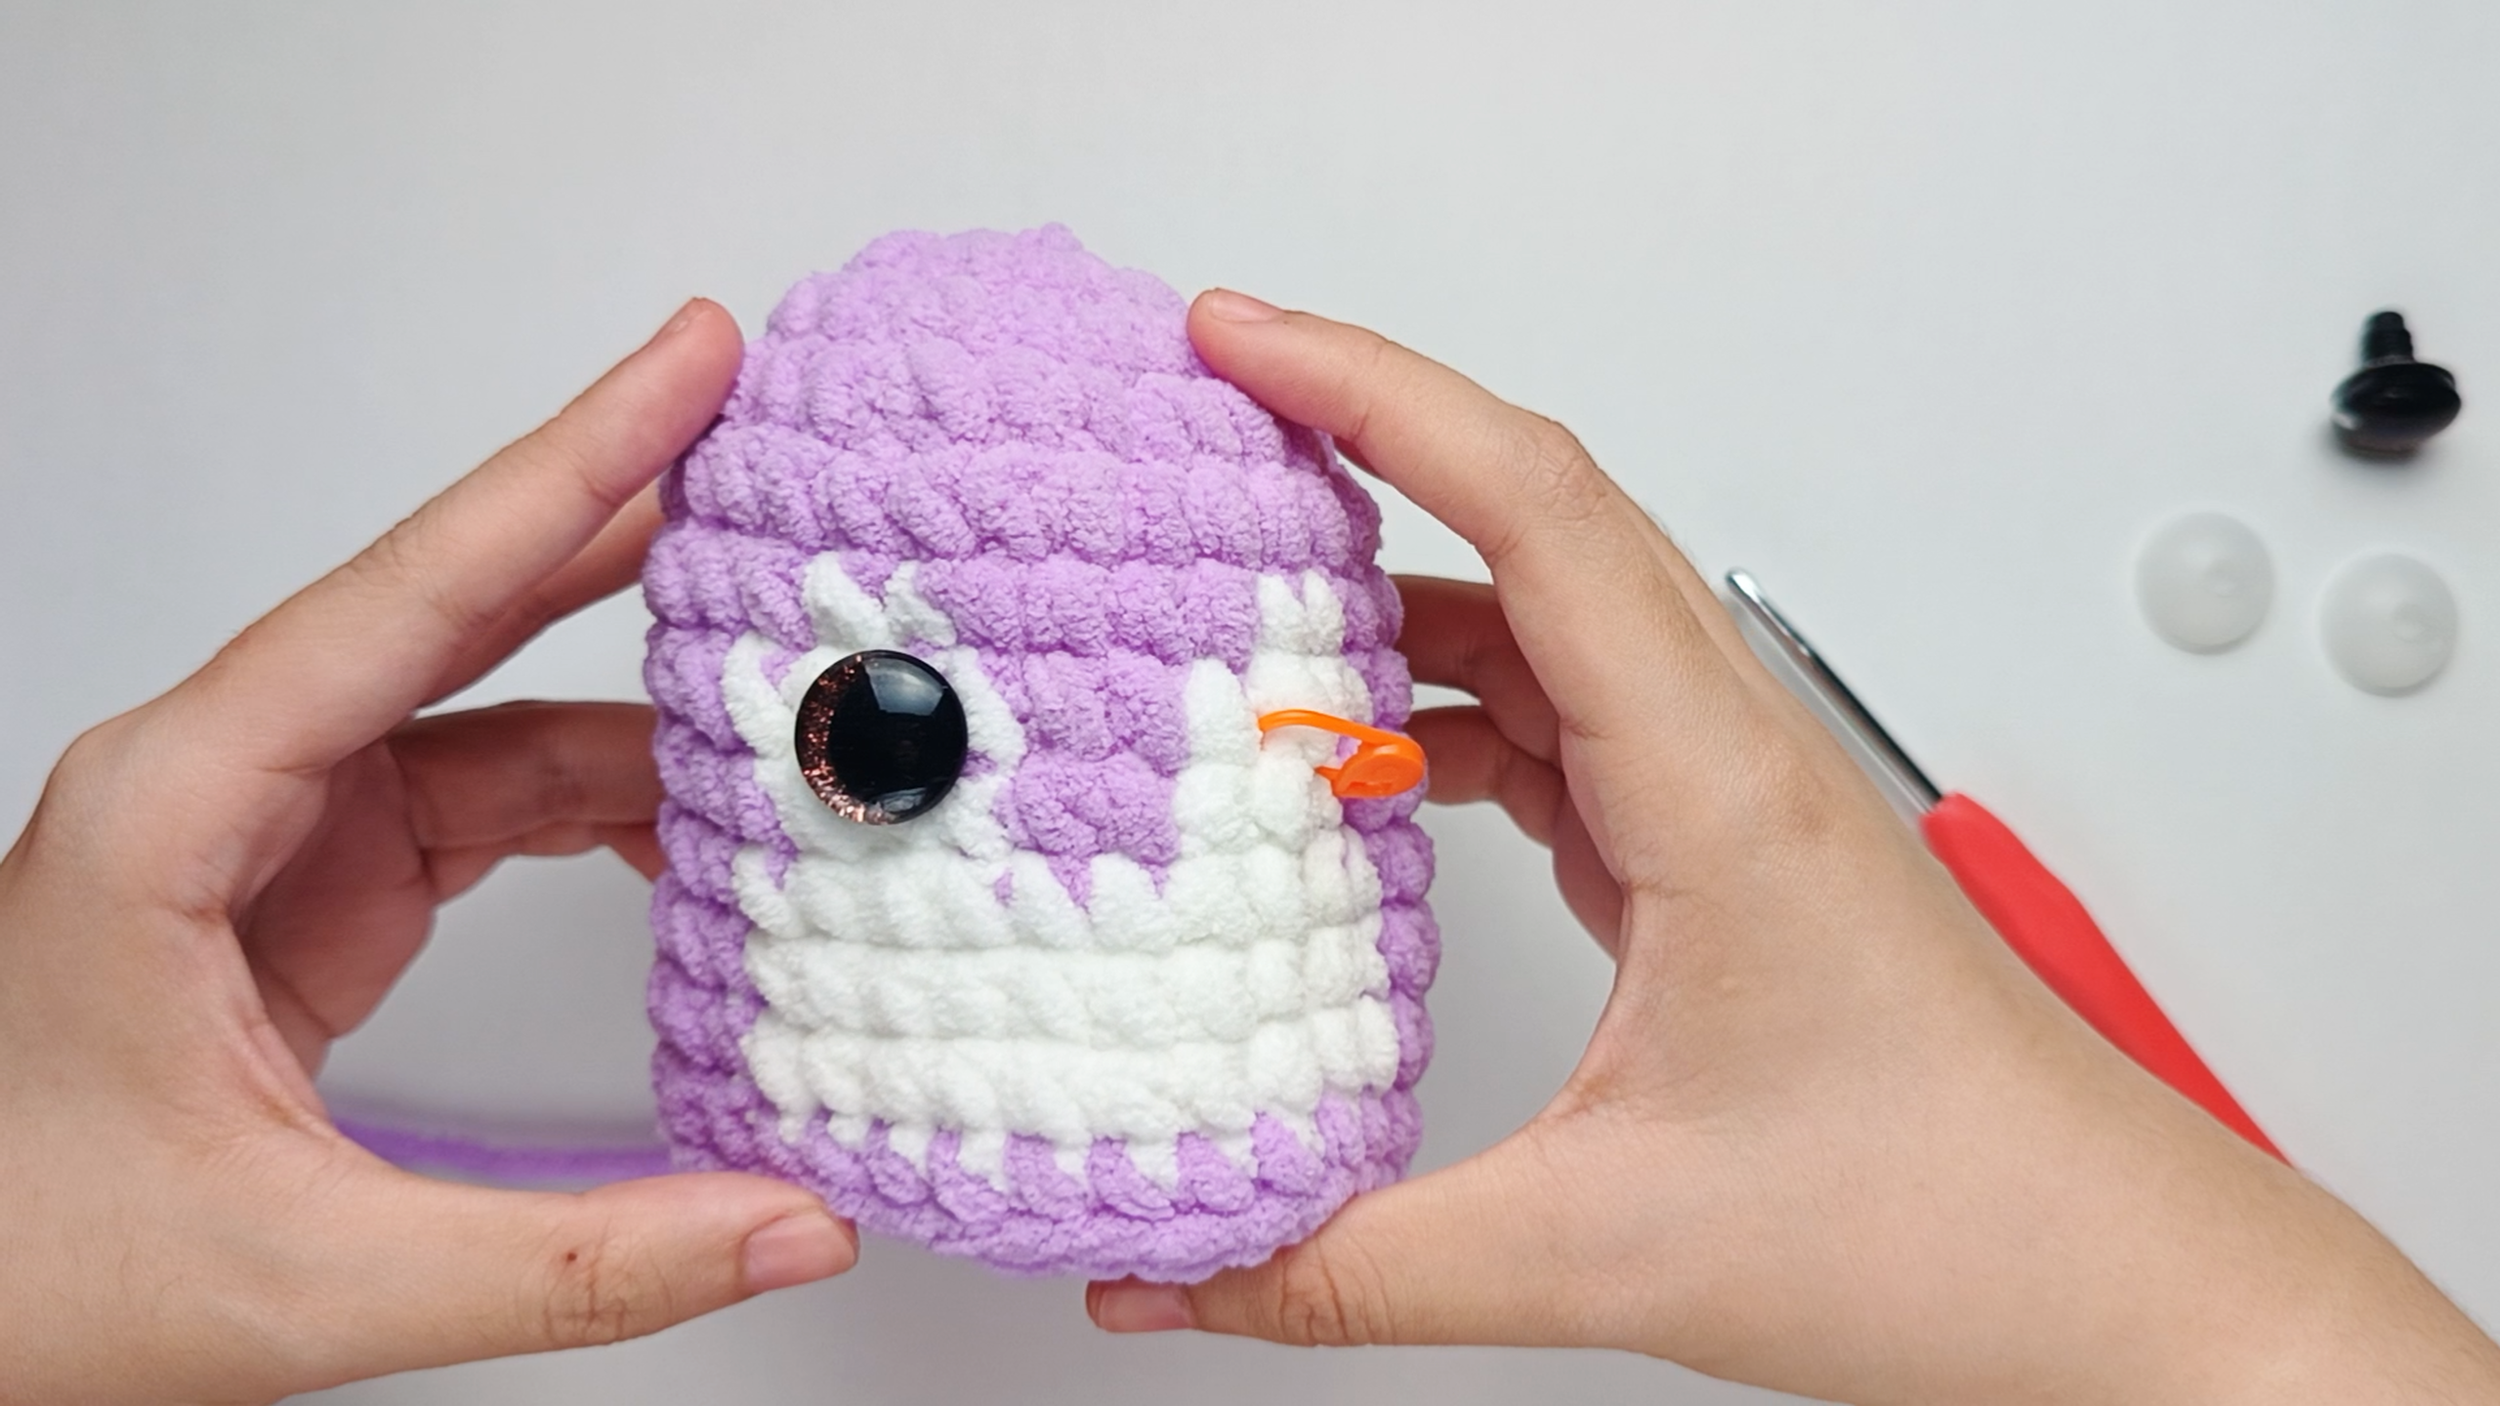
Place the first eye:
Remove the stitch marker. With the right side of your piece facing you, push the first eye's stem between two stitches. The side with colored fabric should face outward.
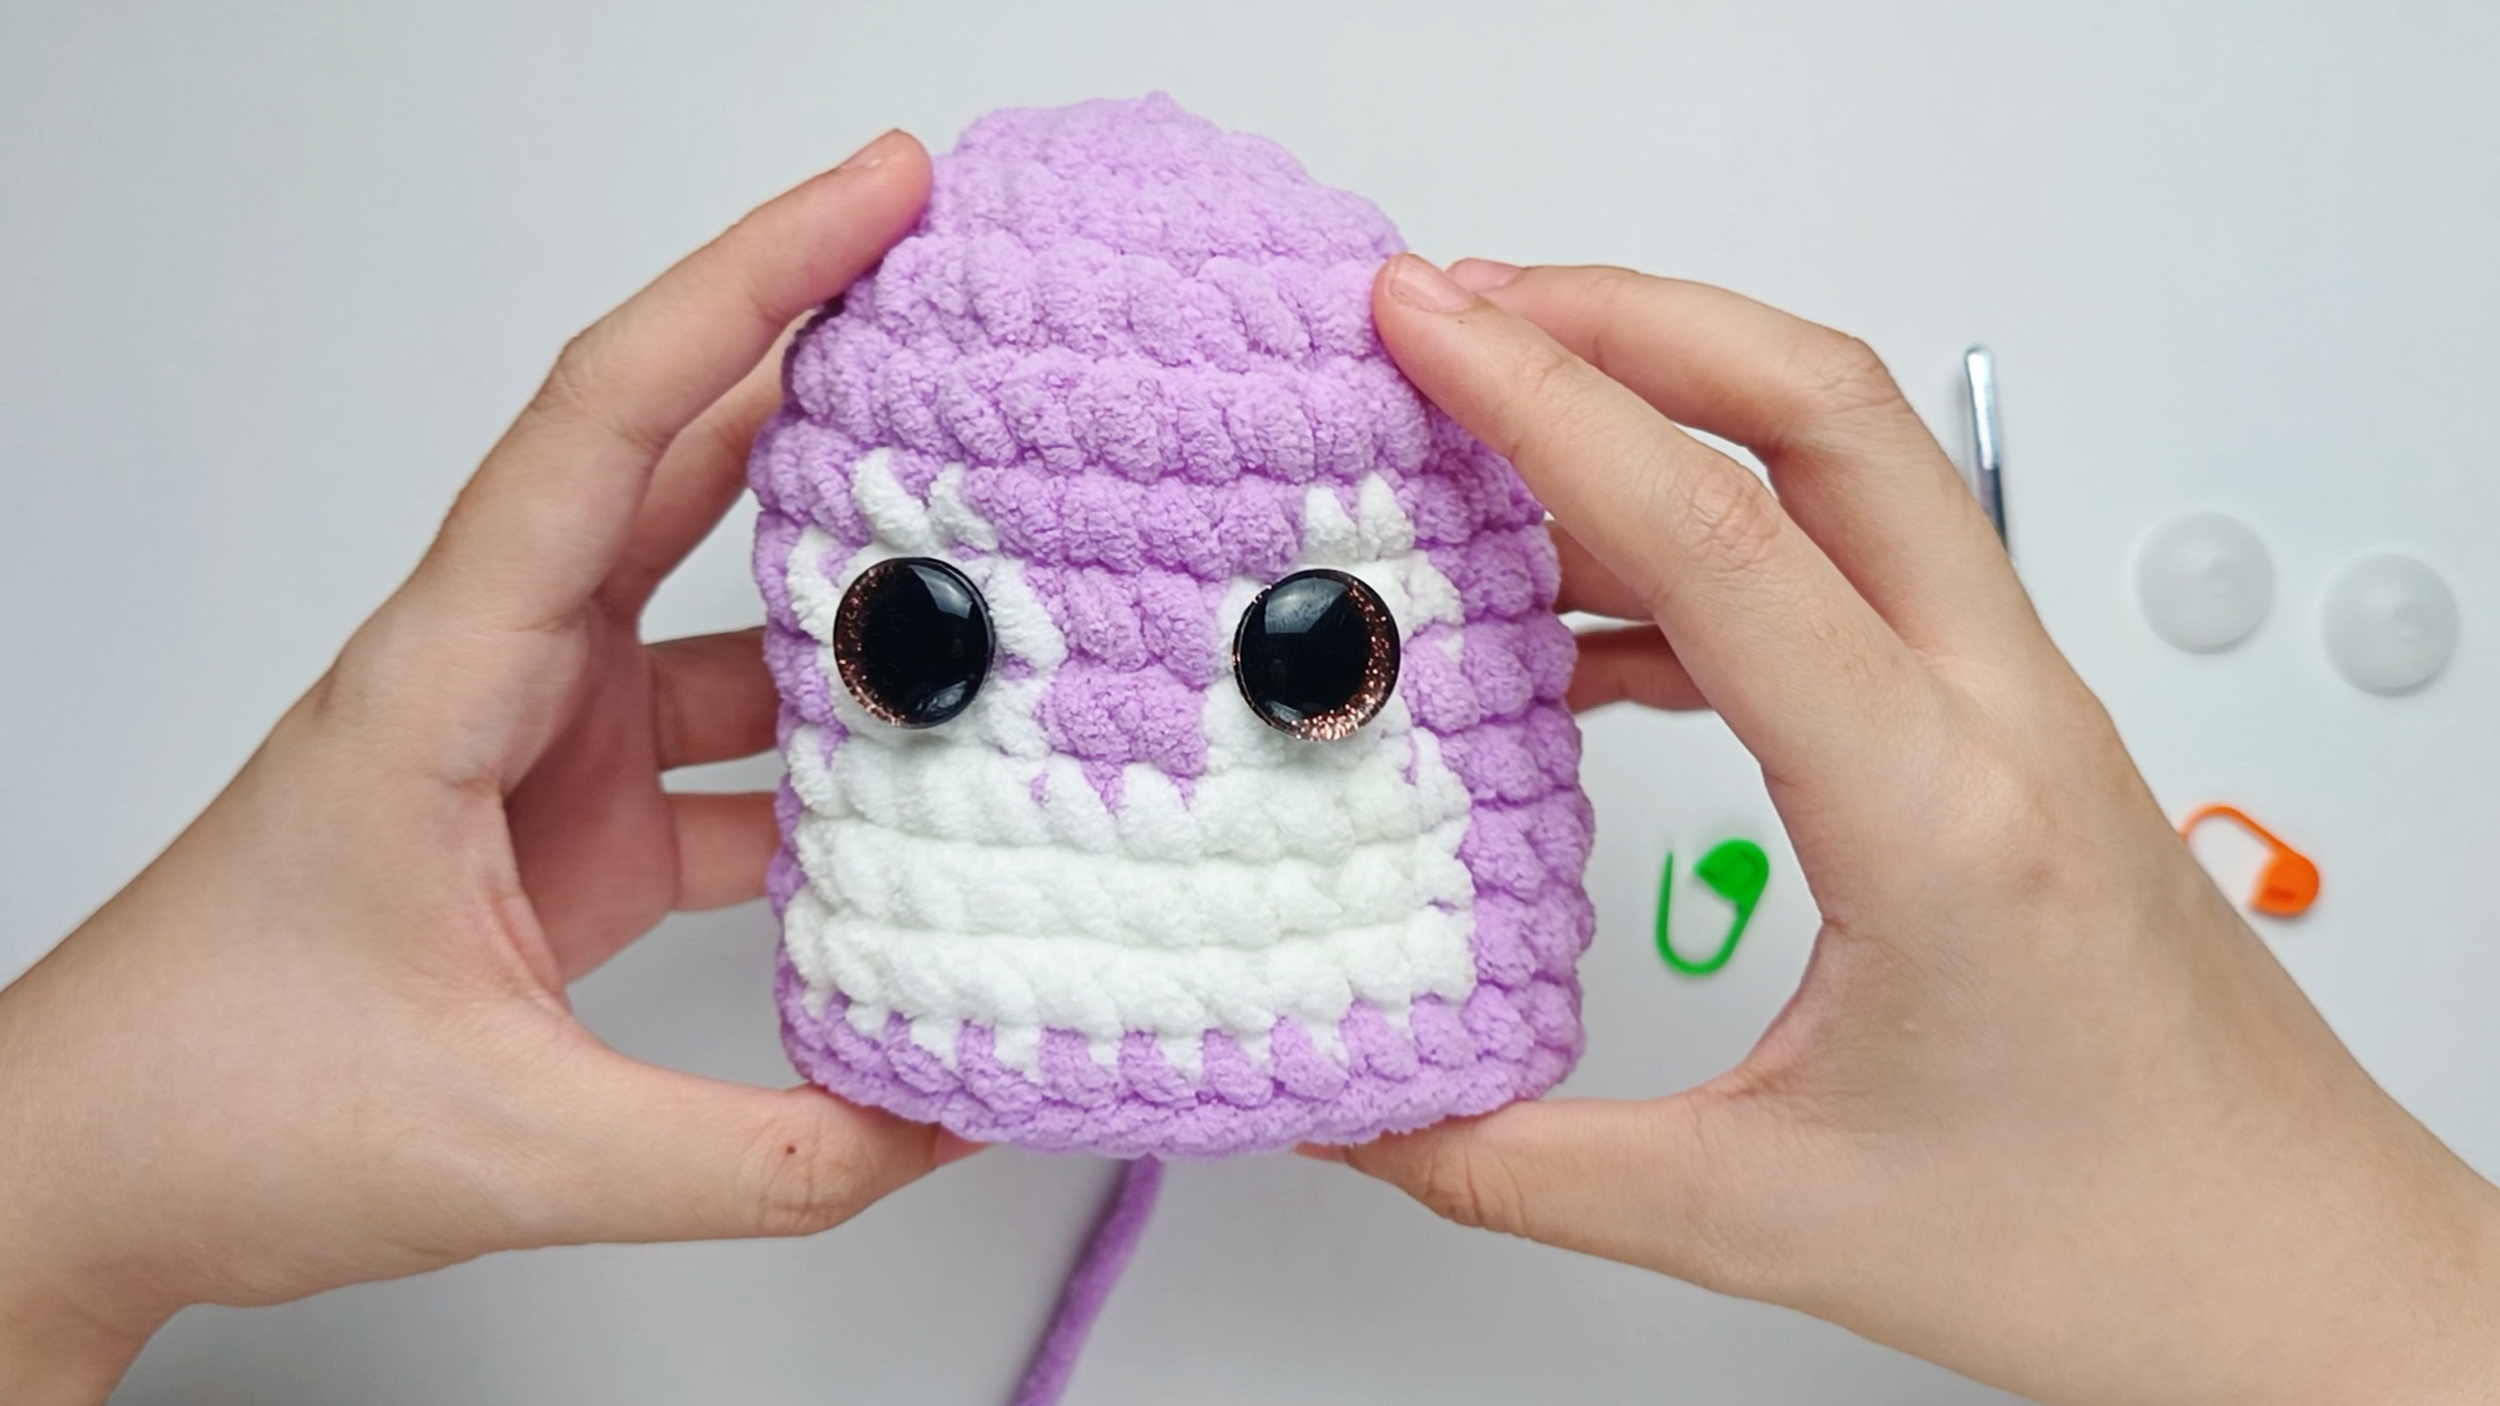
Place the second eye:
Add the second eye. Adjust until they look right to you - once the backing is on, they can't move.
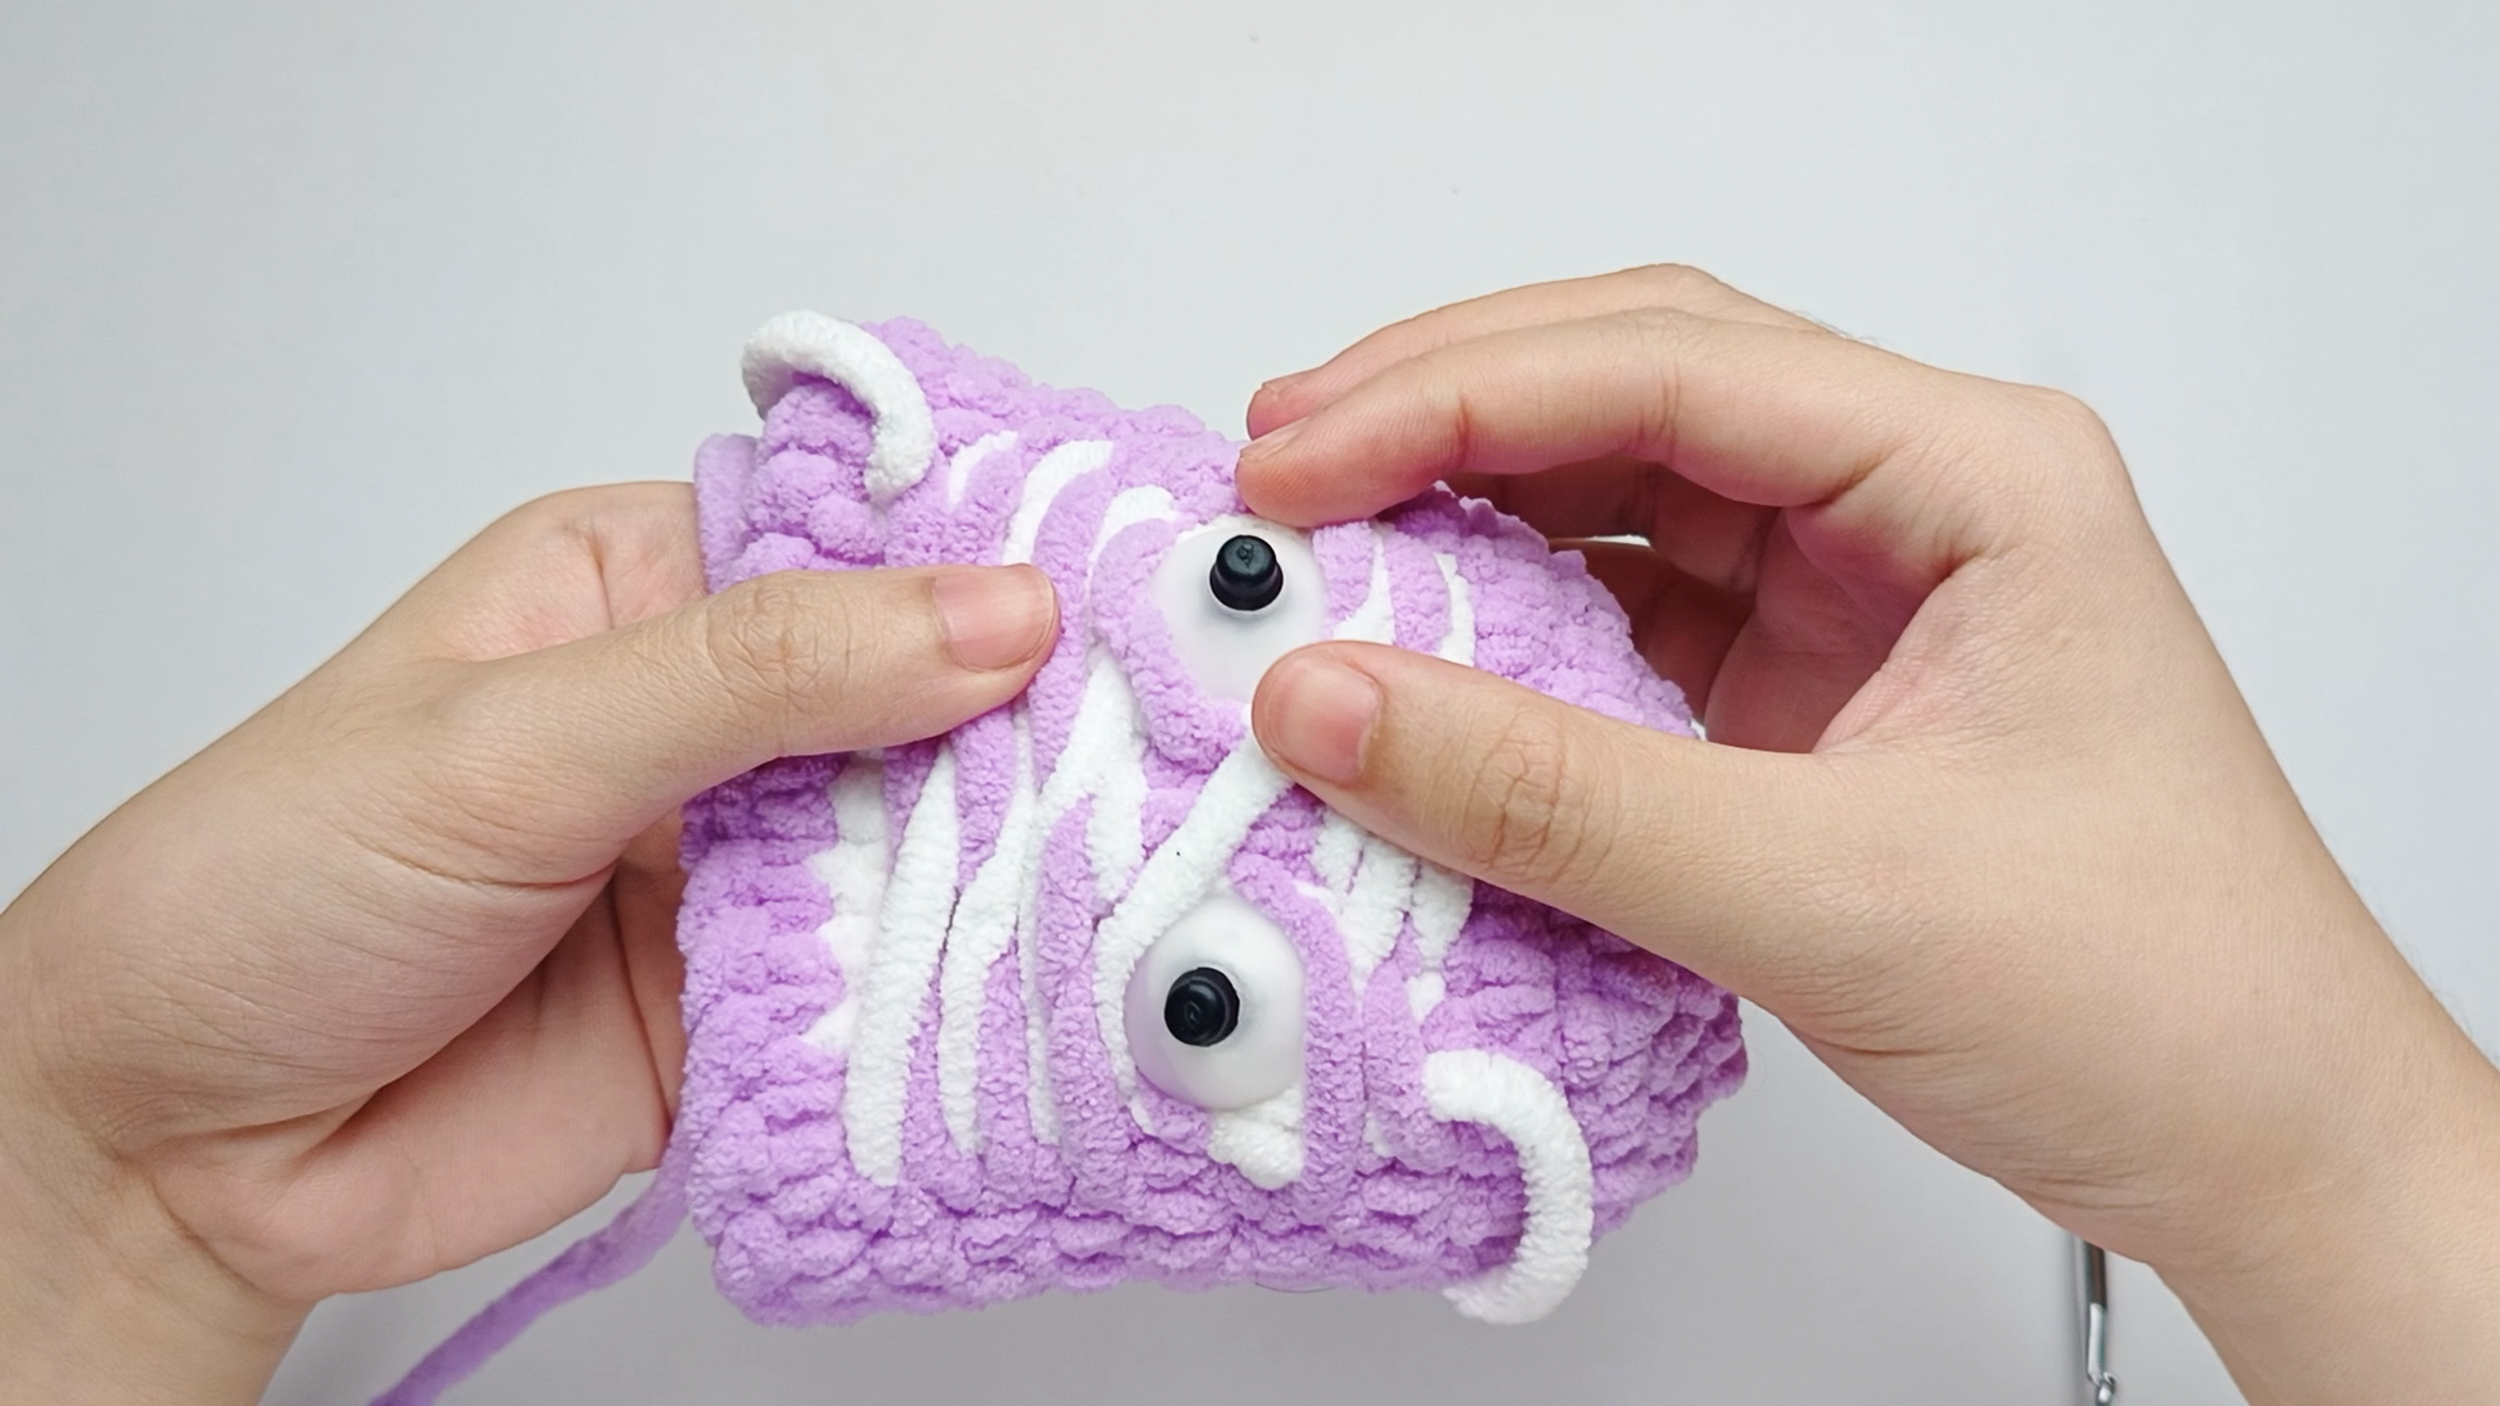
Add the backing:
Turn your piece so you're working from the inside. Slide the backing onto the stem of each eye, flat side against the yarn.
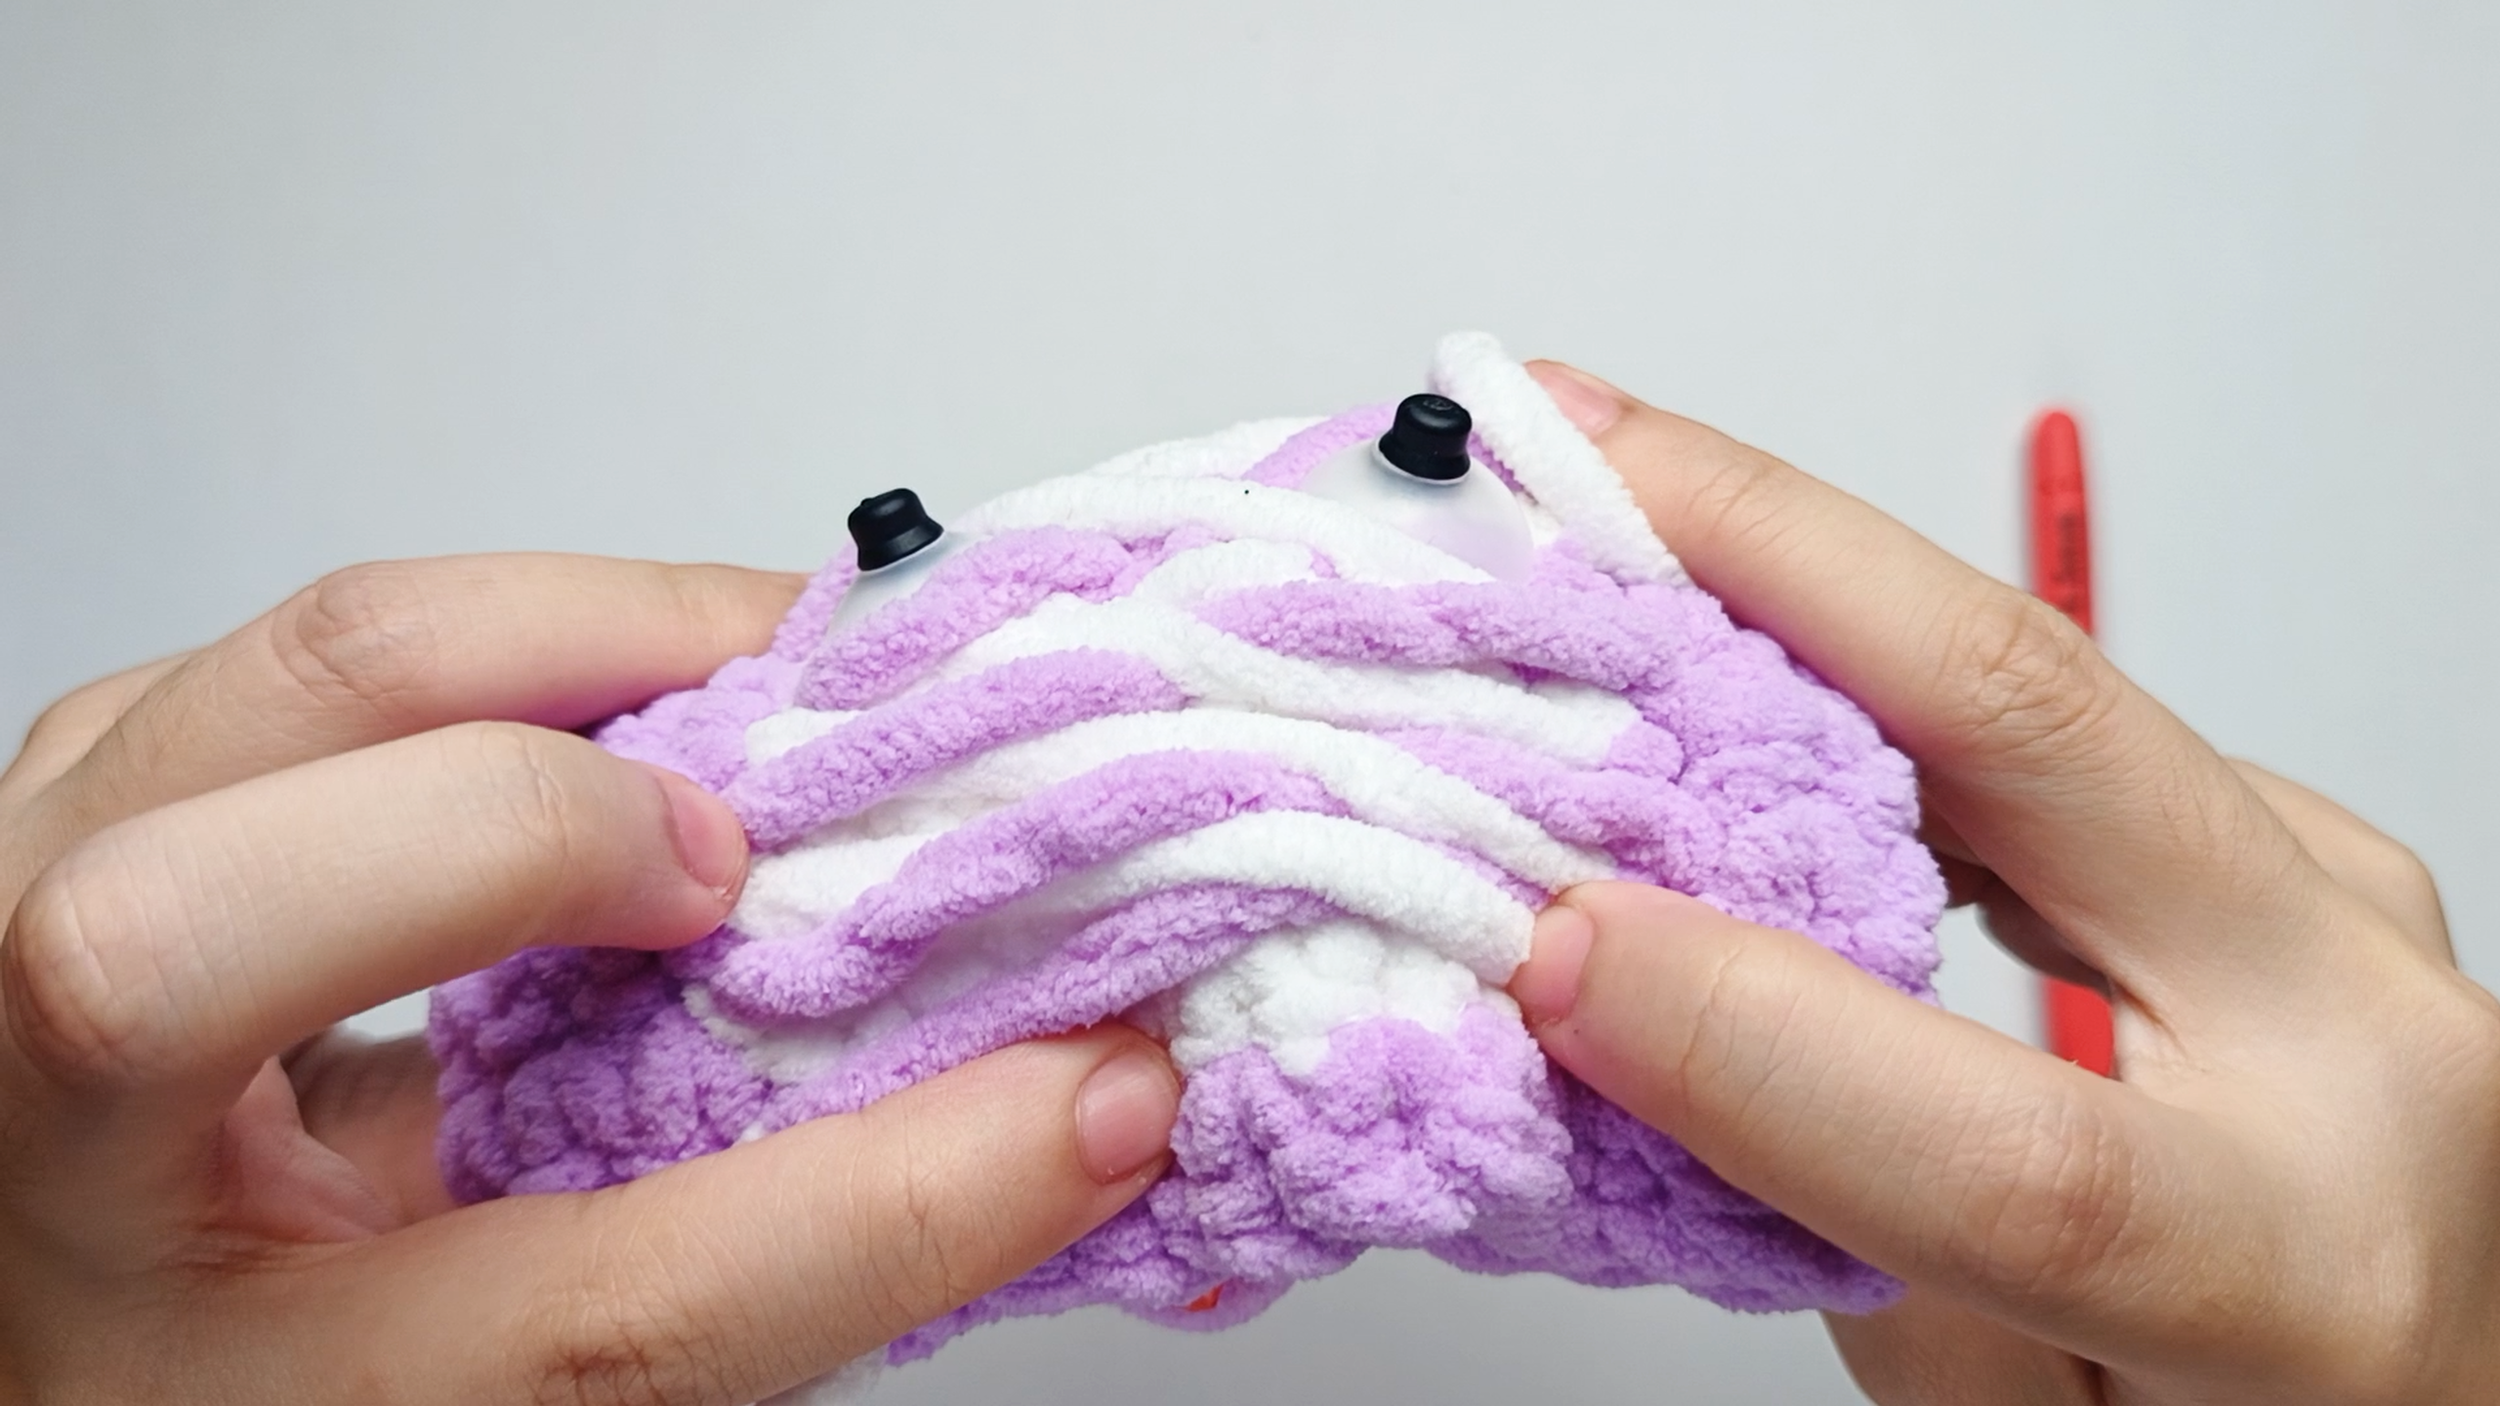
Lock it in:
Press the backing down firmly until it snaps into place. Push enough to lock it, but not so hard that it dents Pip's shape.
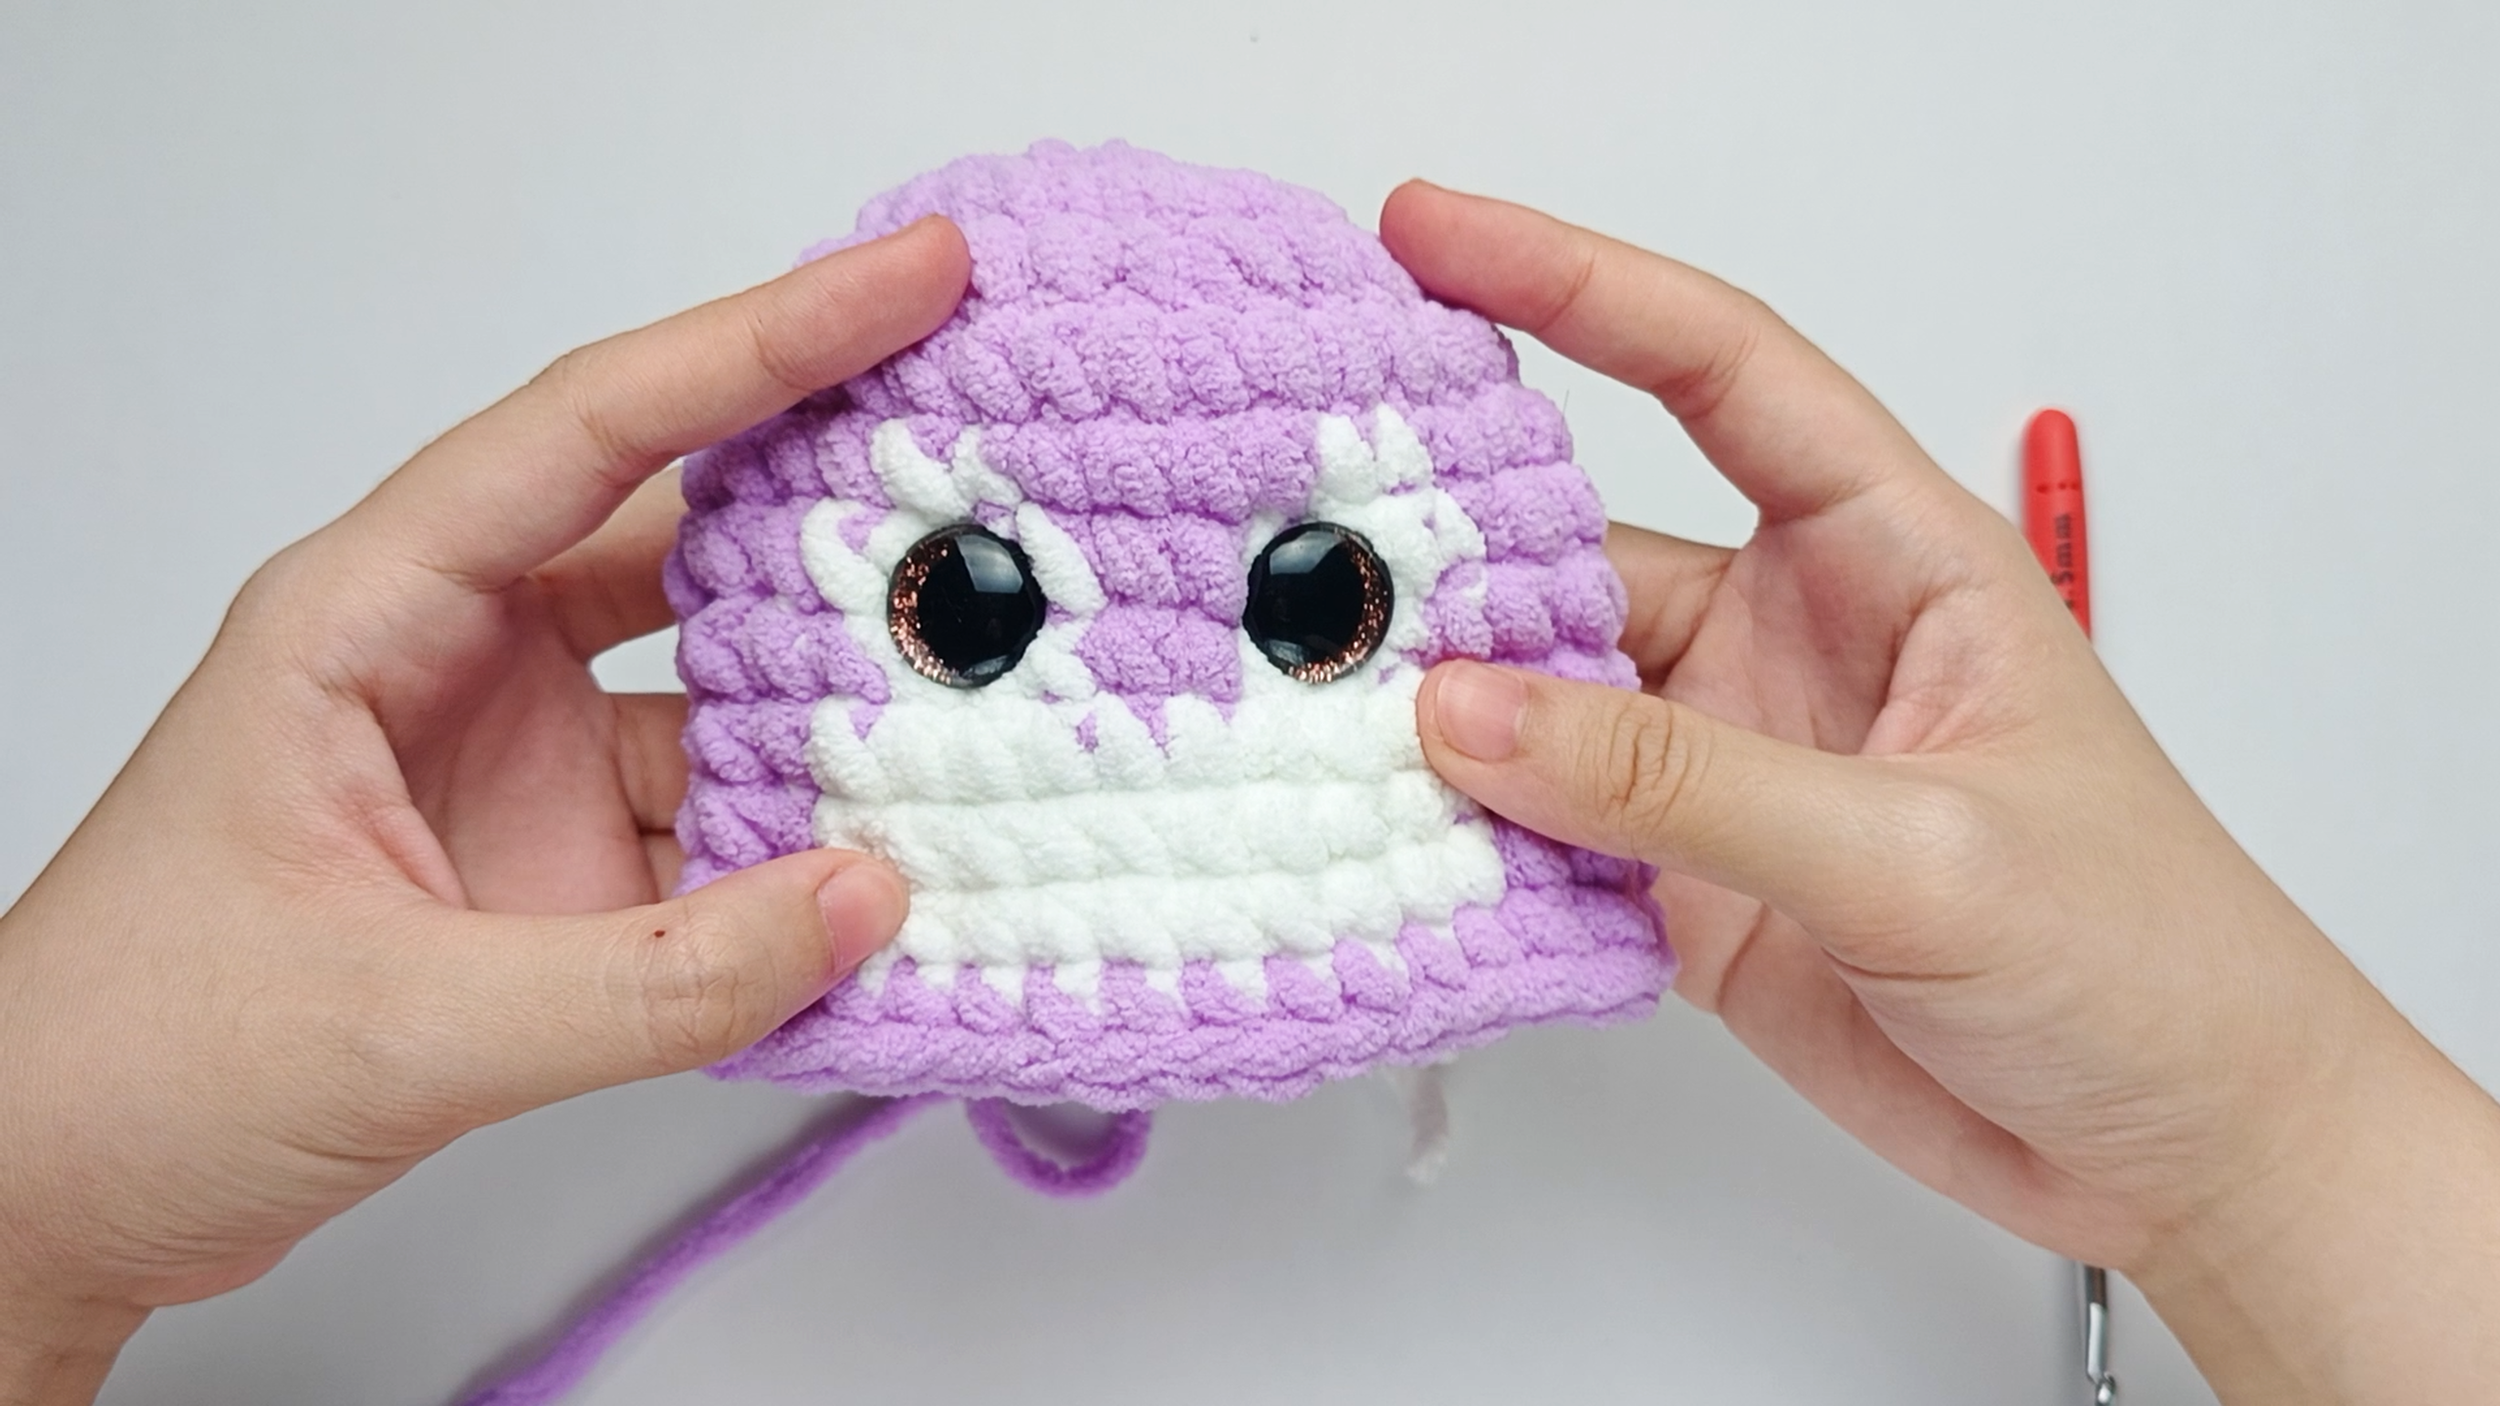
Attached safety eyes:
Let's turn the piece to the right side. The Eyes are now in place.
Add the Stuffing
Now it's time to start adding the stuffing to Pip's Body.
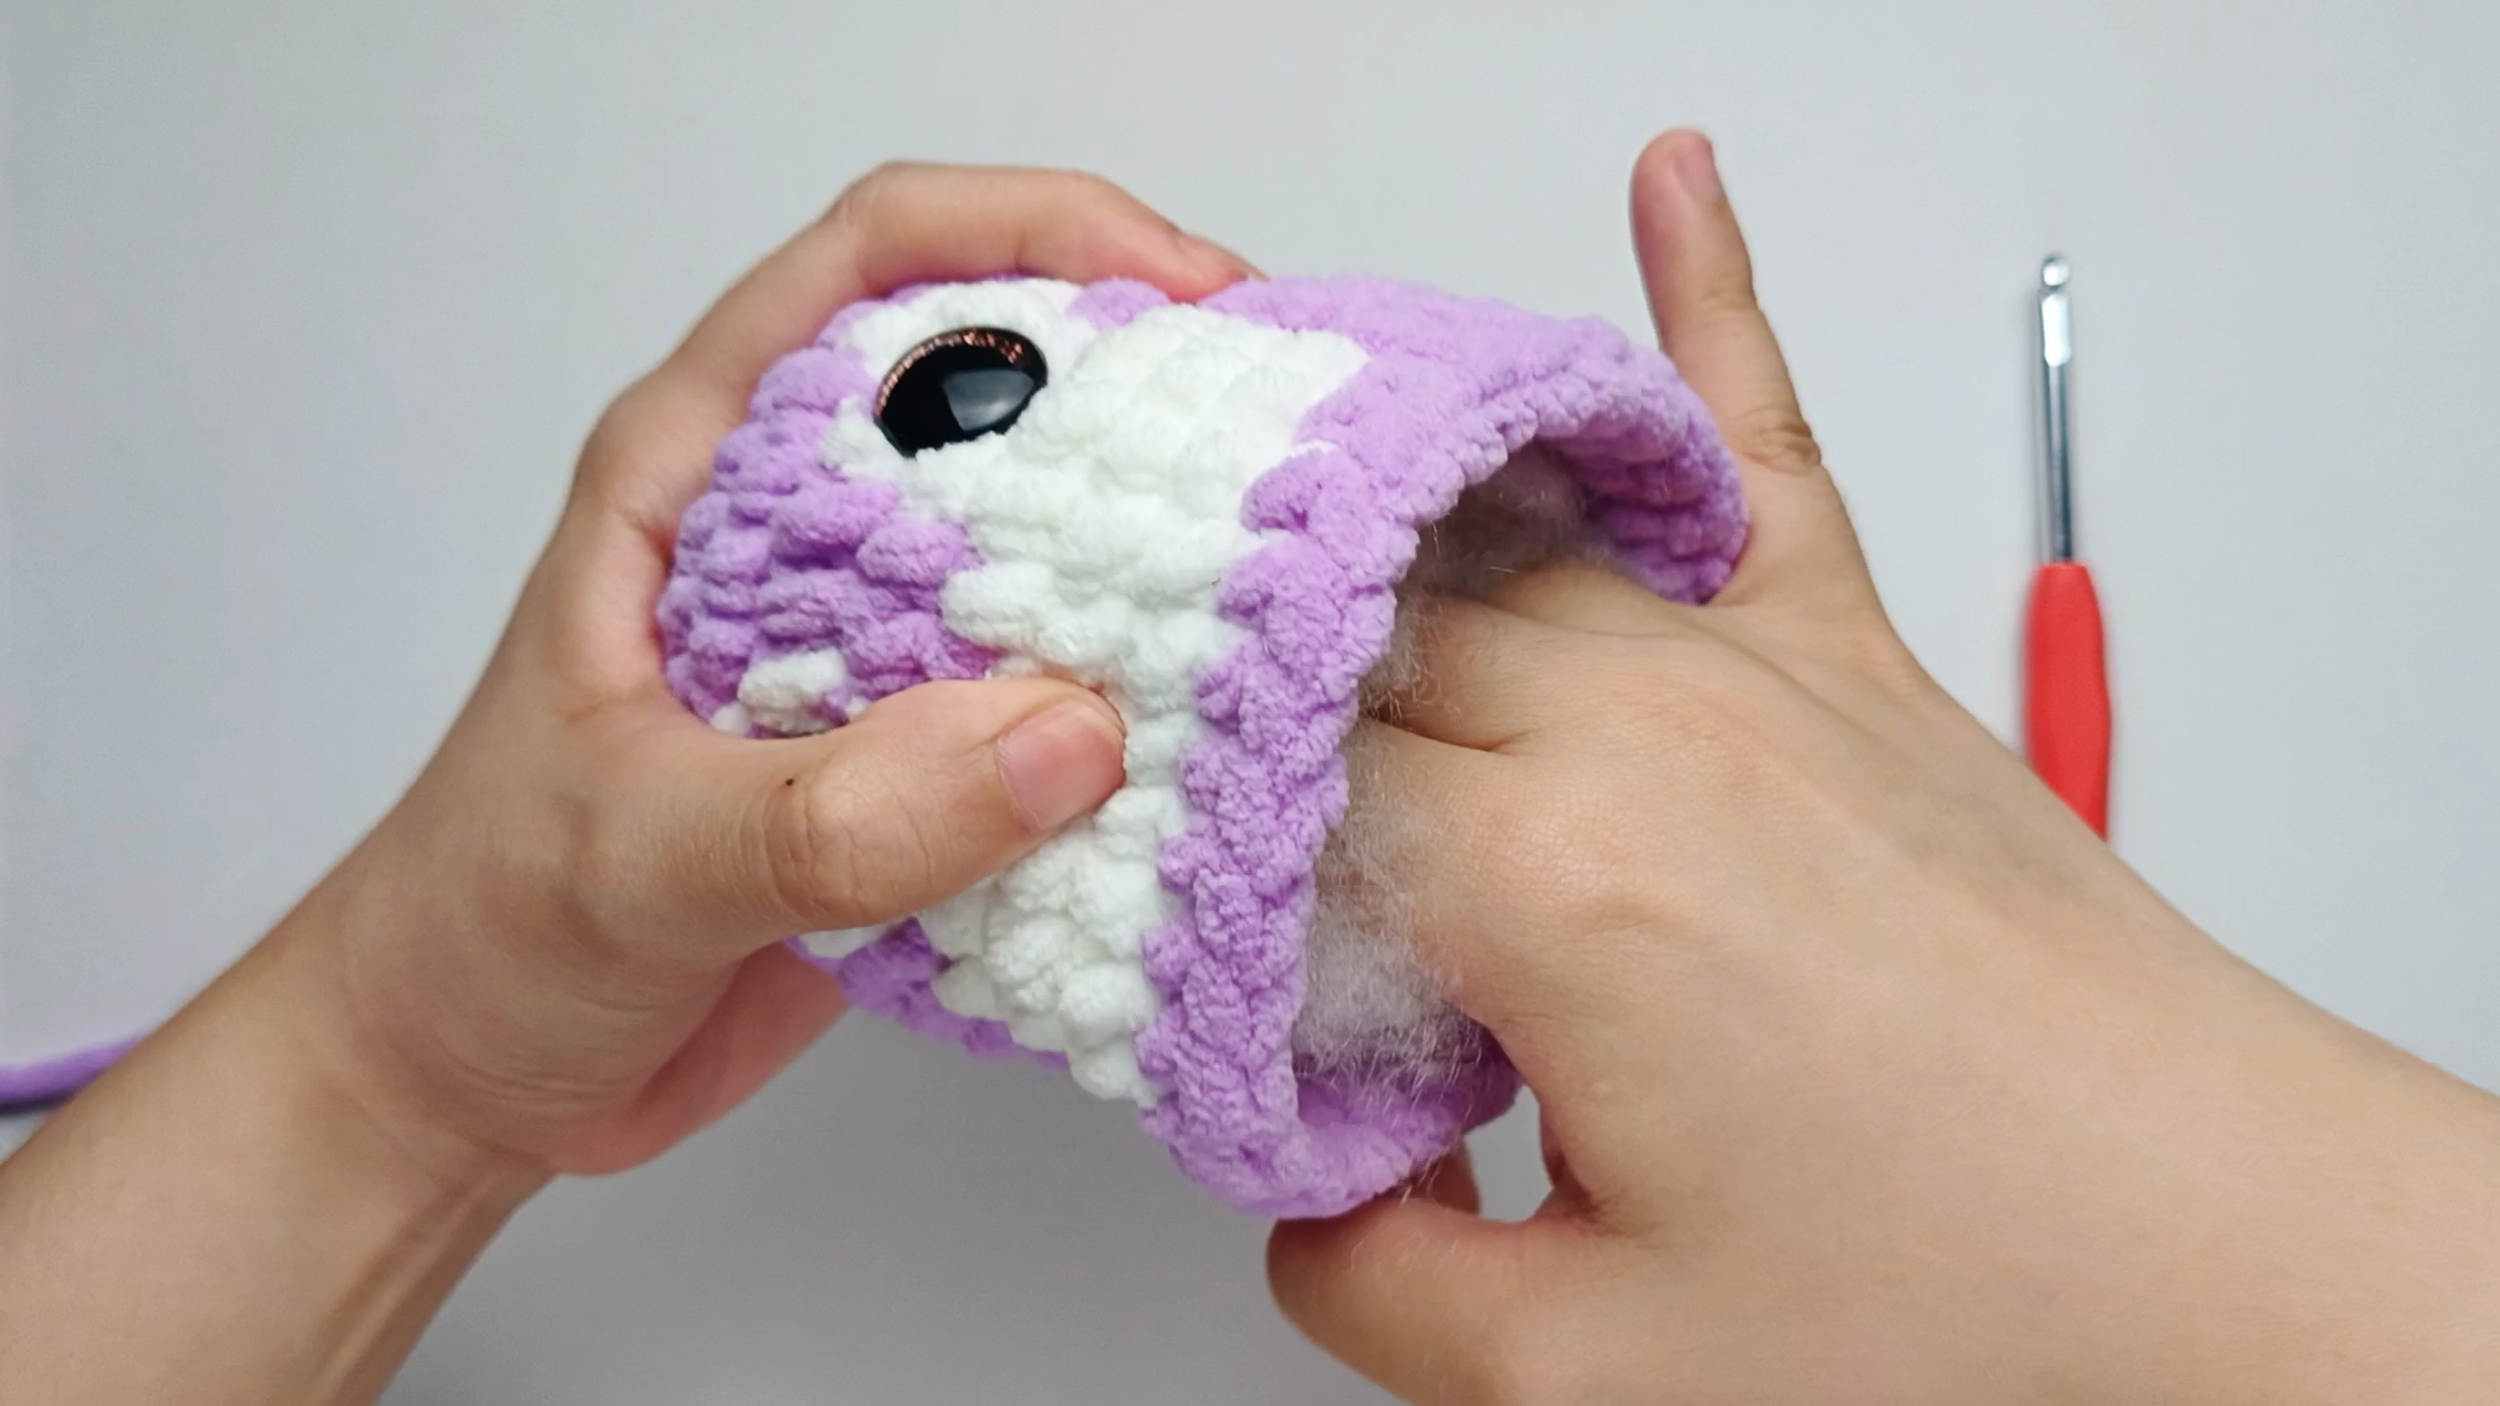
Stuff the Body:
Add small amounts of stuffing at a time and gently shape the Body as you go. Add enough stuffing for the Body to feel firm, soft, and rounded.

Tip: It's best to build up a smooth, even shape if you add a little stuffing at a time instead of all at once. You can always add more later if Pip feels too squishy!
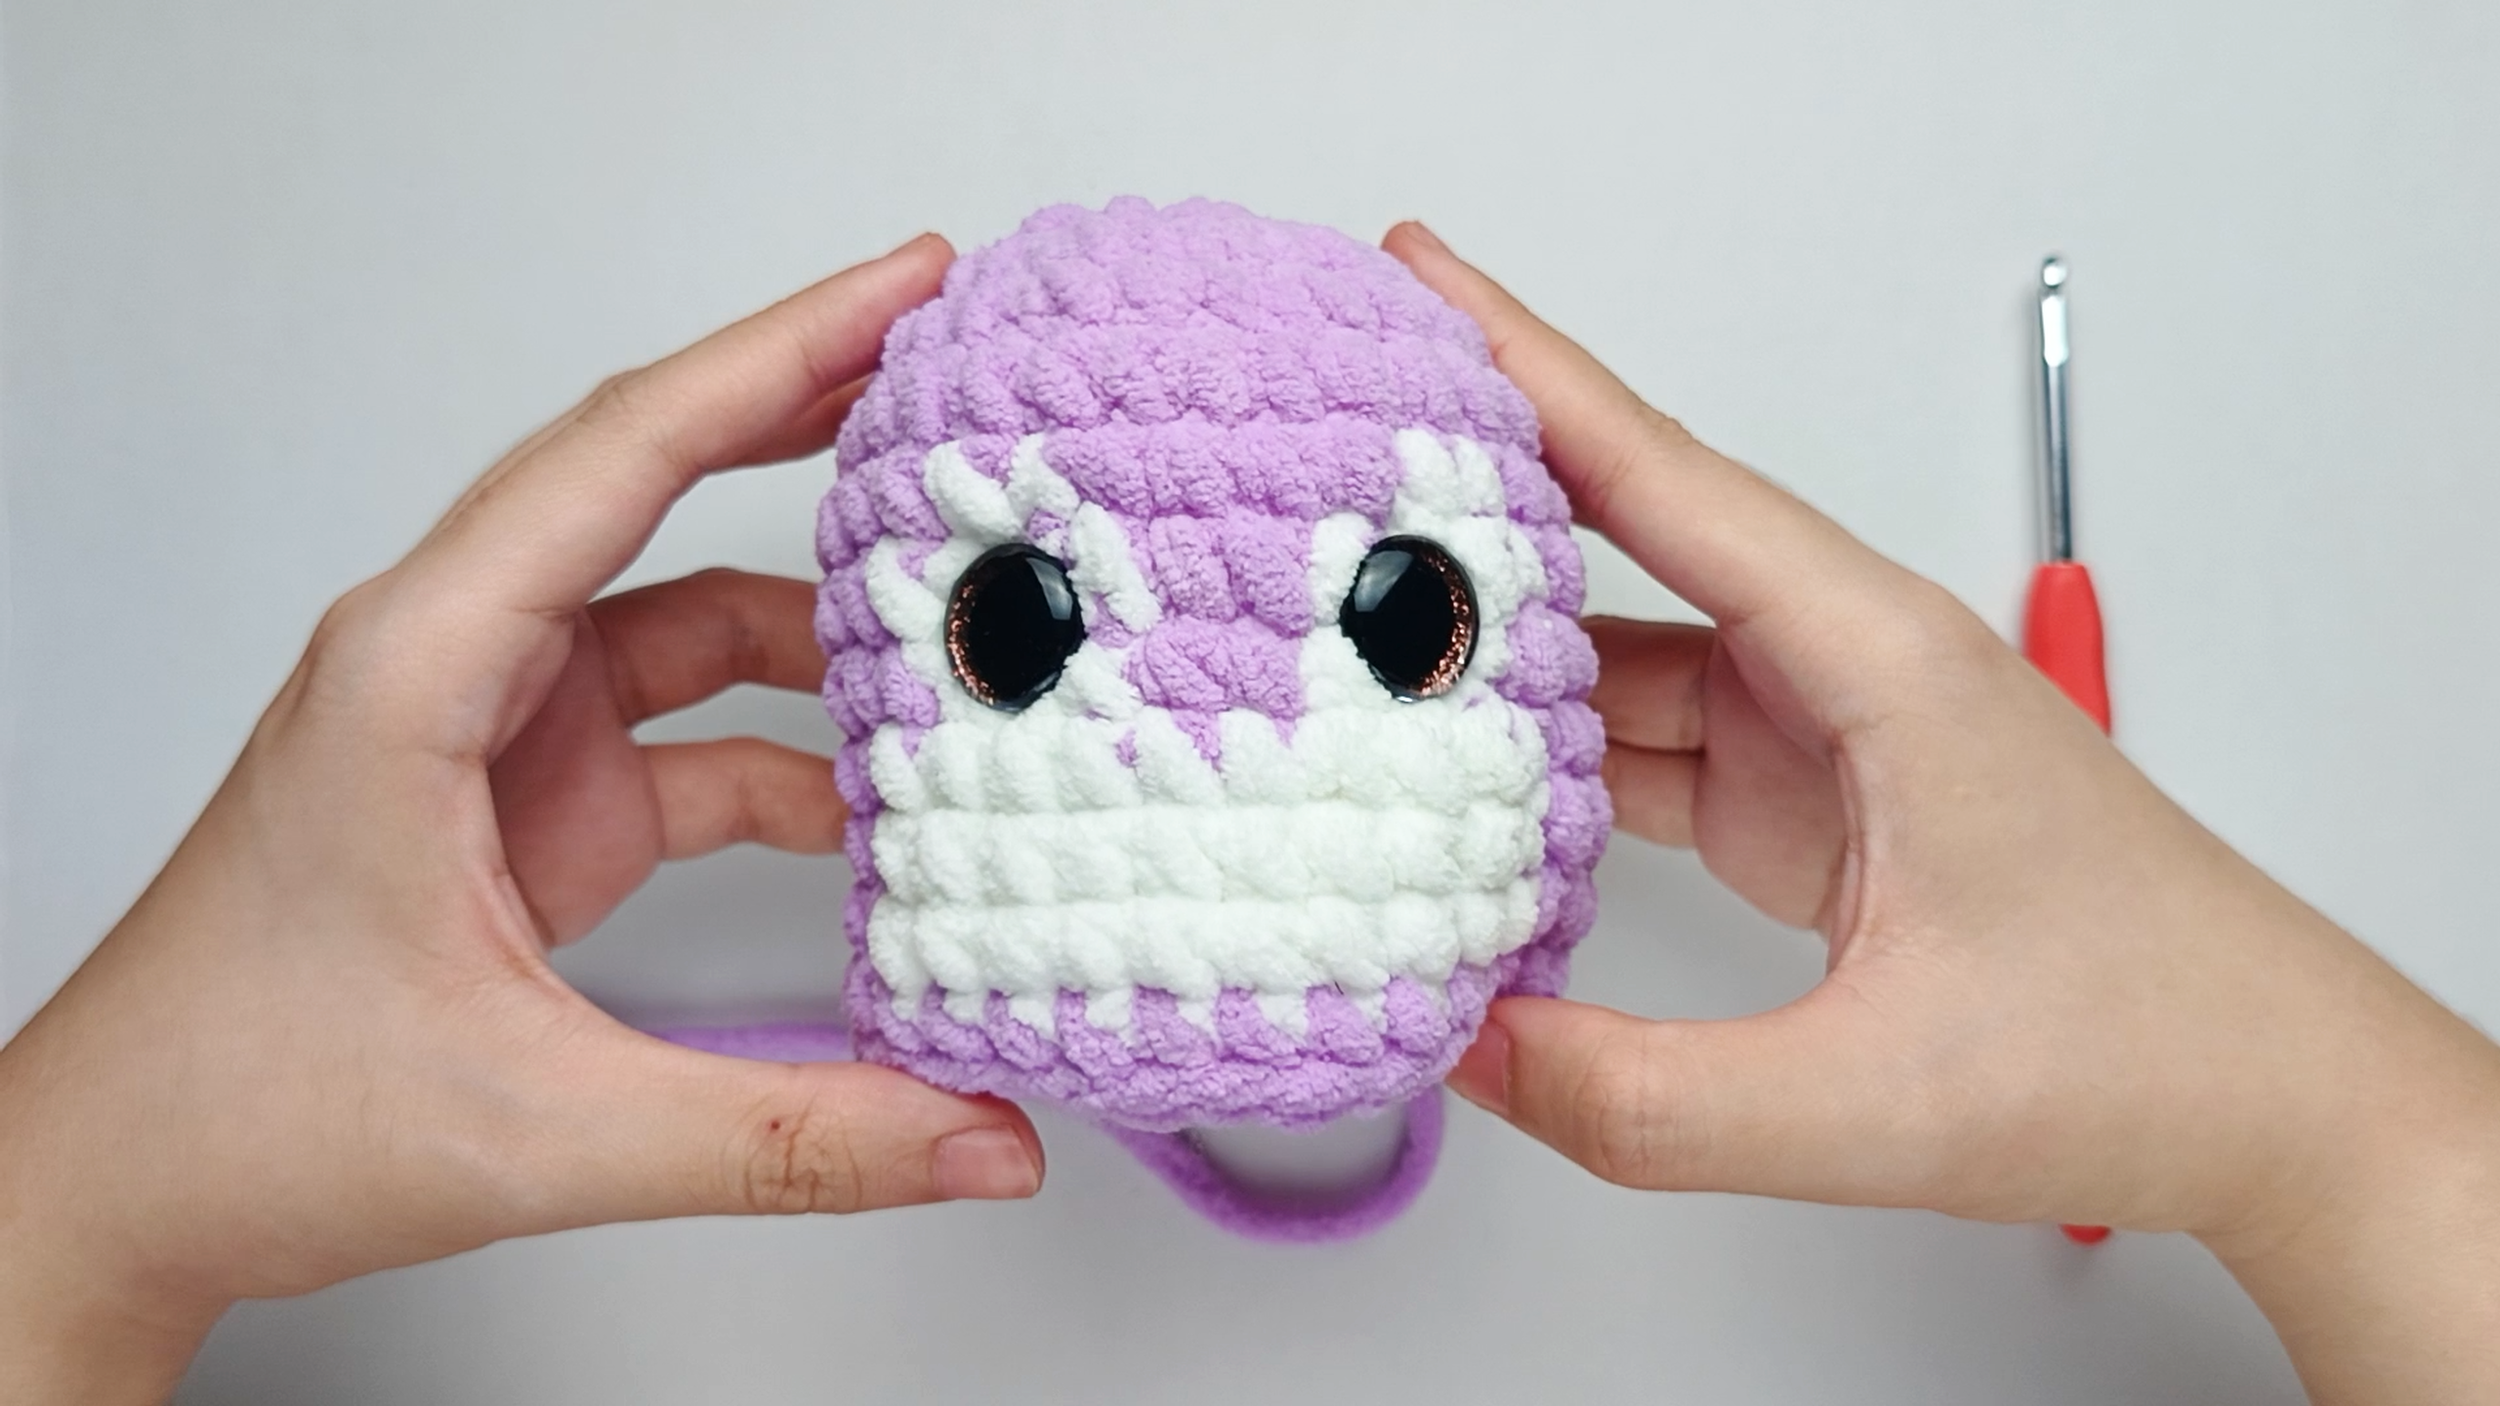
Stuffed Body:
The Body should feel firm, soft, and rounded.